Documents
The Documents page enables you to search for documents using various search criteria, and perform the following actions to these documents:
Unlock checked out documents.
Verify user access rights for the selected document using the Check effective access option.
Verify user access rights based on the groups assigned in the Access Control List (ACL) using the Security option.
View the versions of a document.
View the history of a document.
View details of a document.
Copy a link to one or more documents using the Copy Link option.
Searching for documents
Select Content > Documents. The list of default search fields appears as shown in the following figure:
Figure: Documents page
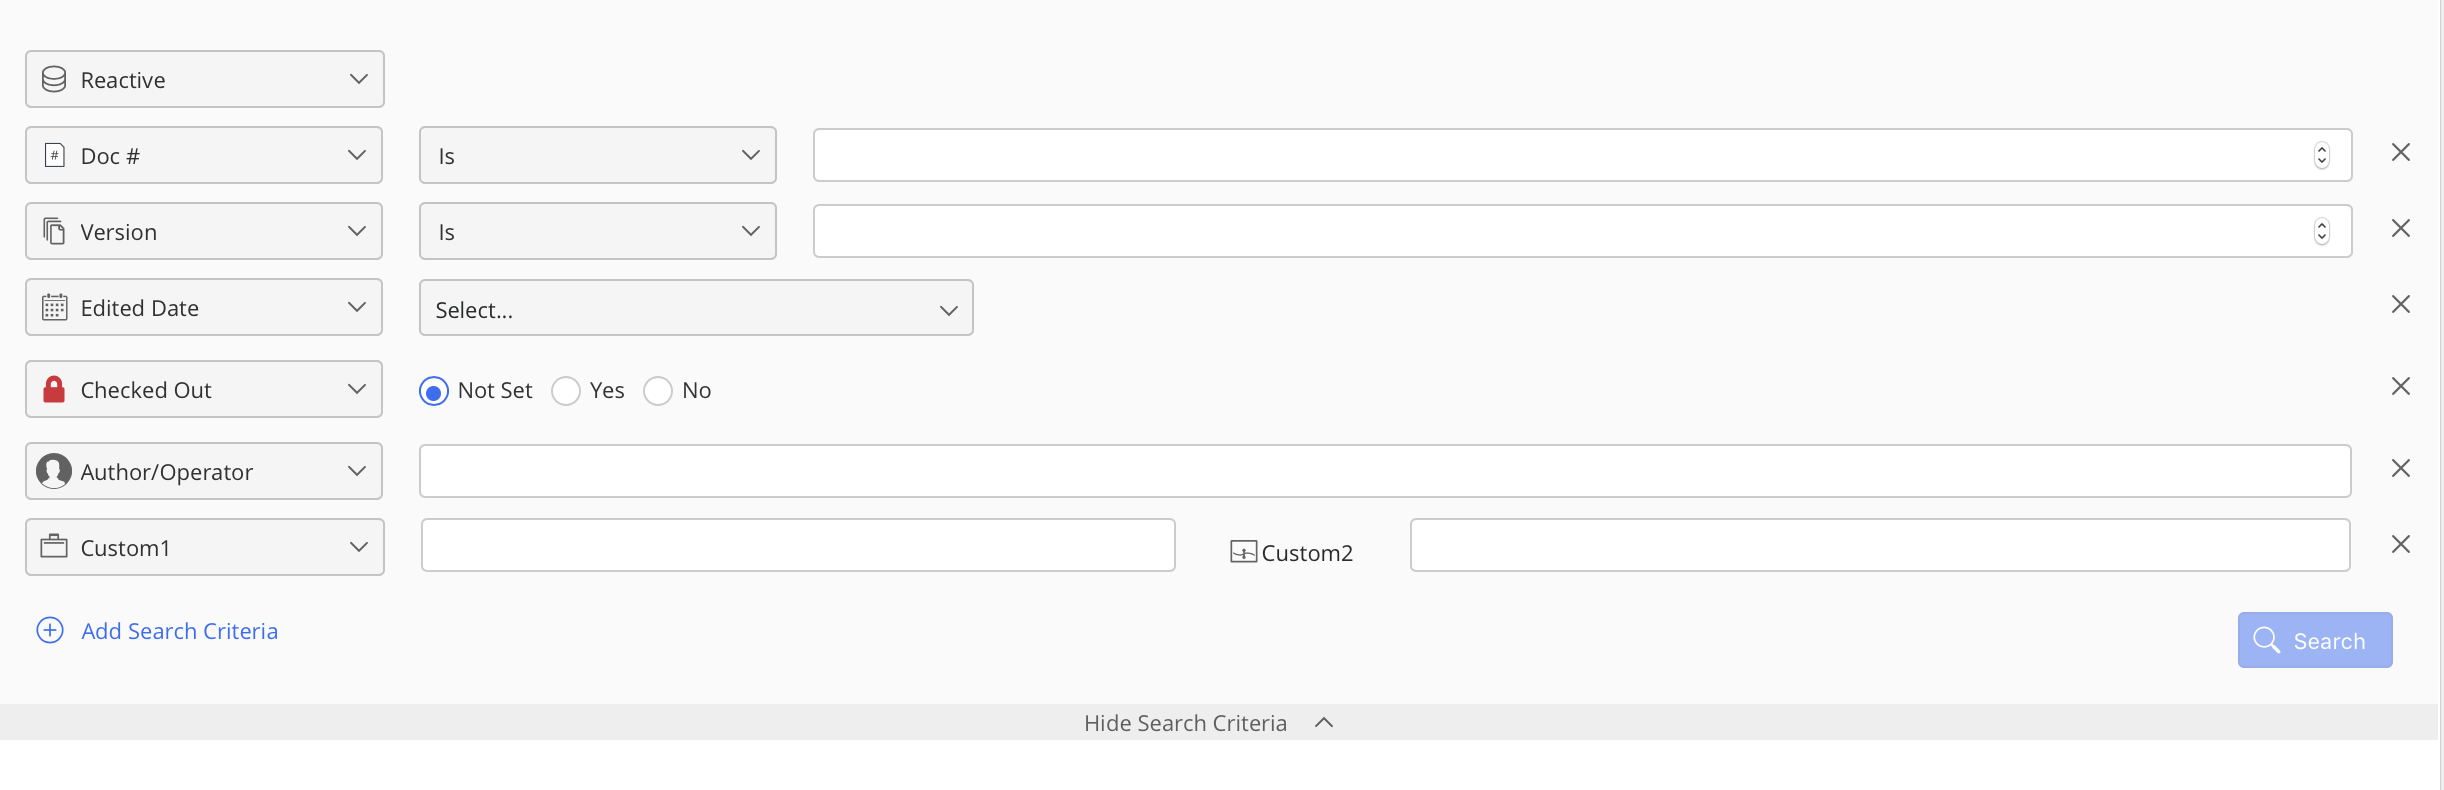
Use these search fields to refine your search, then select Search.
NOTE:
To add more search criteria, select
 .
.With the Search button enabled, the
 option is displayed; select it to reset the search criteria.
Search results are limited to maximum of 5000 items.
In the preceding figure, the Hide Search Criteria toggle option is displayed.
To hide the search criteria and focus only on the list of filtered documents, select Hide Search Criteria.
Selecting Hide Search Criteria changes it to Show Search Criteria. Select this to view the search criteria list.
iManage Control Center preserves the search fields you enter when searching for documents, workspaces, or trash. When you add or remove search fields, your settings are automatically saved and will be present the next time you sign in and access the Documents, Workspaces, or Trash pages. This provides the advantage of not having to remember or reselect your search fields for subsequent searches.
Search fields are stored locally in the browser's cache for each individual library. If you switch to a different browser or to a different device, you will see the default search fields.
Unlocking documents
Use this feature to unlock a document that has been checked out by a user. This enables other users to open, edit, or check out the document.
To unlock a checked out document:
In iManage Control Center, navigate to CONTENT > Documents.
In the list of search criteria, locate the CheckedOut option, and select Yes. By default, this value is set to Any. Enter any other search criteria to locate the document, such as Doc. Number.
Click Search.
Locate the checked out document that you want to unlock in the list of search results. Checked-out documents are indicated with the
 lock icon. Right-click the document and
click Unlock.
lock icon. Right-click the document and
click Unlock.
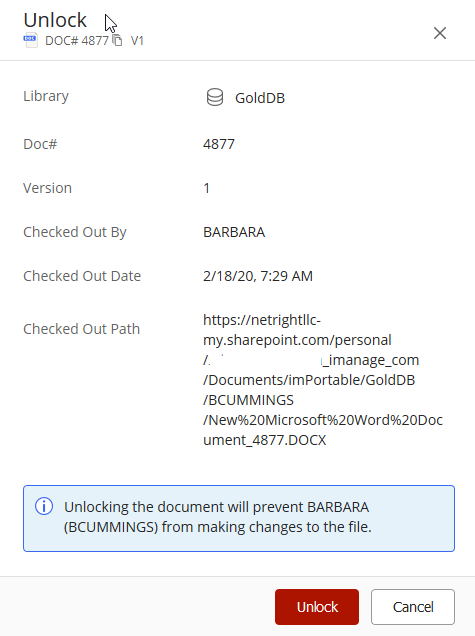
The Unlock dialog opens with details about the checked out document. Click Unlock again to unlock the document.
Figure: Unlock dialog
Checking effective access
To verify the access rights of a user for a selected document, use the Check Effective Access option. It evaluates all permissions (default security, access permission, group memberships, and role abilities).
It is available on the:
Ribbon bar: Select a document to see this option on the ribbon bar.
Kebab menu: Select the
 icon adjacent to each document to see this option.
Context menu: Right-click a document to see this option.
Use one of the preceding options to check the effective access of the document.
Right-click a document and select Check Effective Access. The following dialog box appears:
Figure: Check Effective Access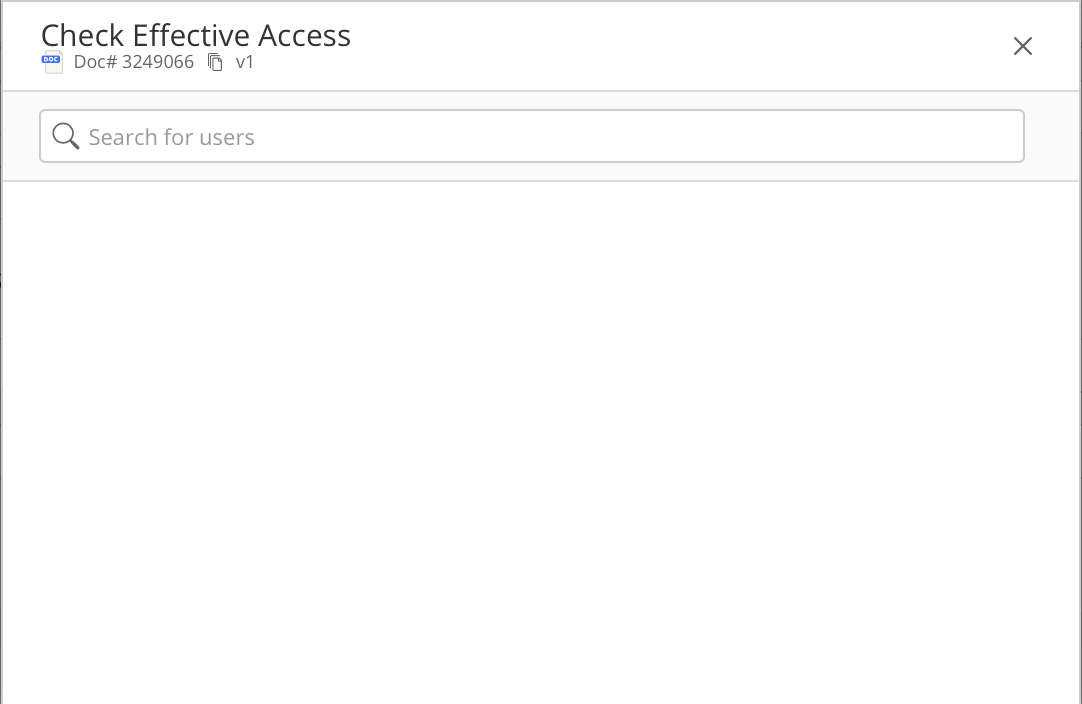
Enter a Username or ID. A suggestion list appears.
Select a user. You see the access right of the selected user for the document.
Verifying security
To verify access permissions for the users and groups assigned in the Access Control List (ACL), you can use Security option. It is available on the:
Ribbon bar: Select a document to see this option on the ribbon bar.
Kebab menu: Select the
icon adjacent to each document to see this option.
Context menu: Right-click a document to see this option.
Right-click on a document, and select Security.
Security details for the document is displayed. The following figure gives you one such example:
Figure: Security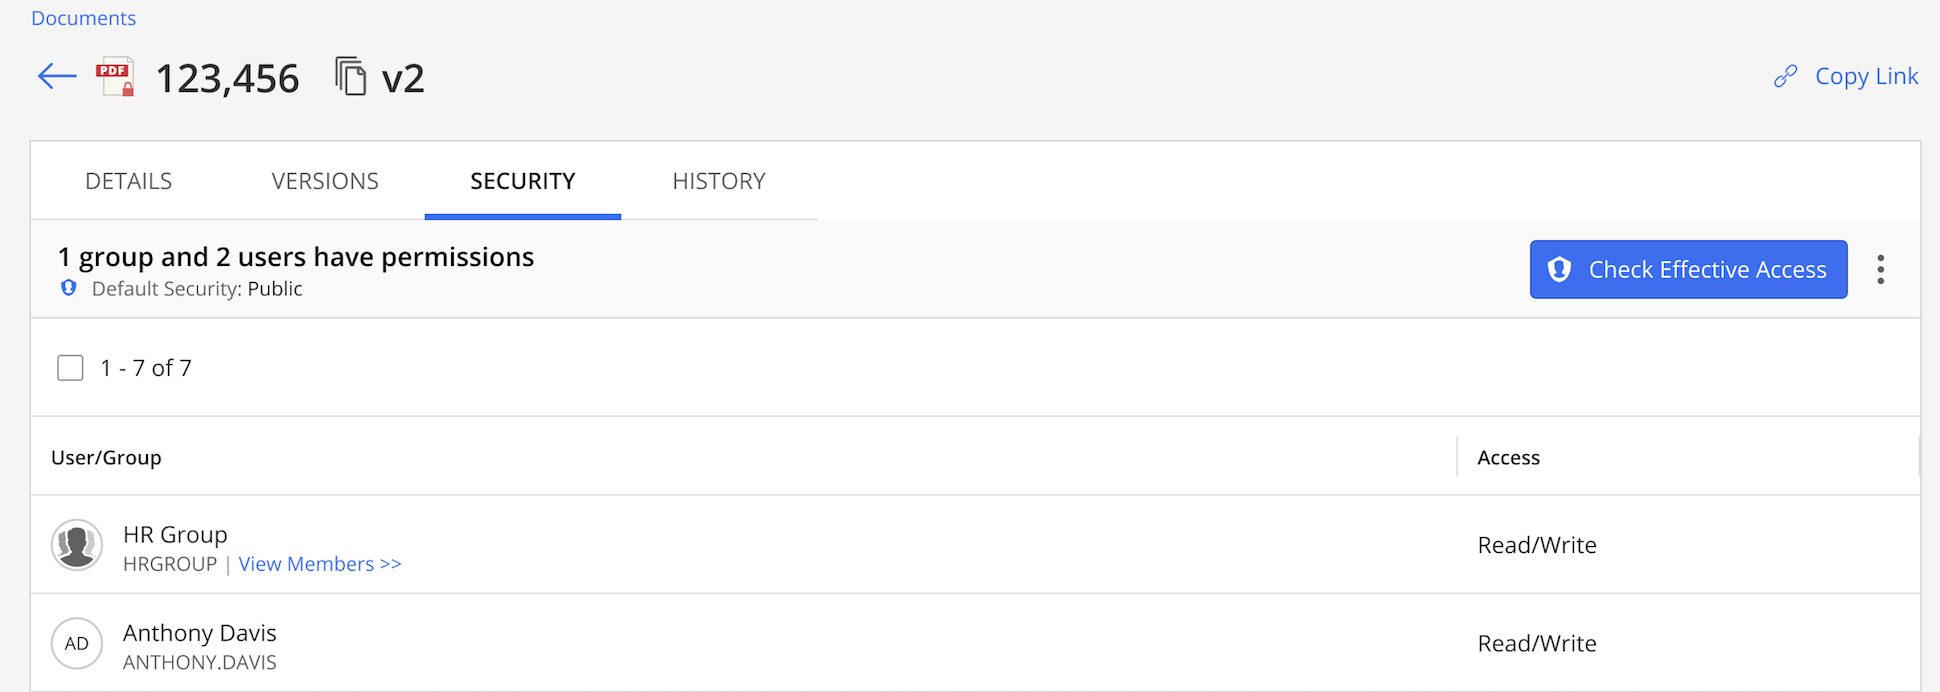
Viewing document versions
Use this feature to view the versions of a document. This is available on the:
Ribbon bar: Select a document to see this option on the ribbon bar.
Kebab menu: Select the
icon adjacent to each document to see this option.
Context menu: Right-click a document to see this option.
Use one of the preceding options to view the document versions. On the Versions tab, you see the following besides the version details:
Author
Custom field 1
Custom field 2
Checked Out By
Checked Out Date
Last Edited By
Last Edited Date
Viewing document history
Use this option to see the history of a document. It is available on the:
Ribbon bar: Select a document to see this option on the ribbon bar.
Kebab menu: Select the
icon adjacent to each document to see this option.
Context menu: Right-click a document to see this option.
Use one of the preceding options to view the document history. On History tab, you see the following details:
Date
User
Activity
Application
Duration
Pages Printed
Location
Comments
Viewing document details
This option is available on the:
Ribbon bar: Select a document to see this option on the ribbon bar.
Kebab menu: Select the
icon adjacent to each document to see this option.
Context menu: Right-click a document to see this option.
Clickable link: I n the Doc #/Version column, select a document.
Use one of the preceding options to view the document details. Y ou see the following details:
Library
Doc#
Version
Name
Author
Class_EN
Type
Operators
Locations
Copying document link
Use this option when you want to share the document link with a customer, partner, or others through email. It is available on the:
Ribbon bar: Select a document to see this option on the ribbon bar.
Kebab menu: Select the
icon adjacent to each document to see this option.
Context menu: Right-click a document to see this option.
Use one of the preceding options to copy the link for the document. The document link gets copied to the clipboard.