Authentication & SSO
This page contains information to help you configure and manage Security Assertion Markup Language (SAML) single sign-on (SSO) authentication with iManage, and update your configuration when Identity Provider (IdP) certificates are nearing expiration and need to be refreshed.
Configuring SAML SSO for your iManage environment offloads authentication of iManage users to your IdP and provides the following benefits:
Simplifies the authentication experience for your iManage users.
Reduces the cost of administering iManage user accounts, such as managing or resetting passwords for iManage users.
iManage uses Service Provider-initiated SAML SSO, where iManage is the service provider. When an iManage user attempts to sign in, a SAML Authentication Request is sent to the IdP to authenticate the user.
Prior to the Q3 2021 Cloud Service Update / iManage Work 10.4.0 release, iManage used Identity Provider-initiated SAML SSO. By migrating to SP-initiated SAML SSO, customers can manage their SAML SSO configuration entirely within Control Center and their Identity Provider. Migrating from IdP-initated to SP-intitiated SAML SSO has no impact to the sign in process for your iManage end users.
Who should use this?
New customers who are adopting iManage Work and want to implement SAML SSO authentication for their users
Existing iManage Work customers who are not currently using SAML SSO and want to transition to SAML SSO authentication for their users.
Existing iManage Work in the Cloud customers who are currently using SAML SSO authentication as configured and managed by iManage, and want to manage their SAML SSO authentication directly using iManage Control Center.
On this page:
Before you begin
Before you configure SAML SSO in your iManage environment:
Confirm that at least one administrative user account with the OS Type of Virtual is created within all iManage libraries. Use this account to configure SAML SSO in the following sections on this page.
When set to Virtual, these accounts use explicit login to authenticate to iManage. That is, they use the username and password as defined in iManage Control Center and do not authenticate using SAML SSO.
See the steps below to confirm the OS type of an iManage user.Confirm these administrative users can sign in to Work 10 Web using the explicit login URL:
https://<domain>/login/imanagework.htmlConfirm that all other iManage user accounts used for authenticating iManage services (such as the account used for iManage Directory Synchronization Service, iManage Refile Service, or Workspace Generator) or third-party integrations are configured with the OS Type of Virtual.
Always keep these account credentials secure.
After enabling SAML SSO in iManage Control Center, we recommend that all other iManage user accounts be defined with the OS Type of Active Directory. This enforces SAML SSO authentication for these users, and prevents them from signing in using explicit login. Any users imported using the iManage Directory Synchronization Service are automatically set to Active Directory.
To confirm the OS Type of a user:
In iManage Control Center, navigate to Access > Users.
Select any user account.
In the Platform Details section of the user's account, view the OS Type field.
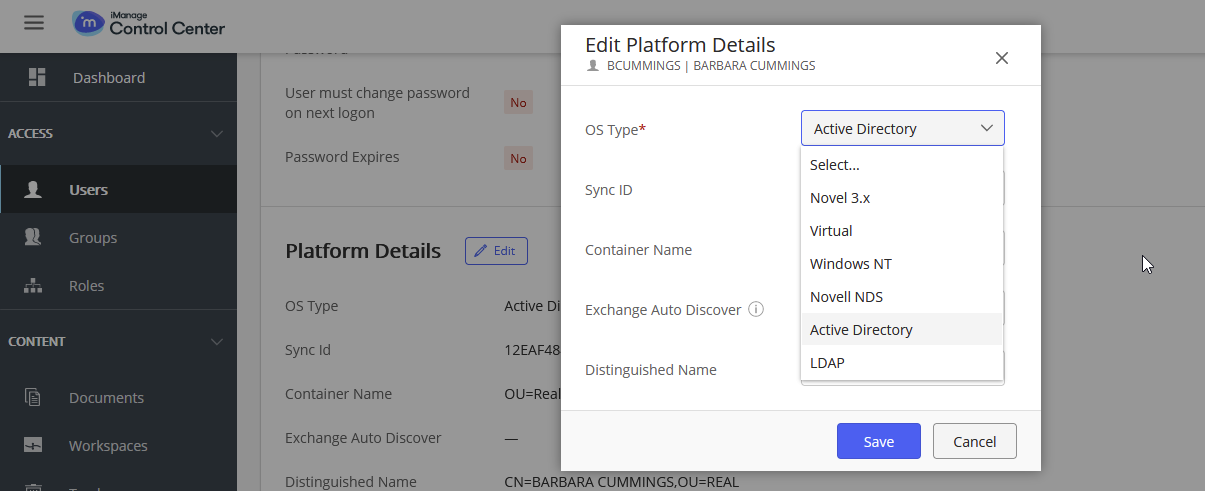
To change the OS Type for an individual user so that they are configured to authentication using SSO:
Select Edit to open the Edit Platform Details dialog box. Modify this setting to Active Directory.
Select Save.
Figure: Edit Platform Details dialog box
Contact support@imanage.com if you require assistance updating a large number of users.
iManage application requirements
All iManage applications support SAML SSO authentication, however the following requirements apply:
Work Desktop for Windows 10.2.4 or later
DeskSite or FileSite 9.3.7 or later
Additionally, authentication using OAuth2 is
required
for these applications. For more information, see the following article:
ADVISORY: Work Desktop for Windows will no longer support the use of the Microsoft Internet Explorer web browser control
Steps to configure SAML SSO
1. Configure your Identity Provider SSO
To configure your Identity Provider to provide SAML SSO authentication for your iManage users, see the following instructions for your IdP:
For all other Identity Providers, see General IdP configuration.
After you have configured your IdP and downloaded the Federated XML metadata file from your IdP, continue to Enable SAML SSO.
2. Enable SAML SSO
The following steps describe how to import the Federated XML metadata file and enable SAML SSO for your iManage users in Control Center.
Sign in to iManage Work using the administrative Virtual account as described in Before you begin using the explicit login page:
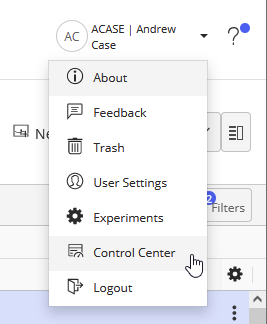
https://<domain>/login/imanagework.htmlOpen iManage Control Center. In the iManage Work user profile menu, select Control Center.
Figure: Accessing iManage Control Center
Navigate to Network & Security > Authentication & SSO.
In the Authentication section, select Edit. The Edit Authentication Settings dialog box appears.
Figure: Edit Authentication Settings dialog box
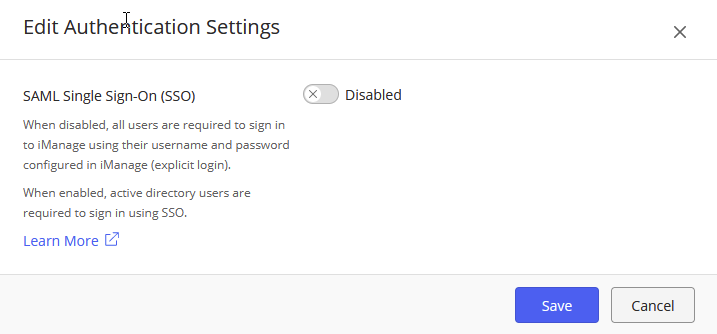
Select Enabled.
Select Service Provider (Recommended).
If you already have SAML SSO enabled in your iManage Work environment, the Identity Provider (Legacy) option is selected by default. In an on-premises environment, this option uses the settings stored on your Work Server. In an iManage Cloud environment, this uses settings as configured by the iManage Cloud Operations team.
This option is provided as a way to roll back to your previously configured SAML SSO configuration. This should only be selected if, after enabling Service Provider (Recommended), users are unable to sign in to iManage Work. For more information, see Troubleshooting.Select Next. The Setup SAML Single Sign-On (SSO) dialog box appears, and displays the information for your iManage environment.
Select Next.
In the Configure SAML SSO section, select Import XML file.
Figure: Setup SAML Single Sign-On (SSO) dialog box
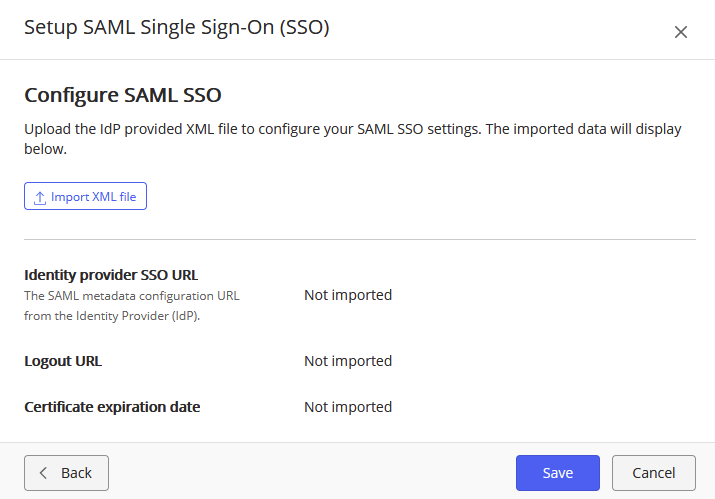
Select Import XML file.
When prompted, locate the metadata XML file that you downloaded from your IdP in Configure your Identify Provider SSO, then select Open.
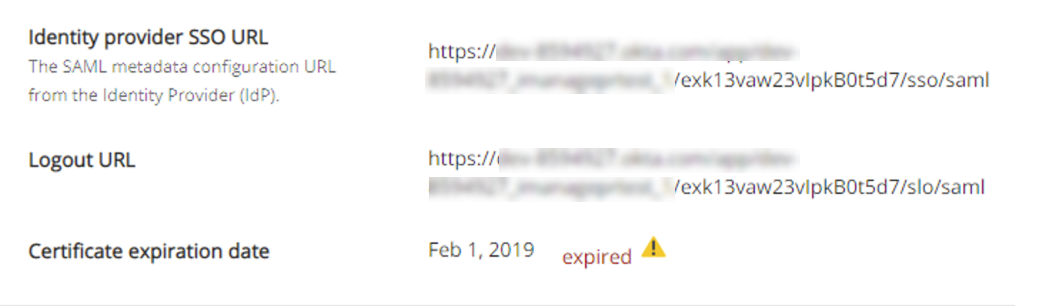
The file is imported into Control Center and the values for Identify provider SSO URL, Logout URL, and Certificate expiration date are displayed based on the information in the metadata XML file.
Before continuing, confirm that the Certificate expiration date displayed in iManage Control Center matches what you configured in your IdP and that it is not expired. Having an expired or improperly loaded certificate will prevent iManage users from signing in successfully using SSO.
Select Save.
SAML SSO is now configured in your iManage Cloud environment.
Continue to Validate that users can sign in to iManage Work.
3. Validate that users can sign in to iManage Work
After SAML SSO has been configured and enabled in iManage Control Center, users can begin signing in to iManage Work. Depending on the Identity Provider you are using, this may take several minutes to become active.
If users are not able to sign in successfully, see Troubleshooting.
Update your IdP certificate
After configuring SAML SSO, you must monitor the expiration of your IdP certificate. When the certificate is nearing expiration, you must generate a new federated metadata XML file from your IdP and import it into iManage Control Center. This file includes the new certificate.
To view the expiration date of your current signing certificate in iManage Control Center, navigate to Network & Security > Authentication & SSO and view the Certificate expiration date field.
iManage Control Center displays a message if the certificate is expiring within the next 45 days, or has already expired.
Figure: Warning message displayed when a certificate has expired
To update your IdP signing certificate:
In your IdP, download the new Federated metadata XML file for your SSO configuration. If needed, upload the updated signing certificate into your IdP's SSO configuration before downloading the Federated metadata XML file.
In iManage Control Center, navigate to Network & Security > Authentication & SSO.
In the Configure SAML SSO section, select Import XML file. The Setup SAML Single Sign-On (SSO) dialog box appears.
Figure: Setup SAML Single Sign-On (SSO) dialog box
Select Import XML file.
When prompted, locate the metadata XML file that you downloaded from your IdP that contains your new certificate, then select Open.
The file is imported into Control Center, and the details such as Certificate expiration date are displayed.
Select Save.
Confirm that the Certificate expiration date field displays the new date.
Troubleshooting
After enabling SAML SSO, if users are not able to sign in to iManage Work using SSO or receive the following error:
Figure: SAML Login Error: invalid_response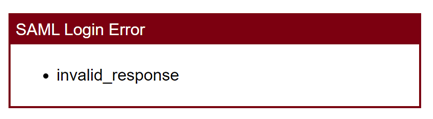
Perform the following steps to resolve the issue.
Verify your SSO configuration in your IdP. Review the detailed instructions and troubleshooting information on the following IdP configuration pages:
Microsoft Azure
Microsoft AD FS
Okta
PingFederate
ShibbolethConfirm that the certificate expiration date shown in iManage Control Center is not expired.
Confirm that your Identity Provider service is available. If it is offline, contact your Identity Provider directly.
If you are unable to determine the cause of the issue, you can temporarily revert to your previously configured Identity Provider SAML SSO configuration in iManage Control Center. See Rolling back your configuration.
Once your users are able to sign in again after rolling back your configuration, contact iManage Support (cloudsupport@imanage.com or support@imanage.com) if you need assistance troubleshooting your SAML SSO configuration.For any other issues, contact iManage Support (cloudsupport@imanage.com or support@imanage.com).
Rolling back your configuration
If, after enabling SAML SSO, your users are not able to sign in to iManage, you can revert your system to use the previously configured IdP SSO configuration.
On the Authentication & SSO page in iManage Control Center, in the Authentication section, select Edit .
Select the Identify Provider (Legacy) option.
Select Save.
Select Revert to confirm this operation.
Verify that users are now able to sign in to iManage Work.
If users are still unable to sign in, contact iManage Support (cloudsupport@imanage.com or support@imanage.com) for assistance.
FAQ
Q: How will I know when my certificate is about to expire?
A: Your certificate's expiration date is shown in the Certificate expiration date field on the Authentication & SSO page in Control Center. iManage Control Center also includes a warning message when the certificate expiration date is within 45 days, or if it is expired. For information, see Update your IdP certificate.
Q: How does SAML SSO effect iManage users who are defined with OS Type = virtual in iManage Control Center?
A: Users configured as virtual users must use their username and password defined in iManage Work. They can sign in to iManage Work using the explicit login URL: https://<domain>/login/imanagework.html
If you have service accounts which are set to OS Type = Active Directory, set these to OS Type = Virtual before enabling SAML SSO.
Q: I just enabled Service Provider SAML SSO and now my administrative users are not able to sign in using their username and password as defined in iManage Control Center.
A: Confirm that these users are set OS Type of Virtual in their user profile in iManage Control Center. For more information, see Before you begin.
Q: Our company has a Utility Service URL available in our iManage Work in the Cloud environment. Should I configure SAML SSO for this Utility Service URL?
A: A Utility Service URL is generally used to offload third-party tools or services that need access to your iManage Work environment. As a best practice, do not configure SAML SSO for your Utility Service URL(s), as this would result in sign in issues for your users. If you need to sign in to this system, you must access this with the explicit login URL: https://<domain>/login/imanagework.html