Users
NOTE:
To perform operations on this page, the user signed in to iManage Control Center must be a member of the NRTADMIN group, or be assigned to a role with Tier 1 or Tier 2 access to Control Center. For more information about the specific operations allowed, see Understanding tiers.
A user is the basic entity for accessing iManage. For more information, see User Management.
Creating users
Users for an iManage Work system are created in one of the following ways: Migration, directory service, and manually. For more information about these options, see User Management.
The following steps describe how to create a user manually using iManage Control Center.
- Browse to Access > Users.
At the top of the page, select the Work library in which this user should be created, then select +Create User.
The Create User dialog box appears.
Figure: Create User dialog box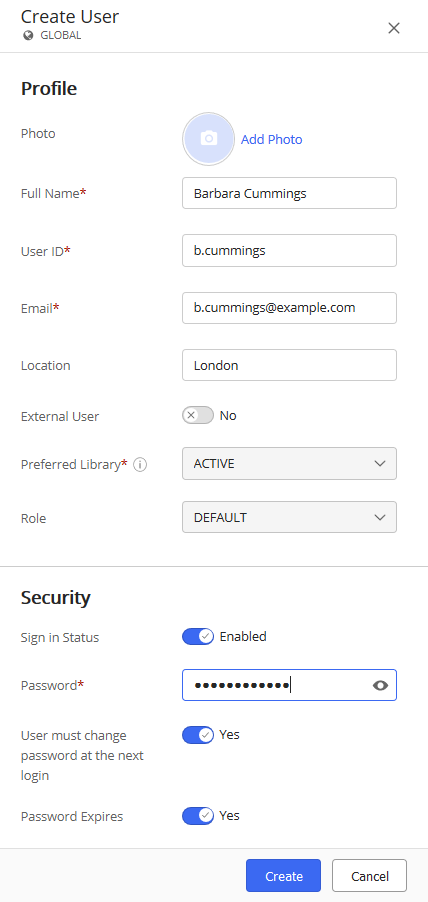
- Enter information for this user as described in the following table, then select Create or Create user and send email. The user account is created.
Table: User account information
Field |
Description |
|---|---|
Photo |
Upload a photo for this user. Select Add Photo to browse to and select a photo. |
Full Name (Mandatory) |
Enter the user's full name, such as Andrew Case, or Marcie J. Davenport-Williams. Maximum length: 64 |
User ID (Mandatory) |
Enter a unique identifier for this user. This user id will be the user's personal identification within the iManage Work system. When entering the user id, follow company guidelines such as the first name and last name order, abbreviations, separation characters, and so on. The value cannot be changed later. For example: ACASE or MARCIE-DAVENPORT . Maximum length: 64 |
Email (Mandatory) |
Enter the user's email address, typically the company email address for the user. It must be unique among all users. Maximum length: 254. The individual parts of the email (user name, domain name, and domain extension) can each be no longer than 64 characters. |
Location |
Enter the user's location, for example, Chicago. Minimum length: 0 |
External User |
Select Yes to define this user as an external user. An external user has no default security access and must later be assigned explicit access for their tasks. An external user is a virtual user without any privileges over content, unless explicitly granted on the content ACL. For example, an external user may be a customer who requires temporary access, a part-time contractor, vendor, or partner. Default: No (disabled) |
Preferred Library |
Choose the default library for this user. Each user is required to have one preferred library. It stores the user's preferred settings such as language preference and default search form for iManage Work advanced searches. When you set the value in this field, the Role field appears. |
Role |
Choose a library role to define the privileges assigned to this user. NOTE:
This field is dependent on the Preferred Library field.
|
Security |
|
Sign In Status |
If enabled, the user can sign in to iManage Work. Set to Disabled to prevent the user from signing in to iManage Work. Default: Enabled. |
Password (Mandatory) |
Enter the user's password. No default password is available for new users and they cannot be added with a blank Password field. Password requirements:
|
User must change password |
If enabled, this setting forces the user to change their password the next time they sign in. Default : Yes. |
Password Expires |
Set to No to exempt this user's password from expiring. Use this option only for system service accounts that should not expire. Default: Yes. |
Searching for users
Use the search field to search for a user by the user's name, ID, or email.
Select the Filter option to filter users shown in the list based on information about the users, such as Sign in Status, Location, Preferred Library, and so on.
Figure: Search and Filter options

Deleting users
Users imported or created from a directory service, such as Windows Active Directory, are managed by the company's network system administrators. Changes are automatically synchronized, or saved, to iManage Work.
iManage Work system administrators cannot delete virtual users. The preferred method is to set the user's account Sign in Status to Disabled. For more information, see Enabling or disabling users.
Changing user passwords
- In iManage Control Center, browse to Access > Users.
- Select one of the following options:
- Select a user in the list, then select Reset Password on the ribbon bar.
- Select
 next to a user, then select Reset Password.
 Right-click on a user, then select Reset Password.
The Reset Password dialog box appears.
Enter the following information:
Field
Description
Password
Specify the new password for this user.
- Minimum length: 4
- Maximum length: 254
- Spaces allowed: No
- Unicode allowed: Yes
- Special Characters allowed: Yes
Must change password at the next login
Specify if the user must change their password at their next sign-in.
If enabled, the user must change their password the next time they sign in.
If disabled, the user is not required to change their password the next time they sign in.
Password Expires
Specify if the password expires. The password expiration period is an iManage Work system setting.
If enabled, the user's password expires.
If disabled, the user's password never expires.
- Select Reset to save the new password and password settings.
Enabling or disabling users
Enabling or disabling sign-in for a user allows or restricts, respectively, access to that specific iManage Work library. The user's content and activity within the library is preserved; however the user will no longer be able to access the library once disabled.
If a user has been disabled, they can be enabled to regain access at any time.
- Browse to Access > Users.
- From the drop-down list at the top of the screen, select the appropriate library where this user is to be enabled or disabled.
- Select one of the following options:
- Select a user in the list, then select Disable Sign in or Enable Sign in on the ribbon bar.
- Select
 next to a user, then select Disable Sign in or Enable Sign in.
 - Right-click on a user, then select Disable Sign in or Enable Sign in.
- If you are disabling sign-in, select Disable Sign In again to confirm the operation.
Adding users to a group
You can also add users to a group from the Groups page. For more information, see Groups.
- Browse to Access > Users.
- From the drop-down menu at the top of the screen, select the appropriate library where this user is to be enabled or disabled.
- Select one of the following options:
- Select one or more users in the list, then select Add To Groups on the ribbon bar.
- Select
 next to a user, then select Add To Groups.
 - Right-click on a user, then select Add To Groups.
- Select groups from the groups list or look for groups using the search field and select Add.
Editing user profiles
NOTE:
If using a directory synchronization solution, user profiles changes should be made in Active Directory. If changes are made in iManage Control Center and not in Active Directory, the directory synchronization solution will update the user profile to match the values in Active Directory after the next synchronization.
- Browse to Access > Users.
- From the drop-down list at the top of the screen, select the appropriate library where this user is to be edited.
- Select one of the following options:
- Select a user in the list, then select Edit Profile on the ribbon bar.
- Select
 next to a user, then select Edit Profile.
 - Right-click on a user, then select Edit Profile.
- Modify any of the available fields, then select Save. The updates are saved.
Editing user security
- Browse to Access > Users.
- From the drop-down list at the top of the screen, select the appropriate library where this user is to be enabled or disabled.
- Select one of the following options:
- Select a user in the list, then select Edit Security on the ribbon bar.
- Select
 next to a user, then select Edit Security.
 - Right-click on a user, then select Edit Security.
- Modify any of the following fields, then select Save.
Fields |
Description |
|---|---|
Allow Login |
Enable or disable the user from accessing their account. |
Password |
Enter the user's password. No default password is available for new users and they cannot be added with a blank Password field. |
User must change password at the next login |
Specify if the user must change their password at their next sign-in. If enabled, the user must change their password the next time they sign in. If disabled, the user is not required to change their password the next time they sign in. |
Password Expires |
Specify if the password expires. The password expiration period is an iManage Work system setting. If enabled, the user's password expires. If disabled, the user's password does not expire. |
Editing user platform details
Browse to Access > Users.
From the drop-down list at the top of the screen, select the appropriate library where this user is to be enabled or disabled.
- Select one of the following options:
- Select a user in the list, then select Edit Platform Details on the ribbon bar.
- Select
 next to a user, then select Edit Platform Details.
 - Right-click on a user, then select Edit Platform Details.
Modify any of the following fields, then select Save.
Fields
Description
OS Type
- Novel 3.x
- Virtual
- Window NT
- Novell NDS
- Active Directory
- LDAP
- Enterprise
Sync ID
Sync ID that is generated at the domain controller of a particular organization.
Name of the container to which the user belongs.
Exchange Auto Discover
Exchange server name.
Distinguished Name
User name that you created is mapped to the container details.
- Select Save.
Viewing user details
- Browse to Access > Users.
- From the drop-down list at the top of the screen, select the appropriate library where this user is to be enabled or disabled.
- Select one of the following options:
- Select a user in the list, then select View on the ribbon bar.
- Select
 next to a user, then select View.
 - Right-click on a user, then select View.
The <Username> page appears and displays the following tabs:
Details: Lists the details about a user.
NOTE:
Select Edit to modify details in each section on the dialog box.
- Groups: Lists the groups associated with a user.
Creating an NRTADMIN User
NRTADMIN access is granted by adding the user to the NRTADMIN group within an iManage Work library. An NRTADMIN user automatically has full privileges within the library, and supersedes all other privileges.
Only an NRTADMIN user can add other users to the NRTADMIN group. To create an NRTADMIN user (add a user to the NRTADMIN group):
- Browse to Access > Users.
- From the drop-down list at the top of the screen, select the appropriate library where this user is to be enabled or disabled.
- Select one of the following options:
- Select a user in the list, then select Add to Group on the ribbon bar.
- Select
 next to a user, then select Add to Group.
 - Right-click on a user, then select Add to Group.
- Select NRTADMIN, then select Add . The user is added to the NRTADMIN group.
Assigning users and groups
Users and groups must be assigned to iManage Work items. Items include workspaces, containers, and documents. To assign a user or group, use an iManage Work client, and not the iManage Control Center. Any user with sufficient access privileges for the item can make this assignment.
To assign a user or group:
- Within an iManage Work client, browse to the item, and select Properties. The properties tab appears.
- Select View Security Details . The Security Details tab appears.
- Select Add Users/Groups.
- Select the users and groups from among the available choices. Multiple selections can be made.
- For each user or group, assign an access privilege level from the security drop-down list next to the user or group name.
- Select Confirm to save the changes to the users and groups.
To remove a user or group:
- Within an iManage Work client, browse to the item, and select Properties. The properties tab appears.
- Select View Security Details . The Security Details tab appears.
- Select Add Users/Groups.
- Select the users and groups from among the available choices. Multiple selections can be made.
- For each user or group, select Remove from their access privilege level of the security drop-down list next to the user or group name.
- Select Confirm to save the changes to the users and groups.
Email notifications
iManage sends emails to the signed-in user to notify them of specific actions they need to take.
NOTE:
Email notifications cannot be customized. Information and instructions in the notifications are provided in English only.
Forgot password
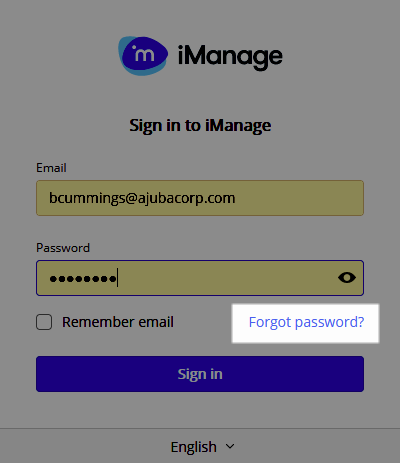
When a user enters their email address, but cannot remember their password, they can select the Forgot password? link on the sign-in page. No action is required by an administrator.
Figure: Forgot password
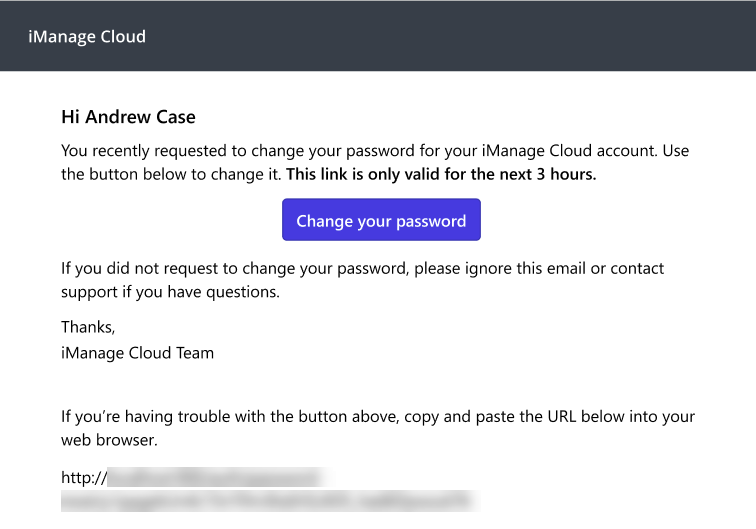
The user receives the following email, which includes a link to change their password. The link remains active for 3 hours.
Figure: Forgot password — Change your password
Users receive an email notification for each time they select Forgot password?.
Only the link in the most recent email notification is active, and the user receives a message if they attempt to access a deactivated link:
Your password change link has expired or has already been used.
New account
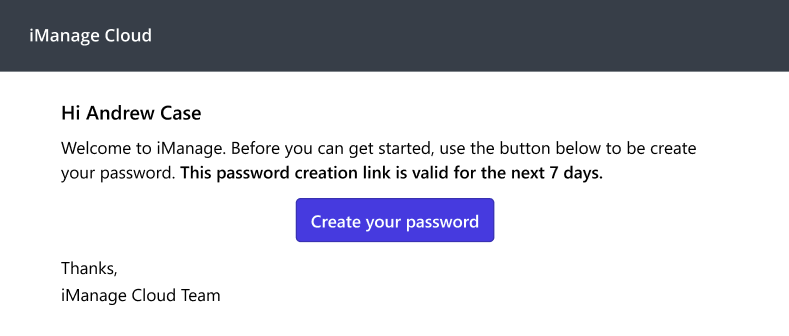
When an administrator creates a new user in iManage Control Center, the administrator can choose to send an email. This welcome email includes instructions to the user to access the link provided in the email to create their password. The link remains active for 7 days.
For more information, see Creating users.
Figure: New account – Create your password
NOTE:
For security reasons, the link provided in the email remains valid for 7 days. If the user does not take action within 7 days, the link is deactivated, and the iManage Work administrator must resend the email to the user from iManage Control Center. For more information, see Changing user passwords.
Password changes
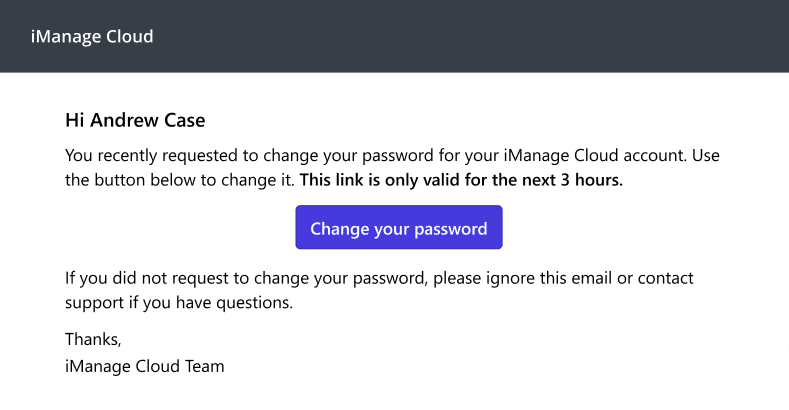
An administrator can trigger an email to be sent to the user requiring them to change their password. For more information, see Changing user passwords.
The user receives the following email, which includes a link to change their password. The link remains active for 3 hours.
Figure: Administrator initiated — Change your password
Account locked
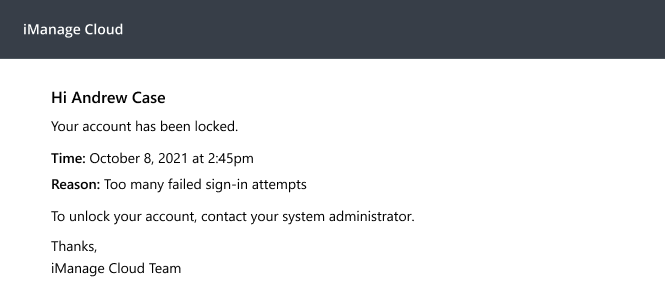
When a user attempts to sign in but is unsuccessful, their account becomes locked and they are prevented from further attempts to sign in.
- After five failed attempts, the system locks the account temporarily for 15 minutes. The user may attempt to sign in again after 15 minutes.
- After 10 total failed attempts, the user account is again locked.
When a user's account becomes locked, the system sends the following email notifications to the user.
Figure: Temporarily locked for 15 minutes
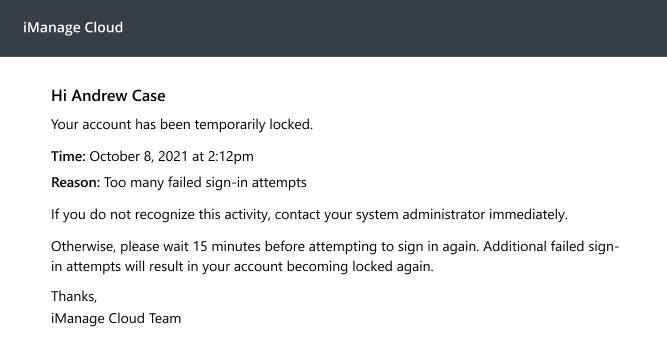
Figure: Locked after 10 total failed attempts
