Task | Application |
|---|---|
Install and connect local Library Manager to IRM Cloud Service | IRM Library Manager |
Configure the Library | Library Manager |
Install Records Manager Components | Various |
To use Library Manager on-premises when IRM is installed in the Cloud, you need to install, but not configure, a local (on-premises) IRM Library Manager instance. The Library Manager can then be configured to connect to IRM Cloud Service. These steps are detailed below, as follows:
Step 1: Install an unconfigured IRM Library Manager locally
Download the relevant IRM Library Manager package from iManage Help Center.
NOTE: Ensure that the server you download matches the version of IRM Cloud Service (per the equivalent version stated in Cloud Service Update), and that you select IRM Library Manager.
Locate and run the IRM Library Manager setup application.
In the installation dialog, select Options to modify or select the installation location—for example, C:\iManage RM Library Manager.
To return to the initial dialog, select OK or Cancel.Select the checkbox to agree to the license terms and conditions.
Select Install.
NOTE: If you receive a security prompt at this stage, select the relevant option to proceed with the installation.
In the installation success dialog, select Close.
Step 2: Configure programinit.properties file
Browse to …\rmserver\config\programs, where ... is the location where you installed the IRM Library Manager in Step 1 above. The programinit.properties file is located in this folder.
Open programinit.properties with a suitable editor.
Edit:
com.imanage.cms.ssl.client.require=falseto:
com.imanage.cms.ssl.client.require=trueand
com.imanage.cms.fc.net.rpc.transport = Tcp,Httpto:
com.imanage.cms.fc.net.rpc.transport = Http
Save and exit the programinit.properties file.
Step 3: Optionally configure proxy server connection
If your organization uses a hosted proxy for connecting to iManage Records Manager in the Cloud, you can configure Library Manager to connect to the proxy server.
To do so:
Browse to …\rmserver\config\programs, where ... is the location where you installed the local IRM Library Manager.
Open libmgr.properties with a suitable editing program and:
For
com.imanage.cms.fc.net.rpc.http.proxy.address=, enter the hostname or IP of your proxy server.For
com.imanage.cms.fc.net.rpc.http.proxy.port=, enter the port to be used for your proxy server (for example443).
Save the libmgr.properties file.
Library Manager can now connect to IRM server through the configured proxy.
Step 4: Connect Library Manager to IRM Cloud Service
Browse to …\rmserver\bin\win, where ... is the location that you installed the local IRM server. Imlibmgr.exe Library Manager is located in this folder.
Double-click to run Imlibmgr.exe. Library Manager opens.
In the left pane of the Library Manager window, under Clusters, an entry with a question mark is displayed.
Figure: Example of cluster shown at initial opening of Library Manager after local server install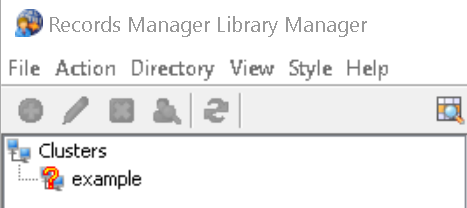
Select the cluster with the question mark.
Select the delete
 button.
In the pop-up window asking if you're sure that you want to delete the selected cluster, select Yes.
Select Clusters and then select the add
 button.
In the Add Records Manager Cluster window, in the Cluster Name field, enter the cluster name and port address (443) of the IRM Cloud Service—for example, yourcompanyname-cms.imanage.work:443.
Select OK. When a connection is established, the IRM Cloud Service (server) is listed under Clusters.
If you're connecting to iManage Work at cloudimanage.com, you must now authenticate with the iManage Records Manager Service. This identification operation must be performed successfully, once, to allow local users to access iManage Records Manager tools or clients.
NOTE: This step isn't applicable when connecting to iManage Work Cloud.Browse to your IRM URL your system administrator has provided, for example—https://yourcompany-irm.imanage.work/login.
Using the Sign in to iManage screen, sign in using your iManage Work credentials:
In Email, enter your iManage Work email address.
In Password, enter your iManage Work password.
NOTE: You may display or hide the password by selecting the icon.
icon.
Select Sign in. The following message is displayed, indicating successful identification:
Figure: identification success screen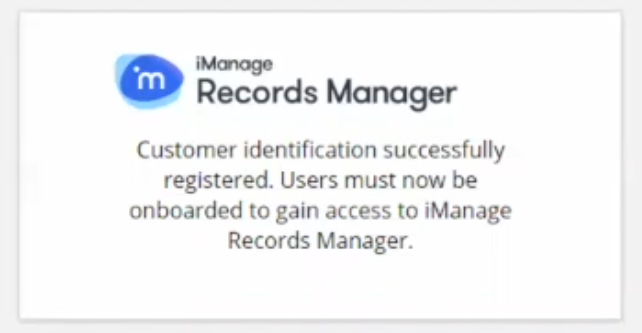
You can now use Library Manager to interact with IRM Cloud Service, per all of the functionality of Library Manager as detailed in this administration guide.