


Filtering content
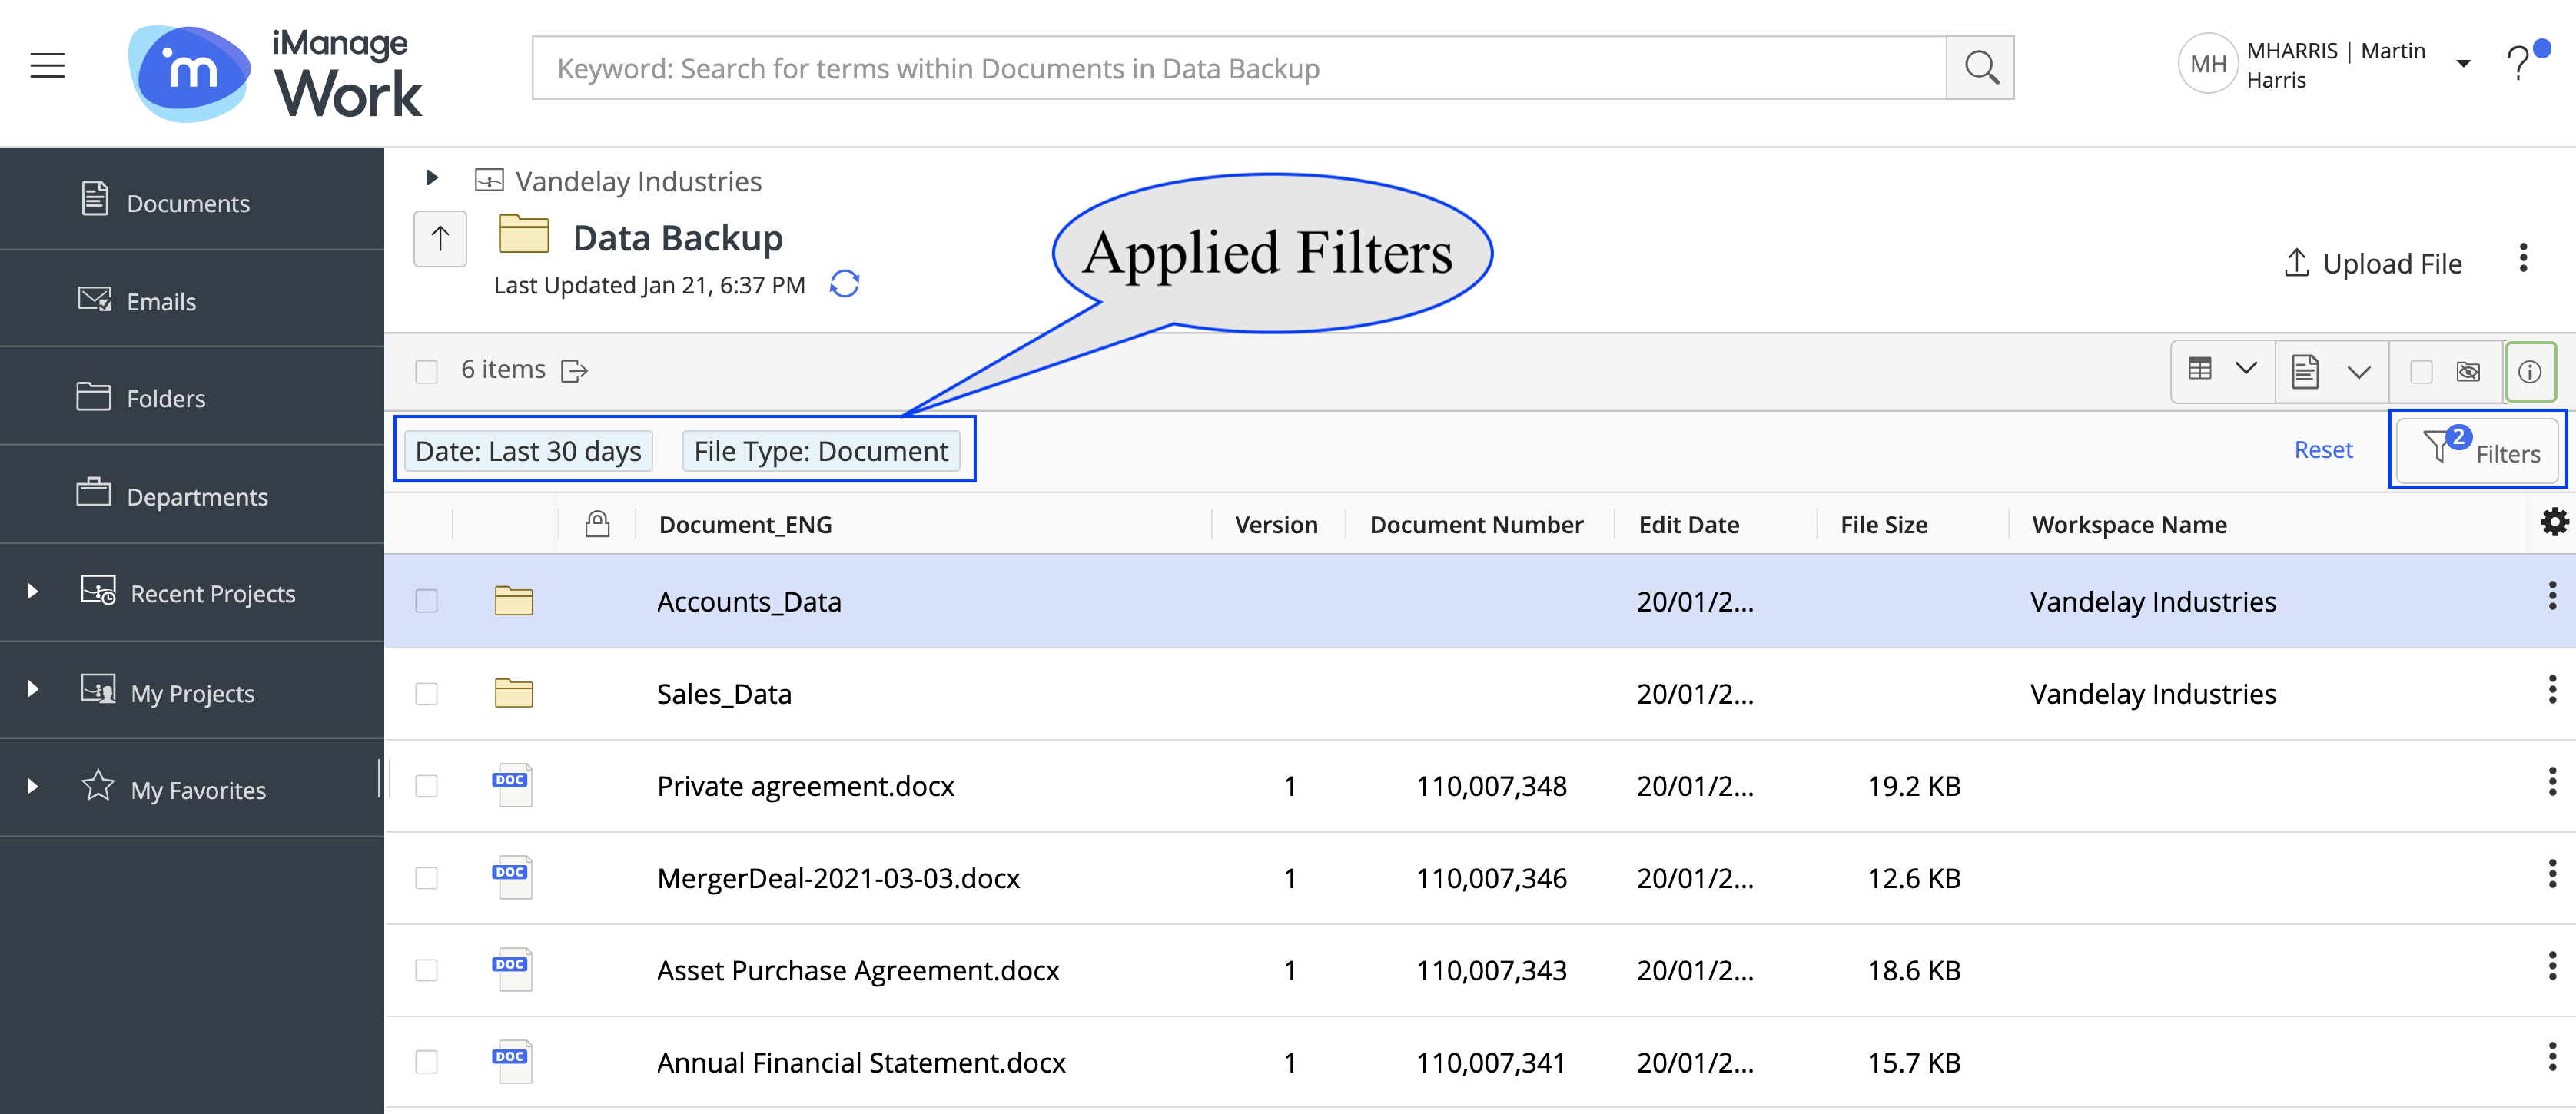
When users apply filter(s) on a result set, applied filters appear above the center panel . This helps users quickly identify the filter(s) applied to the items being displayed in the center panel.
A filter icon with a blue number indicates how many filters are applied.
Figure: Filters in the center panel
Filter panel can be opened in one of the following methods:
Selecting anywhere on the filters appearing above the center panel.
(OR)Selecting the Filters button below the View Selector
(OR)Using the SHIFT+F keyboard shortcut
Use filters to sort search results, the contents in iManage Work containers, or the items in the main list for each tab.
Different filters are available depending on what tab you are on. For example—on the Documents tab you can filter by Recent Documents, which are documents accessed in the last 30 days. You can filter by activities performed on documents, such as documents that were copied, or downloaded, or printed and so on.
On the Emails tab you can filter by Recent Emails, Sender, whether a document has an attachment, emails filed by you and so on.
For all content types you can filter by time: Today, Yesterday, Last 7 days, Last 30 days, or Date Range. Date Range opens a calendar picker tool. The default Date Range is last 20 days.
Resetting applied filters
Use the
Reset
option
in the
area above center panel or in the filter panel, to reset applied filters. The Reset option appears only if you have applied any filters other than the default filters. Any filter selections that are persisted across browsers / devices are also reset when the Reset option is selected.
Additional Filter Options
When searching for documents or emails, in the Client and Author/Operator Top 5 Filters, you can type in and select an additional author or client value not provided in the Top 5.

