Creating workspaces
TIP:
As part of the improved experience, you are presented with the new dialog, but you have an option to switch back to the old interface. We strongly encourage working in the new interface so that you can take advantage of all the new improvements. Select Switch back to the old interface if you run into an issue, and be sure to provide us with feedback on why you switched. After you switch back to the old interface, the selection is remembered for future workspace creation.
To create a new workspace:
Select the Recent Matters or My Matters node in the tree.
Select
 New Matter.
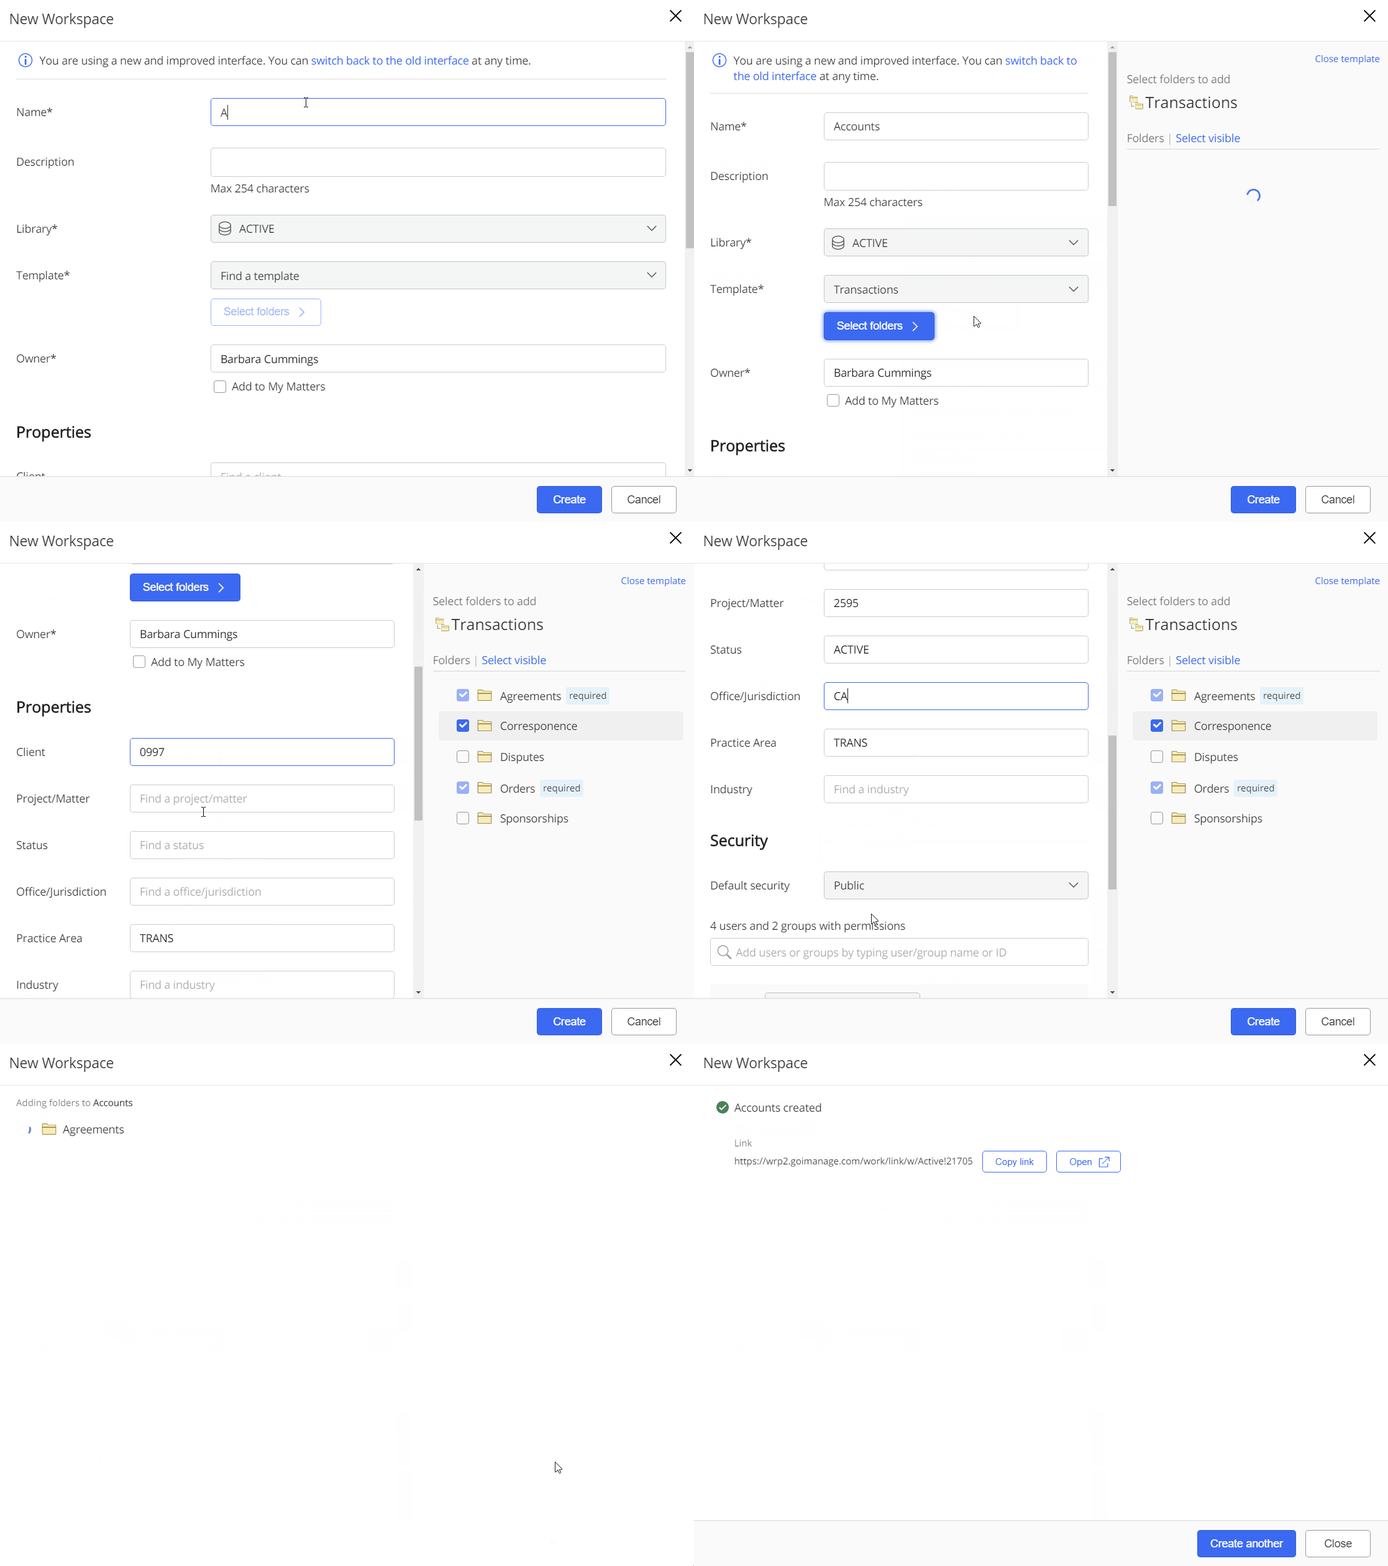
The New Matter dialog box appears.Type a name and description for the workspace.
In the Library list, select the library where this workspace must be created. Your last selection is automatically remembered.
When you create a workspace for the first time, the library defaults to your preferred library, but you can switch to any other library. The library earlier used by you is pre-loaded in this dialog the next time you create a workspace.In the Template list, select a workspace template. Templates provide a predefined list of folders for the workspace.
To save time, the last template you used is automatically selected.
All templates are listed in alphabetical order.
In the Filter text field, enter any part of the Template name to quickly filter this list.
Figure: New workspace dialog box
Select Select Folders to preview the folders that are defined within this template. Folders with the required tag are automatically created when the parent folder is created.
From the available folders defined in the template, select which additional folders you want to create. You can optionally rename any folders. This ability must be enabled within the template by your iManage Work administrator.
Folders with the required label are automatically created. If a required folder is under an optional parent folder (one where the checkbox is not pre-selected), then the required folder is created only if you choose to create the optional parent folder.
Use the Select visible option in the template preview list to quickly select all the folders that are displayed. The Select Visible option is useful when you have expanded a subfolder's children folders several levels deep and you quickly want to add all the folders in that structure.
You can create any of the other remaining folders after the workspace has been created.
(Optional) You can select the Add to My Matters check box to add the workspace to your My Matters.
Enter the required values for fields marked with
 below Properties.
(Optional) The Security section displays the security settings as defined in the template. You can modify the Default security for this workspace, and use the search box to define permissions for specific users or groups. Disabled users are indicated by the icon and external users are indicated by the
  icon. The list of users are listed in the alphabetical order if the security is pre-configured. The sort option allows you to list ordering to make it easier in understanding the access levels of other users.
When finished, select Create.
The following screen displays a
 icon indicating the successful creation of the template-based folders.
Select Open Link to launch the new workspace on a new tab in you browser or select Close.
To learn more about how templates are created and used in iManage Work, refer to the Templates section in iManage Control Center help.