The following information describes how to configure SAML SSO in the Identity Provider (IdP) of your choice. These are general instructions, and should be used in conjunction with your IdP documentation.
Configure SSO in your IdP
In your IdP, create a connection (or connector) for iManage. For detailed instructions, refer to your IdP documentation.
Depending on your IdP, select one of the following options to copy or download information from iManage Control Center.
Copy the information from iManage Control Center and paste it into your IdP configuration.
Browse to Network & Security > Single Sign-On (SSO), then select Copy in SAML service provider metadata URL and SAML consumer URL.Figure: Copy option to copy information from iManage Control Center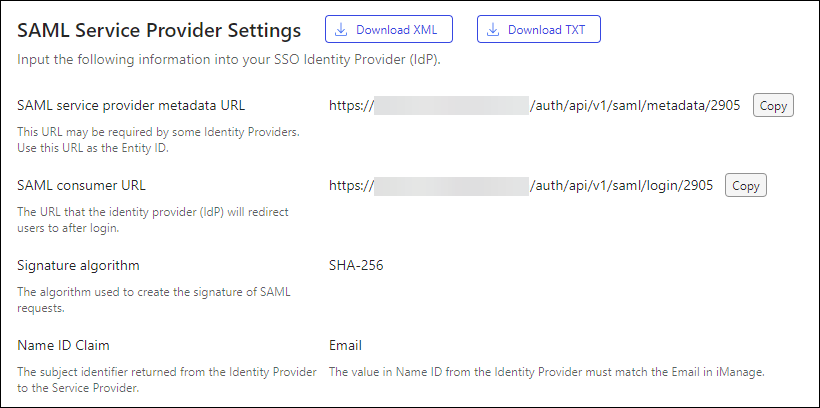
Your IdP may also support the import of this information from an XML file.
To download a file with this information from iManage Control Center, browse to Network & Security > Single Sign-On (SSO), then select Download XML in the SAML Service Provider Settings section.Figure: Download XML option in iManage Control Center
Import the XML file, or configure the following information into your IdP. For detailed instructions, see your IdPs documentation.
NOTE: If you import the settings from an XML file, these settings should automatically be populated in your IdP configuration. Confirm the information is correct.
Assertion Customer Service (ACS) URL: Enter the SAML consumer URL from iManage Control Center.
For example: https://<domain>/auth/saml/login/callbackEntity ID: Enter the SAML service provider metadata URL from iManage Control Center.
For example: https://<domain>/auth/saml/metadataAttribute Statements:
Name: Name ID.
Value: Select the format which matches the email address value in cloudimanage.com. This allows the IdP to match its users with those in iManage Cloud.
After you've configured your IdP, download the Federation XML metadata file from your IdP as described in your IdP documentation, and then continue to Enable SAML SSO.