This page contains information to help you configure and manage OpenID Connect (OIDC) single sign-on (SSO) authentication with iManage, and update your configuration when the Identity Provider (IdP) OIDC client secret is nearing expiration and needs to be refreshed.
Configuring OIDC SSO for your iManage environment offloads the authentication of iManage users to your IdP and provides the following benefits:
Simplifies the authentication experience.
Reduces the cost of administering iManage user accounts, such as managing and resetting passwords.
iManage supports Service Provider-initiated OIDC SSO, where iManage is the service provider. When a user attempts to sign in, an OIDC Authentication Request is sent to the IdP to authenticate the user.
Who should use this guide?
New customers who are adopting iManage Work at cloudimanage.com and want to implement OIDC SSO authentication for their users.
iManage Work at cloudimanage.com customers who aren't currently using OIDC SSO and want to transition to OIDC SSO authentication for their users.
iManage Work at cloudimanage.com customers who are currently using OIDC SSO authentication as configured and managed by iManage, and want to manage their OIDC SSO authentication directly using iManage Control Center.
iManage Work at cloudimanage.com customers who manage their OIDC SSO authentication using iManage Control Center and who need to update their OIDC client secret.
On this page:
Before you begin
Before you configure OIDC SSO in your iManage environment:
Confirm that at least one administrative account with the Account type of Virtual is created at the global user level in iManage Control Center. Use this account to configure SAML SSO in the following sections on this page.
When set to Virtual, these accounts use explicit sign in to authenticate to iManage. That is, they use the user name and password as defined in iManage Control Center and don't authenticate using OIDC SSO.
Refer to the steps below to confirm the Account type of an iManage user. Confirm that these administrative users can sign in to iManage Work.
CAUTION: If you don't configure at least one virtual administrative account at the global user level in iManage Control Center, and your SSO authentication is improperly configured, or your OIDC client secret expires, all users will be blocked from signing in to iManage.
Confirm that all other iManage user accounts used for authenticating iManage services (such as the account used for iManage Directory Synchronization Service, iManage Refile Service, or Workspace Generator) or third-party integrations are configured with the Account type of Virtual.
We recommend that all other iManage user accounts be defined with the Account type of Enterprise. This enforces OIDC SSO authentication for these users, and prevents them from signing in using explicit sign-in.
To confirm the Account type of a user:
In iManage Control Center, browse to Access > Users.
Select Global management from the menu at the top of the page.
Select any user account.
In the Platform Details section of the user account, view the Account type field.
To change the Account type for an individual user so that they are configured to authenticate using SSO:
In the Platform Details section of the user account, select Edit to open the Edit Platform Details dialog.
Select Enterprise.
Select Save.
Figure: Edit Platform Details dialog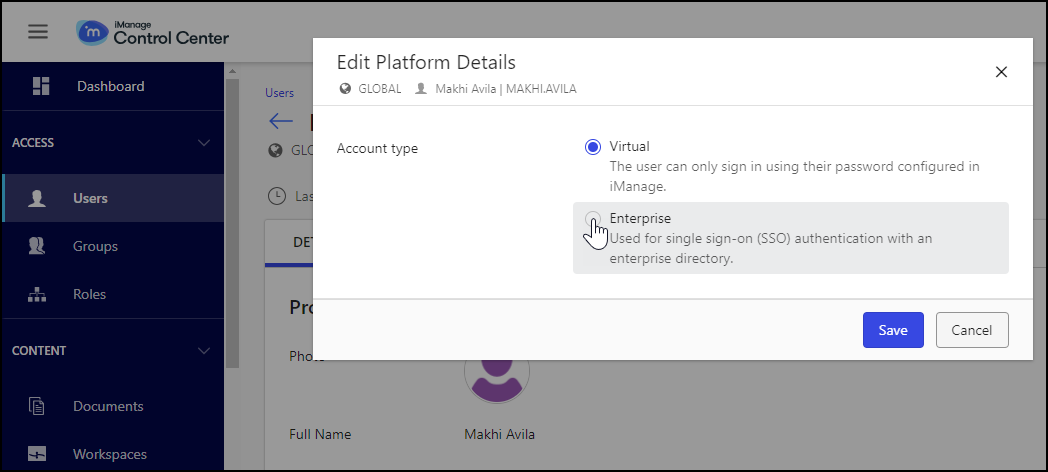
Contact iManage Cloud Support if you require assistance updating a large number of users.
Steps to configure OIDC SSO
What iManage expects from the Identity Provider
After completing the steps in Configure your Identity Provider SSO, you'll be provided with information used to set values for the following items when configuring OIDC SSO settings in Control Center, as described in Enable OIDC SSO:
Client ID: The client ID of the application registered in the third-party OIDC identity provider.
Client Secret: The client secret of the application registered in the third-party OIDC identity provider.
Discovery Endpoint URL: The URL that contains metadata about the third-party OIDC identity provider.
Customer Logout API Endpoint URL: The URL used to redirect a user's browser window to a logout endpoint to end their authentication session and log them out.
Configure your Identity Provider SSO
To configure your Identity Provider to provide OIDC SSO authentication, refer to the following instructions for your IdP:
For all other Identity Providers, refer to General IdP configuration for OIDC SSO.
After you've configured your IdP and copied OIDC SSO configuration data from your IdP, continue to Enable OIDC SSO.
Enable OIDC SSO
The following steps describe how to enter OIDC SSO configuration data and enable OIDC SSO for your iManage users in Control Center.
TIP: To avoid disruption in the event of a misconfiguration, we recommend that you perform these steps during a maintenance window or when few users are using iManage Work.
Sign in to iManage Work using the administrative Virtual account, as described in Before you begin, using the following URL: https://cloudimanage.com
In the iManage Work user profile menu, select Control Center to open iManage Control Center.
Figure: Accessing iManage Control Center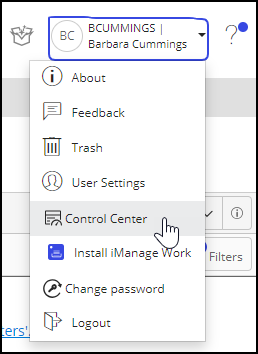
Browse to Network & Security > Single Sign-On (SSO).
NOTE: To perform operations on the Single Sign-On (SSO) page, the user signed in to iManage Control Center must be assigned to a Global Management role, which has the Settings Management privilege. For more information, refer to Global privilege descriptions. Modifications to the settings on this page may take up to four hours to take effect.
In the Authentication section, select Edit. The following dialog opens:
Figure: Edit Authentication Settings dialog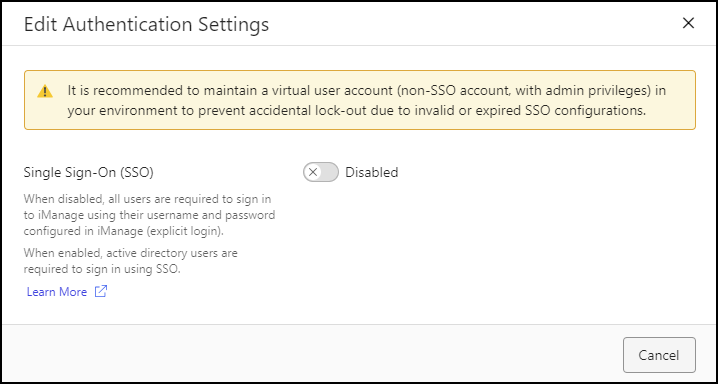
In Single Sign-On (SSO), select Enabled.
In SSO Authentication Protocol, select OpenID Connect (OIDC).
Select Next. The Setup OIDC Single Sign-On (SSO) dialog opens, and displays information for your iManage environment. Confirm that the service provider settings are correct.
Figure: Setup OIDC Single Sign-On (SSO) dialog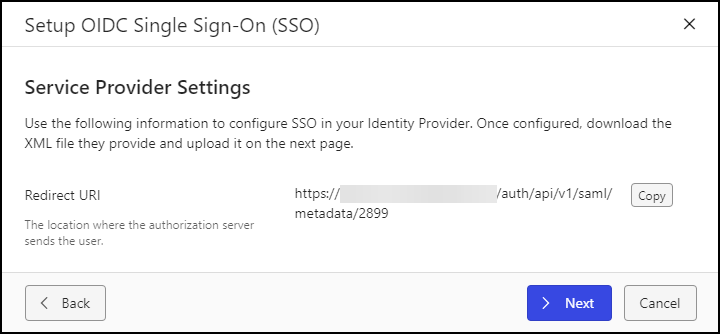
Select Next. The Setup OIDC Single Sign-On dialog displays the Configure OIDC SSO section.
Figure: Setup OIDC Single Sign-On (SSO) dialog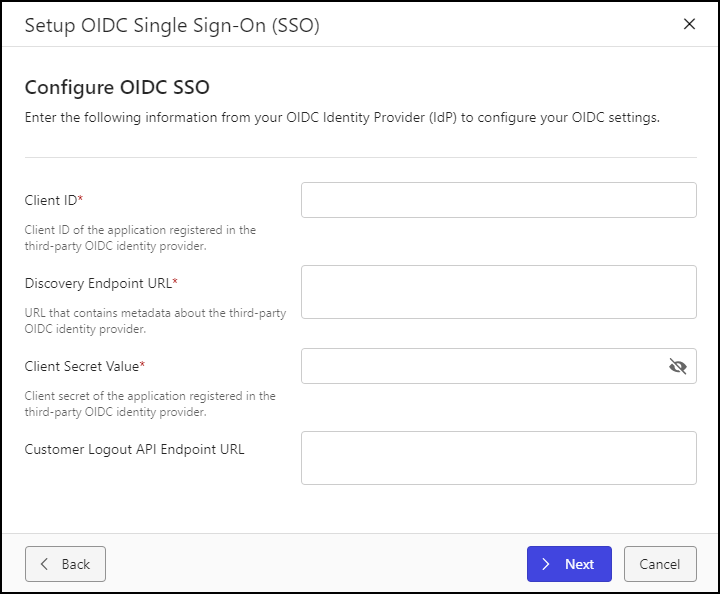
Enter information saved from Configure your Identity Provider SSO in the following fields:
Client ID
Discovery Endpoint URL
Client Secret Value
Customer Logout API Endpoint URL
Select Next. The Setup OIDC Single Sign-On dialog displays a warning message and configuration settings. Read the warning message and confirm the settings.
Figure: Setup OIDC Single Sign-On (SSO) dialog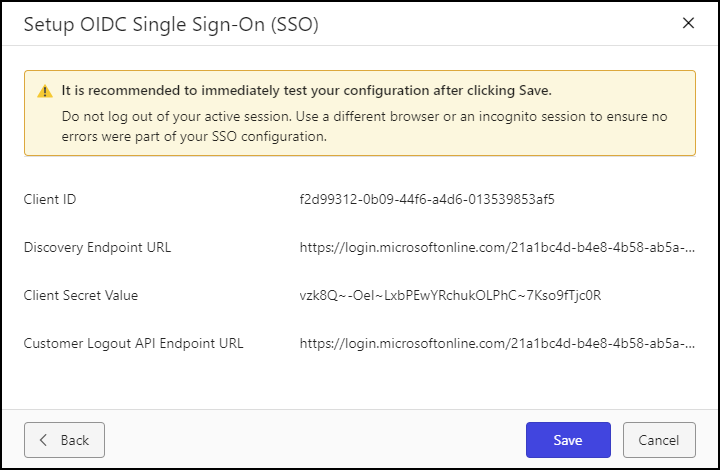
Select Save.
OIDC SSO is now configured in your iManage Cloud environment. Continue to Validate that users can sign in to iManage Work.
Validate that users can sign in to iManage Work
After OIDC SSO has been configured and enabled in iManage Control Center, users can begin signing in to iManage Work. Depending on the Identity Provider you are using, this may take several minutes to become active.
If users aren't able to sign in successfully, refer to Troubleshooting.
Update your OIDC client secret
After configuring OIDC SSO, you must monitor the expiration of your OIDC client secret. When the client secret is nearing expiration, you must generate a new client secret in your IdP and enter it into iManage Control Center.
IMPORTANT: It's your responsibility to follow these steps whenever the client secret has changed within your IdP, or if it is set to expire soon. If your OIDC client secret changes or expires without entering it into iManage Control Center, users will be unable to sign in to iManage. If this occurs, only users with Account type set to Virtual will be able to sign in using explicit sign in.
To update your OIDC client secret:
Follow the instructions in your IdP documentation to generate a new client secret.
In iManage Control Center, browse to Network & Security > Single Sign-On (SSO).
In the Configure OIDC SSO section, select Edit. The following dialog opens:
Figure: Setup OIDC Single Sign-On (SSO) dialog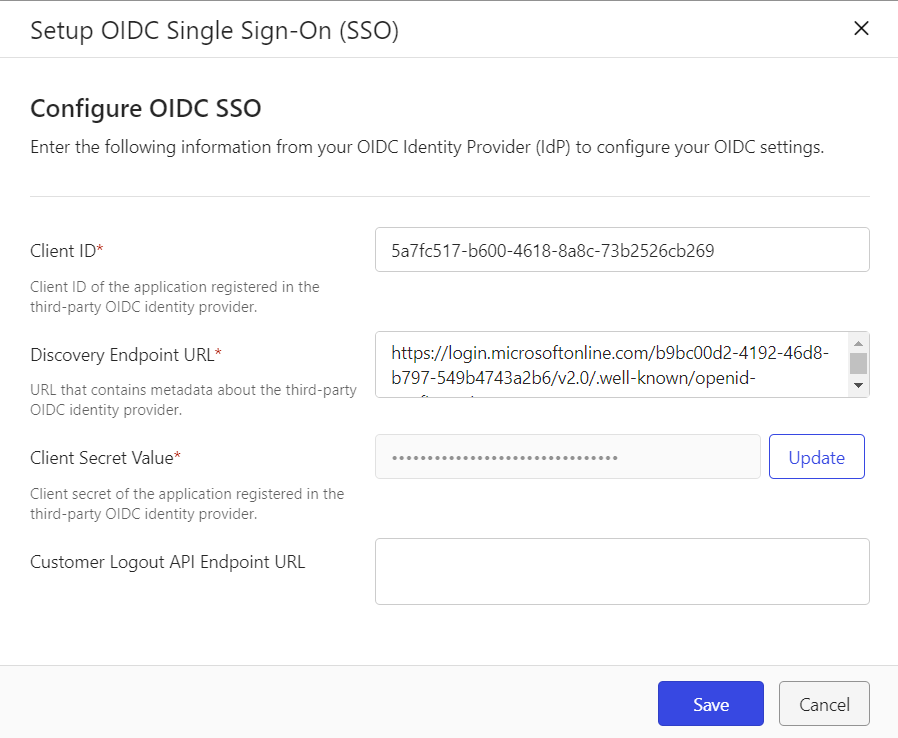
In Client Secret Value, select Update. The Client Secret Value field becomes editable and the existing client secret value is cleared.
Enter the client secret value generated in Step 1.
Select Save.
Troubleshooting
If users receive error "400-Error Getting OIDC Credentials" when attempting to sign in to iManage Work, the most likely cause is due to the expiration of the OIDC client secret. To resolve the issue, follow the steps in Update your OIDC client secret to generate a new client secret and update the client secret in iManage Control Center.
For other failed sign-in attempts, perform the following steps to investigate and resolve the issue:
Confirm that your Identity Provider service is available. If it is offline, contact your Identity Provider directly.
Verify your SSO configuration in your IdP. Review the detailed instructions on the following IdP configuration pages:
Configure OIDC SSO in Microsoft Entra ID
Configure OIDC SSO in OktaConfirm that your iManage Control Center OIDC SSO settings match your IdP SSO configuration. Mismatched settings can result in failed sign-in attempts.
If you're unable to determine the cause of the issue, you can temporarily disable Single Sign-On. Refer to Rolling back your configuration.
Once your users can sign in again after rolling back your configuration, contact iManage Cloud Support if you need assistance troubleshooting your OIDC SSO configuration.For any other issues, contact iManage Cloud Support.
Rolling back your configuration
If, after enabling OIDC SSO, your users aren't able to sign in, you can disable Single Sign-On.
NOTE: When Single Sign-On is disabled:
Only users with an Account Type of Virtual can sign in (and are required to sign in to each iManage application using their user email and password configured in iManage Work).
All previously-configured settings on the Single Sign-On (SSO) page are preserved.
In iManage Control Center, browse to Network & Security > Single Sign-On (SSO).
In the Authentication section, select Edit. The Edit Authentication Settings dialog opens.
In Single Sign-On (SSO), select Disabled.
Select Save.
Select Revert to confirm this operation.
Verify that users are now able to sign in to iManage Work using their iManage user name and password.
If users are still unable to sign in, contact iManage Cloud Support for assistance.
FAQ
Q: How will I know when my client secret is about to expire?
A: Follow the instructions in your IdP's documentation to review your client secret expiration date.
Q: How does OIDC SSO effect iManage users who are defined with Account type = Virtual in iManage Control Center?
A: Users configured as virtual users must use their user name and password defined in iManage Work. They can sign in to iManage Work using the explicit sign in URL: https://<domain>/login/imanagework.html
If you have service accounts which are set to Account type = Enterprise, set these to Account type = Virtual before enabling OIDC SSO.
Q: I just enabled OIDC SSO and now my administrative users aren't able to sign in using their user name and password as defined in iManage Control Center.
A: Confirm that these users are set with Account type of Virtual in their user profile in iManage Control Center. For more information, refer to Before you begin.