The following steps describe how to configure OpenID Connect (OIDC) SSO in Okta.
Copy the Redirect URI for your iManage environment
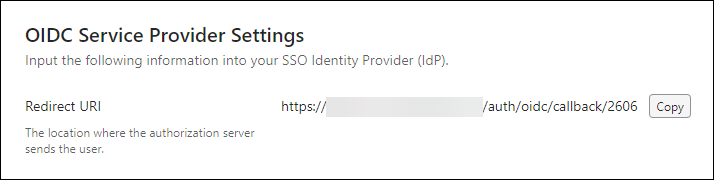
Before you begin, copy the Redirect URI of your iManage environment. This URI is used to configure OIDC SSO in Okta.
In iManage Control Center, browse to Network & Security > Single Sign-On (SSO).
Select Copy in the Redirect URI field of the OIDC Service Provider Settings section. Save the Redirect URI for use in section Registering a new application in Okta.
Registering a new application in Okta
Complete the following steps in Okta to configure single sign-on:
Sign in to the Okta portal as an Administrator.
In the left panel, browse to Applications and select Create App Integration.
NOTE: If switching from Security Assertion Markup Language (SAML) SSO to OIDC SSO in iManage Control Center, we recommend that you create a new application in Okta. Creating a new application allows you to preserve your existing SSO application and roll back to it if necessary.
For Sign-in method, select OIDC - OpenID Connect.
For Application type, select Web Application and then select Next.
Figure: Create a new app integration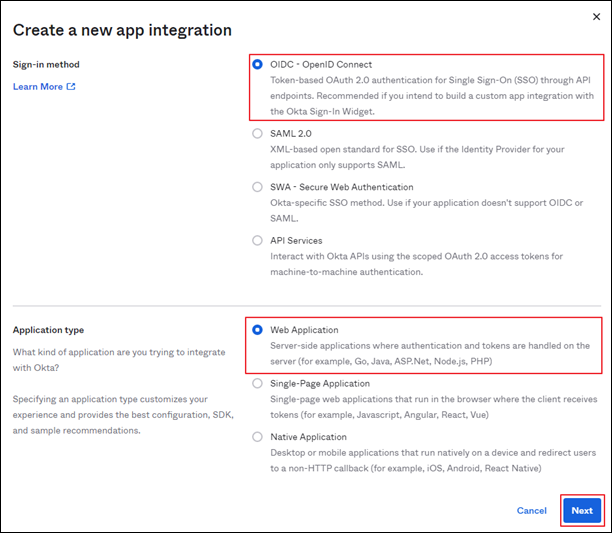
For App integration name, enter the name for the iManage application, for example, iManage Cloud with Okta.
For Grant Type, confirm that Authorization Code is checked.
For Sign-in redirect URIs, paste the value copied in Copy the Redirect URI for your iManage environment.
Optional: For Sign-out redirect URIs, enter https://cloudimanage.com/signout/callback.
In the Assignment section, define any needed group assignments to allow users in Okta to have access to the iManage application.
Figure: New Web App Integration
Select Save.
Completing the OpenID Connect configuration
The iManage application is now created in Okta. The next step is to collect the information needed to complete the OIDC SSO configuration in iManage Control Center.
Open the iManage application in Okta.
Browse to the General tab.
In the Client Credentials section, select the Copy icon for the Client ID. Save the Client ID for use when configuring OIDC in iManage Control Center.
In the Client Secrets section, select the Copy icon for the Client Secret. Save the Client Secret for use when configuring OIDC in iManage Control Center.
Figure: Client Credentials
The following table provides a mapping between the Okta values and the values used to configure OIDC in Control Center. The step numbers refer to the step in Completing the OpenID Connect configuration where the value is found.
Table: OIDC SSO configuration value mapping
OIDC SSO Configuration in Okta | OIDC SSO Configuration in Control Center |
|---|---|
Client ID (from Step 3) | Client ID |
Discovery Endpoint URL This is a value of the form: https://<yourOktaDomain>/oauth2/default/.well-known/openid-configuration | |
Client Secret (from Step 4) | Client Secret Value |
Customer Logout API Endpoint URL This is a value of the form: https://<yourOktaDomain>/oauth2/v2.0/logout |
Return to iManage Control Center and complete the steps in Enable OIDC SSO using the values from the above table.