The following steps describe how to configure OIDC SSO in Microsoft Entra ID. For more information, refer to Microsoft Entra seamless single sign-on.
Copy the Redirect URI for your iManage environment
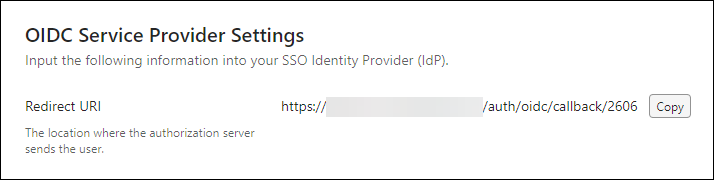
Before you begin, copy the Redirect URI of your iManage environment. This URI is used to configure OIDC SSO in Microsoft Entra ID.
In iManage Control Center, browse to Network & Security > Single Sign-On (SSO).
Select Copy in the Redirect URI field of the OIDC Service Provider Settings section. Save the Redirect URI for use in section Configure SSO in Microsoft Entra ID.
Configure SSO in Microsoft Entra ID
Complete the following steps in Microsoft Entra ID to configure OIDC single sign-on:
Sign in to Azure and browse to Microsoft Entra ID.
In App Registration, select New registration.
NOTE: If switching from Security Assertion Markup Language (SAML) SSO to OIDC SSO in iManage Control Center, we recommend that you create a new registration in Microsoft Entra ID. Creating a new registration allows you to preserve your existing SSO registration and roll back to it if necessary.
In the Name field, enter a name.
Select Accounts in this organizational directory only.
Leave Redirect URI (optional) set to Web, and either:
Paste the value copied in Copy the Redirect URI for your iManage environment, or
Enter the value in the form:
https://cloudimanage.com/auth/oidc/callback/<customer-id>
where <customer-id> is your customer tenant ID.
Figure: New registration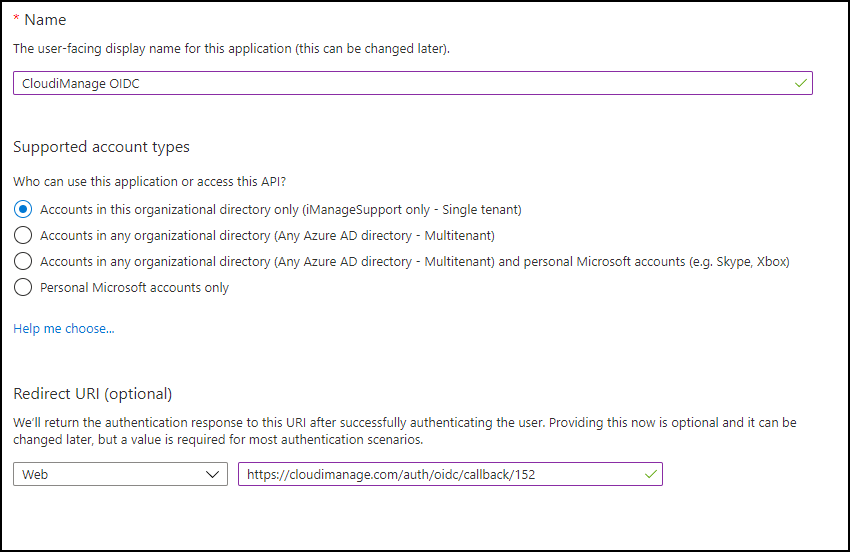
Select Create.
In the navigation panel on the left, select Authentication.
Figure: Authentication page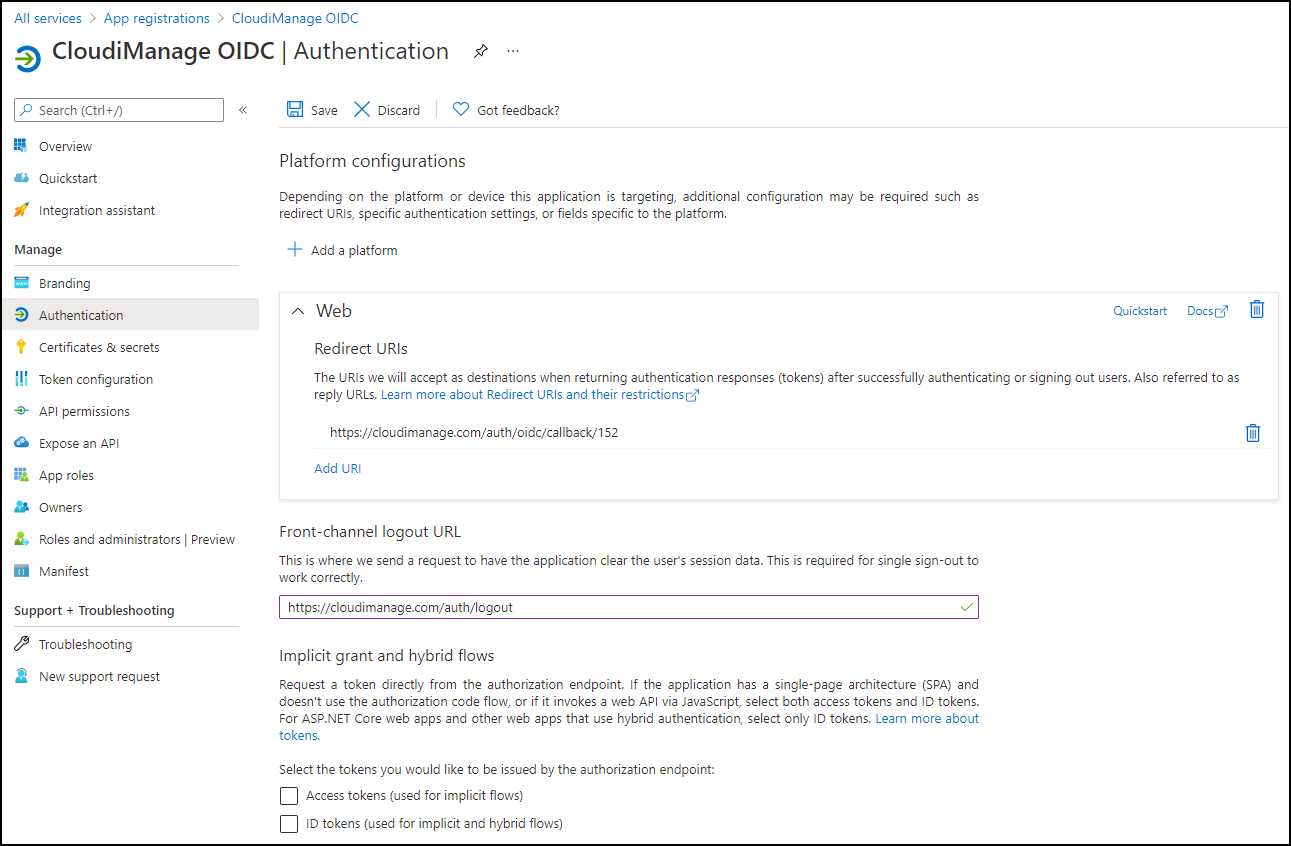
Set Front-channel logout URL to:
https://cloudimanage.com/auth/logoutBrowse to Overview and note the following values:
Application (client) ID
Directory (tenant) ID
Figure: Overview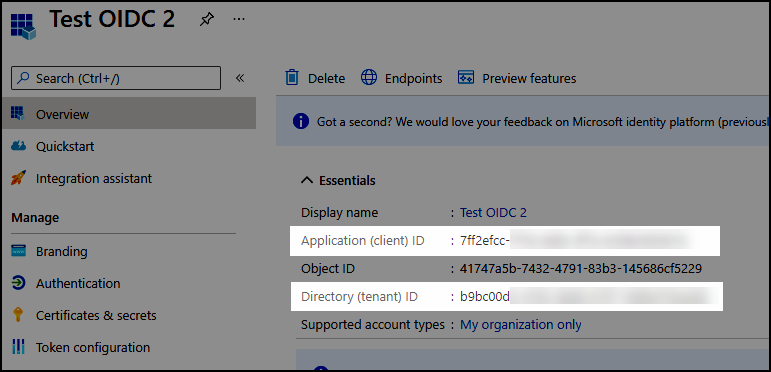
Select Endpoints at the top of the page and note the value for the following setting:
OpenID Connect metadata documentFigure: Endpoints page > OpenID Connect metadata document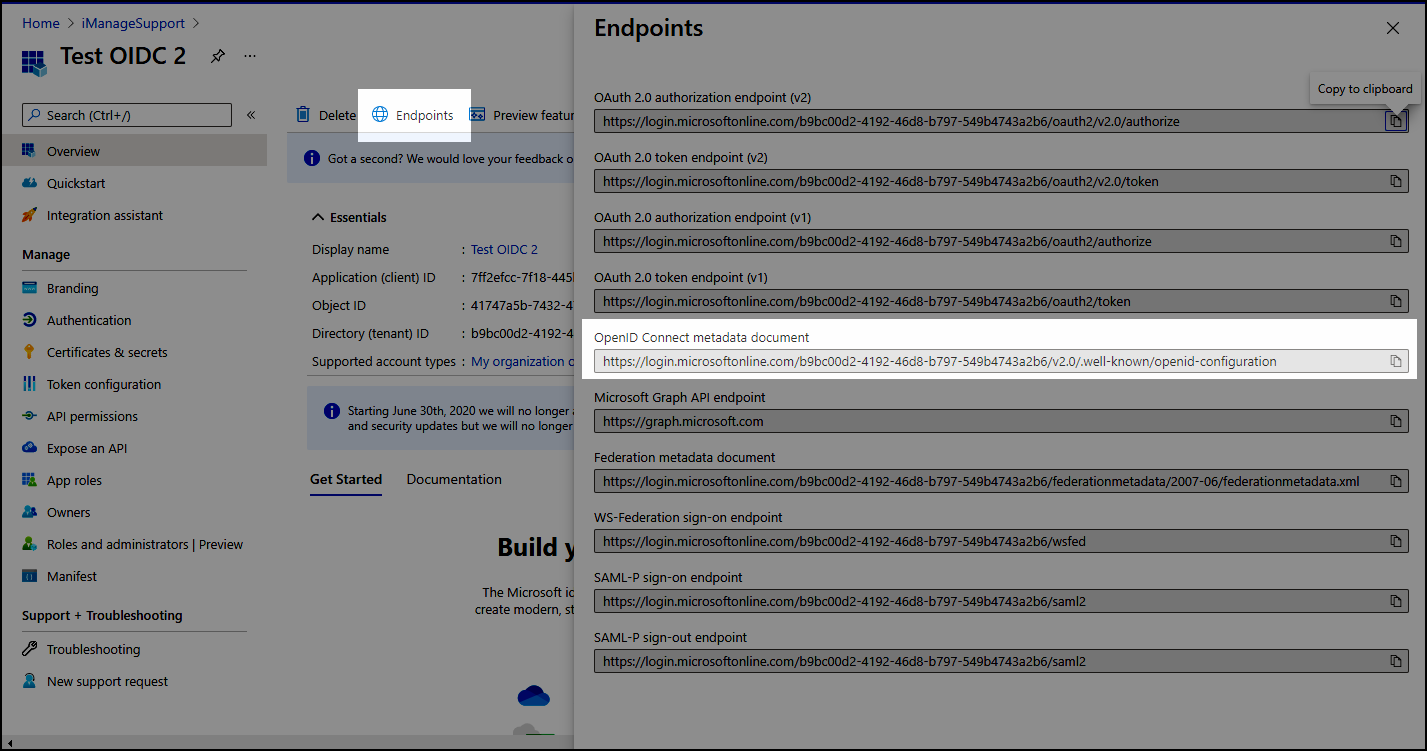
Select Certificates & Secrets > New client secret.
Figure: New Client Secret page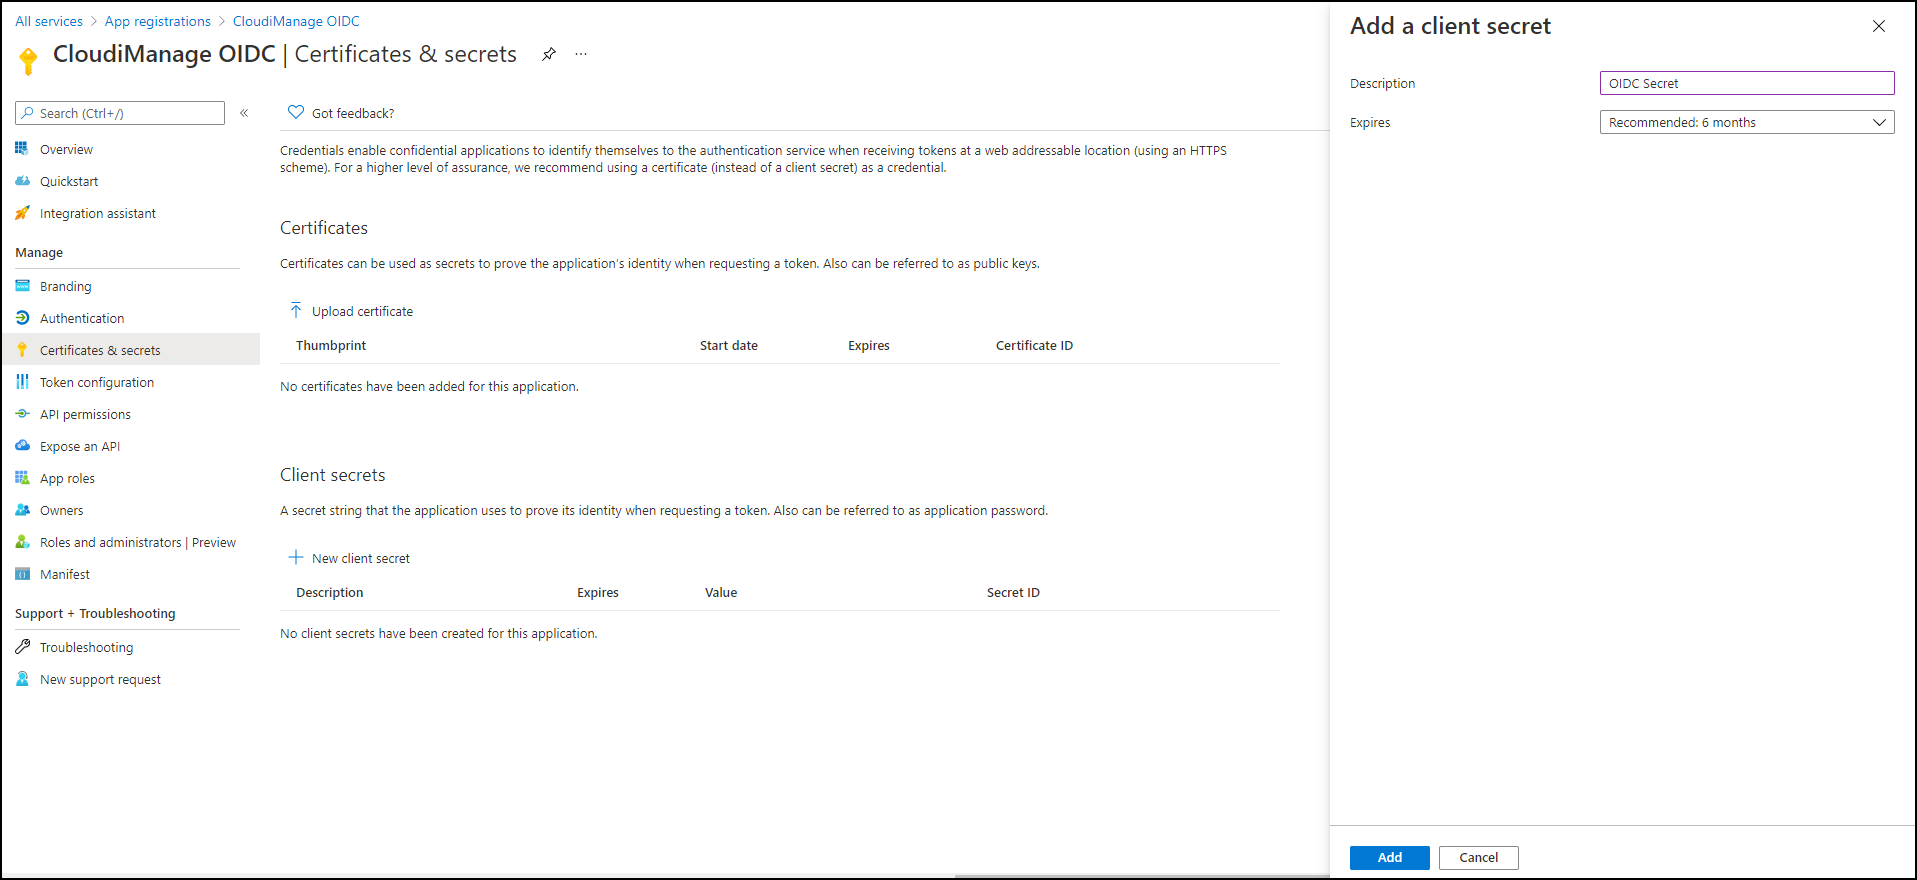
In the Add a client secret frame, enter a value in Description, select a value in Expires, and select Add.
Note the client secret Value in the Client secrets window.
Figure: Client secret value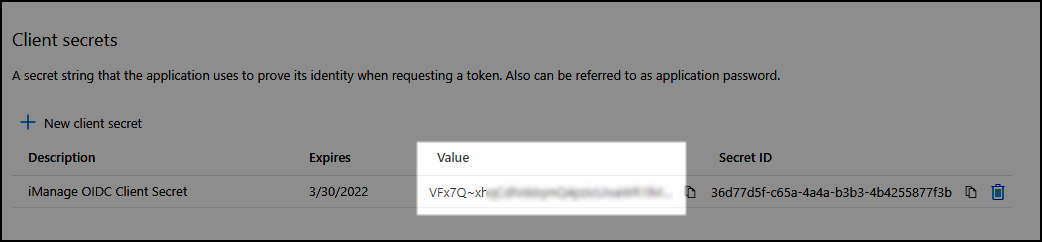
Copy settings to iManage Control Center
Several values from the Microsoft Entra ID OIDC SSO configuration are used to configure OIDC SSO in Control Center. The following table provides a mapping between the Microsoft Entra ID values and the values used to configure OIDC in Control Center. The step numbers refer to the step in Configure SSO in Microsoft Entra ID where the value is found.
Table: OIDC SSO configuration value mapping
OIDC SSO Configuration in Microsoft Entra ID | OIDC SSO Configuration in Control Center |
|---|---|
Application (client) ID (from Step 9a) | Client ID |
OpenID Connect metadata document (from Step 10) | Discovery Endpoint URL This is a value of the form: https://login.microsoftonline.com/<DirectoryID>/v2.0/.well-known/openid-configuration NOTE: In the sample URL, "<DirectoryID>" represents the "Directory (tenant) ID" value identified in Step 9b of Configure SSO in Microsoft Entra ID. |
Client secrets Value (from Step 13) | Client Secret Value |
Customer Logout API Endpoint URL This is a value of the form: https://login.microsoftonline.com/<DirectoryID>/oauth2/v2.0/logout NOTE: In the sample URL, "<DirectoryID>" represents the "Directory (tenant) ID" value identified in Step 9b of Configure SSO in Microsoft Entra ID. |
Return to iManage Control Center and complete the steps in Enable OIDC SSO using the values from the above table.