When a user selects a value from the main landing page, displayed when they first sign in to iManage Insight+, they’re taken to a sub-landing page that displays information and content related to the value they selected.
Configure a message for each sub-landing page
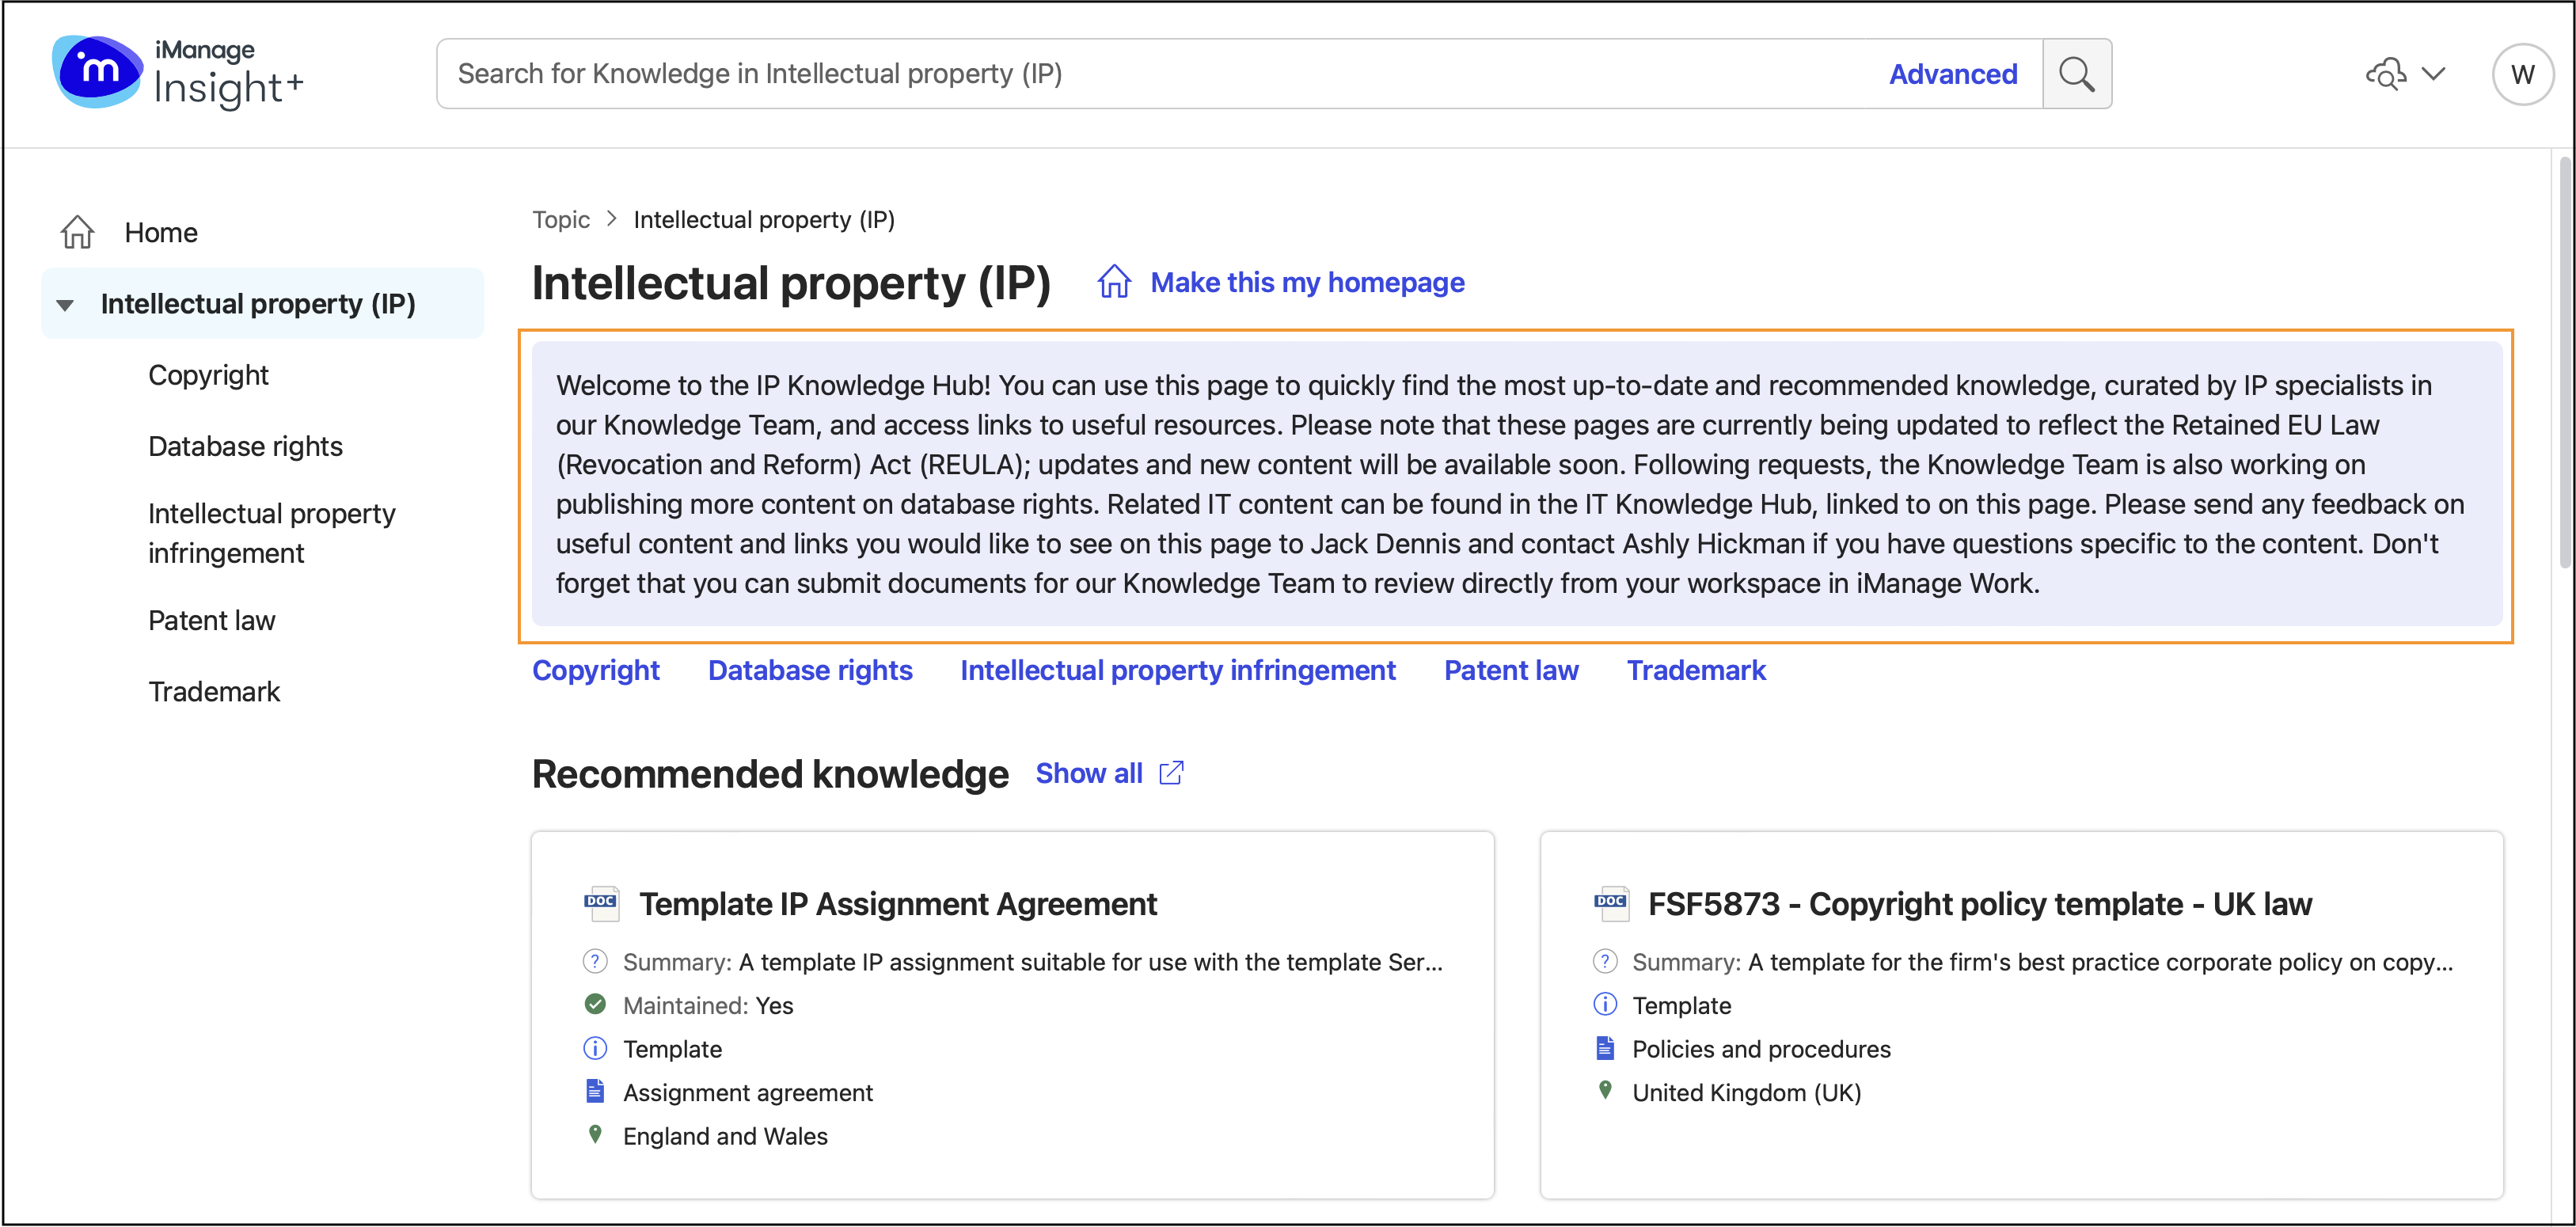
Custom text can be added to any of the sub-landing pages. You can use this feature for any purpose. For example, as illustrated in the image below, you can use the message to inform the user about what they'll find on the sub-landing page.
While setting up a message to be displayed on any sub-landing page, you can choose to populate all
sub-nodes with the same message, or apply User profiles to your messages to further target them, for example—by region.
To configure a message on any sub-landing page in iManage Control Center, browse to Extensions > iManage Insight+ > Landing page > Sub-landing pages > Custom messages.
Add Custom messages to dual taxonomies
In the Custom messages dialog, from the All taxonomies dialog, select a taxonomy, for example—Industry.
Select New message.
In the New message dialog, select the taxonomy from the Taxonomy field.
Select taxonomy node from the drop-down list.
(Optional) Select the Apply message to all the children of select node check box.
By default, the Default tab is selected. Under the Default tab, enter the custom message. The
 icon displays next to the tab, indicating that a unique message has been applied to it.
 Select Save.
On the Custom messages dialog, select Save again to complete the configuration.
Apply User Profiles to Custom Messages
You can configure custom messages that'll get displayed on the Insight+ Sub-landing page based on a user’s profile. This lets you show targeted, node-specific information to users as part of different User profiles.
Specific messages provide relevance to the users of that profile. You can add messages based on priorities and updates that matter to users. For example, a firm has Litigation, Corporate, and Real estate User profiles. A custom message can be set for each of these profiles.
For example, a firm has Litigation team. Previously, everyone on the team would have seen the same custom message(s). Now they can be more granular and target each profile with a custom message that can be set for each of them. For Litigation (UK Profile), admins can set the message as “Upcoming court deadlines and key filings for Q2”, while for the Litigation (US Profile), the custom message(s) can be set as “Three new deals in due diligence this week”.
In the Custom messages dialog, select New message.
In the New message dialog, select a taxonomy from the Taxonomy field, for example—Industry.
Select taxonomy node from the drop-down list.
(Optional) Select the Apply message to all the children of select node check box.
From the User profile drop-down, select a profile that the custom message will apply to, for example—Boston.
Enter the custom message in the Message field.
Repeat step 5-6 for each User profile that needs a custom message.Select Save. The
icon displays next to the user profile tab, indicating that a unique message has been applied to it. (Optional) On the Custom messages dialog:
To view the custom messages in the Custom messages dialog, select a profile or Default view from the Profiles drop-down and then select Apply all. A list of taxonomies with their nodes, User profiles, and applicable messages is displayed.
To reset, select Clear all from the Profiles drop-down.
To edit or delete an entry, hover over an entry, select the
 icon, then select Edit or Delete.
After completing all the configuration, on the Custom messages dialog, select Save.
NOTE:
As an administrator, when you:
Configure a custom message as a default message, so it's displayed to all users.
Configure a profile-specific custom message, so that message is displayed to all users for that profile.
haven’t configured a custom message, no message will be displayed to users.
You can view, filter, and manage custom messages based on profiles.
You can also edit, delete, or re-assign a custom message to other user profiles.
Profile-specific custom messages take precedence over the default custom message on the User profile’s sub-landing page.
When entering a custom message for a sub-landing page, you're notified when you exceed the
2000-character limit.
Nodes excluded on Landing page are grayed out in Custom messages with an Excluded label. These nodes can only be deleted and not edited.
Adding filters to a sub-landing page
You can configure up to seven filters and choose any taxonomy or look-up field for any sub-landing page. Depending on the taxonomy, you can choose the filters to browse through the sub-landing pages. As best practice, you can set three filters to enhance users' browsing experience.
For example, if you're using Practice area or topic, then we recommend that you configure the Jurisdiction, Industry, and Knowledge type filters.
These filters help users filter their content accordingly so that they can find the knowledge they need on a particular page without having to always select through a search page.
To configure:
To filter on any sub-landing page in iManage Control Center, browse to Extensions > iManage Insight+ > Landing page > Sub-landing pages > Filters.
Default admin filters, browse to Insight+ Admin page > General. For more information, refer to setting up admin default filters for Landing pages.
Sidebar
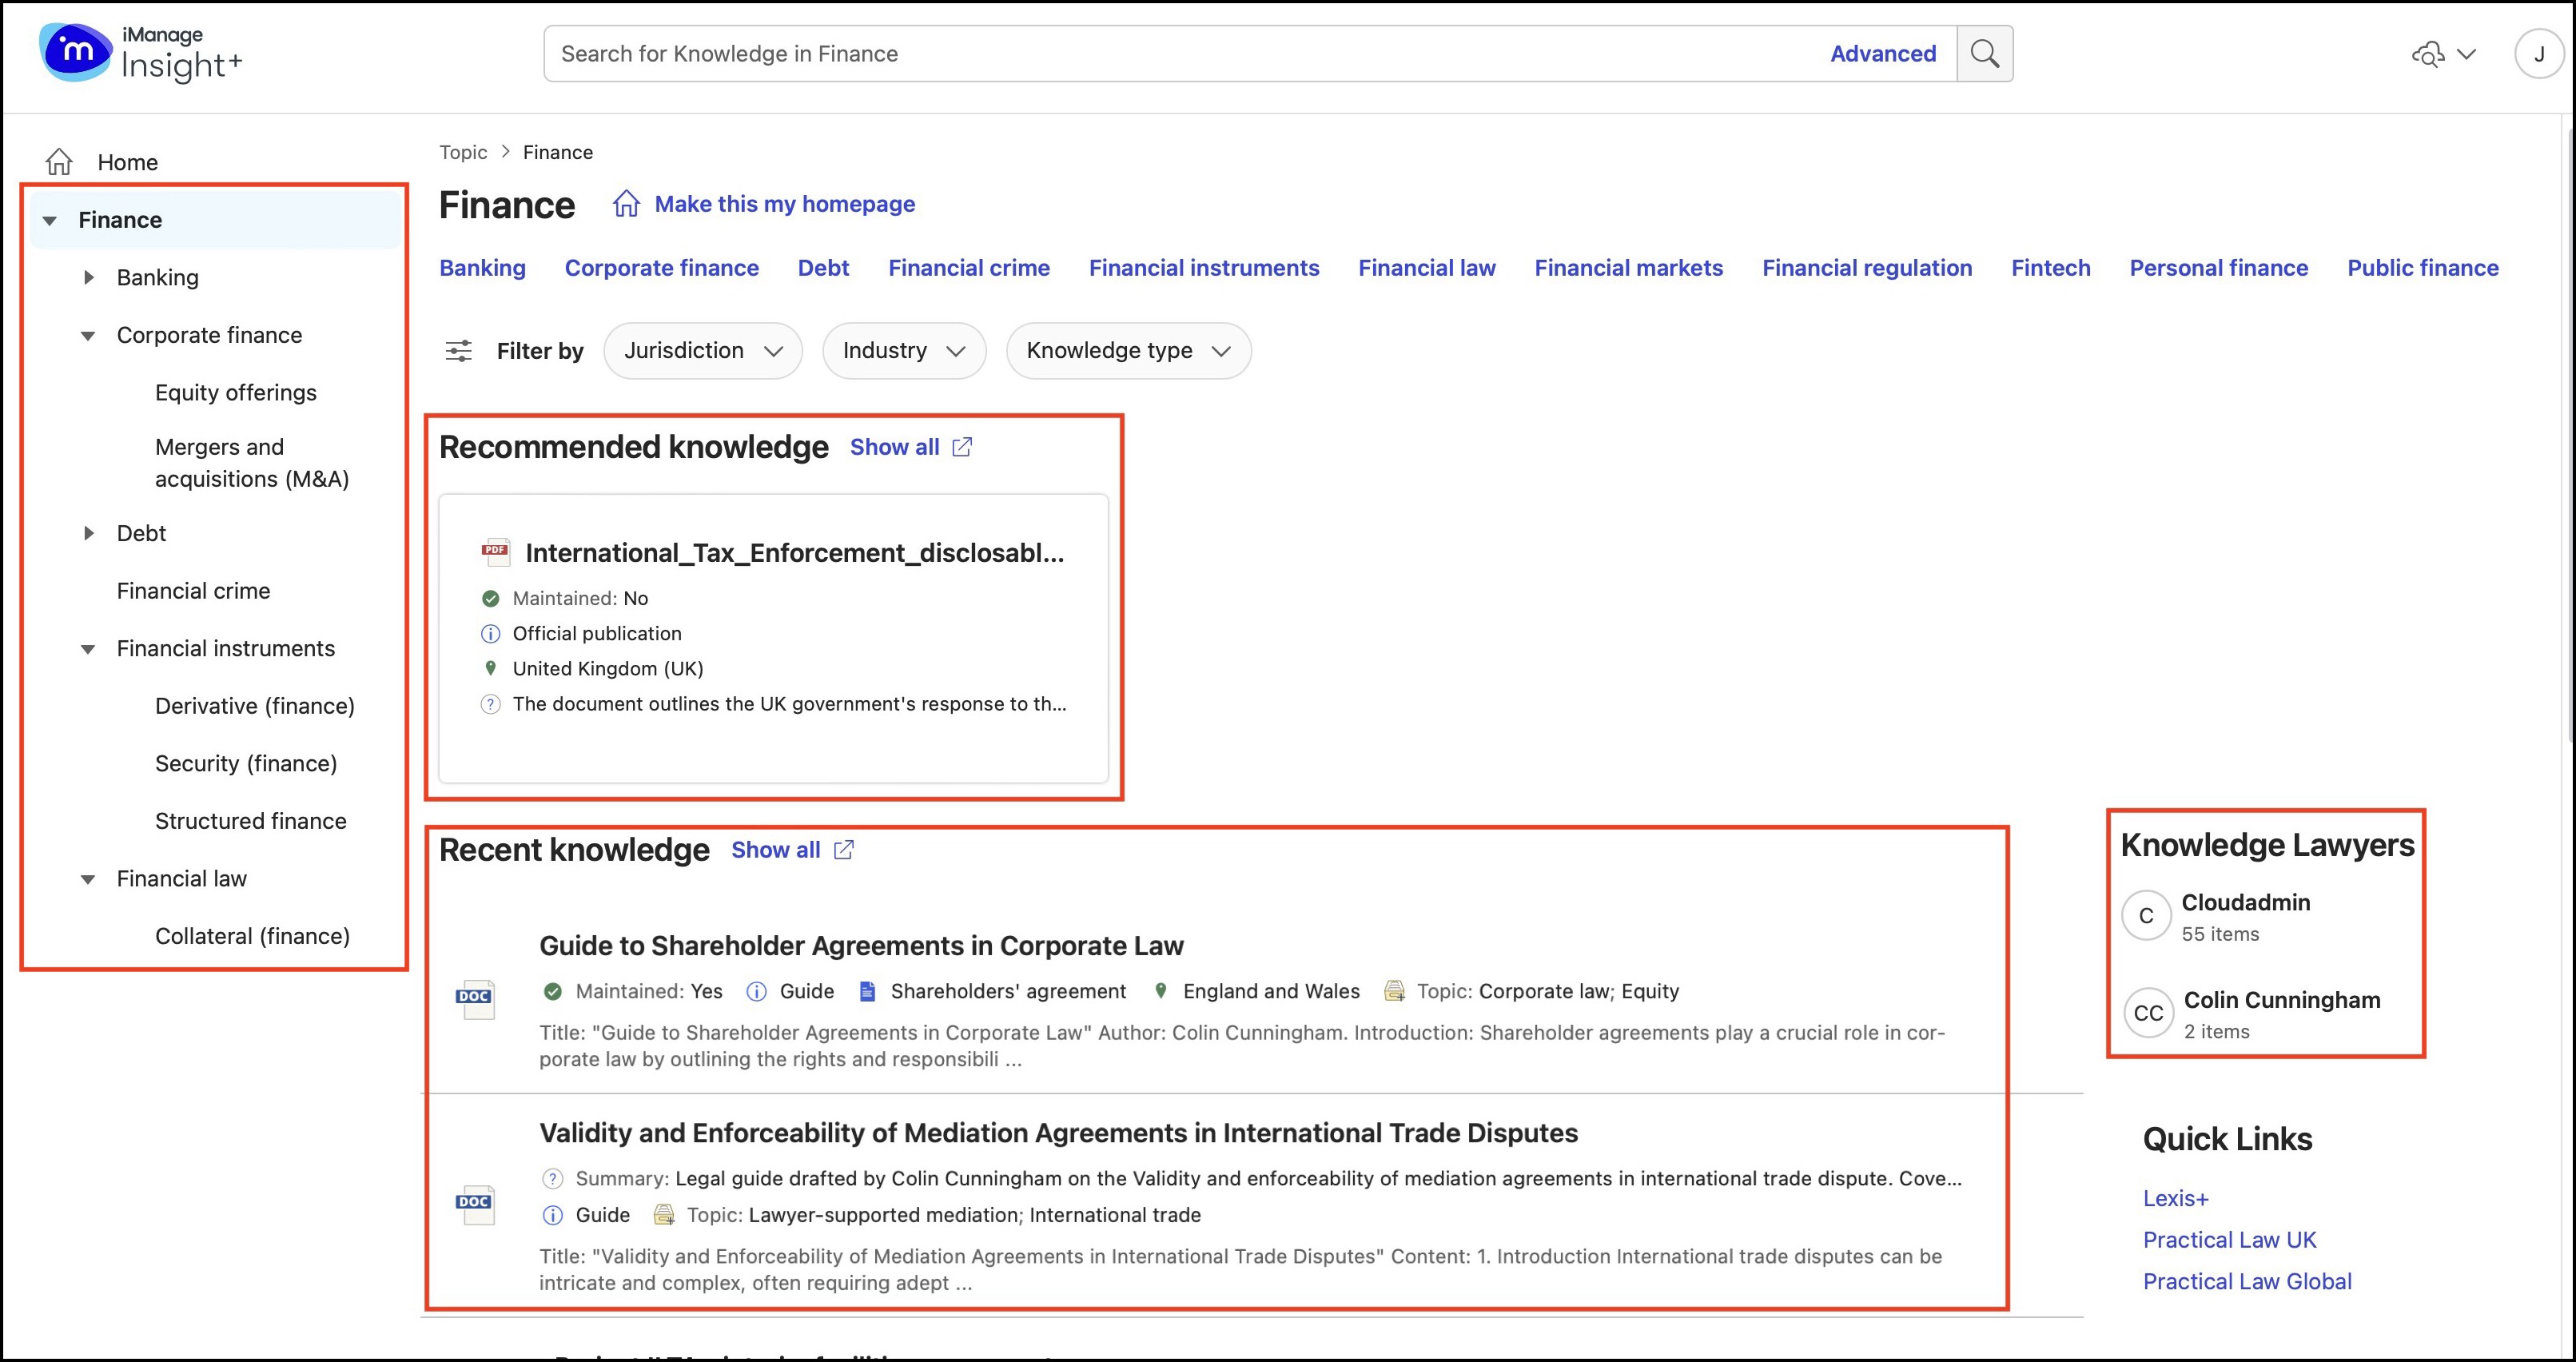
In the sidebar on the left side of the page, the full taxonomy for the field connected to the landing page is shown. The selected value (for example, Construction) will be focused, and the taxonomy tree will be opened at this point.
Main content
At the top of the page, a title and breadcrumb trail showing the value you've selected (for example, Home > Construction) is displayed. Below the breadcrumb trail, a list of immediate sub-levels related to the value selected is displayed. For example, for Construction, this could be Building Contracts and Contractors, Statutory liabilities: Land and Buildings, and so on.
A list of recommended knowledge that matches the relevant value is also shown. Documents are shown here if they match the selected value (for example, Construction) and are flagged with a field of your choice (usually a Recommended or Promoted field you defined in your metadata schema). The count of documents shown is limited by the user’s screen width. To view all recommended knowledge, users can select Show All. If there's no recommended knowledge for a specified sub-landing page, no content is displayed.
A list of recent knowledge is shown below the Recommended knowledge list. You can change the definition of Recent knowledge by specifying a date field in the Admin control panel.
Users can select Show all to be taken to a full list of content matching the specified value—for example, Construction. The list of content is a pre-filtered search according to the value selected on the landing page. From here, the user can refine their search as per other iManage Insight+ functionality (for example, to refine to a particular document type).
From a sub-landing page, a user may select any sub-value. For example, a user wishing to view topics in the construction practice group that relate to a sub-value, such as Sustainability and Environment can view all materials that relate to that sub-value and also view a refined list of content on that sub-value.
Contributors widget
A list of people who are related to the documents retrieved for a specified sub-landing page, is displayed on the right side of the page. You can select the relevant relationship between the documents and the people. For example, you may wish to select Author as the field if you wish to display a list of authors. Alternatively, you may have a field called Responsibility which defines who's ultimately responsible for the documents (which may be different from the specific individual who authored them).
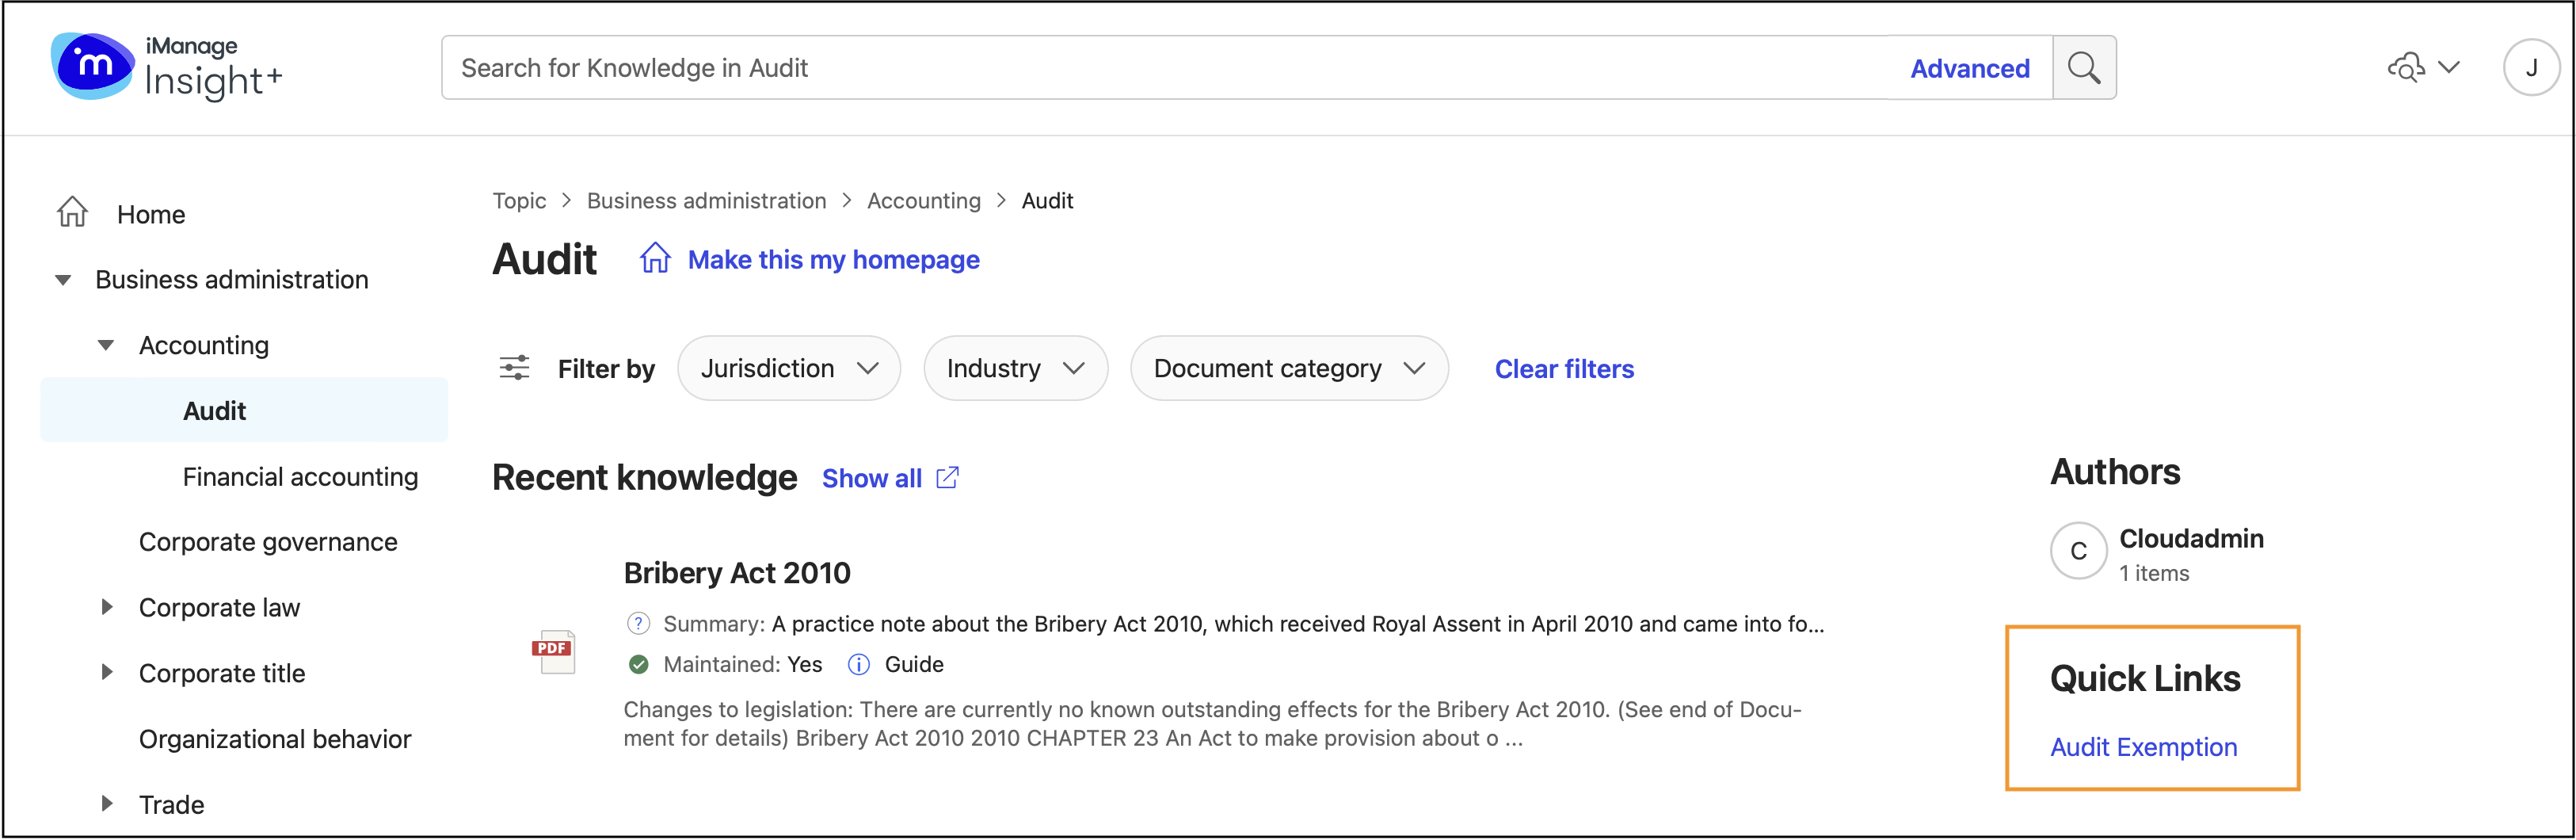
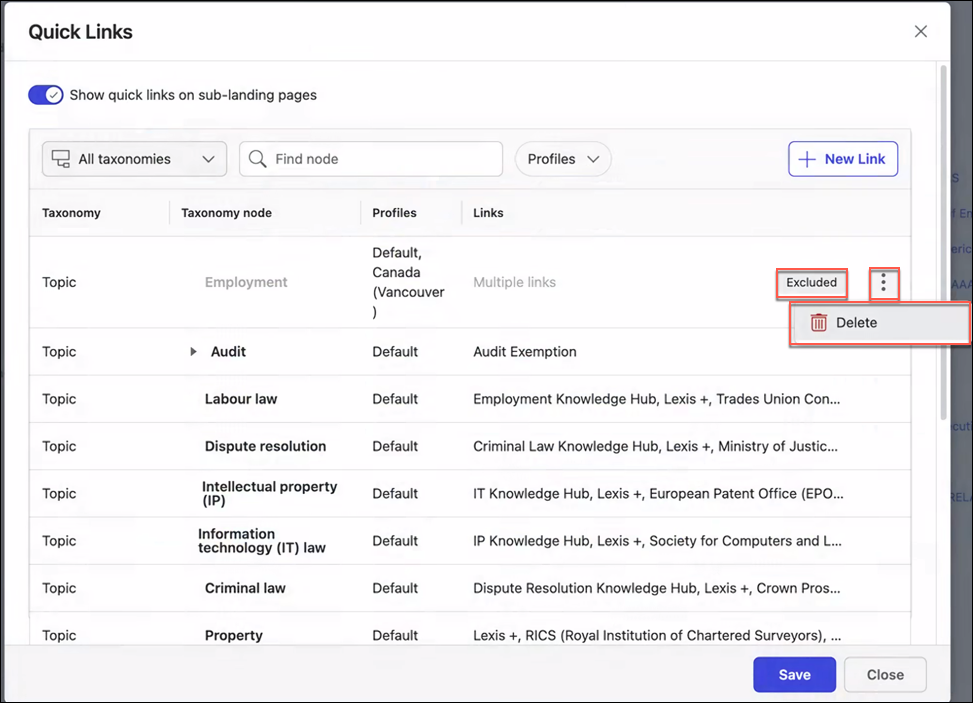
Quick links
Quick links specified for landing pages are generally displayed on each sub-landing page. You can add quick links on sub-landing pages to important websites or internal resources that are related to the topic of the page. This helps you make useful resources available to your team.
When setting up links for a sub-landing page, you can choose to populate all sub-nodes with the same links or apply links to selected nodes, or sub-nodes.
The maximum number of quick links per taxonomy node is limited to 10. If there are more than 10 links, the Add Another button is unavailable in the New link dialog.
Where links are already configured for a node, the Select taxonomy node will be inactive to prevent unintentional overwriting of links.
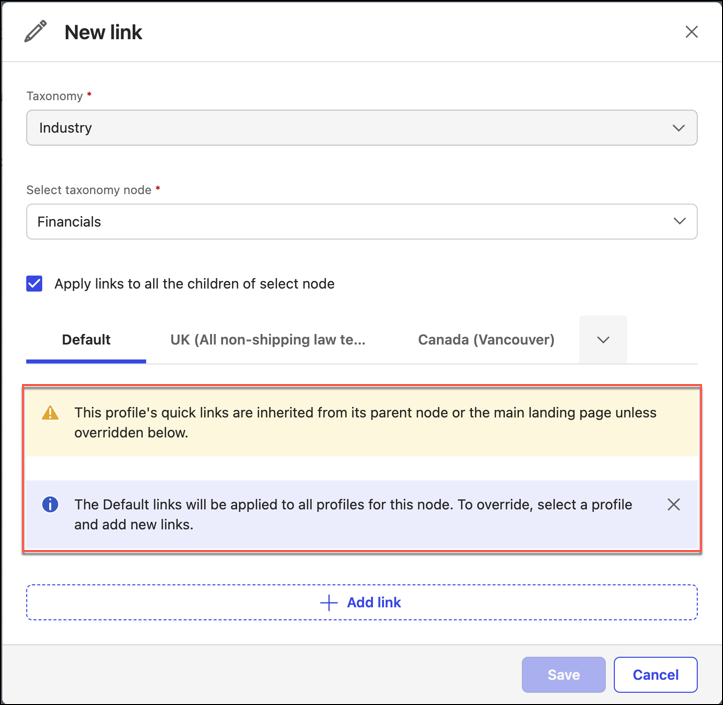
When creating a child node, if the custom links for the child node are inherited from the parent node, a message is displayed, as shown below.
Figure: Custom links for the child node inherited from the parent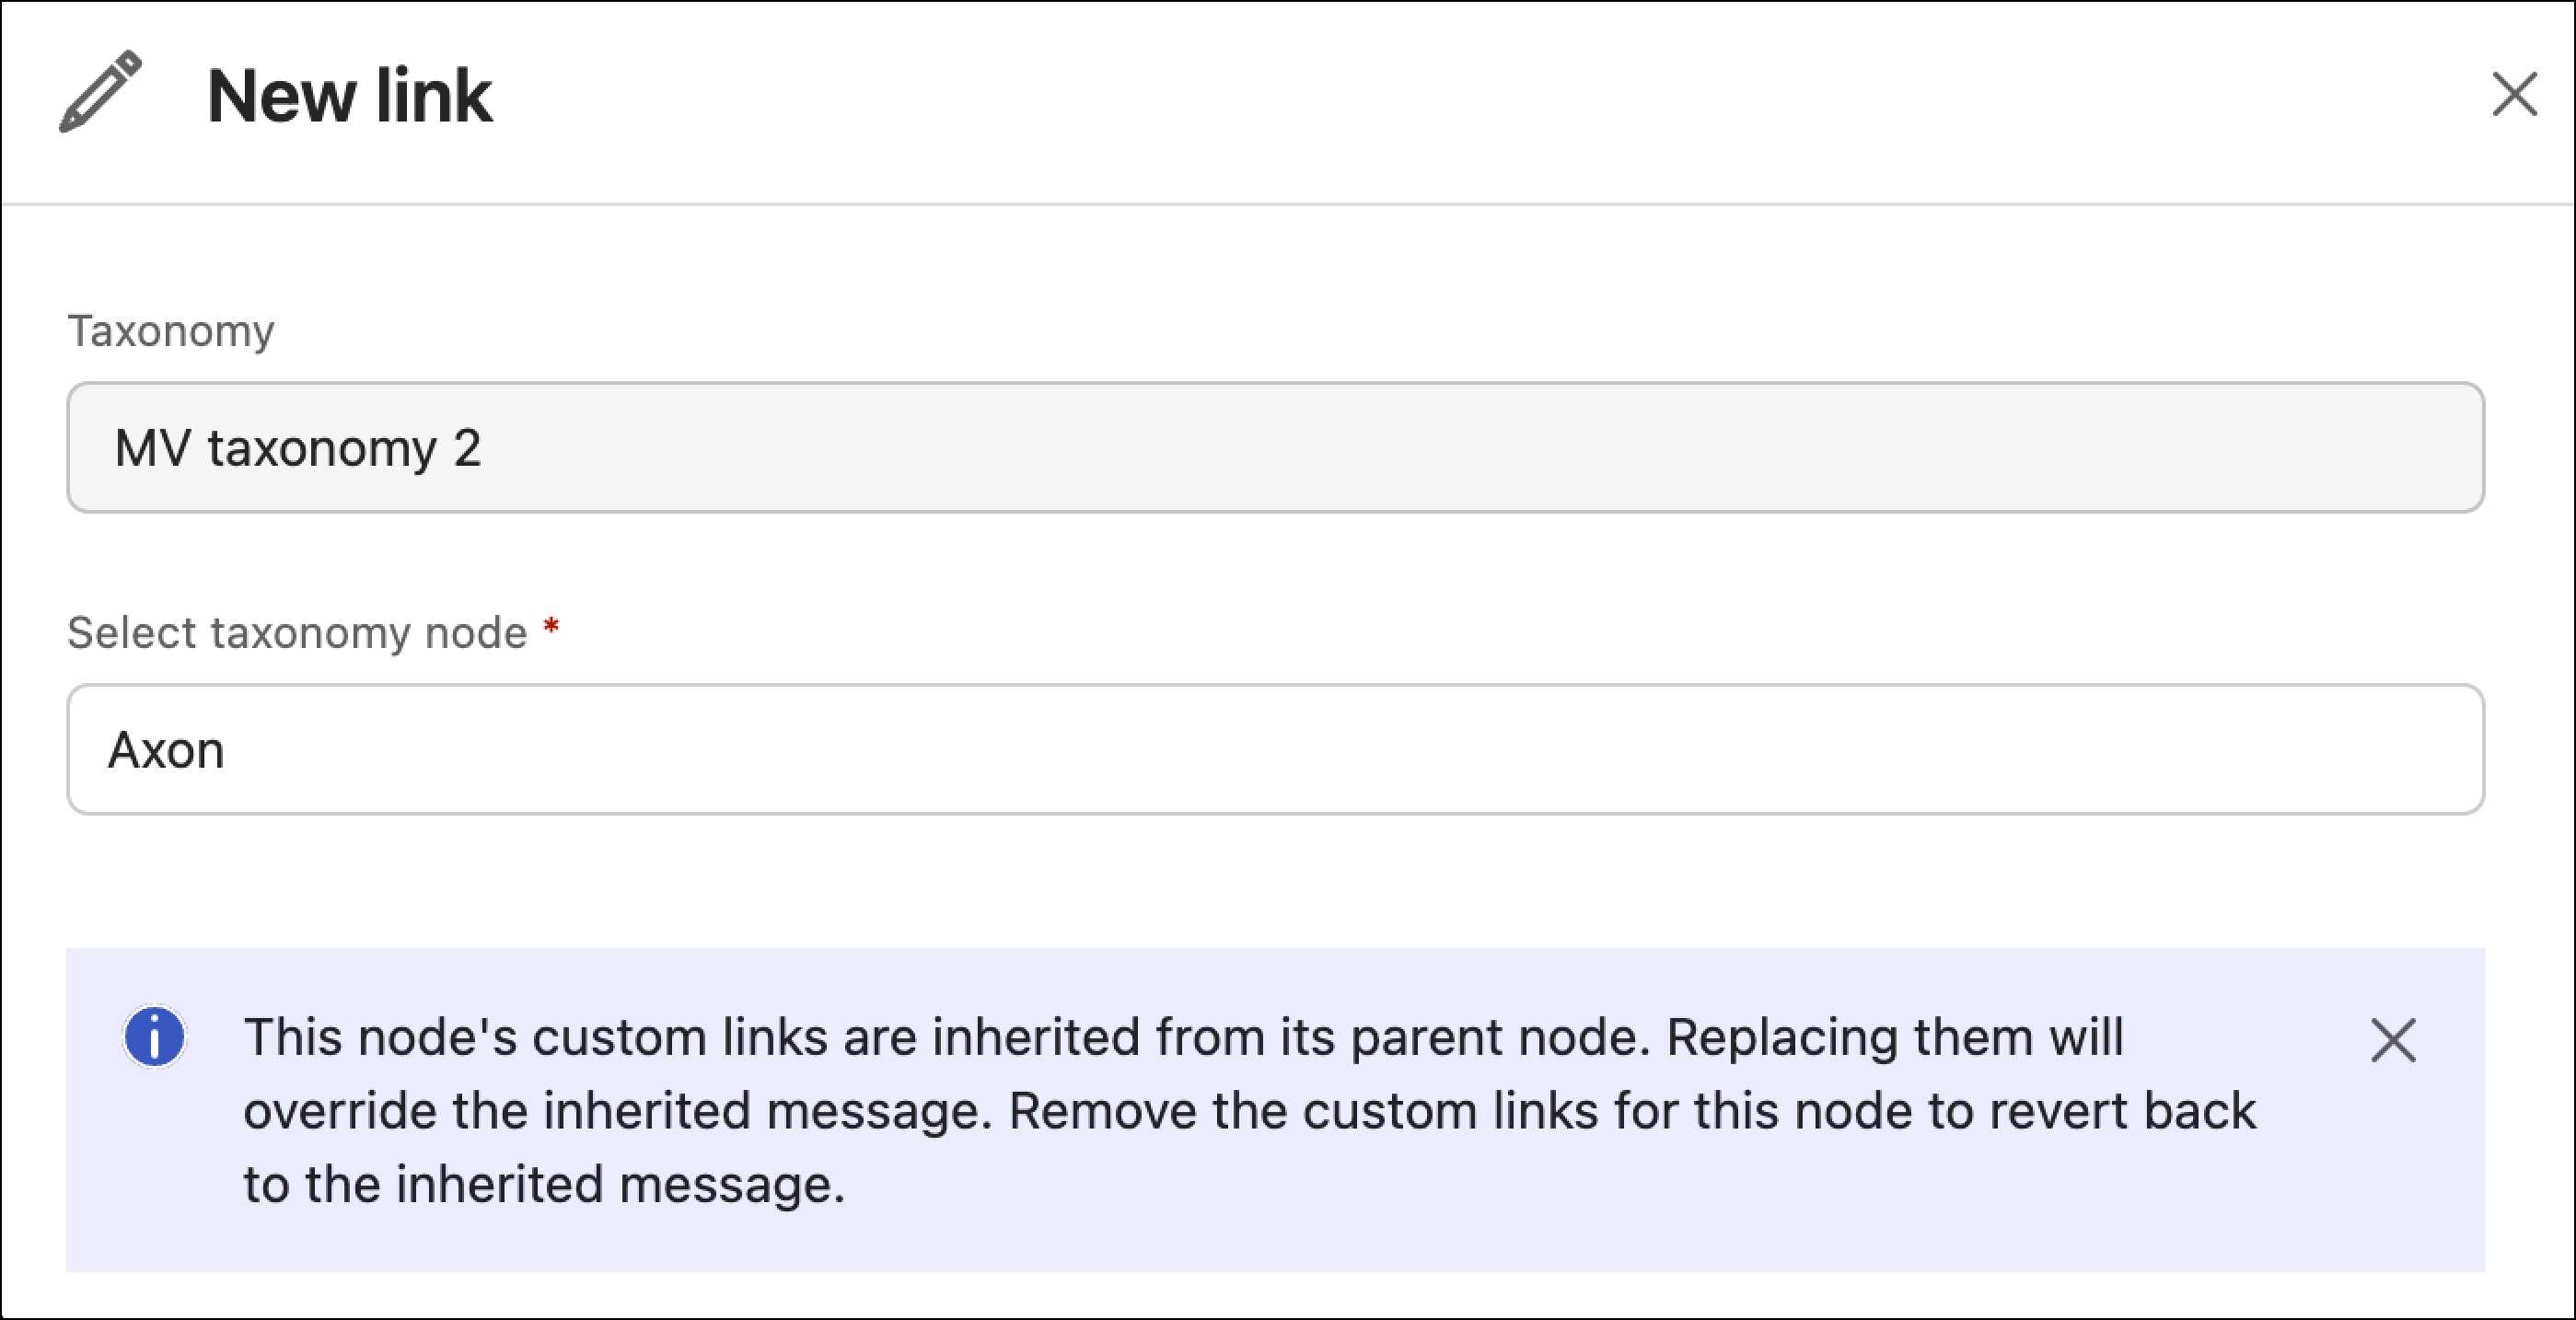
After creating a child node with custom links that are different from the parent, you can restore the inherited links.
Figure: Child nodes that are different from the parent node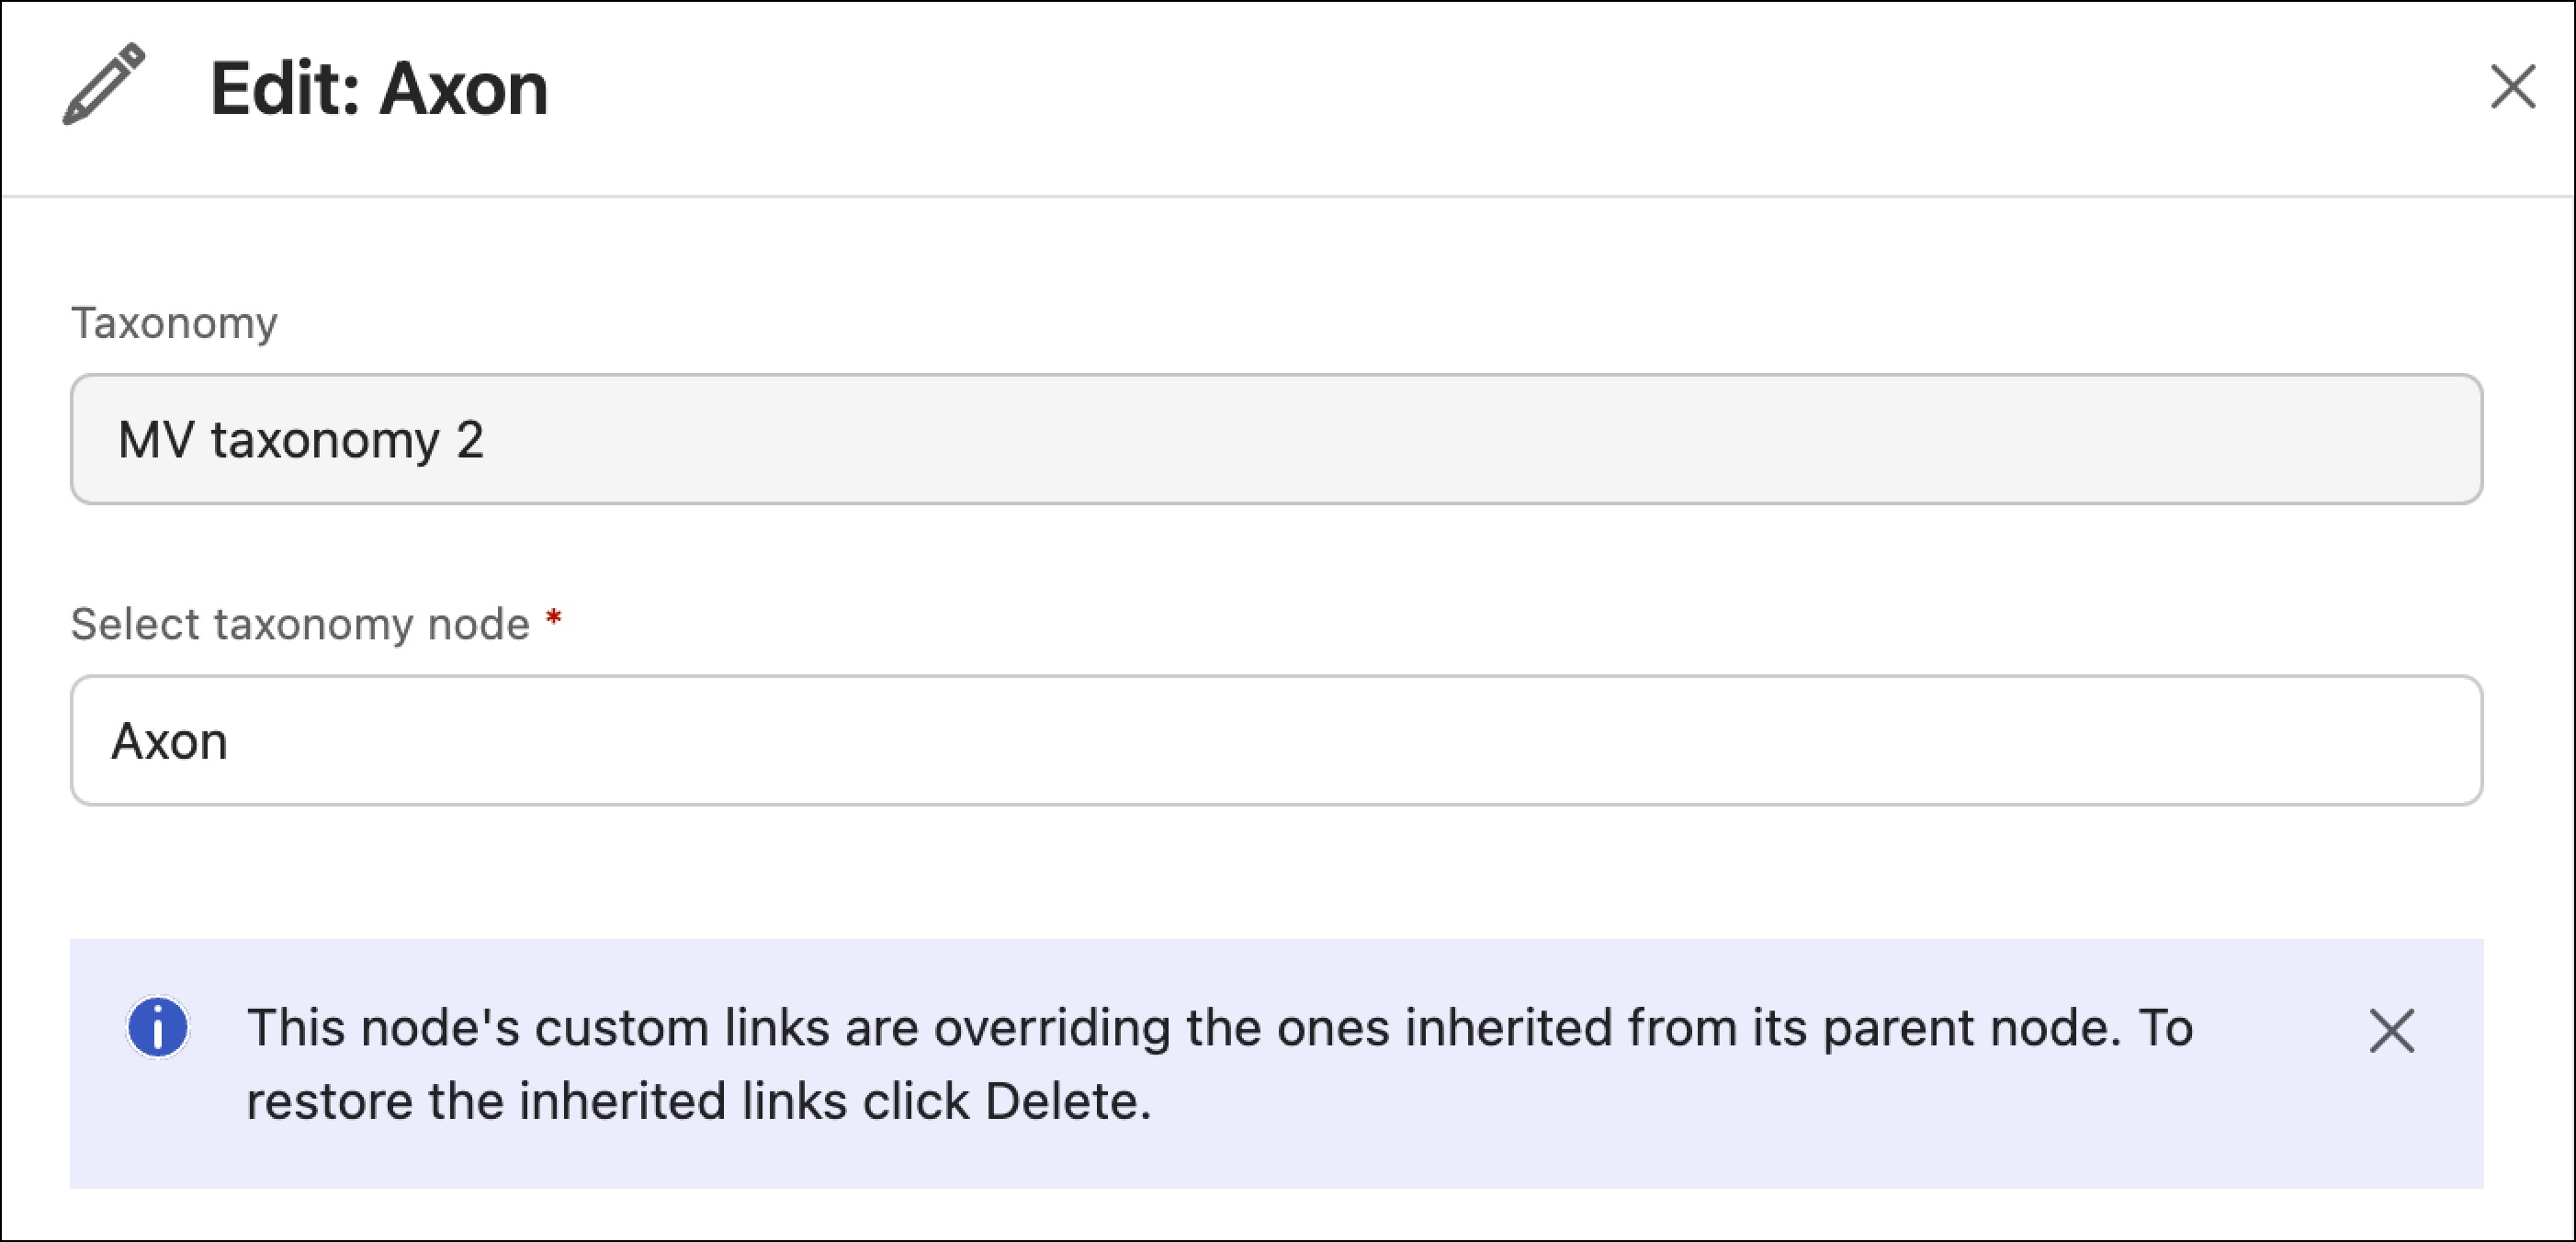
To configure quick links in iManage Control Center, browse to Extensions > iManage Insight+ > Landing page > Sub-landing pages > Quick Links.
Nodes excluded on Landing page are grayed out in Quick Links with an Excluded label. These nodes can only be deleted and not edited.
Apply User profiles to Quick links
You can configure quick links that'll get displayed on the Insight+ Sub-landing page based on a user’s profile. This lets you show targeted, node-specific information to users as part of different User profiles.
Availability of specific quick links provides relevance to the users of that profile. You can add links based on priorities and updates that matter to users.
For example, a firm has Litigation team. Previously, everyone on the team would have seen the same quick links. Now they can be more granular and target each profile with different quick links that can be set for each of them. For Litigation (UK Profile), admins can add custom quick links to the organization’s E-filing system. While for the Litigation (US Profile), admins can set the custom quick links to Deposition transcript repository, Court rules database, and others.
In the Quick Links dialog, select New link.
In the New link dialog, select a taxonomy from the Taxonomy field, for example—Industry.
Select taxonomy node from the drop-down list.
(Optional) Select the Apply message to all the children of select node check box.
The Default tab is selected by default. To add quick links to a different profile, select it from the drop-down list.
NOTE:The default quick links are inherited from the parent nodes or the Main Landing page.
Quick links configured under the Default tab will apply to all User profiles.
Profile-specific quick links take precedence over the default quick links on the User profile’s sub-landing page.
Select Add link.
Under Title field, enter the text to be displayed.
Under URL field, enter the full website address.
Repeat steps 6–8 for all quick links to be added for the selected user profile or Default tab.
To add quick links to other user profiles, repeat steps 5–8.Select Save.
(Optional) On the Quick Links dialog:
To view all the quick links in the Quick Links dialog, select a profile or Default view from the Profiles drop-down and then select Apply all. A list of taxonomies with their nodes, User profiles, and applicable links is displayed.
To reset, select Clear all from the Profiles drop-down.
To edit or delete an entry, hover over an entry, select the
icon, then select Edit or Delete.
After completing all the configuration, on the Quick Links dialog, select Save.
Default quick-link inheritance
Quick Links are inherited down the taxonomy hierarchy. If not overridden, a node uses Quick Links from its closest parent node or from the Main Landing page. The Main Landing page is the default for all user profiles.
In the New link dialog, under Default tab and all User profile tabs, you’ll see the following message:
“This profile's quick links are inherited from its parent node or the main landing page unless overridden below.”
Profile-specific quick links
You can replace inherited Quick Links for a taxonomy node by adding links under the Default tab or for a specific user profile.
Links added in Default tab apply to all User profiles for that node and override anything inherited from parent nodes or the Main Landing page. Profile-specific links override both inherited links and default links for that node.
Under the Default tab, you’ll see the following message:
“The Default links will be applied to all profiles for this node. To override, select a profile and add new links.”