Freeing up disk space in iManage Drive
You can free up disk space in iManage Drive by using any of the following methods:
Method 1
Select
 and then select Manage Disk Space. The following dialog is displayed:Figure: Manage Disk Space dialog
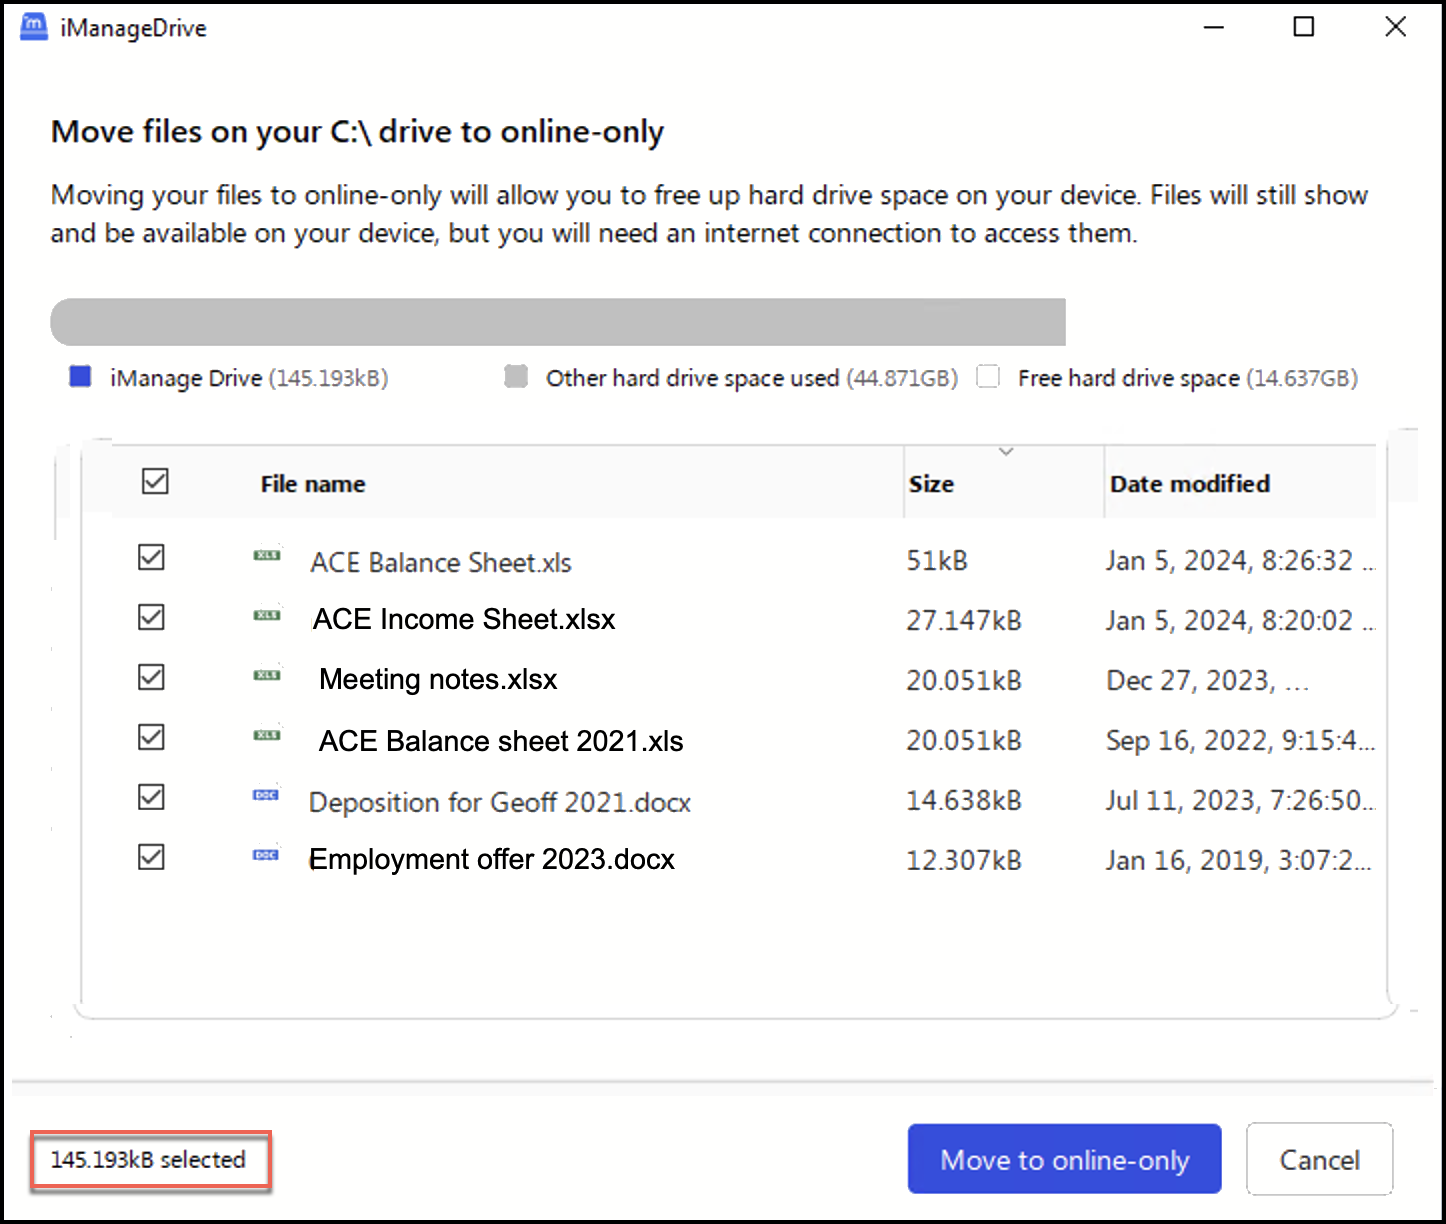
Select the file(s) by selecting the check boxes near the file name. Alternatively, select the check box near the File name to select all the files.
The total size of the files selected is displayed in the lower left corner of the dialog.Select Move to online-only. The selected files are moved online and can be accessed in iManage Work. In this state, these files don't take up any disk space.
The Manage Disk Space dialog displays:
The total disk space used by iManage Drive.
The total disk space used by other applications for that drive.
The total free disk space.
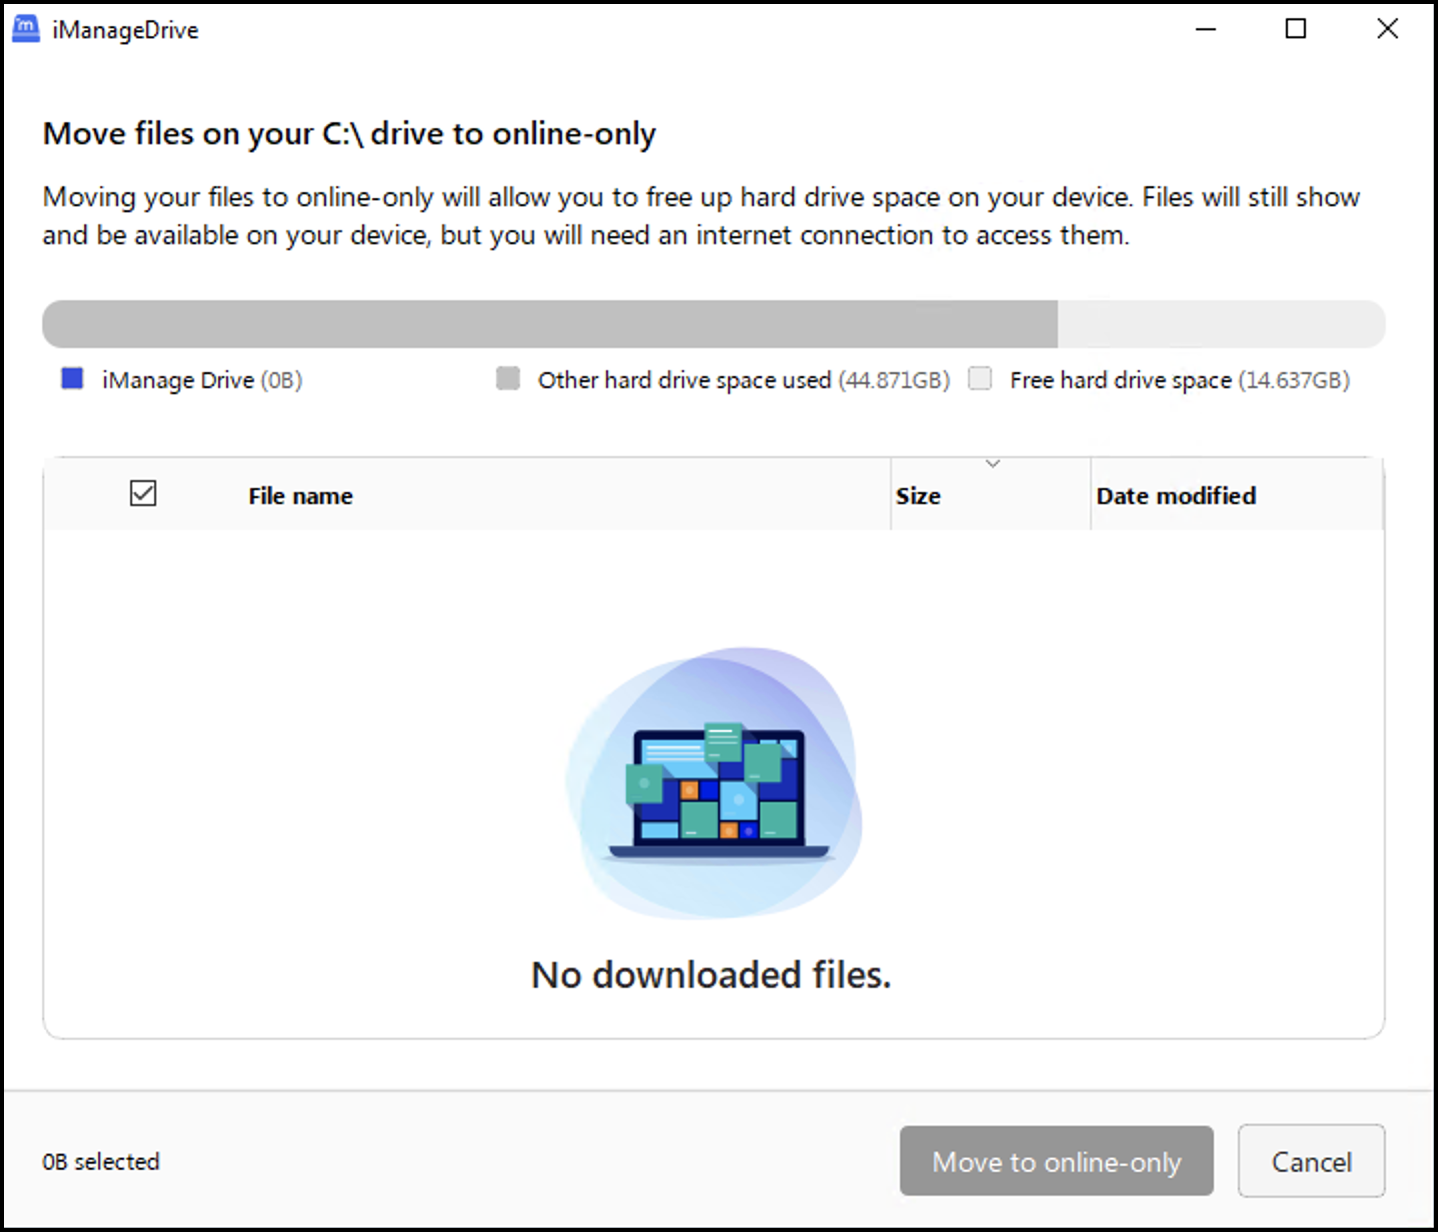
If no files are downloaded, selecting Manage Disk Space displays the following dialog:
Method 2
To make the files that you don't need to access offline available only when you are online, use Access Online Only. The green checkmark  icon changes to the cloud
  icon. All files with can be accessed in iManage Work and are available only when you are online. In this state, these files don't take up any disk space.
Method 3
Select and then select Show document change log. The list of files you changed or added to your mapped folder is displayed. Right-click the document or documents and then select Delete document change. For any documents selected, the reference tracking the most recent change to the document(s) will be removed. This can help lower disk space, as all references to a file stored within iManage Drive must be deleted before the physical file can be deleted by iManage Drive to free up space.
Method 4
In addition, iManage Drive frees up disk space four times a day by removing files that are no longer in reference in Windows Explorer or Document Change Log. This includes documents that haven't been opened or modified recently.