Diagnostics: Generate Support Snapshot
- Select Diagnostics: Generate Support Snapshot. The snapshot tool appears with the Description tab selected by default.
- In the Describe What Happened field, describe the iManage Drive issue you're facing.
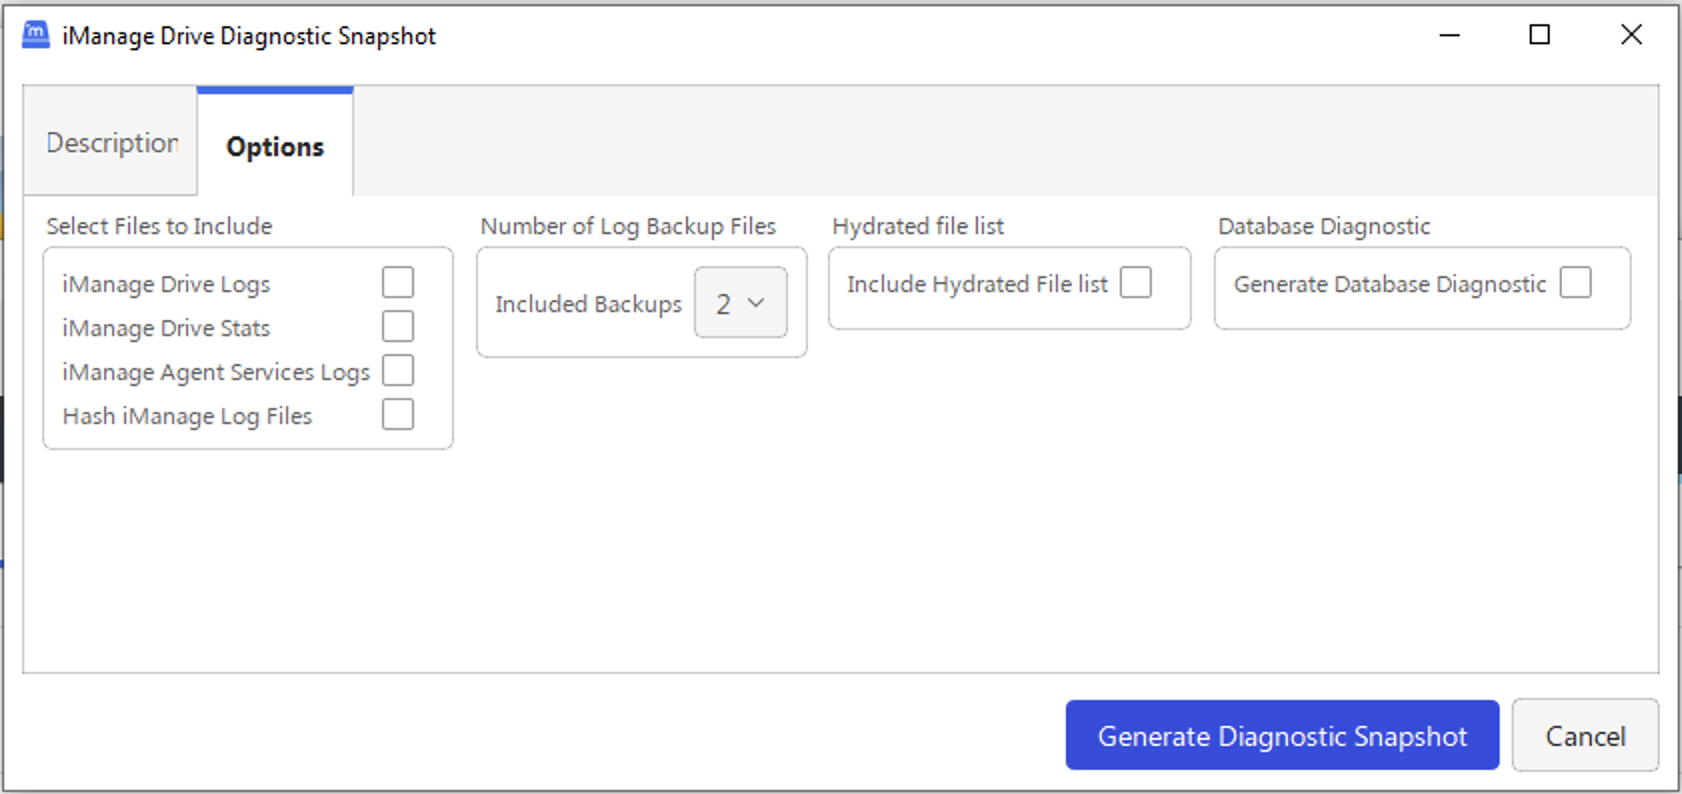
- Select the Options tab. The types of files to be included are selected by default in the Select Files to Include field.
(Optional) Clear the check boxes for the files you don't want to include in the snapshot.
Figure: Diagnostic snapshot tool
- From the Included Backups list, select the number of backup files to include. The value is set to 2 by default.
- (Optional) Select Include Hydrated File list check box to include hydrated file list. The will include the list of all the files that are available as full file and not as a link or a stub in iManage Drive.
- (Optional) Select Generate Database Diagnostic to include database diagnostic.
- Select Generate Diagnostic Snapshot.
The ...\AppData\Local\iManage\GoDrive\diagnostics\snapshots folder opens, displaying the ZIP folder that contains the files to be sent to the system administrator or application support for troubleshooting and analysis of the issue you are facing while working with the application.
NOTE:
The database diagnostic snapshot is available at the following location: ...\AppData\Local\iManage\GoDrive\diagnostics\database.
