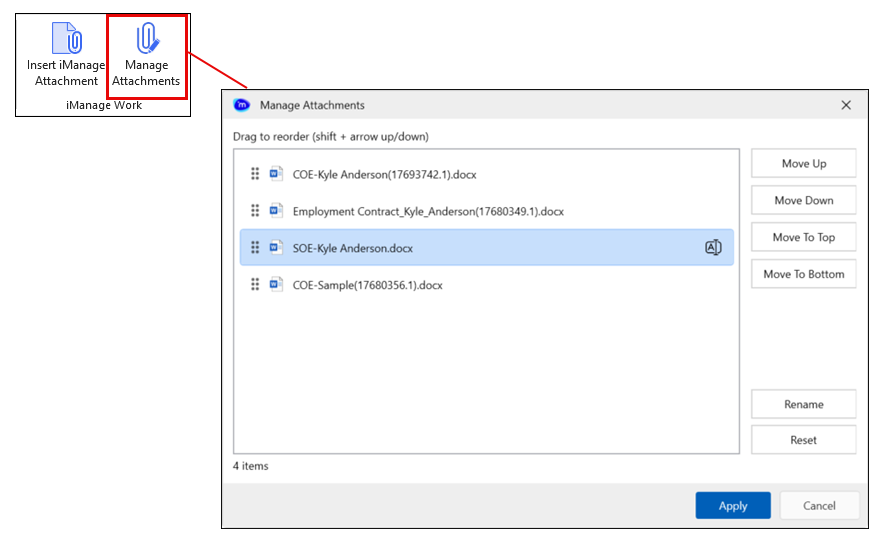
When writing emails or putting together invitations in Outlook, you can now reorder the iManage documents you have attached and rename the files to make them more meaningful to the recipients. The Manage Attachments button, integrated into both the draft email Message and Insert tabs for messages with attachments, provides a centralized dialog for managing attachments. After launching the Manage Attachments dialog from the button, reorder, rename (without altering file extensions), or reset the email attachments using drag-and-drop, keyboard shortcuts, or on-screen buttons. The feature also emphasizes accessibility, supporting screen readers, keyboard navigation, and a resizable interface for improved usability.
Manage Attachments dialog
You can access the Manage Attachments dialog by selecting the Manage Attachments button from the iManage Work group on both the Outlook Message and Meeting Invitation Main and Insert ribbons.
Manage attachments
Follow the steps to manage the attachments.
Select each attachment you want to rename, and one by one, use one of the following three ways to rename your attachments:
Click the Rename icon that displays when the file is highlighted
Double-click the file and enter the new name
Highlight the file and select Rename on the right side of the dialog
Select each attachment you want to reorder, and one by one, use one of the following three ways to reorder your attachments:
Select the file and drag it to the location
Use the Shift + Arrow up or Shift+Arrow down
Select the file and use the Move to Top, Move to Bottom, Move Up, or Move Down buttons on the right of the dialog
When you are finished, select Apply to save your changes and close the dialog.
NOTE: The selected attachment determines which buttons are active. For example, when the top attachment is selected, only the Move to Bottom and Move Down buttons are active.