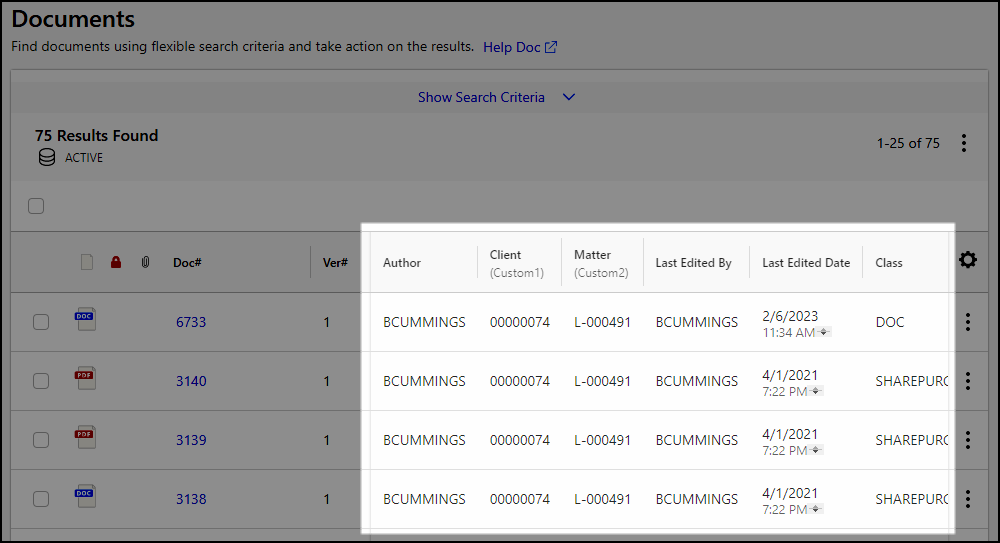
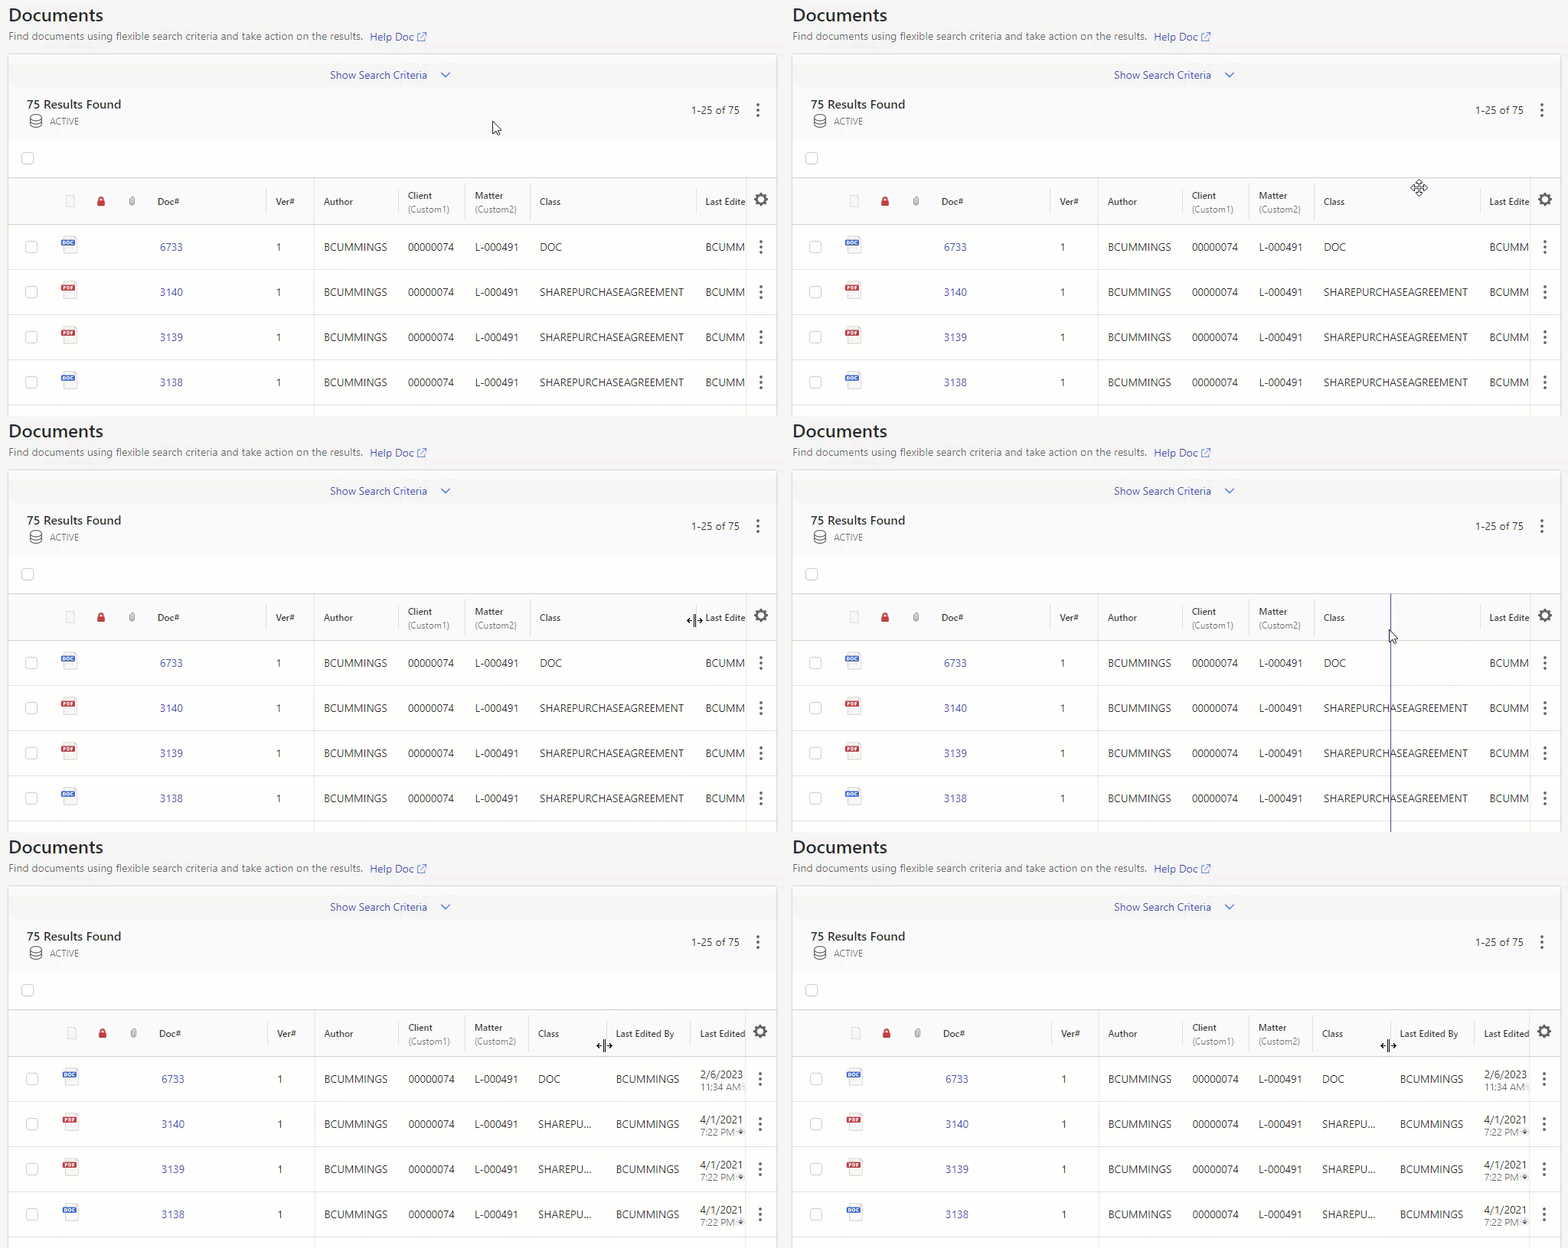
iManage Control Center allows you to modify the columns shown in iManage Control Center tables. The following figure shows a sample table, with a section of the table highlighted to show columns that can be customized:
NOTE: When many columns are present in the customizable section of a table, some columns may be hidden from view. You can view these columns by using your browser’s horizontal scrolling capability.
Whereas columns in the fixed sections of a table can't be altered, you can do the following in the customizable section:
Except for column resizing, your browser automatically remembers the customizations you made to each table.
Adding and removing columns
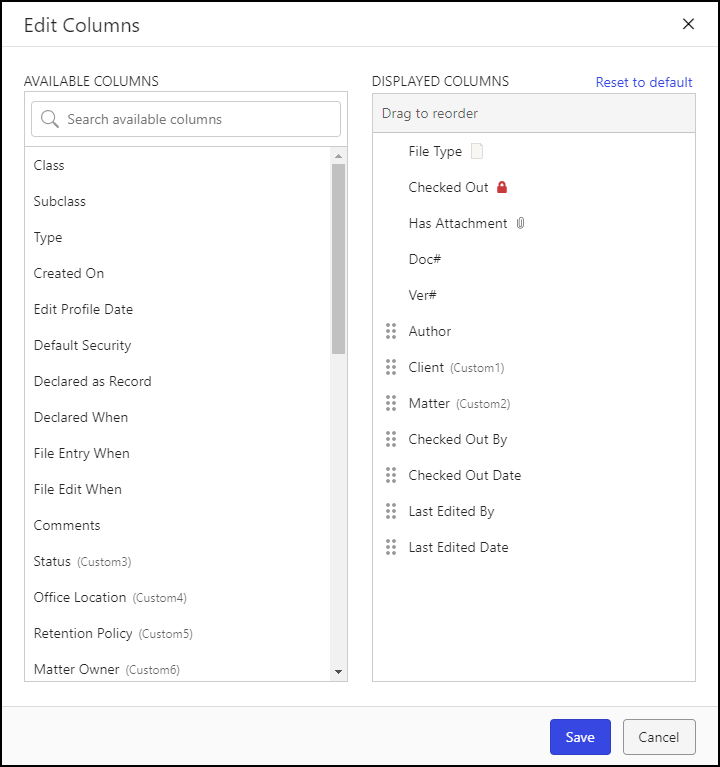
Each table has a default view that consists of a pre-defined set of columns, displayed in a preset order. To change which columns are displayed, select the icon. The Edit Columns dialog is displayed.
NOTE: You can’t change which columns are displayed in the table view of the following tables because all of the pre-defined columns are already displayed:
Upcoming Features
Refile
Library Encryption
Office
The Edit Columns dialog includes two column lists:
Available Columns: Identifies columns available for inclusion in a table that aren’t currently displayed.
Displayed Columns: Identifies columns currently displayed in a table.
NOTES:
Columns are displayed in a table in the order in which they appear in the Displayed Columns list.
Columns that can be reordered and removed from the Displayed Columns list are denoted by theicon. Columns without this icon are fixed in place and can’t be reordered or removed.
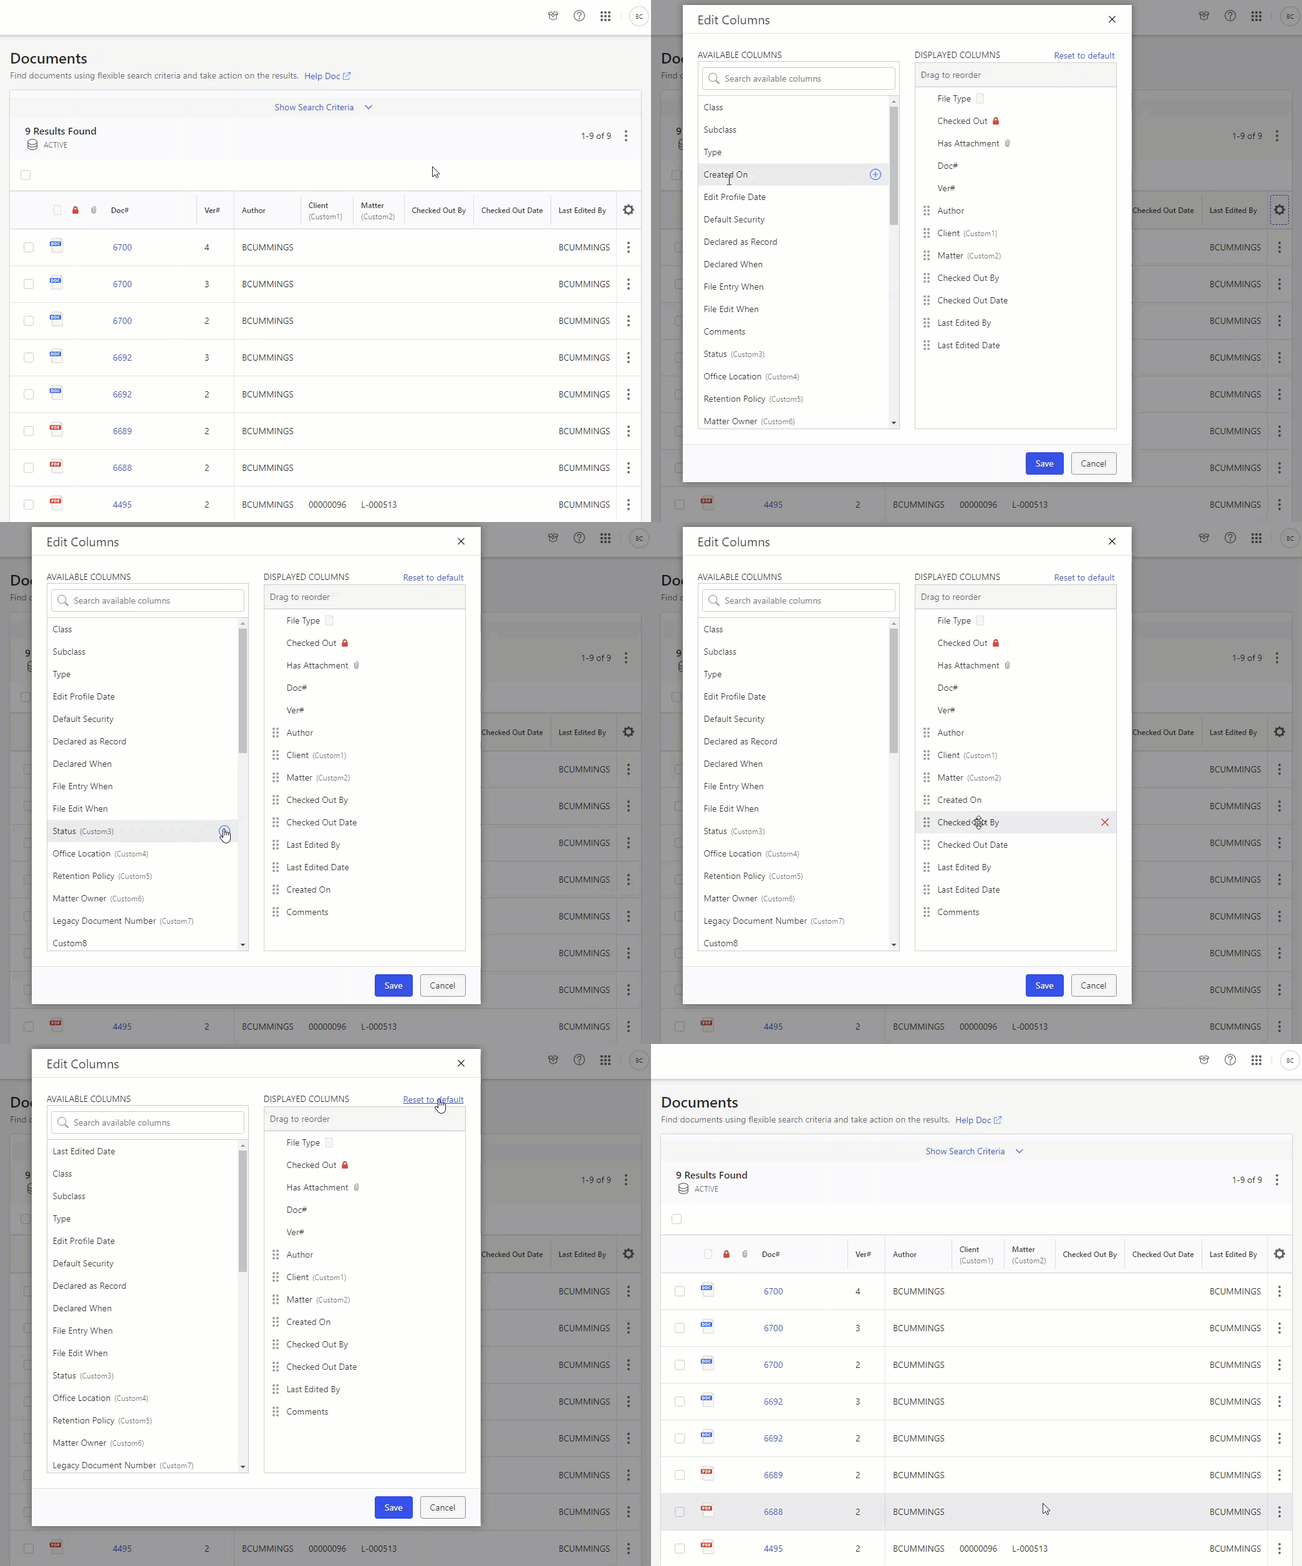
You can perform the following actions to select which columns are displayed in a table and to reorder them:
To display a column in a table, hover over the column name in Available Columns, then select the icon.
To remove a column from a table, hover over the column name in Displayed Columns, then select the icon.
To change the column order, select the column in Displayed Columns and drag it to the desired location in the list.
To restore a table’s default column list and order, select Reset to default.
NOTES:
To search for a column in the Available Columns list, begin typing the column caption name or ID in the Search available columns search box.
When you add a column to the Displayed Columns list, it's automatically added at the bottom of the list.
Changing column order
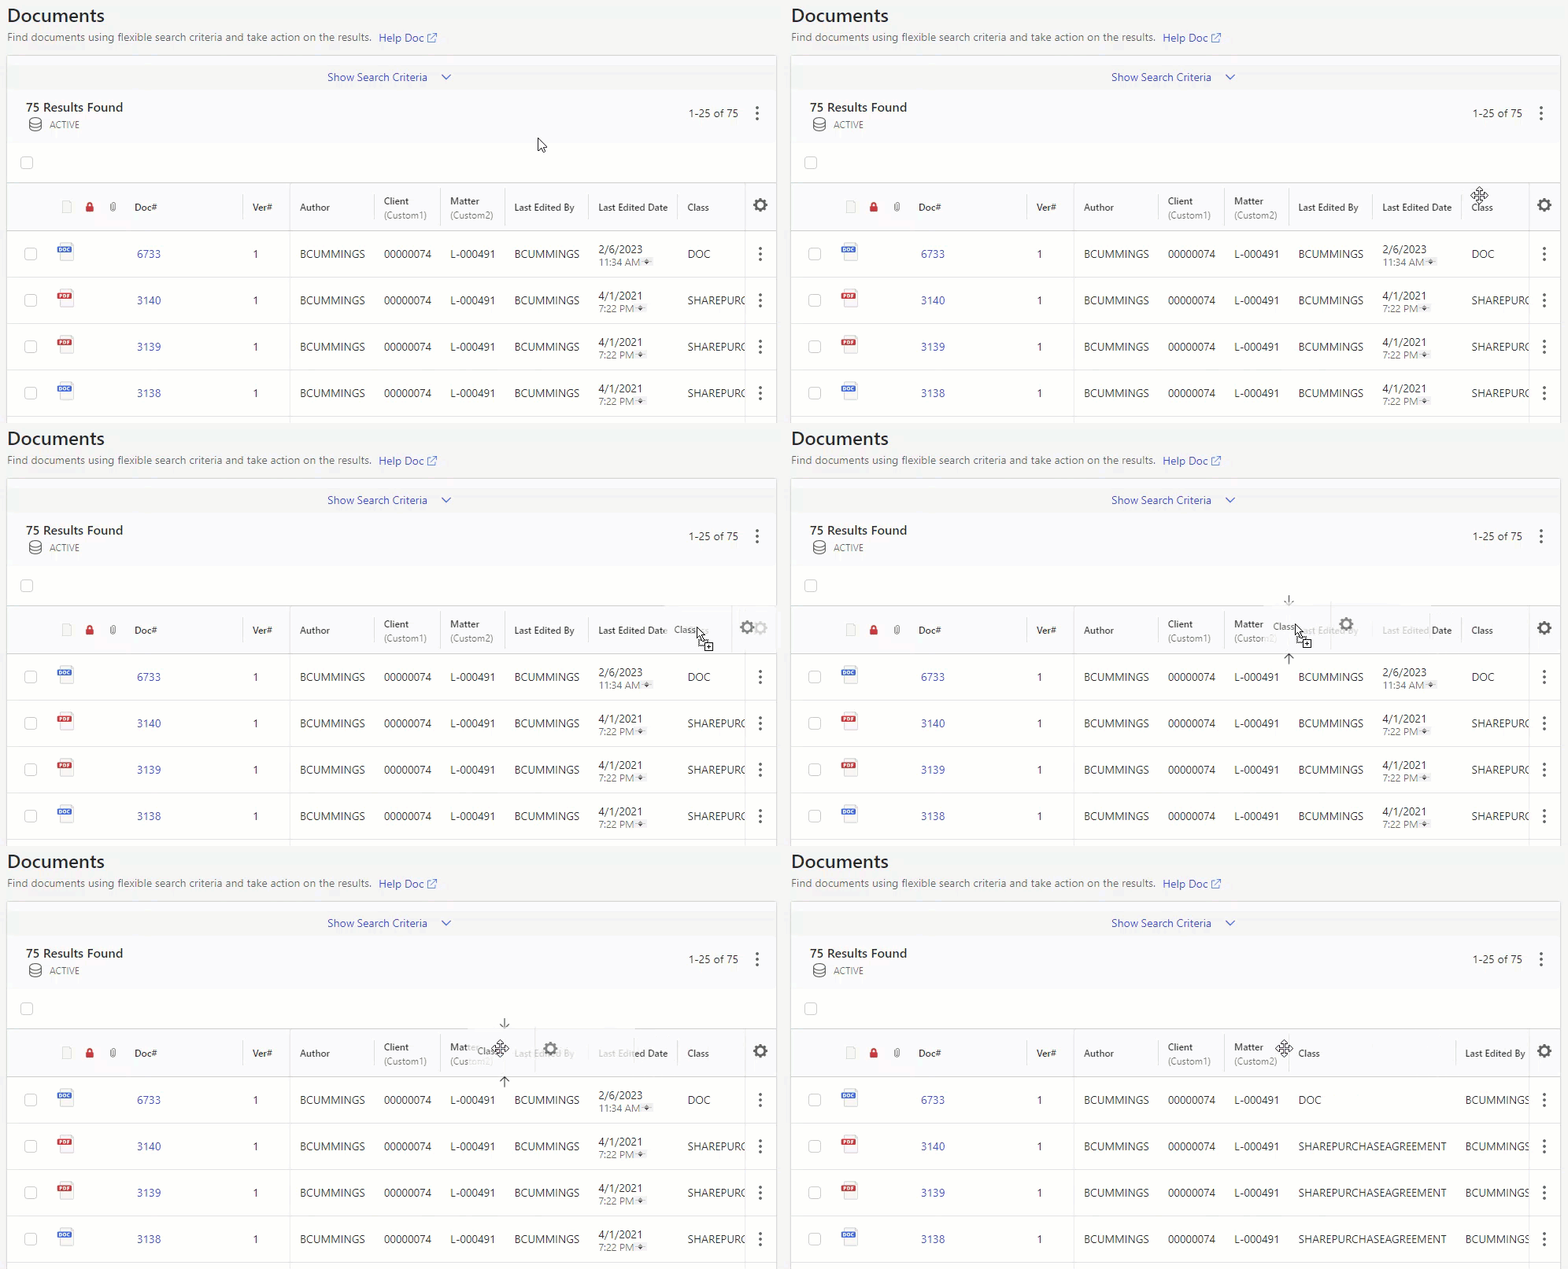
Column order can be changed either through the Edit Columns dialog (refer to Adding and removing columns) or by dragging and dropping the column heading to the desired location.
NOTE: Only columns in the customizable section of a table can be reordered.
Resizing column width
Columns can be resized by selecting a column divider from the heading row of a table and dragging it to the desired position.
NOTES:
Only columns in the customizable section of a table can be resized.
Changes to the width of a column aren't remembered. As a result, column width changes are lost when:
A subsequent search is performed,
The browser window is refreshed,
Returning to view the table later in the current session or in a subsequent session using the same browser,
Returning to view the table using a different browser, or
Returning to view the table on a different device (either using the same or a different browser).
