Creating configuration files
When you deploy iManage Work Mobility for iOS as a Managed App through MDM, the first step is to upload the XML configuration file. This file contains the same data as the Managed App Configuration key-value pairs.
iManage Control Center enables you to create your own configuration file or edit an existing .immconfig file, which are deployed through email or MDM. For more information, see Deploying configuration files.
From the iManage Control Center, select iOS under Client Setup.
CREATE CONFIG FILE is displayed as shown in the following figure:
Figure: CREATE CONFIG FILE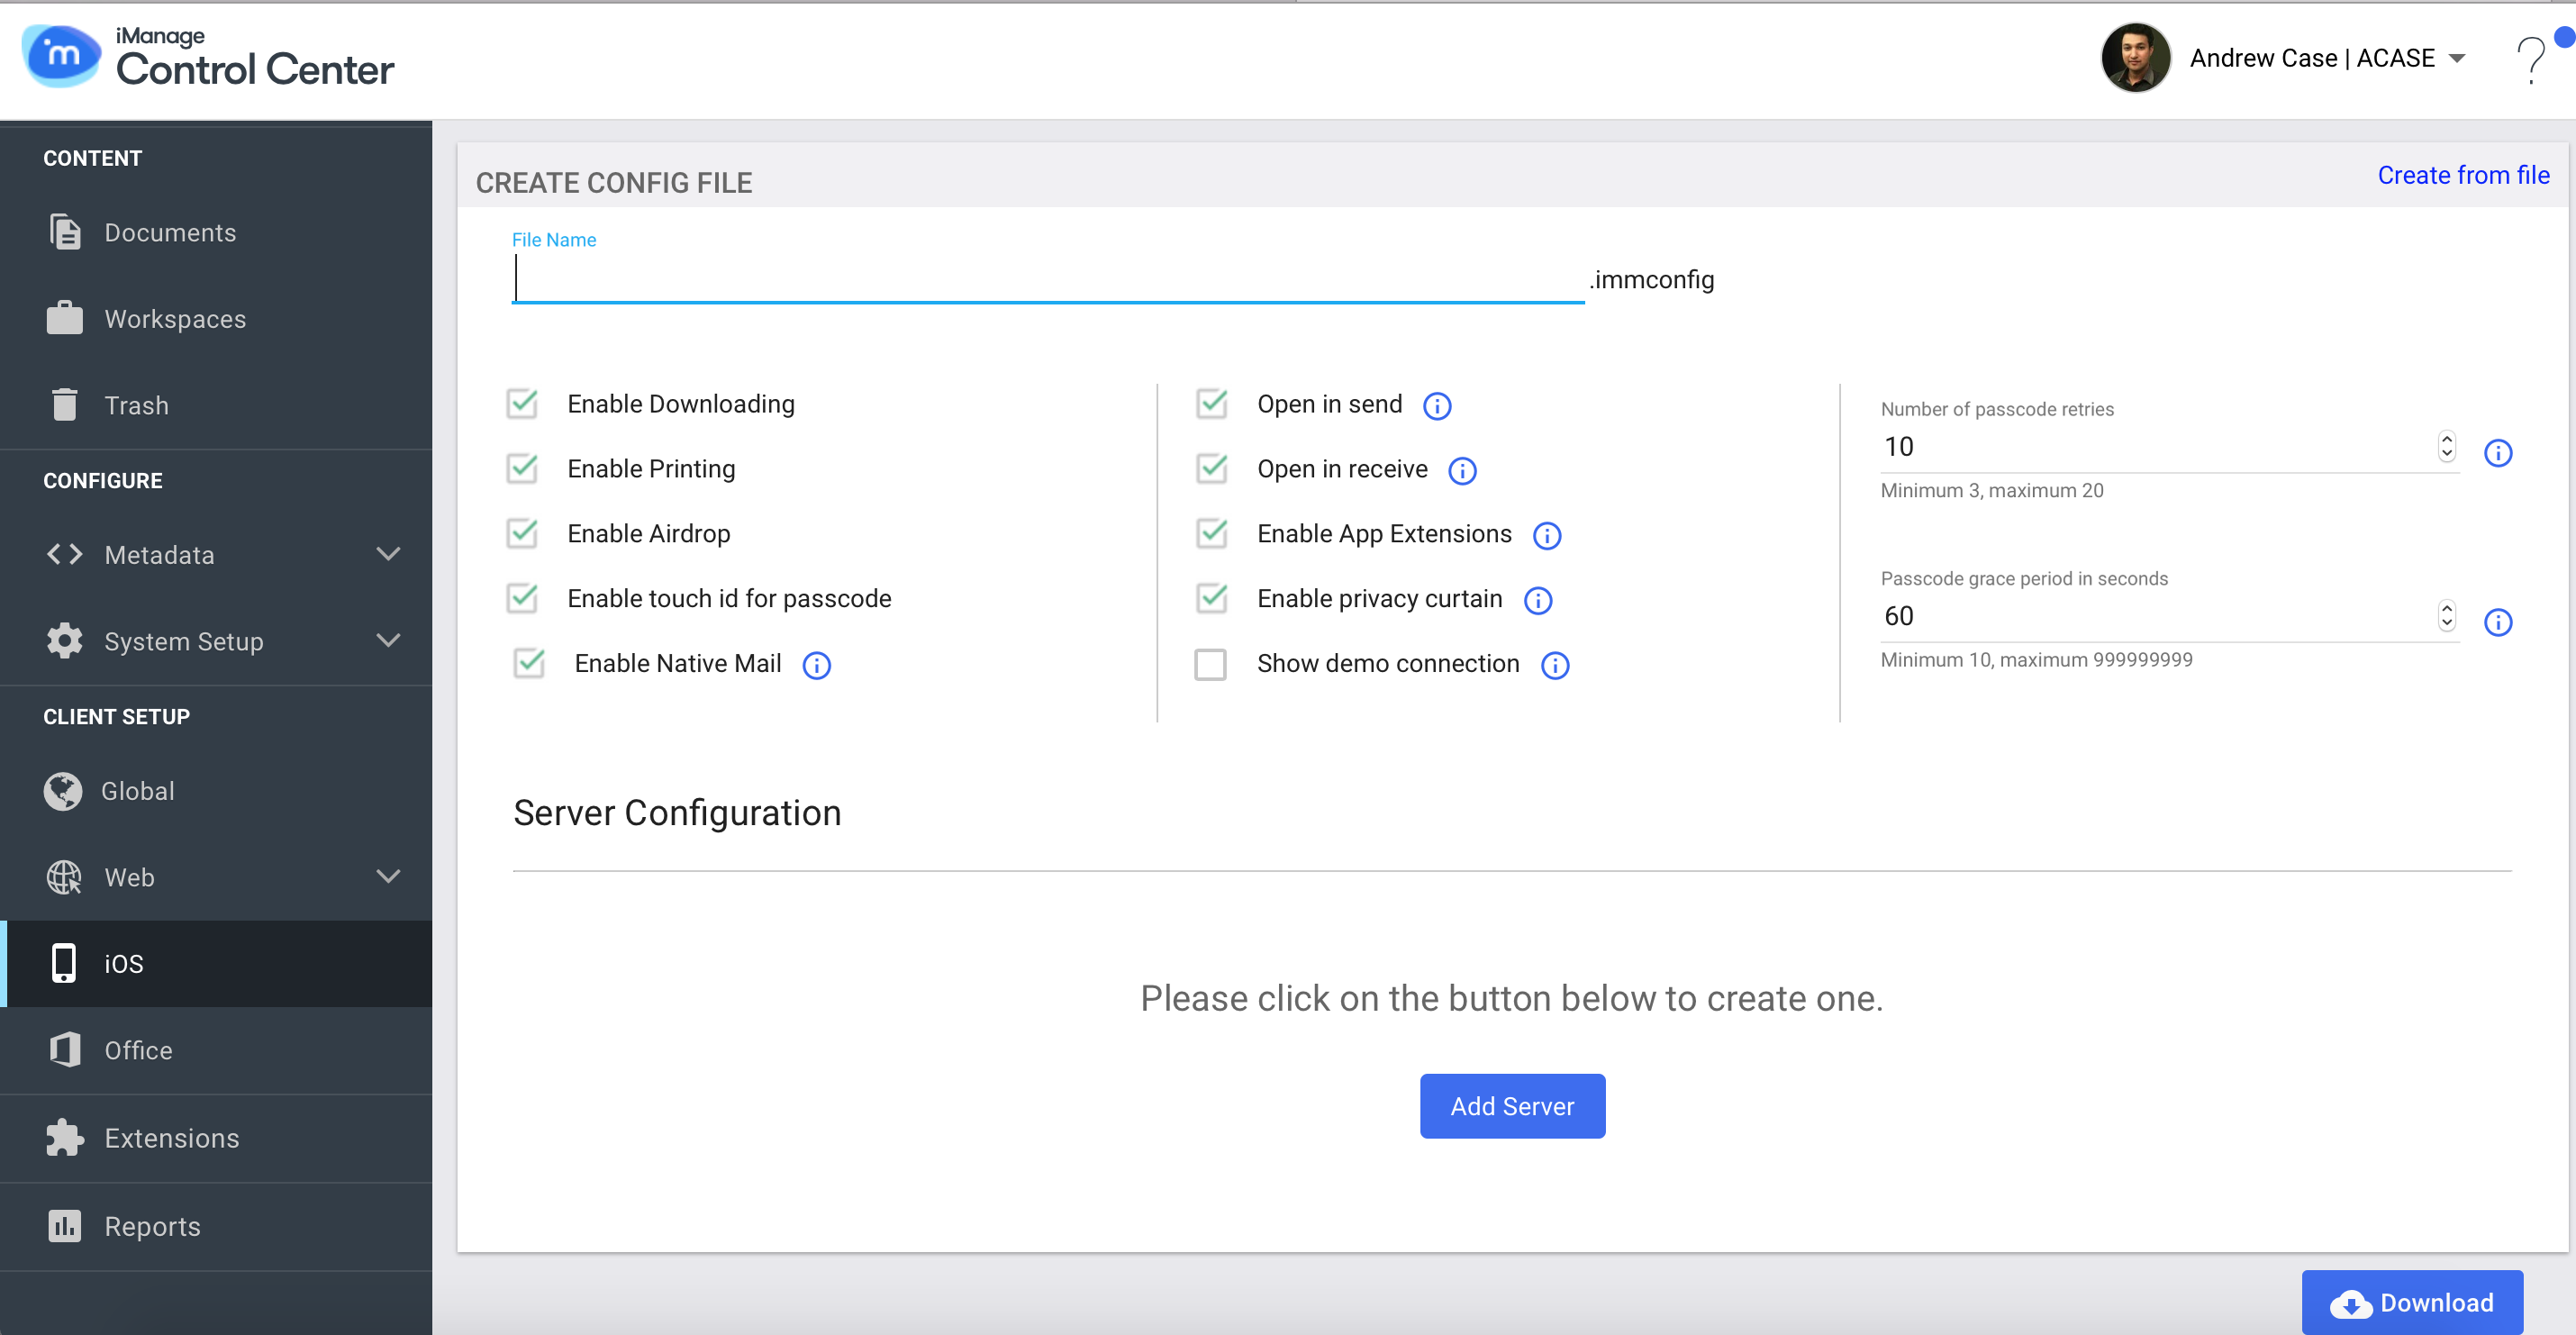
Type the name of the file in File Name at the top.The following table lists the available policies under iManage Control Center and a very brief description of their use in iManage Work Mobility:
Table: PoliciesOption
Description
Enable Downloading
Is enabled by default, and allows the users to download document(s) copy on their iOS mobile device.
Enable Printing
Is enabled by default, and allows the users to print the iManage Work documents through iOS AirPrint.
Enable AirDrop
Is enabled by default, and allows the users to share the iManage Work documents using iOS AirDrop feature.
Enable touch ID for passcode
Is enabled by default, and enables the Touch ID authentication for users on the Passcode screen.
Enable Native Mail
Is enabled by default, and allows the users to send documents as attachments from the native email app. This feature does not affect the Document NRLs.
Open in send
Is enabled by default, and allows the users to send a copy of a document to other applications through the Open In feature of iOS.
Open in receive
Is enabled by default, and allows the users to receive copies of documents from other apps through the Open In feature.
Enable App Extensions
Is enabled by default, and restricts the users from using the Storage Provider Extension to save or access content on their iOS mobile device.
Enable privacy curtain
The Privacy Curtain feature is enabled by default, and is displayed when the application is not active.
Show demo connection
Is disabled by default, and Demo is not listed on the Sign In screen of the iManage Work Mobility application.
Number of password retries
Is used to set the number of times a user enters the app passcode, before all locally stored data is erased from the iOS mobile device (data on the server is not impacted).
By default, the Number of password retries is set to a Minimum of 3 and a Maximum of 20.CAUTION:
Users may also lose any local document modifications.
Passcode grace period in seconds
Is the time delay that is enforced when switching away from the iManage Work Mobility app, before the App Lock is enforced, and the user is required to enter the app passcode (or use Touch ID if configured).
By default, the Passcode grace period in seconds is set to a Minimum of 10 seconds and a Maximum of 999999999 seconds.Select Add Server at the bottom to update the server configurations.
Server Details is displayed as shown in the following figure:
Figure: Server Details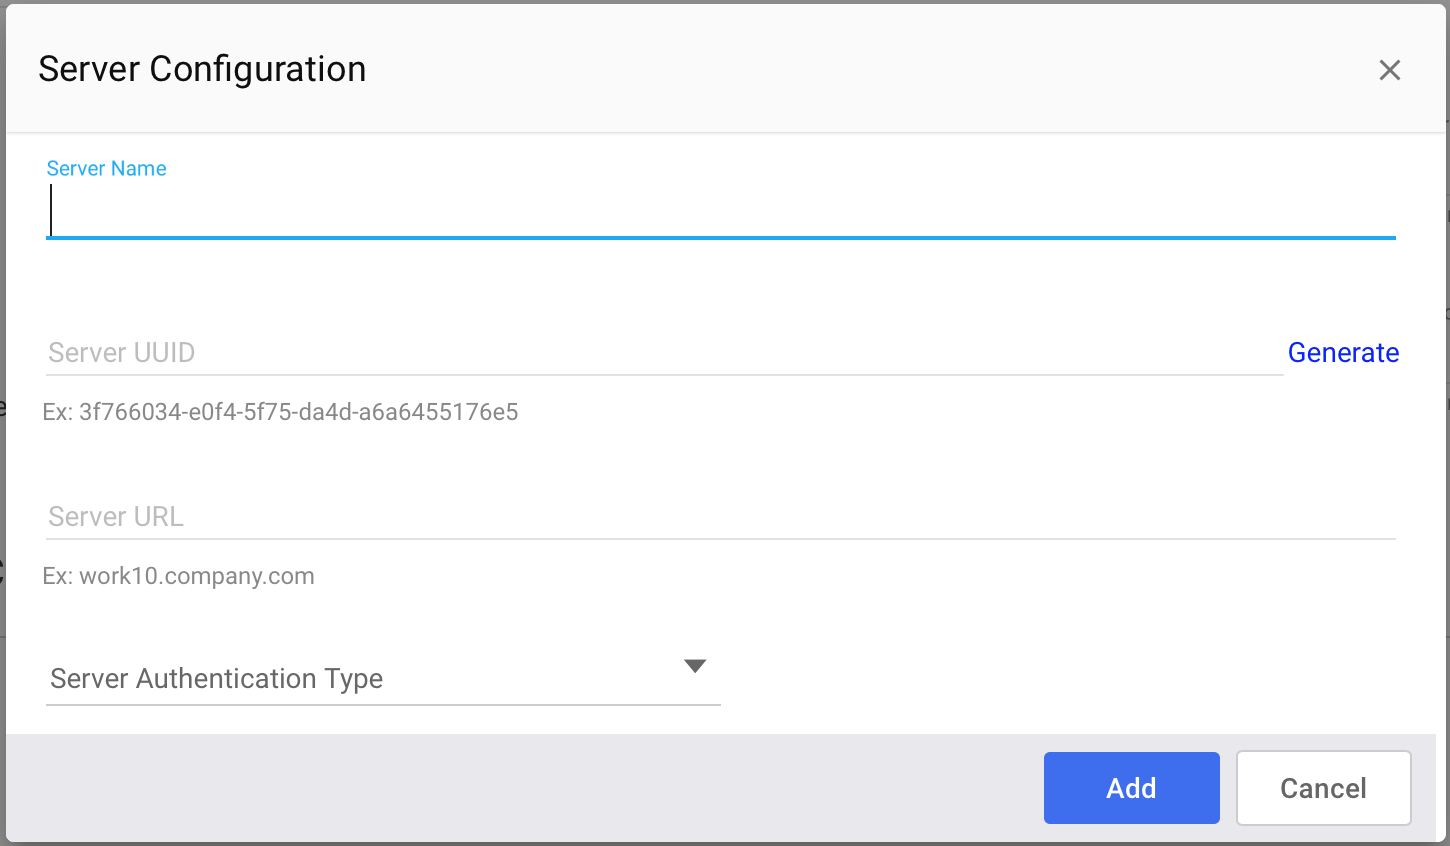
Enter Server Name, and select Generate to get the Server UUID.
Provide the URL link to the Server.
Select Server Authentication Type from the list:
Standard: Supports both Work credentials and domain/username & password for explicit network authentication.
ADFS: Displays an embedded web view where the user must follow whatever authentication procedures the company has defined for the ADFS implementation.
iManage Cloud (ADFS): Can be used for customers connecting through cloud.
For more information, refer to the Server Configuration section of the table, in Managed App Configuration Policies.
Select Add.
The .immconfig file is generated and the configurations are captured.Select Download File at the bottom to save the file.
You can use this to deploy the configurations. For more information, see Deploying configuration files.
For more information on setting up ADFS and SAML, refer to iManage Work Server Administration Guide.