NOTE: To manage service accounts, the user signed in to iManage Control Center must be assigned to a global role that has the User Management privilege. For more information, refer to Global privilege descriptions.
This page includes the following topics:
Overview
A service account is a non-interactive account used by iManage tools and services. These accounts have scoped API access for a specific application and can't be modified for use with other applications. Service accounts often have additional access that isn't available to interactive user accounts, such as Sync APIs, but they can't be used to sign into interactive applications like Work Web.
On the Service Accounts page, you can:
Create and update application-specific service accounts
Control the sign-in status of service accounts
Assign trusted IP address ranges to limit the sign-in locations for service accounts
Reset the authorization key assigned to a service account
Download the Service Account table
View the properties of all the configured service accounts
Customize the appearance of the service account table
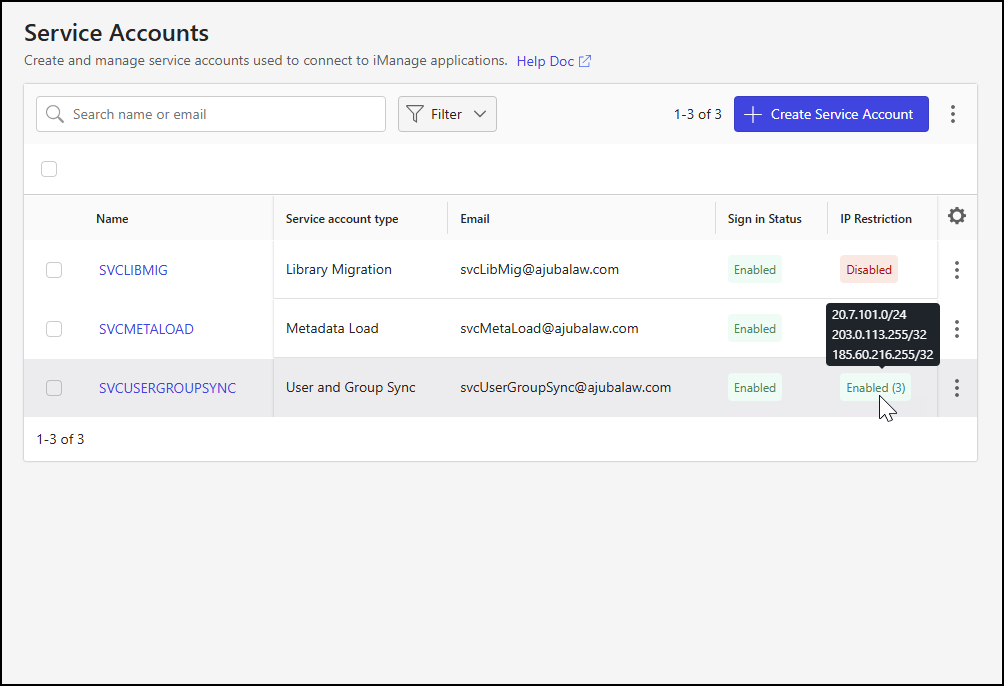
A sample of the Service Accounts page is shown below:
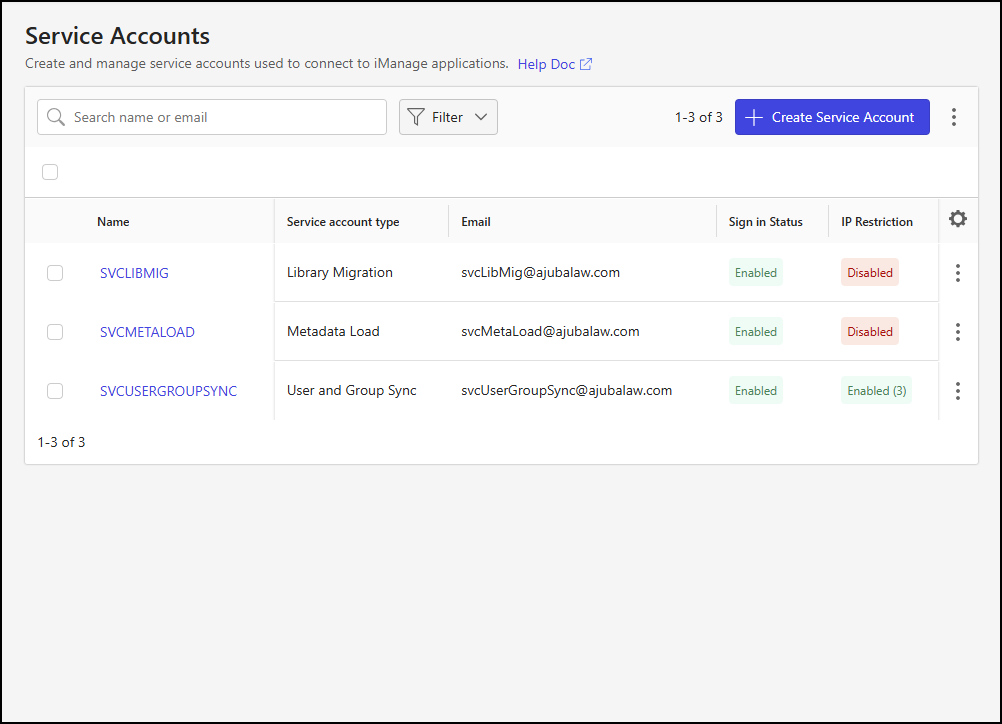
Create a service account
Perform the following steps to create a service account:
In iManage Control Center, browse to Access > Service Accounts.
At the top of the page, select + Create Service Account.
Figure: Create Service Account dialog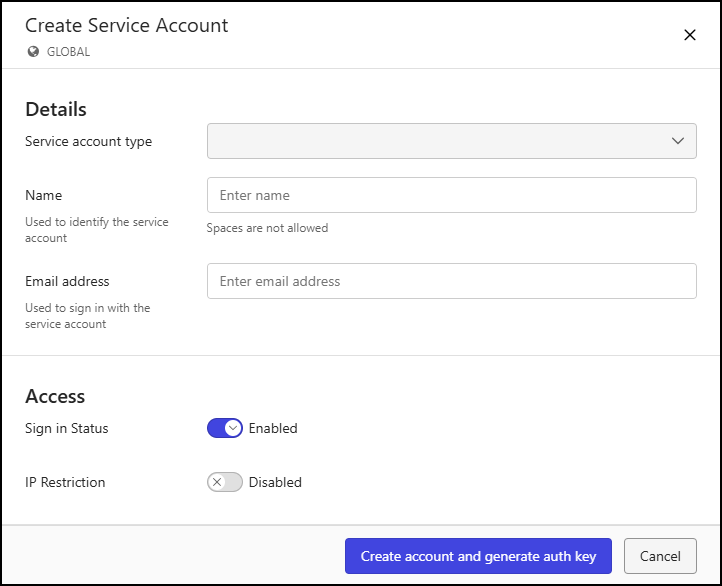
In the Create Service Account dialog, enter service account details as described in the following table.
Table: Create Service Account fields
Field | Description |
|---|---|
Service account type | Identifies the type (or application) of the service account. Select the type from the drop-down list:
|
Name | Specifies the name of the service account. Enter a value that conforms to the following specifications:
NOTE: Letters are converted to uppercase when the Name is created. |
Email address | Identifies the email address of the service account. Enter a value that conforms to the following specifications:
|
Sign in Status | Specifies the sign-in status of the service account. Setting this field to:
|
IP Restriction | Indicates whether access to the application is allowed from any IP address or only from trusted IP address ranges. Setting this field to:
When set to Enabled, a user-entry field is displayed and an IP address range that is public, in IPv4 format, and in Class Inter-Domain Routing (CIDR) notation must be entered. NOTES:
To define additional IP address ranges, select + Add another. Each time this is selected, a new user-entry field is displayed. To delete an IP address range when more than one range is defined, select the X next to the IP address range. An example of a service account with IP restrictions enabled and multiple trusted IP address ranges defined is shown in the following figure. Figure: Create Service Account dialog 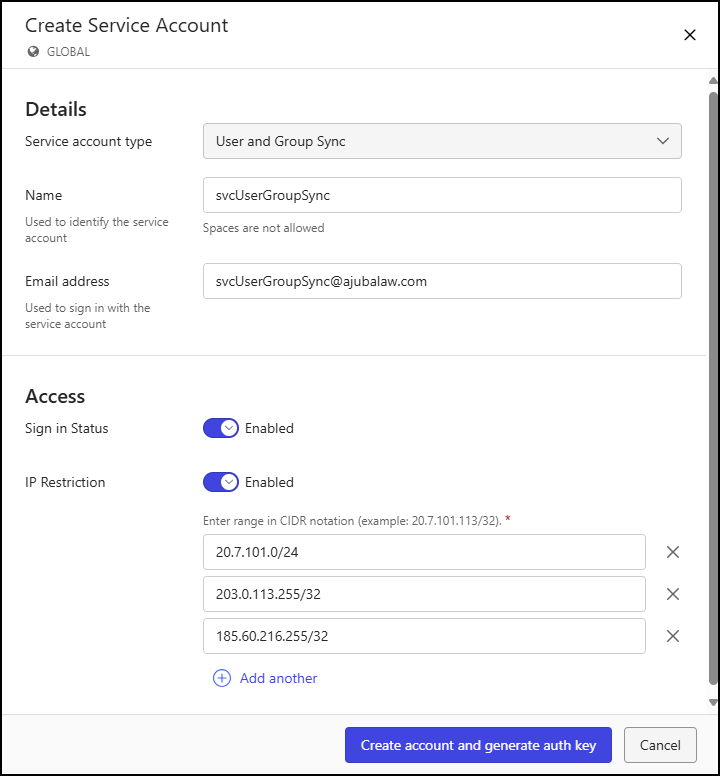 |
Select Create account and generate auth key. The service account is created and a confirmation dialog is displayed.
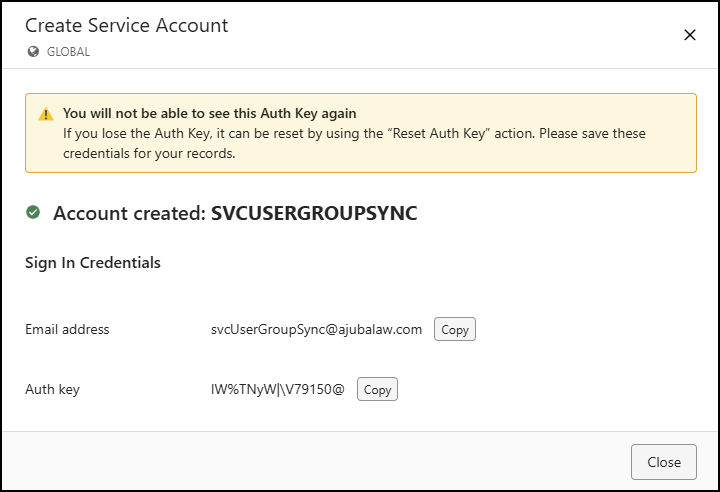
The sign-in credentials (Email address and Auth key) for the service account are shown in the confirmation dialog. You can copy these values by selecting the associated Copy button.
NOTE: The authorization key is displayed only in the confirmation dialog. You should copy and save the key for use when signing in. If you lose the key, you’ll need to reset it.
Select Close to return to the Service Accounts page.
View a service account
To view service account details and access settings, perform one of the following actions:
Select a service account name.
Select a service account check box, then select View on the ribbon bar.
Right-click anywhere on a service account row, then select View.
Select the
 icon for a service account row, then select View.
For each of these actions, the Service Accounts view is displayed.
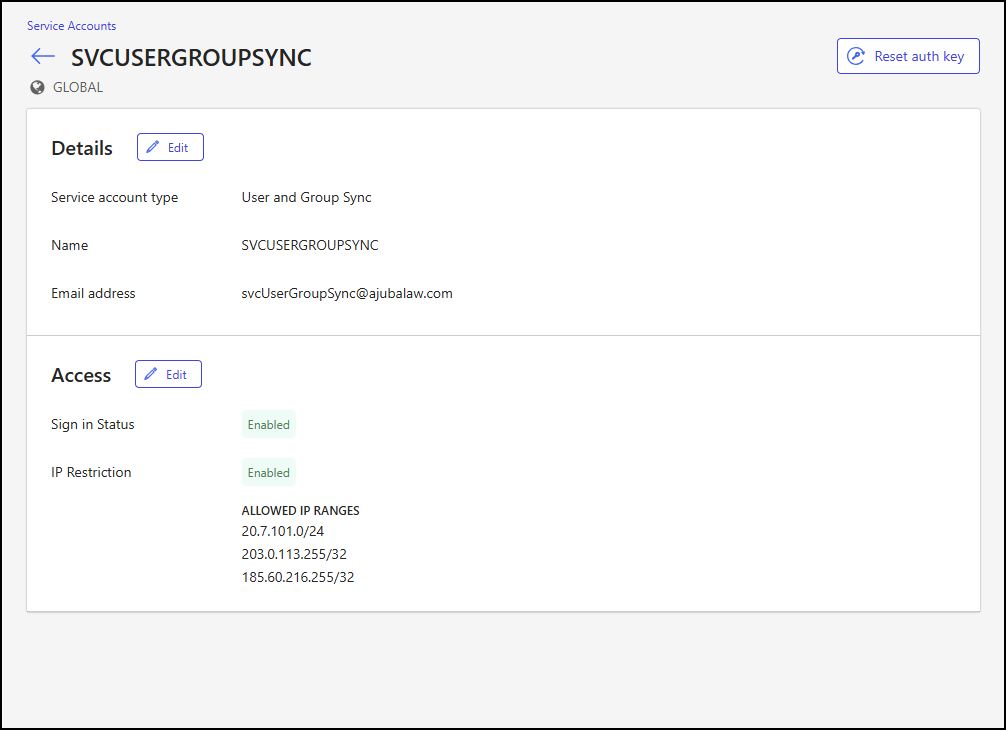
This view lets you perform the following actions:
To edit service account details, select Edit in the Details section of the view.
To edit service account access settings, select Edit in the Access section of the view.
To reset the authorization key of the service account, select Reset auth key.
Service account actions
The following service account actions are supported:
Update service account details
To update service account details, perform one of the following actions:
Select a service account name. In the Details section of the Service Accounts page, select Edit.
Select a service account check box, and then select Edit details on the ribbon bar.
Right-click anywhere on a service account row, and then select Edit details.
Select the
icon for a service account row, and then select Edit details.
For each of these actions, the Edit Detail dialog is displayed.
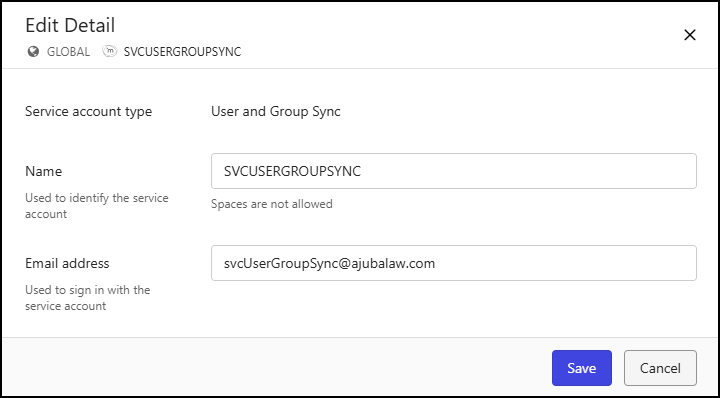
In the Edit Detail dialog, you can update the service account name and email address. For details about configuring these fields, refer to the Create Service Account fields table.
Update service account access
The sign-in status of a service account can be toggled between the enabled and disabled states.
Enable a service account
If the service account is disabled, perform one of the following actions to enable it:
Select a service account name.
In the Access section of the Service Accounts page, select Edit.
In the Edit Access dialog, slide the Sign in Status toggle to enable the account.
Figure: Edit Access dialog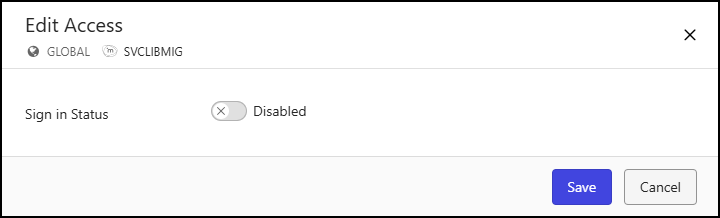
Select a service account check box, and then select Enable Sign in on the ribbon bar.
Right-click anywhere on a service account row, and then select Enable Sign in.
Select the
icon for a service account row, and then select Enable Sign in.
Disable a service account
If the service account is enabled, perform one of the following actions to disable it:
Select a service account name.
In the Access section of the Service Accounts page, select Edit.
In the Edit Access dialog, slide the Sign in Status toggle to disable the account.
Figure: Edit Access dialog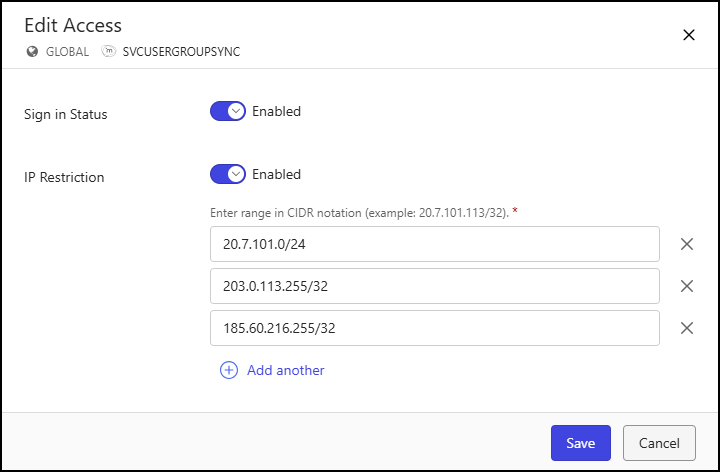
Select a service account check box, and then select Disable Sign in on the ribbon bar.
Right-click anywhere on a service account row, and then select Disable Sign in.
Select the
icon for a service account row, and then select Disable Sign in.
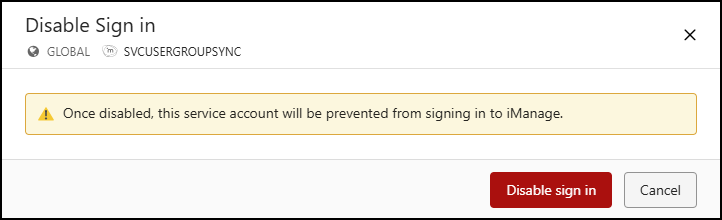
After each of these actions to disable a service account, a warning message is displayed, letting you continue with the disable action or cancel it.
Edit IP restrictions
View IP restrictions
The IP Restriction column on the Service Accounts page shows whether IP restrictions are enabled or disabled for each account. For an account for which IP restrictions are enabled, hovering over the column entry displays the trusted IP address ranges of the account, as shown in the following figure.
Manage IP restrictions
IP restrictions for an existing service account can be managed by performing one of the following actions. Depending on the action taken, either the Edit IP Restrictions or Edit Access dialog opens.
Select a service account name. In the Access section of the service account view, select Edit. The Edit Access dialog is displayed.
Select a service account check box, and then select Edit IP Restrictions on the ribbon bar. The Edit IP Restrictions dialog is displayed.
Right-click anywhere on a service account row, and then select Edit IP Restrictions. The Edit IP Restrictions dialog is displayed.
Select the
icon for a service account row, and then select Edit IP Restrictions. The Edit IP Restrictions dialog is displayed.Select the
icon for a service account row, and then select View. In the Access section of the service account view, select Edit. The Edit Access dialog is displayed.
The Edit IP Restrictions and Edit Access dialogs are shown in the following figures.
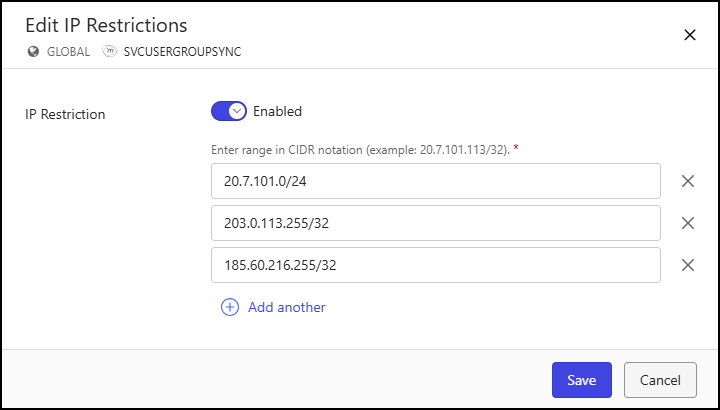
For details about configuring IP restrictions, refer to the IP Restriction field in the Create Service Account fields table.
NOTE: Changes to IP Restriction settings are applied the next time the service account is used to sign in.
Reset the authorization key
An authorization key is generated when a service account is created. This key is used along with the email address of the service account to sign in to the iManage application. You can reset the authorization key by performing one of the following actions:
Select a service account name. On the Service Accounts page, select the Reset auth key button.
Select a service account check box, and then select Reset auth key on the ribbon bar.
Right-click anywhere on a service account row, and then select Reset auth key.
Select the
icon for a service account row, and then select Reset auth key.
For each of these actions, the Reset auth key dialog is displayed.

To continue with the reset, select Yes, reset auth key. The authorization key is reset and a confirmation dialog is displayed.
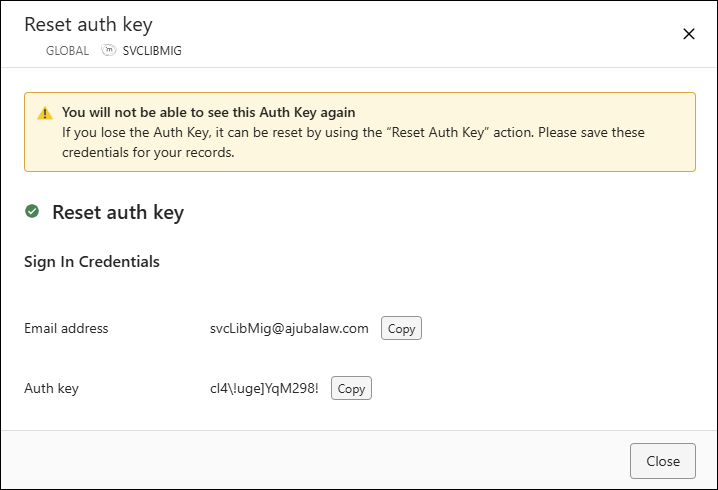
The sign-in credentials for the service account are displayed in the Email address and Auth key fields of the confirmation dialog. You can copy these values by selecting the associated Copy button.
NOTE: The authorization key is displayed only in the confirmation dialog. You should copy and save the key for use when signing in. If you lose the key, you’ll need to reset it.
Configure the Service Accounts table
Service accounts are displayed in a table on the Service Accounts page. By default, the following columns are displayed in this table:
Name
Service account type
Email
Sign in Status
IP Restriction
To add, remove, or reorder the columns, select the gear icon at the far right of the Service Accounts table.

In the Edit Columns dialog:
To add a column to the output, hover over the column name in the Available Columns panel and select the + icon. This action moves the column to the Displayed Columns panel.
To remove a column from the output, hover over the column name in the Displayed Columns panel and select the X icon. This action moves the column to the Available Columns panel.
To reorder columns, select and drag a column in the Displayed Columns panel.
To return to the default column display and order, select Reset to default.
To save your column display and order changes, select Save or select Cancel to abandon your changes.
Download the Service Accounts table
To download the Service Accounts table to your device, select the ![]() icon in the upper-right portion of the Service Accounts page, and then select Download as CSV.
icon in the upper-right portion of the Service Accounts page, and then select Download as CSV.