NOTE: To administer global users, the user signed in to iManage Control Center must be assigned to a Global Role that has the User Management privilege. For more information, refer to Global privilege descriptions.
To administer iManage Work library-level users, the user signed in to Control Center must be a member of the NRTADMIN group, or be assigned to a role with Tier 1 or Tier 2 Control Center access. For more information about the specific operations allowed, refer to Understanding tiers.
Modifications to these settings may require up to eight hours to take effect.
A user is the basic entity for accessing iManage. For more information, refer to User Management.
Understanding global and library-level user management
On the Users page, iManage Control Center enables you to manage users across all libraries (Global) or per library (Library-level):
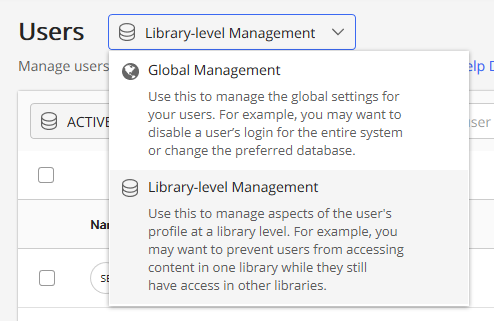
Global Management: Select this option to view, manage, and create global users. Global users are created and managed independently of any iManage Work library. Changes made to a user's profile or settings are updated at a global level, and not individually within each library.
TIP: A user account must exist at the Global Management level before the user can be assigned (granted access) to any iManage Work library.
Library-level Management: Select this option to specify the iManage Work libraries a global user may access.
Selecting this option displays a secondary menu where you can select an individual Work library.Figure: Library menu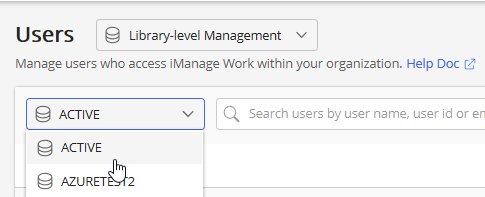
The list of users displayed changes based on your selection.
Creating users
Users for an iManage Work system are created in one of the following ways: Migration, directory service, and manually. For more information about these options, refer to User Management.
The following steps describe how to create a user manually using iManage Control Center.
Browse to Access > Users.
Select Global Management, and then select +Create User. The Create User dialog is displayed.
Figure: Create User dialog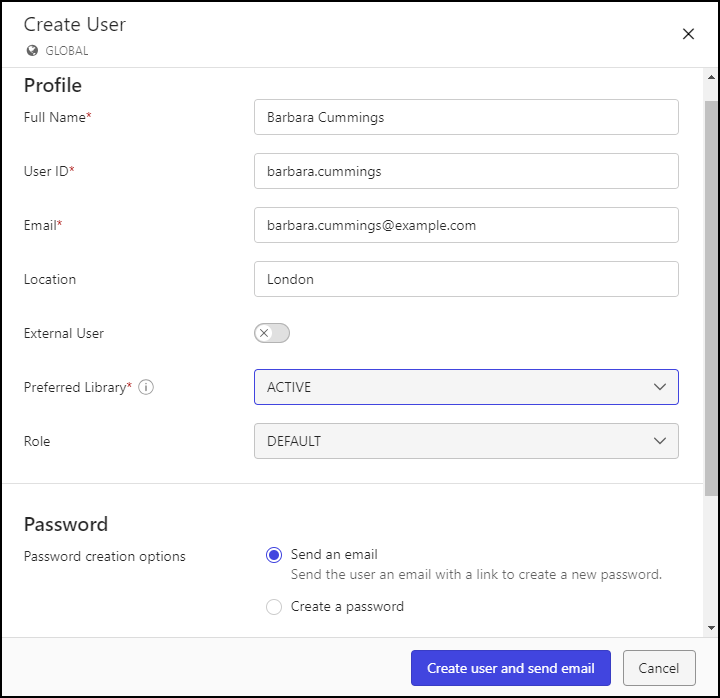
Enter information for this user as described in the following table, and then select Create or Create user and send email. The user account is created.
Continue with Assigning users to a library.
Table: User account information
Field | Description |
|---|---|
Profile | |
Full Name (Mandatory) | Enter the user's full name, such as Andrew Case, or Marcie J. Davenport-Williams.
|
User ID (Mandatory) | Enter a unique identifier for this user. This User ID is the user's personal identification within the iManage Work system. When entering the user Id, follow company guidelines such as the first name and last name order, abbreviations, separation characters, and so on. For example: ACASE or MARCIE-DAVENPORT .
NOTE: Letters are converted to uppercase when the User ID is saved. |
Email (Mandatory) | Enter the user's email address, typically the company email address for the user. It must be unique across all users connecting to http://cloudimanage.com .
|
Location | Enter the user's location, for example, Chicago.
|
External User | Select this toggle to define this user as an external user. An external user has no default security access and must later be assigned explicit access for their tasks. An external user is a virtual user without any privileges over content, unless explicitly granted on the content ACL. For example, an external user may be a customer who requires temporary access, a part-time contractor, vendor, or partner. Default: not selected |
Preferred Library | Select the default library for this user. Each user is required to have one preferred library. It stores the user's preferred settings such as language preference and default search form for iManage Work advanced searches. |
Role | Select a library role to define the privileges assigned to this user. NOTE: This field is dependent on the Preferred Library field. |
Password | |
Password creation options | Select one of the following options to create a password for this user:
NOTE: For security reasons, the link provided in the email remains valid for 7 days. If the user doesn't take action within 7 days, the link is deactivated, and the iManage Work administrator must resend the email to the user from iManage Control Center.
|
Password expiration | Specifies if the user's password expires. Set this field to:
Passwords for virtual users expire after 90 days. This time period can't be changed. NOTE: As best practice, setting Password expiration to Disabled should be discouraged and should only be used for automation or similar use cases where an expired password may disrupt a workflow. In these instances, password changes should be automated through the iManage Work Universal API. |
Access | |
Sign In Status | Specifies the user's sign in status. Set this field to:
|
IP Restriction | Specifies whether the user can access iManage Work only from trusted IP address ranges. Set this field to:
When set to Enabled, a user-entry field is displayed and an IP address range that is public, in IPv4 address format, and in Class Inter-Domain Routing (CIDR) notation must be entered. NOTES:
To define additional IP address ranges, select + Add another. Each time this is selected, a new user-entry field is displayed. To delete an IP address range when more than one range is defined, select the X next to the IP address range. An example of a user with IP restrictions enabled and multiple trusted IP address ranges defined is shown in the following figure. Figure: IP restrictions with multiple trusted IP ranges 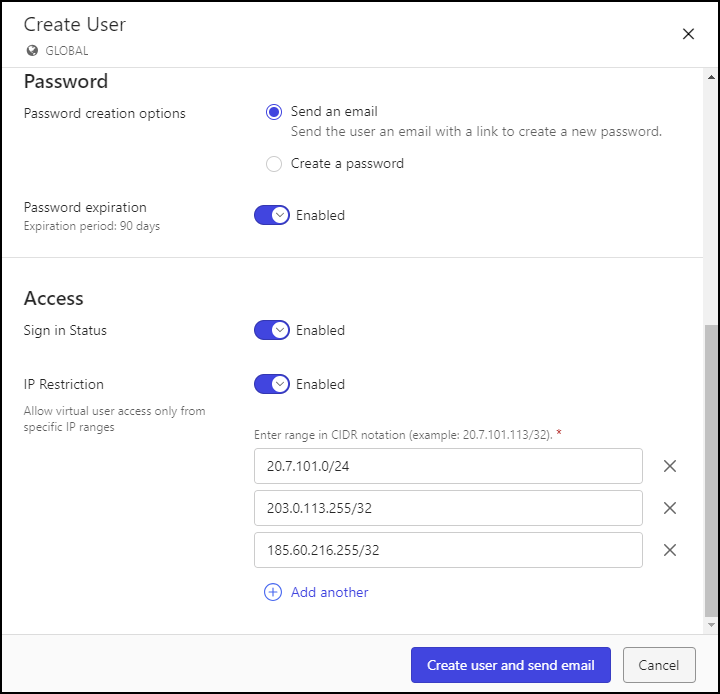 NOTE: Changes to IP Restriction settings for a virtual user are applied the next time they sign in. For more information, refer to IP Restrictions. |
Assigning users to a library
Assigning a user to a library provides them access to the iManage Work library. If a user isn't assigned to a library, they can't see any workspaces, folders, documents, or email within the library, or perform any actions within the library.
NOTE: Library assignments are cached for up to 8 hours. When a user has already signed in to iManage Work, and is then assigned to another library, it may take several hours before the user can access the library.
From the Users drop-down list, select Library-level management.
From the drop-down list, select the appropriate library where this user is to be assigned.
Select Assign User to Library.
Figure: Assign User to Library dialog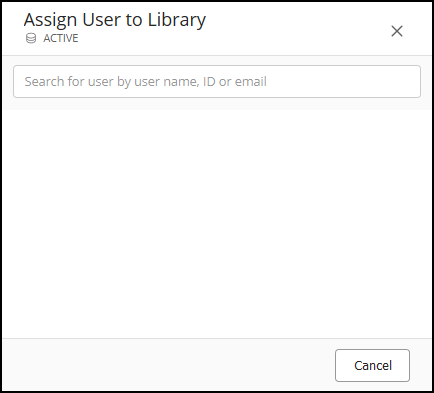
In the search field of the Assign User to Library dialog, begin typing the user's name. A list of users matching the characters you entered is returned.
Figure: Assign User to Library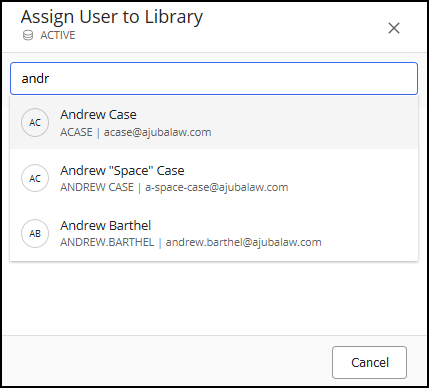
Select the appropriate user.
Figure: Assign User to Library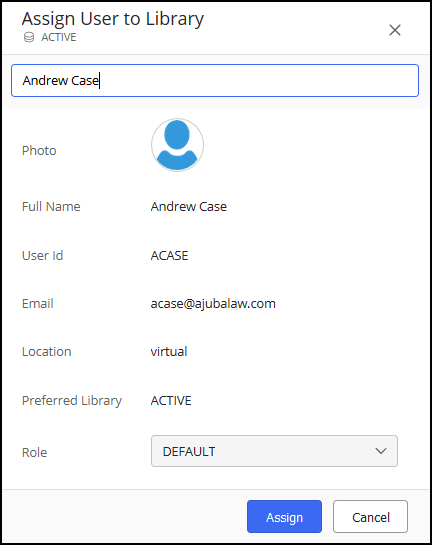
In the Role drop-down list, select a library role for this user. This role defines the privileges assigned to the user within this library.
Select Assign. The user is assigned to the selected library.
To remove this assignment, you must Disable Sign in for the user for the specific library. The user's content and activity within the library is preserved; however, the user will no longer be able to access the library after they're disabled.
For more information, refer to Enabling or disabling users.
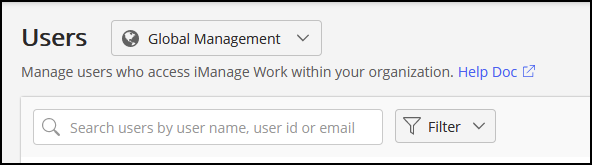
Searching for users
Use the search field to search for a user by the user's name, ID, or email.
Select the Filter option to filter users shown in the list based on information about the users, such as Sign in Status, Location, Preferred Library, IP Restriction, and so on.

Deleting users
Users imported or created from a directory service, such as Windows Active Directory, are managed by the company's network system administrators. Changes are automatically synchronized, or saved, to iManage Work.
iManage Work system administrators can't delete virtual users. The preferred method is to set the user's account's Sign in Status to Disabled. For more information, refer to Enabling or disabling users.
Unlocking a user account
iManage Work limits the number of times a virtual user can enter an incorrect user name or password when signing in.
After five failed attempts, the user account is temporarily locked. During this time, the user is prevented from attempting to sign in again for 15 minutes.
After 10 total failed attempts, the user account is locked again.
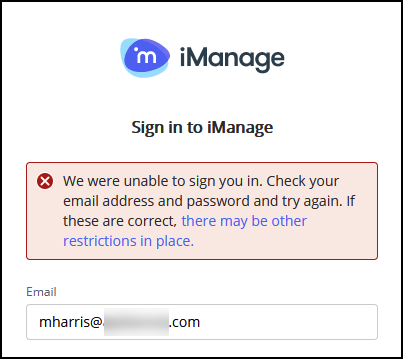
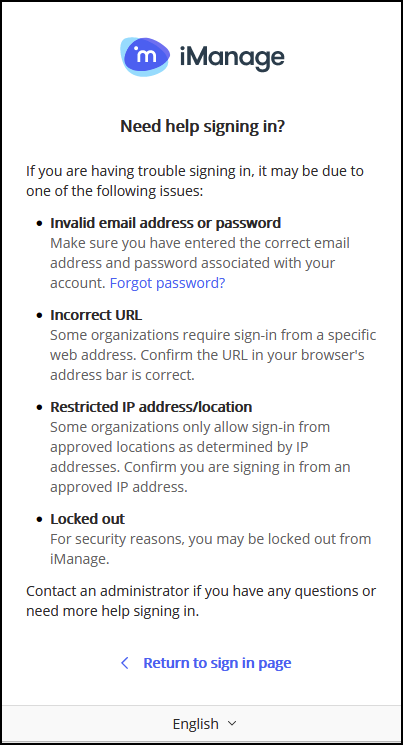
When a user attempts to sign in while their account is locked, they receive the following messages.
Figure: Account locked notification and list of possible restrictions
When their account is locked, the user is also notified by email. For more information about the email notification provided, refer to Email notifications.
The user must contact an iManage Work administrator to unlock the account within iManage Control Center.
To unlock a user:
In iManage Control Center, browse to Access > Users.
At the top of the page, select Global Management.
NOTE: Users can’t be unlocked at the Library-level view.
Locate the user that’s locked.
TIP: Use the Filter options to see a list of user accounts which are locked.
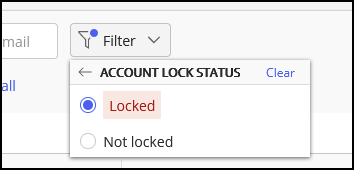
The Sign in Status column displays the accounts that are locked.
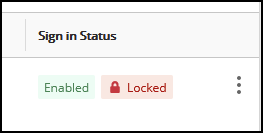
Right-click the locked user account and select Unlock. The Unlock dialog appears.
Select Unlock to confirm the operation.
Changing user passwords
NOTE: Passwords can be changed only from the Global Management view at the top of the Users page.
In iManage Control Center, browse to Access > Users.
At the top of the page, select Global Management.
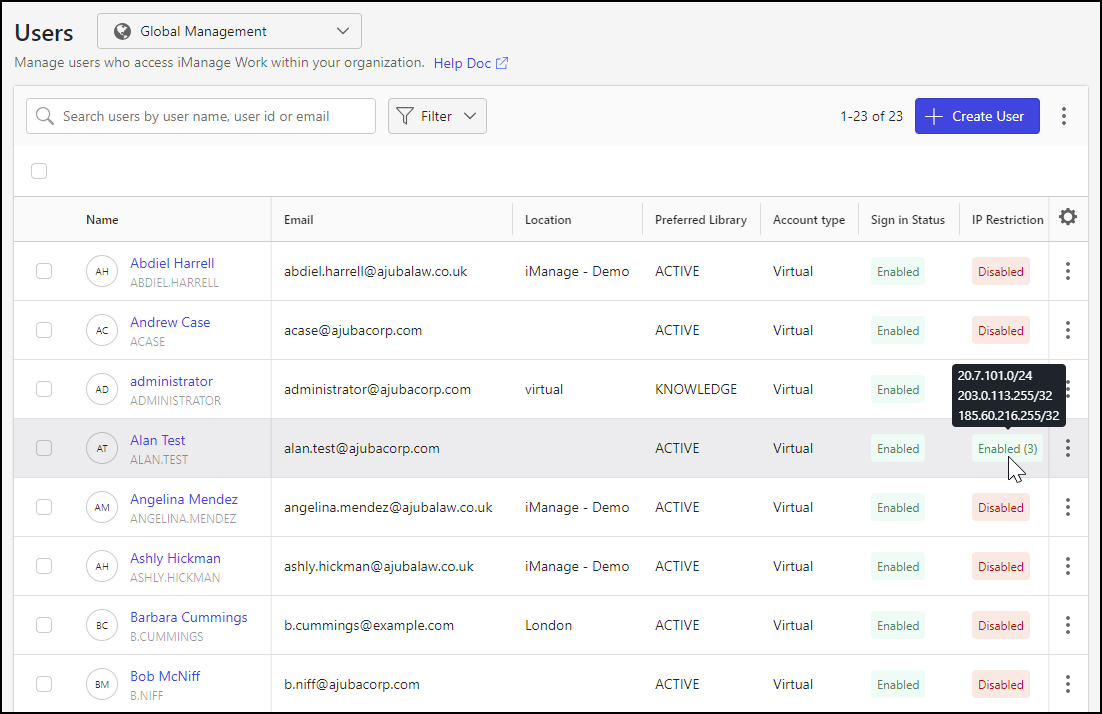
Figure: Users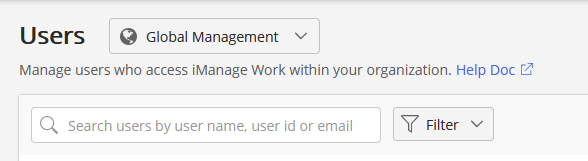
Perform one of the following actions:
Select one or more users in the list, then select Change password on the ribbon bar.
Select the
 icon next to a user, then select Change password.
Right-click on a user, then select Change password.
The Change Password dialog is displayed.
Figure: Change Password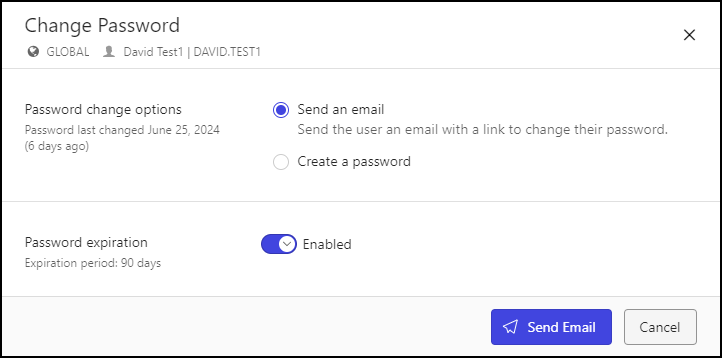
Select one of the following options:
Send an email: iManage sends an email to the user to change their password. The email includes a link to the iManage sign-in page where the user must enter their new password.
For more information about the email notification provided, refer to Email notifications.
NOTE: For security reasons, the link provided in the email remains valid for three hours. If the user doesn't act within three hours, the link is deactivated, and the iManage Work administrator must resend the email to the user from iManage Control Center.
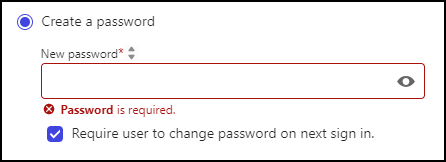
Create a password: Manually enter a valid password in iManage Control Center.
After selecting this option, the New password field is displayed.
Figure: New password field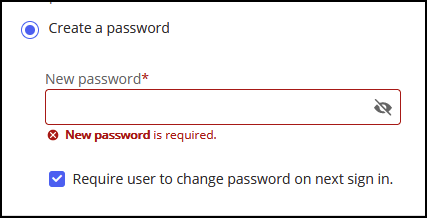
Enter the user's new password. No default password is available and a new password is required.TIP: You must provide this password to the user.
Password requirements:
A minimum of 12 and a maximum of 64 characters.
At least one uppercase letter.
At least one lowercase letter.
At least one number or one special character from the following list:
! # $ % & ‘ ( ) * + , - . / : ; < = > ? @ [ ] ^ _ ` { | } ~ " (including the space character)
Require user to change their password on next sign in: Select this option to force the user to change their password the next time they sign in.
Select Save.
Enabling or disabling users
Enable or disable sign-in at the global level
Before changing the Sign in status
If using a directory synchronization solution, ensure the user is appropriately enabled or disabled in Active Directory. If the Sign in status is updated in iManage and not in Active Directory the directory synchronization solution will update the Sign in status based on the Account options in Active Directory.
Enabling or disabling sign-in for a user at the global management level allows or restricts, respectively, access to iManage Work. A user can't sign in to iManage Work when their account status is set to Disabled.
When disabling a user, the user's content and activity within the iManage Work is preserved.
If a user has been disabled, they can be enabled to regain access at any time.
User accounts can also be locked because of too many failed sign-in attempts. This lock occurs automatically by the system without any action by an administrator. Unlocking and disabling sign-in are two independent states. For more information, refer to Unlocking a user account.
NOTE: When you disable sign-in for users at the global management level, their access is blocked immediately.
Browse to Access > Users.
At the top of the Users page, select Global Management.
Perform one of the following actions:
Select a user in the list, then select Disable Sign in or Enable Sign in on the ribbon bar.
Select the
icon next to a user, then select Disable Sign in or Enable Sign in.Right-click on a user, then select Disable Sign in or Enable Sign in.
If you are disabling sign in, select Disable Sign In again to confirm the operation.
Enable or disable sign-in at the library level
Enabling or disabling sign-in for a user at the library level allows or restricts, respectively, access to a specific iManage Work library. When you disable sign-in for a user, their content and activity within the library is preserved; however, the user will no longer be able to access the library once disabled.
If you disable a user in all libraries, they'll be restricted from signing in to iManage Work entirely.
If you enable sign-in for a user at the global level, you must also separately enable their sign-in status for any iManage Work libraries for them to regain access to those libraries.
Browse to Access > Users.
At the top of the Users page, select Library-level Management.
From the drop-down list at the top of the screen, select the appropriate library where this user is to be enabled or disabled.
Perform one of the following actions:
Select a user in the list, then select Disable Sign in or Enable Sign in on the ribbon bar.
Select the
icon next to a user, then select Disable Sign in or Enable Sign in.Right-click on a user, then select Disable Sign in or Enable Sign in.
If you are disabling sign-in, select Disable Sign In again to confirm the operation.
IP restrictions
Managing IP restrictions
The IP Restriction setting allows you to assign trusted IP address ranges to iManage Work virtual user accounts through iManage Control Center. When enabled for a user, the user can only sign in to iManage Work from a trusted IP address. Attempts to access the system from a non-trusted IP address are denied. This capability:
Is defined per user and isn't based on group or role assignments.
Is managed for users at the global management level only.
Applies to virtual users only.
Is disabled by default.
NOTE: iManage Security Policy Manager doesn't enforce IP restrictions for virtual users.
To manage IP restrictions for a user:
In iManage Control Center, browse to Access > Users.
At the top of the Users page, select Global Management.
To define IP restrictions for a new virtual user through the Create User dialog:
Select the + Create User button on the Users page.
Scroll to the Access section of the Create User dialog and set IP Restriction to Enabled.
Enter one or more trusted IP address ranges.
To manage IP restrictions through the Edit IP Restrictions dialog:
Perform one of the following actions:
Select the check box for a user in the list, then select Edit IP restrictions on the ribbon bar.
Select the
icon next to a user, then select Edit IP restrictions.Right-click on a user, then select Edit IP restrictions.
In the Edit IP Restrictions dialog:
Set the IP Restriction field to Enabled or Disabled.
If the IP Restriction field is set to Enabled, enter one or more trusted IP address ranges.
To manage IP restrictions through the Edit Access dialog:
Perform one of the following actions:
Select a user name in the users table.
Select the check box for a user in the list, then select View on the ribbon bar.
Select the
icon next to a user, then select View.Right-click on a user, then select View.
In the Details tab of the <Username> page, scroll to the Access section and select Edit.
In the Edit Access dialog:
Set the IP Restriction field to Enabled or Disabled.
If the IP Restriction field is set to Enabled, enter one or more trusted IP address ranges.
Select Create user and send email, Create, or Save, depending on which dialog you're in.
NOTE: IP restrictions can be enabled only when a virtual user's Sign in Status is set to Enabled. Consequently, the option to edit IP restrictions isn't available for users whose Sign in Status is set to Disabled.
Displaying IP restrictions in the Users table
IP restrictions are hidden by default in the table in the Users page table. To display IP restrictions:
In the Users table, select the Gear icon to open the Edit Columns dialog. This dialog lets you add and remove columns and change the order in which columns are displayed.
In the Available Columns panel, hover over the IP Restriction column and select the + icon to move it to the bottom of the the Displayed Columns panel.
Drag and drop the IP Restriction column to change column order, if desired.
Select Save.
Adding the IP Restriction column to the Users page table is shown in the following animation.
NOTE: On the Users page, IP restriction settings are viewable if you’re using Global Management but not if you’re using Library-level Management.
The IP Restriction column shows whether IP restrictions are enabled or disabled for each user. For a user for which IP restrictions are enabled, hovering over the column entry displays the user’s trusted IP address ranges, as shown in the following figure:
Filtering output by IP Restriction status
Filtering output based on IP restriction status is supported in the Users page. Perform the following steps to apply the IP Restriction filter:
From the Filter drop-down list, select IP Restriction.
In the IP Restriction filter option dialog, select:
Enabled to show only the users with IP restrictions enabled.
Disabled to show only the users with IP restrictions disabled.
Use one of the following methods to clear IP restriction filtering:
From the Filter drop-down list, select IP Restriction.
In the IP Restriction filter option dialog, select Clear.
In the search ribbon:
Select X next to the IP Restriction filter option, or
Select Clear all.
IP restriction filtering behavior is shown in the following animation.
Adding users to a group
You can also add users to a group from the Groups page. For more information, refer to Groups.
Browse to Access > Users.
From the drop-down menu at the top of the screen, select the appropriate library where this user is to be enabled or disabled.
Perform one of the following actions:
Select one or more users in the list, then select Add To Groups on the ribbon bar.
Select the
icon next to a user, then select Add To Groups.Right-click on a user, then select Add To Groups.
Select groups from the groups list or look for groups using the search field and select Add.
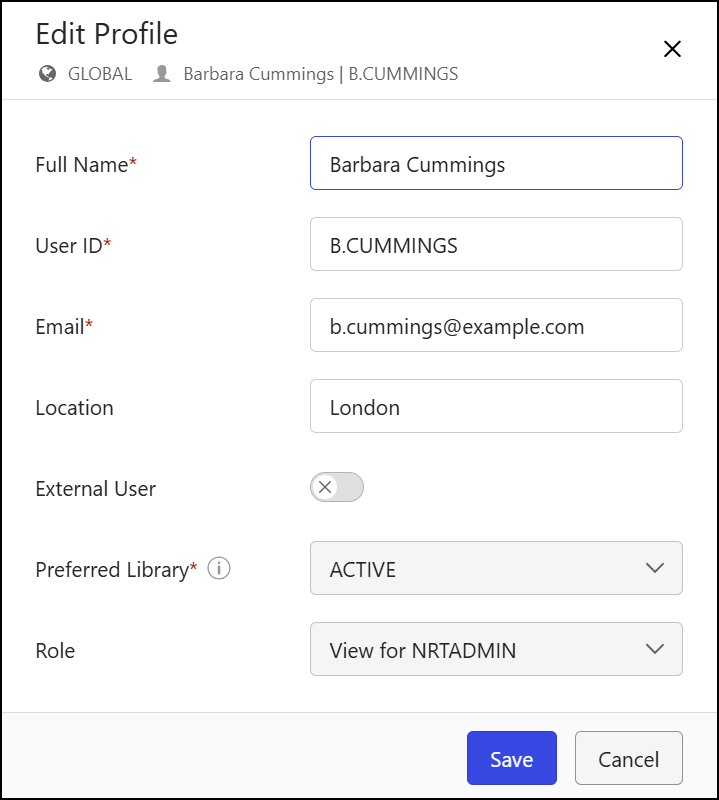
Editing user profiles
NOTE: If using a directory synchronization solution, user profile changes should be made in Active Directory. If changes are made in iManage Control Center and not in Active Directory, the directory synchronization solution will update the user profile to match the values in Active Directory after the next synchronization.
The following user profile fields can be updated:
Full Name
User ID
Email
Location
External User
Preferred Library
Role
NOTE: For more information about these fields, refer to the User account information table.
To update user profile fields, perform the following steps:
Browse to Access > Users.
From the drop-down list at the top of the screen, select Global Management.
Perform one of the following actions:
Select a user in the list, then select Edit Profile on the ribbon bar.
Select the
icon next to a user, then select Edit Profile.Right-click on a user, then select Edit Profile.
In the Edit Profile dialog, modify any of the available fields, then select Save.
IMPORTANT:
Each User ID must be unique.
User IDs can't be merged following this procedure.
Users can't be deleted.
There's no capability to remove users from iManage Cloud. The preferred method is to set the user's account's Sign in Status to Disabled. For more information, refer to Enabling or disabling users.
Disabled users don't count as billable users.
Editing user platform details
Browse to Access > Users.
At the top of the Users page, select Global Management.
Perform one of the following actions:
Select a user in the list, then select Edit Platform Details on the ribbon bar.
Select the
icon next to a user, then select Edit Platform Details.Right-click on a user, then select Edit Platform Details.
In the Edit Platform Details dialog, modify any of the following fields, and then select Save.
Table: Edit Platform Details options
Field | Description |
|---|---|
Account Type |
|
NOTE: No email notification is sent to the user when their account type is changed.
If you change the account type for a user from Enterprise to Virtual, and the system has no password for this user, the user can't sign in. As a best practice, change this user's password in iManage Control Center to manually set their password or generate an email to the user to set their password. For more information, refer to Changing user passwords.
Viewing user details
Browse to Access > Users.
To view a user's:
Global settings, select Global Management at the top of the Users page.
Library-level settings, select Library-level Management at the top of the Users page.
From the drop-down list at the top of the screen, select the appropriate library where this user is to be viewed.
Perform one of the following actions:
Select a user in the list, then select View on the ribbon bar.
Select the
icon next to a user, then select View.Right-click on a user, then select View.
The <Username> page appears and displays the following tabs:
Details: Lists the details about a user.
NOTE: Select Edit to modify details in each section on the dialog.Groups: Lists the groups associated with a user.
Creating an NRTADMIN User
NRTADMIN access is granted by adding the user to the NRTADMIN group within an iManage Work library. An NRTADMIN user automatically has full privileges within the library, and supersedes all other privileges.
NOTE: Only an NRTADMIN user can add other users to the NRTADMIN group. NRTADMIN applies only to users at the library level. An NRTADMIN can't be applied to users at the global level. An NRTADMIN is assigned to one library. The user must be defined and assigned to each library individually. To create an NRTADMIN user (add a user to the NRTADMIN group):
Browse to Access > Users.
From the drop-down list at the top of the screen, select the appropriate library where this user is to be enabled or disabled.
Perform one of the following actions:
Select a user in the list, then select Add to Groups on the ribbon bar.
Select the
icon next to a user, then select Add to Groups.Right-click on a user, then select Add to Groups.
Select NRTADMIN, and then select Add. The user is added to the NRTADMIN group.
Assigning users and groups
Users and groups must be assigned to iManage Work items. Items include workspaces, containers, and documents. To assign a user or group, use an iManage Work client, and not the iManage Control Center. Any user with sufficient access privileges for the item can make this assignment.
To assign a user or group:
Within an iManage Work client, browse to the item, and select Properties. The properties tab appears.
Select View Security Details . The Security Details tab appears.
Select Add Users/Groups.
Select the users and groups from among the available choices. Multiple selections can be made.
For each user or group, assign an access privilege level from the security drop-down list next to the user or group name.
Select Confirm to save the changes to the users and groups.
To remove a user or group:
Within an iManage Work client, browse to the item, and select Properties. The properties tab appears.
Select View Security Details . The Security Details tab appears.
Select Add Users/Groups.
Select the users and groups from among the available choices. Multiple selections can be made.
For each user or group, select Remove from their access privilege level of the security drop-down list next to the user or group name.
Select Confirm to save the changes to the users and groups.
Email notifications
iManage sends emails to the signed-in user to notify them of specific actions they need to take.
NOTE: Email notifications can't be customized. Information and instructions in the notifications are provided in English only.
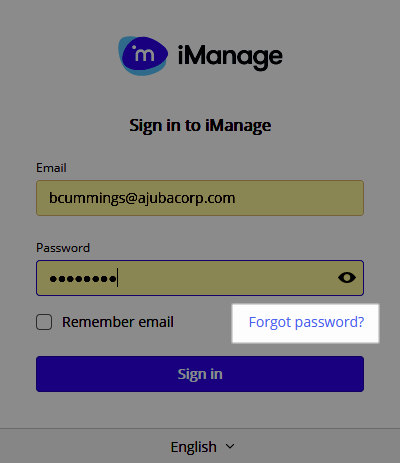
Forgot password
When a user enters their email address, but can't remember their password, they can select the Forgot password? link on the sign-in page. No action is required by an administrator.
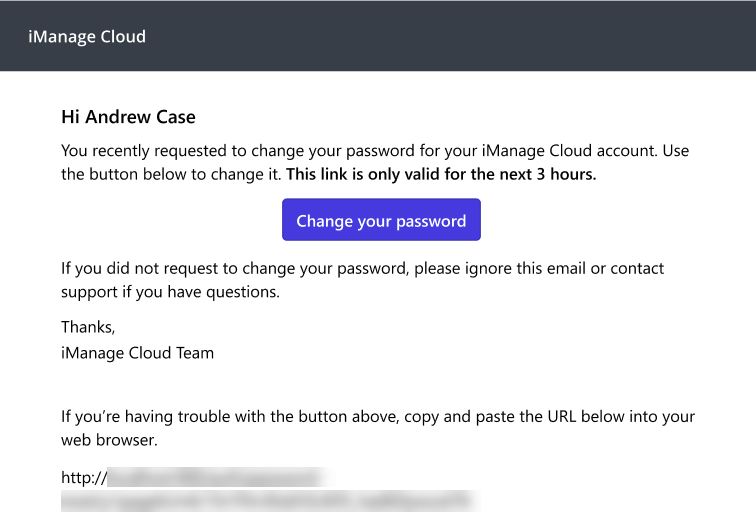
The user receives an email, as in the following example, which includes a link to change their password. The link remains active for 3 hours.
Users receive an email notification each time they select Forgot password?.
Only the link in the most recent email notification is active, and the user receives a message if they attempt to access a deactivated link:
Your password change link has expired or has already been used.
New account
When an administrator creates a new user in iManage Control Center, the administrator can choose to send an email. This welcome email includes instructions to the user to access the link provided in the email to create their password. The link remains active for 7 days.
For more information, refer to Creating users.
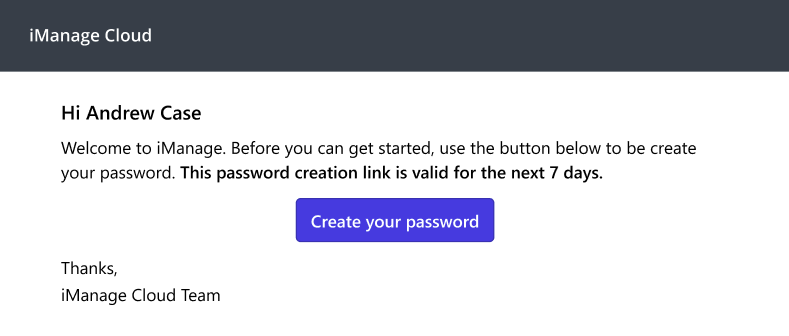
NOTE: For security reasons, the link provided in the email remains valid for 7 days. If the user doesn't take action within 7 days, the link is deactivated, and the iManage Work administrator must resend the email to the user from iManage Control Center. For more information, refer to Changing user passwords.
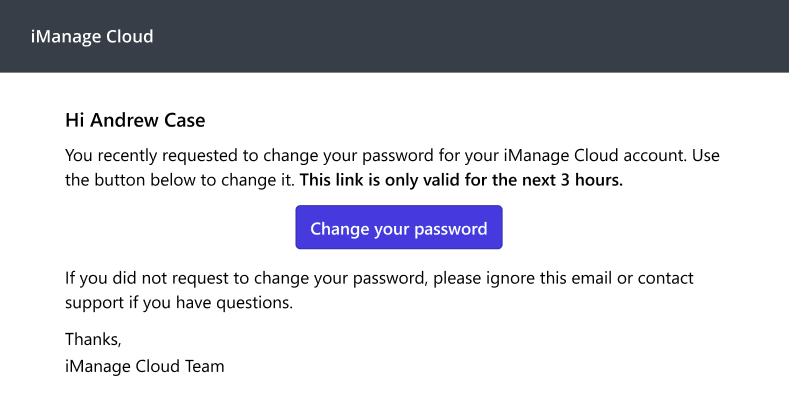
Password changes
An administrator can trigger an email to be sent to the user requiring them to change their password. For more information, refer to Changing user passwords.
The user receives the following email, which includes a link to change their password. The link remains active for 3 hours.
Account locked
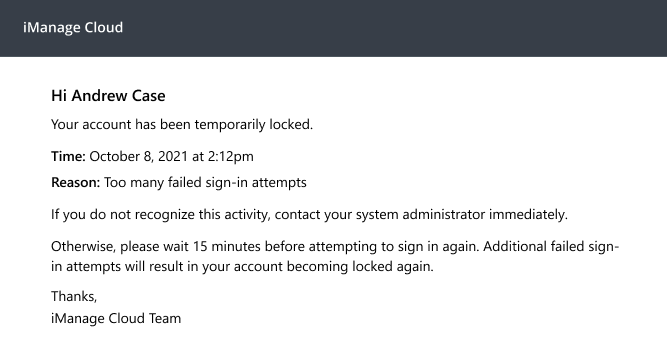
When a user attempts to sign in but is unsuccessful, their account becomes locked and they're prevented from further attempts to sign in.
After five failed attempts, the system locks the account temporarily for 15 minutes. The user may try to sign in again after 15 minutes.
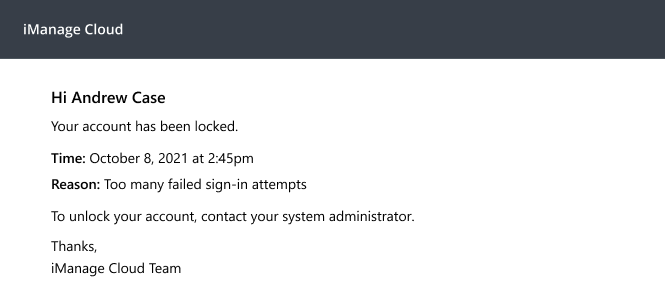
After 10 total failed attempts, the user's account is again locked and they'll have to contact their system administrator to unlock it.
When a user's account becomes locked, the system sends the following email notifications to the user.