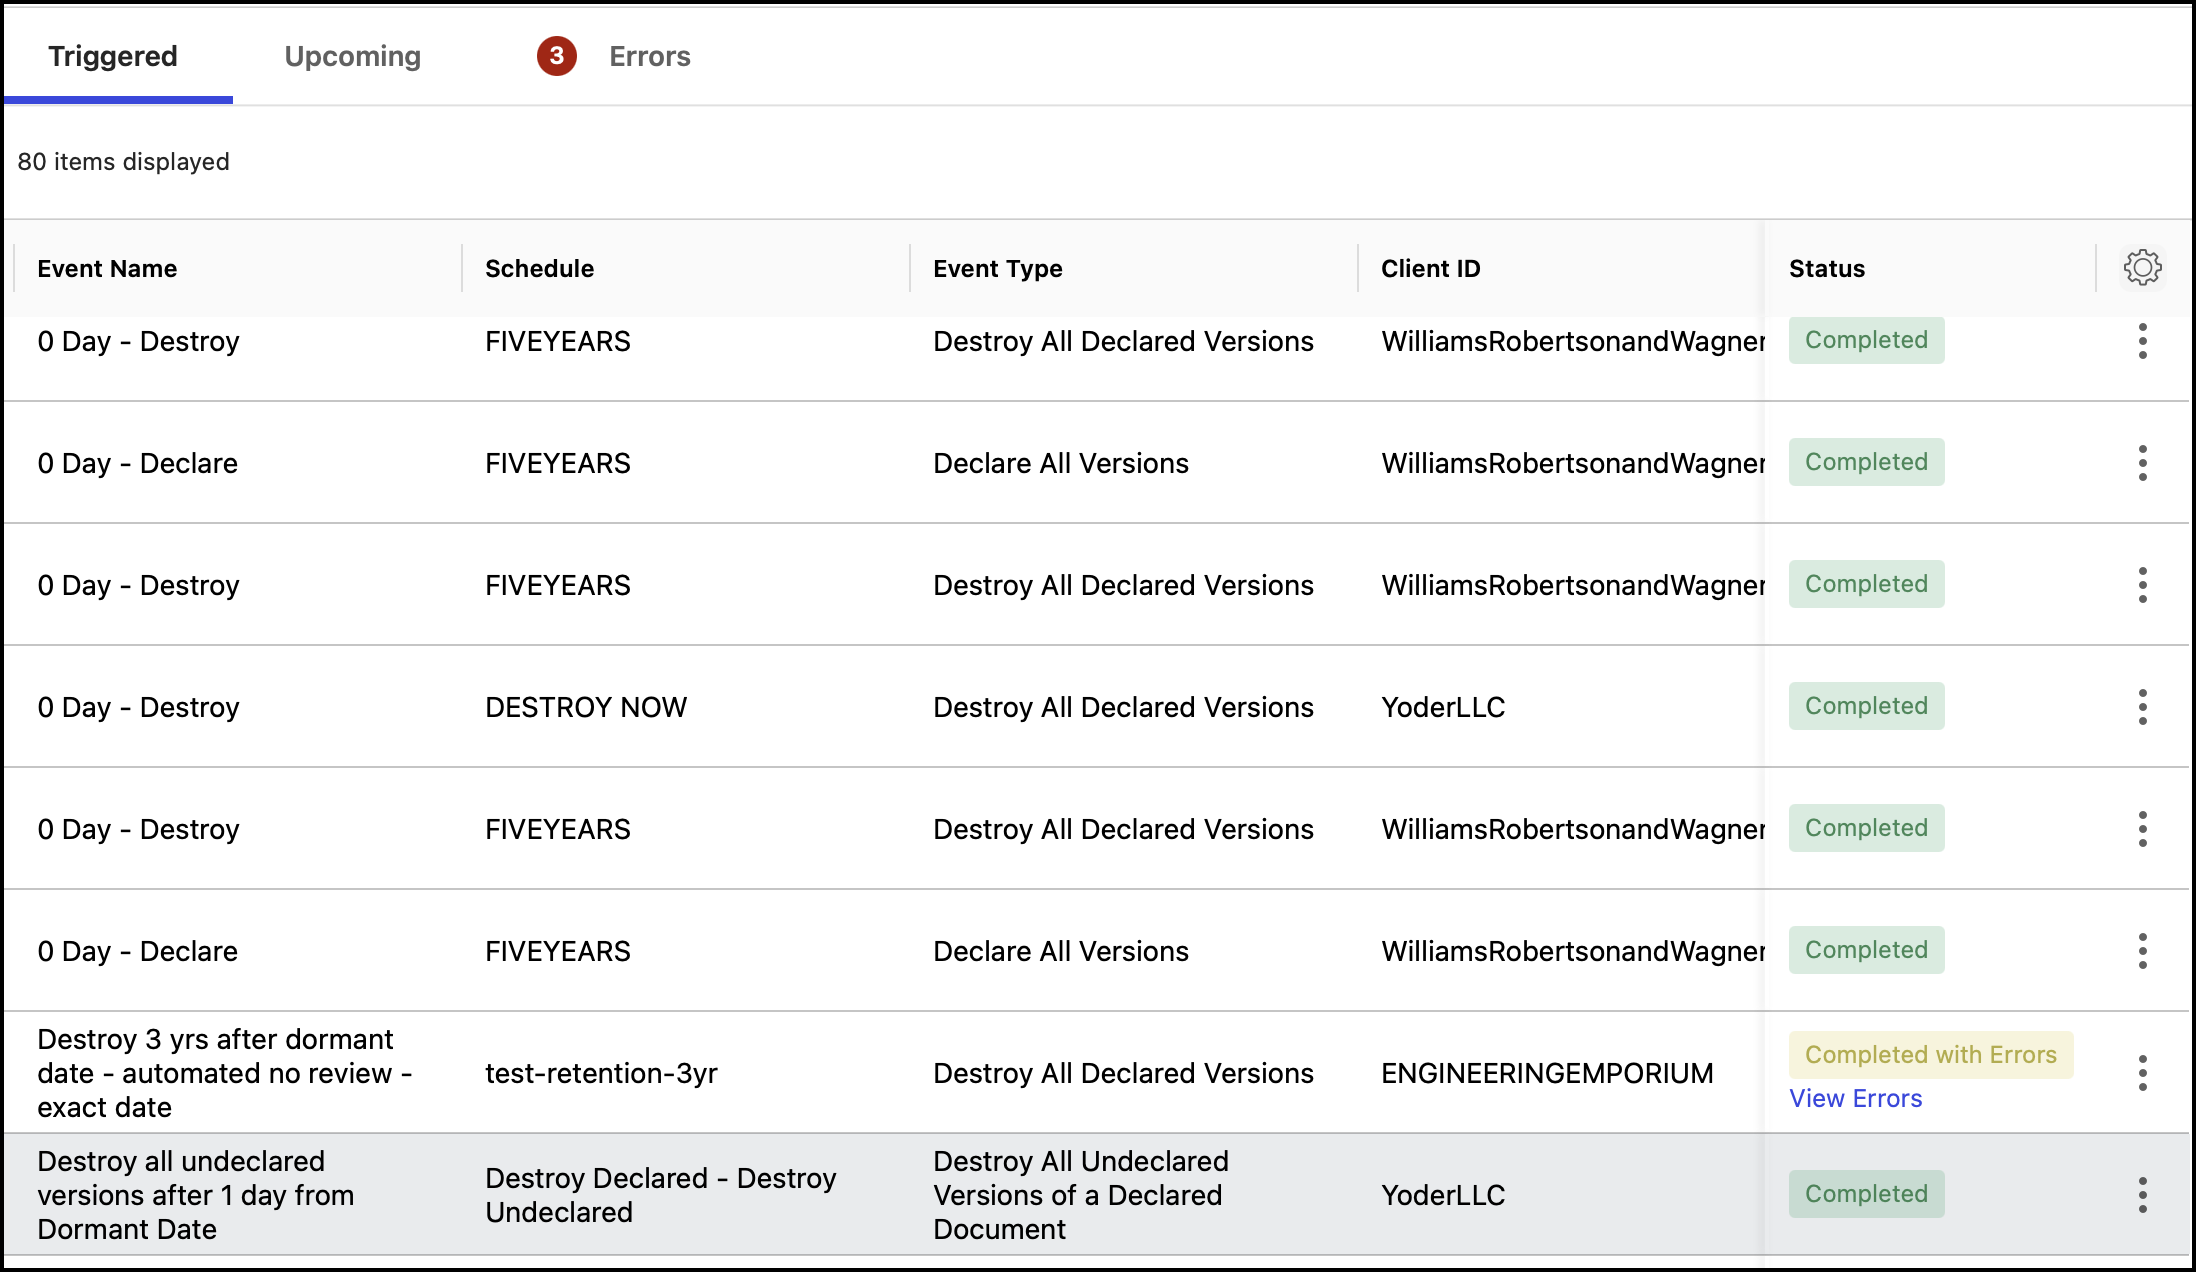
Records Managers can check for all triggered tasks by selecting Tasks and then selecting Triggered. All tasks that are processed or being processed are displayed as shown in the following figure.
IMPORTANT: When records are destroyed, they're deleted from iManage Work at cloudimanage.com and can't be retrieved or restored.
Records aren't destroyed immediately when events to destroy records are created or added to a schedule, or applied to workspaces, folders, or subfolders. Records are destroyed when tasks defined by these destroy events are manually or automatically executed.
Selecting table columns
Select the icon to display the list of Table Columns. You can select or deselect the columns you want to display on the Triggered Tasks page.
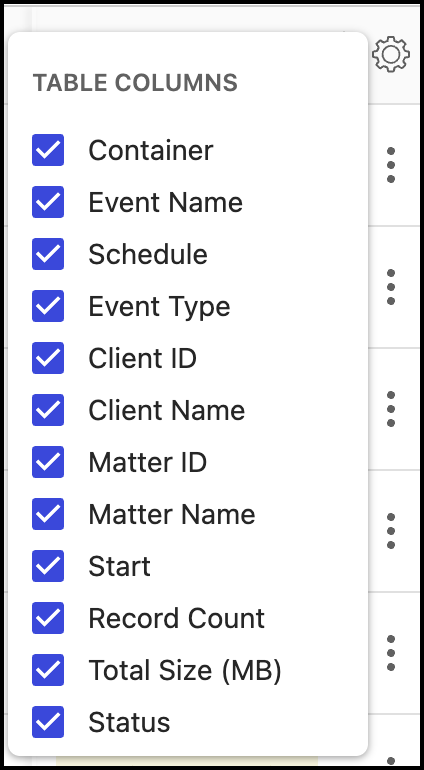
The Table Columns list includes the following options:
Container: Displays the workspace in which the records are destroyed. Records Managers can select the link provided in this column. Selecting the link takes Records Managers to the Destroyed Records page for that workspace, where they can look at all the profiles for records that were destroyed.
Event Name: Displays the name of the event applied to the schedule that is applied to the record.
Schedule: Displays the name of the schedule applied to the record.
Event Type: Displays the name of the event type selected for the event applied.
Client ID and Client Name: Displays the name and ID of the client associated with the records before they were destroyed. This information is sourced from iManage Work at cloudimanage.com.
Matter ID and Matter Name: Displays the name and ID of the workspace associated with the records before they were destroyed. This information is sourced from iManage Work at cloudimanage.com.
Start: Displays the time the task was triggered.
Record Count: Displays the number of records destroyed for the task. This is available only for destruction tasks.
Total Size (MB): Displays the total size of all the records destroyed for the task. This is available only for destruction tasks.
Status: Displays the status of the triggered task.
Using filters
Additionally, select Filters to view or hide the filter pane. In the filter pane:
In the Start Time section, select the time range. This displays all triggered tasks for the selected time range.
In the Status section, select the status of the task. This displays all the triggered tasks for the selected status. The available options are All, In Progress, Completed, and Completed with Errors.
In the Libraries section, select the library. This displays all triggered tasks applicable to the selected library.
In the Client section, select the client. This displays all triggered tasks for the selected client.
In the Matter section, select workspaces. You can select more than one workspace at a given time. This displays all triggered tasks for the selected workspace or workspaces.
In the Event Types section, select an event type. This displays all triggered tasks for the selected event type.
In the Event Name section, select an event name. This displays all triggered tasks for the selected event name.
In the Schedule section, select a schedule. This displays all triggered tasks for the selected schedule.
All the selected filters are displayed next to the Filters button as shown in the following figure. You can either select the  icon to clear a filter or select Clear All to clear all the selected filters.
