Using your company credentials, sign in to your Power Automate account.
In the left pane, select My flows. From the top, select Import > Import Package (Legacy).
Figure: Importing a package
Select Upload and then select the .zip template file from your file explorer. You'll be directed to the next page where you must review the package contents.
Figure: Reviewing package contents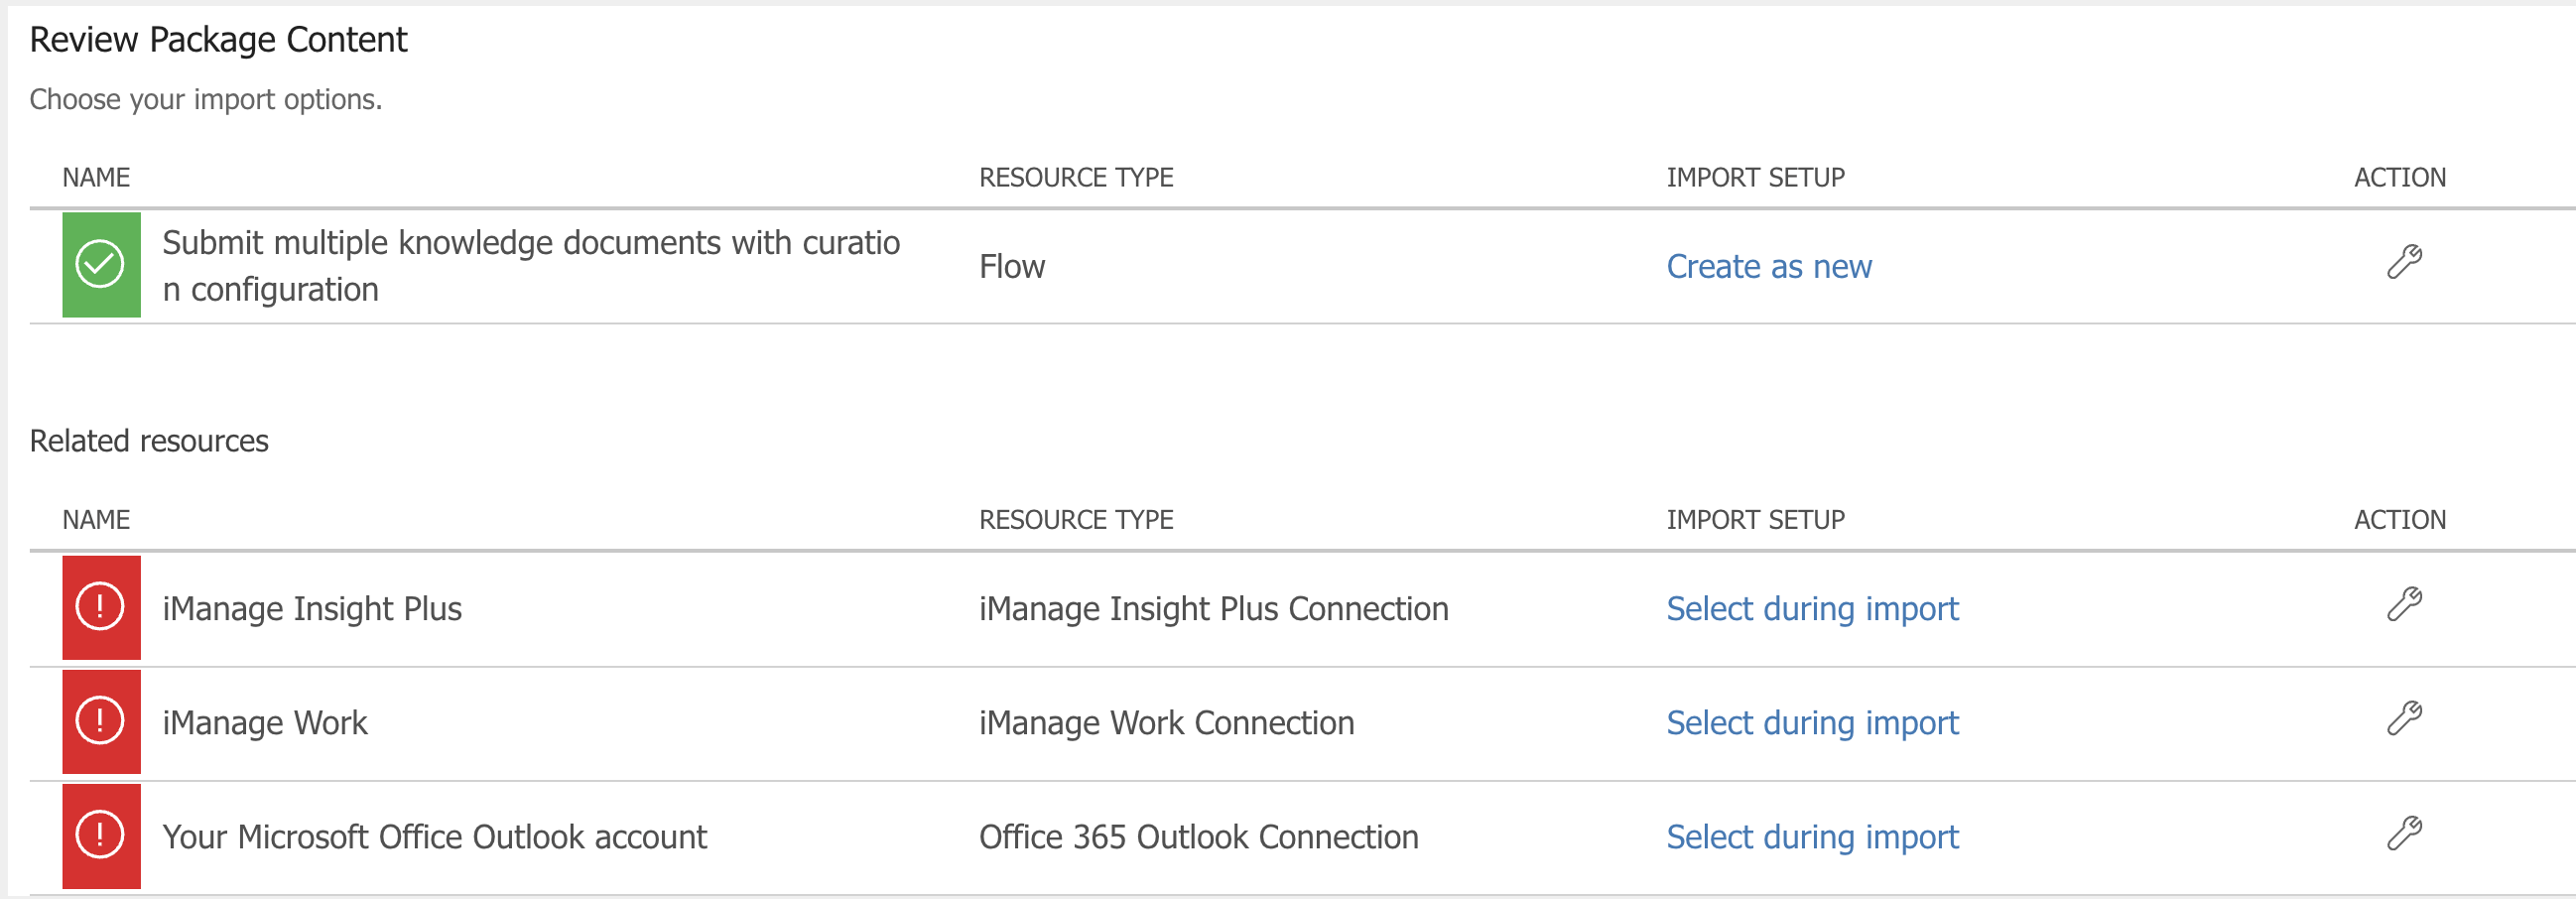
To complete uploading the templates, choose Select during import to establish a connection for each resource type that has a warning indication beside them. The Import setup dialog appears.
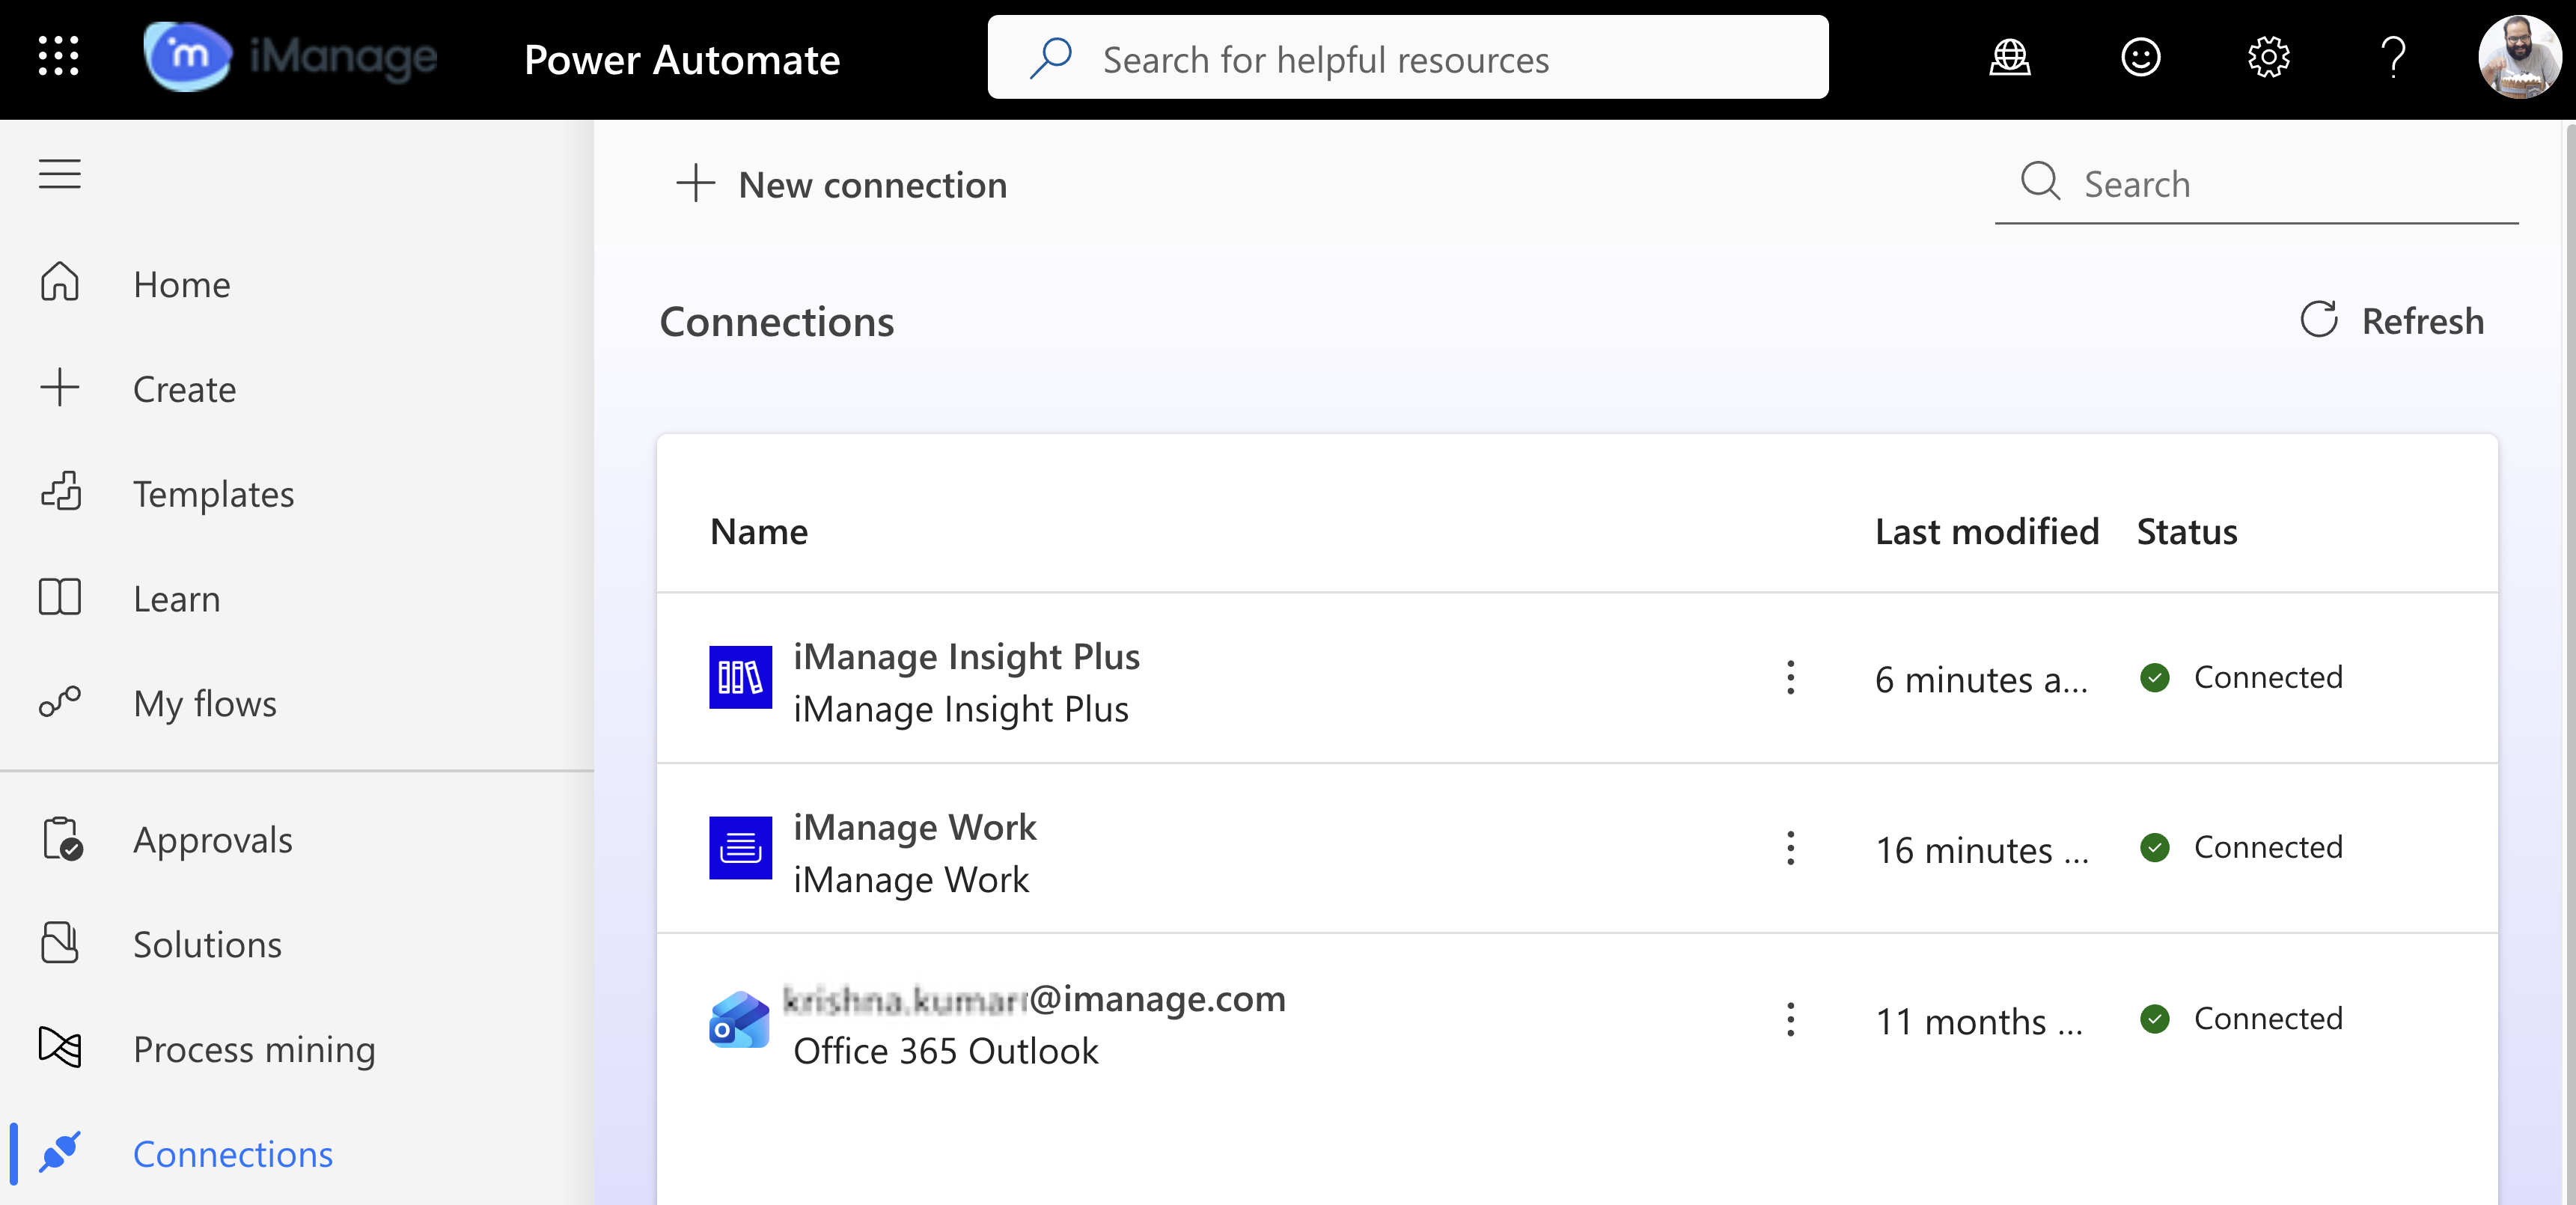
Select Create new in the import setup dialog. You'll be directed to the Connections page.
Select New connection. You must have the following resource type connections established because you’re importing the Submit workflow template:
iManage Work Connection: Search for the iManage Work connector and then select Create. You'll be directed to your Insight Plus connector sign-in page. Enter your company credentials and select Import.
iManage Insight Plus Connection: Search for the iManage Insight Plus connector and then select Create. You'll be directed to your cloudimanage.com sign-in page. Enter your company credentials and select Import.
Office 365 Outlook Connection: Search for the Office 365 Outlook connector and then select Create. Enter your Microsoft account credentials. The connector is added and displayed on the Connections page.
The connectors are added and displayed on the Connections page.
After importing the workflow, browse to My flows in the left pane, you’ll see the flow listed below Cloud flows. If the flow isn't turned on, select More commands and then select Turn on.

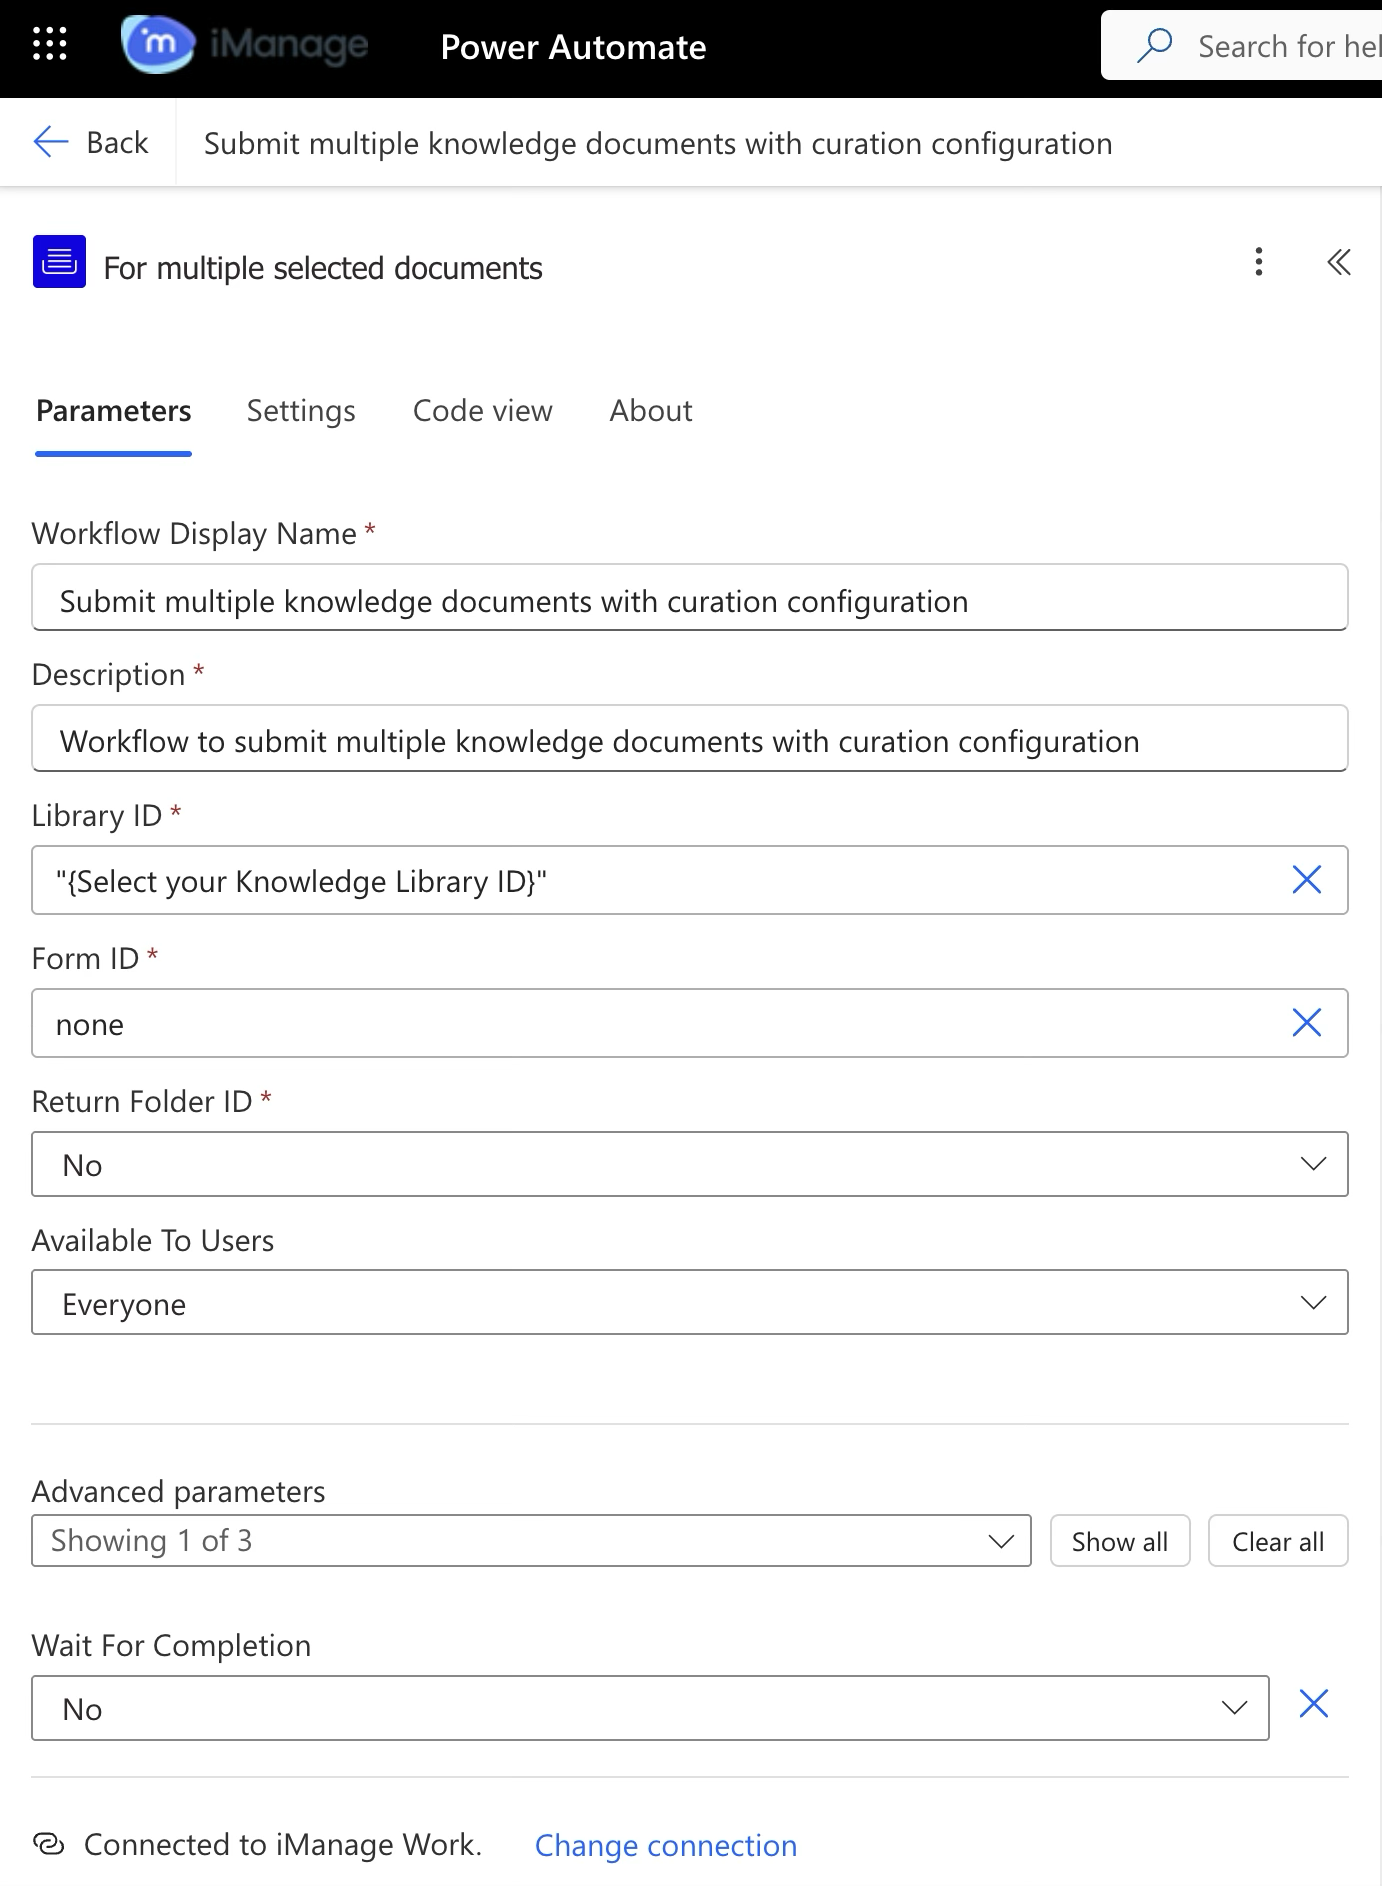
Select the Edit :Edit-icon: icon to view the workflow.
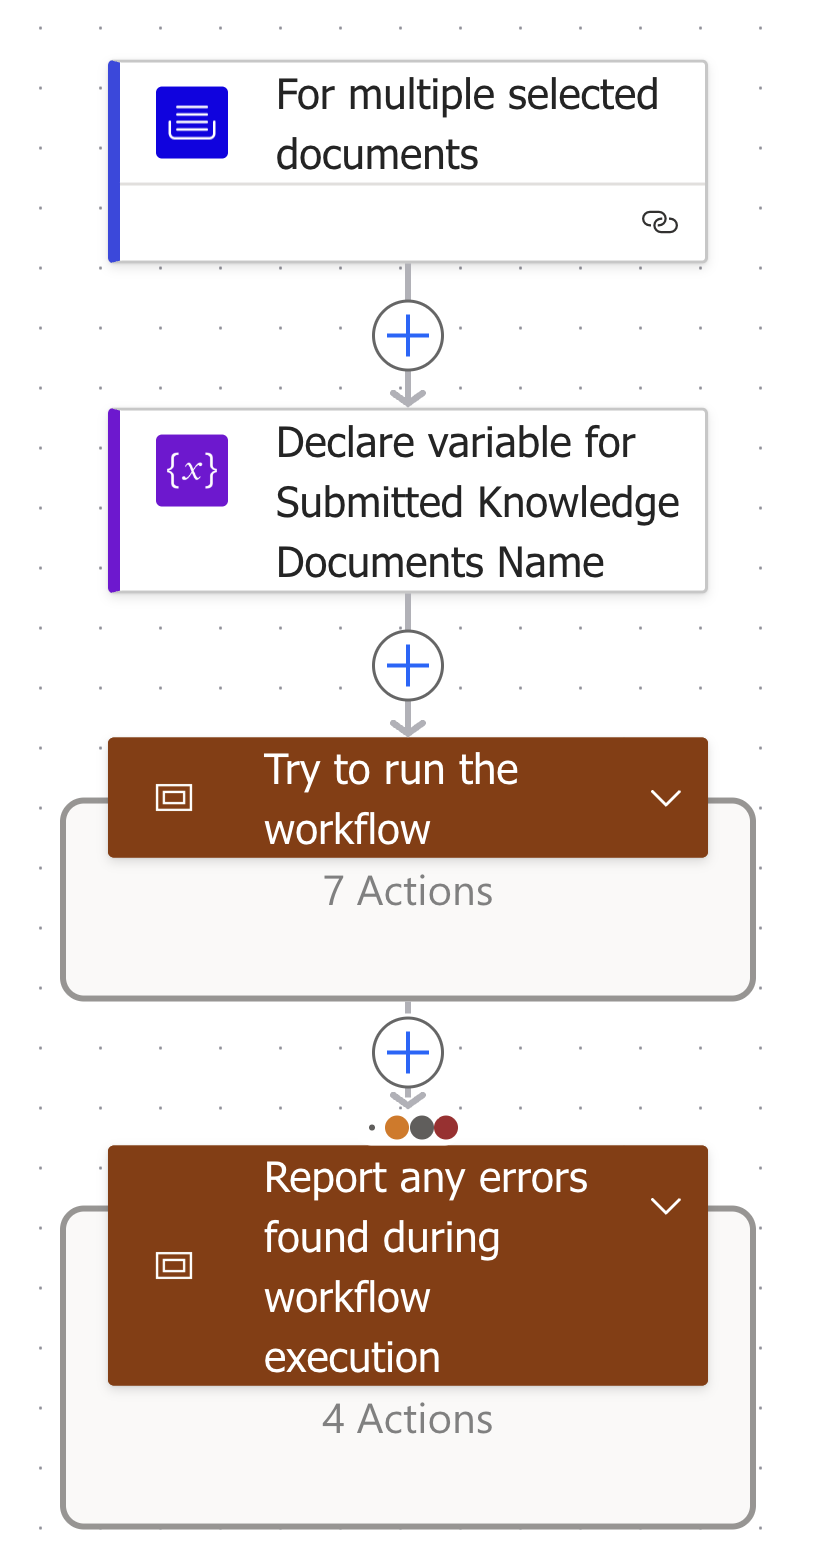
Block 1: For multiple selected documents (iManage Work Connector)
This trigger allows you to start a workflow for one or more selected documents in iManage Work. Provide a display name that'll be shown to users in iManage Work applications.
Workflow Display Name: Provide a name to the workflow you're creating. This workflow will be available in the Edit: Workflow routing dialog.
Description: Specify the description of the workflow you're creating.
Library ID: Specify the Knowledge library ID where the document would be submitted.
Form ID: Specify the ID of the form that is presented to users to collect inputs used by the workflow. This is the Workflow form that can be designed by the Admin, which is used to collect knowledge properties when users are submitting the knowledge asset for curation.
Return Folder ID: Specifies if the document’s folder ID is required by the workflow. This is helpful if you want to use a specific folder where the selected document is located further in your Power Automate script.
Available To Users: Specify one or more user IDs separated by semicolons, to whom the workflow is available. Select Everyone if you wish to make the workflow available to all users in your organization.
Available to groups: Specify one or more Knowledge admin group IDs separated by semicolons, who can access the workflow.
Show form for every document: Set this value to Yes if you want to display a submission form for each document when submitting multiple documents for Curation. Setting it to No displays just one form during multiple document submissions.
If Wait For Completion is set to Yes, you must use the Update workflow state action in your workflow, otherwise applications will eventually time out without indicating the completion state to the user.
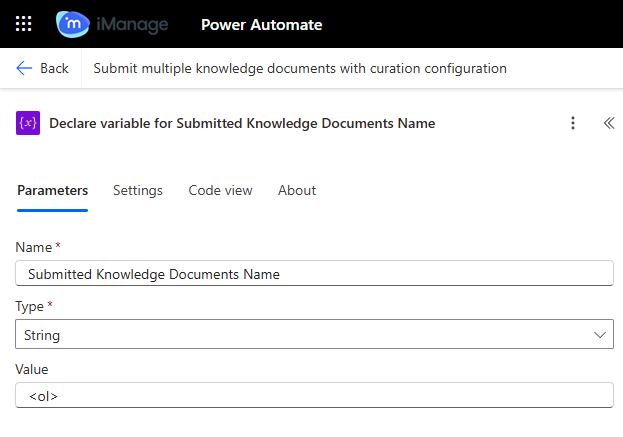
Block 2: Declare variable for Submitted Knowledge Documents Name (Variable - Compose function)
This variable is a No Op (No Operation) block, essentially a placeholder or starting point in a workflow, which is useful when you’re structuring multiple blocks in parallel. It doesn’t run any logic, transform data, or trigger events—it simply exists to provide structure.
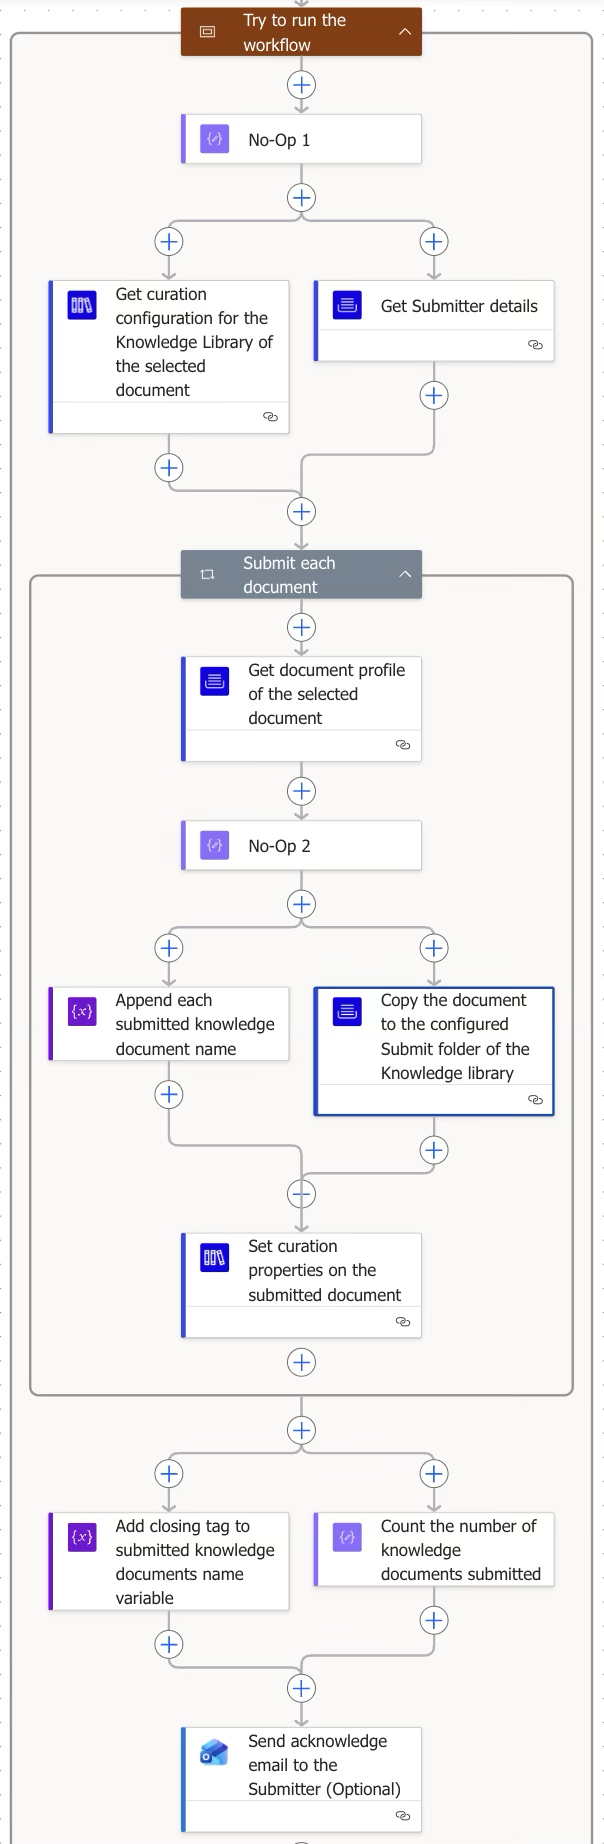
Block 3: Try to run the workflow
This is the main block that runs the complete workflow logic, including document submission to the target folder and sending emails to users.
Step | Figure | Description |
|---|---|---|
3.1 | 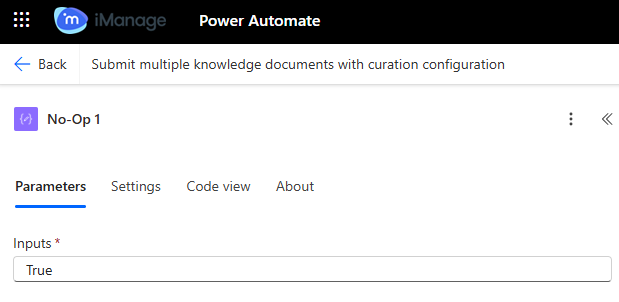 | No Operation block (Data operation) |
3.1.1 | 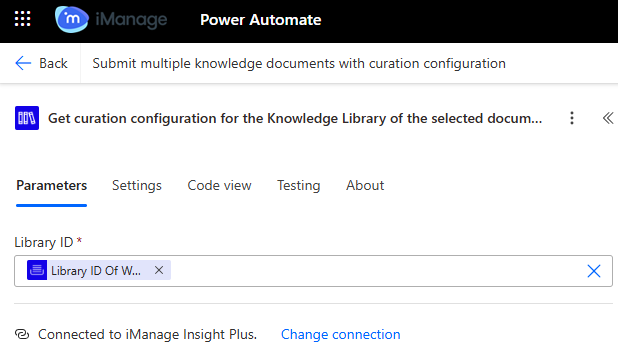 | iManage Insight Plus Connector |
3.1.2 | 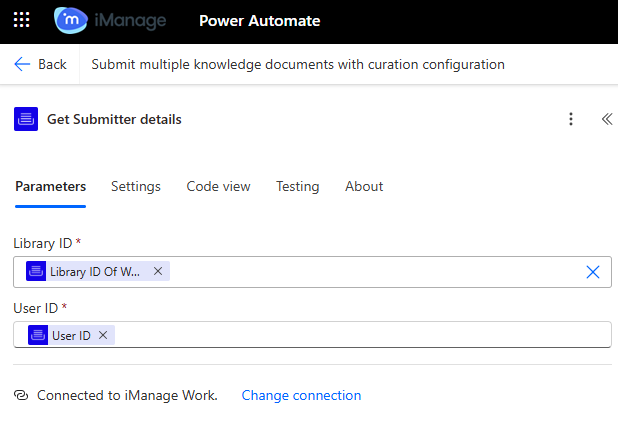 | iManage Work Connector |
3.2 | 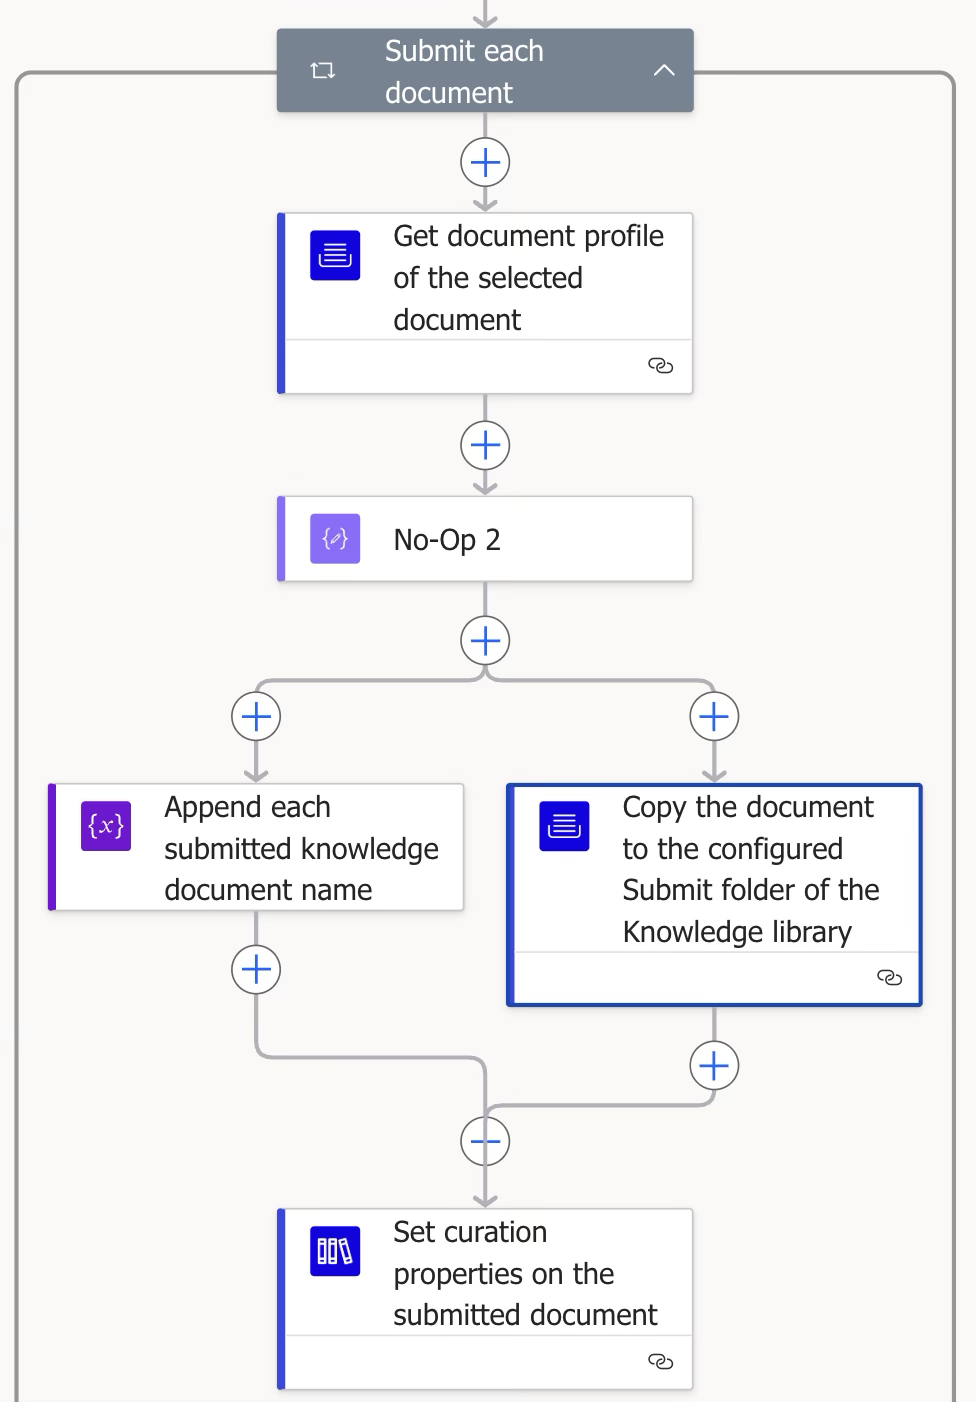 | Control Connector Executes a block of actions for each item in the input array. In this block, we're retrieving the submitted document and its profile from the active library, then uploading it to the knowledge library as a new entry with associated metadata.
|
3.2.1 | 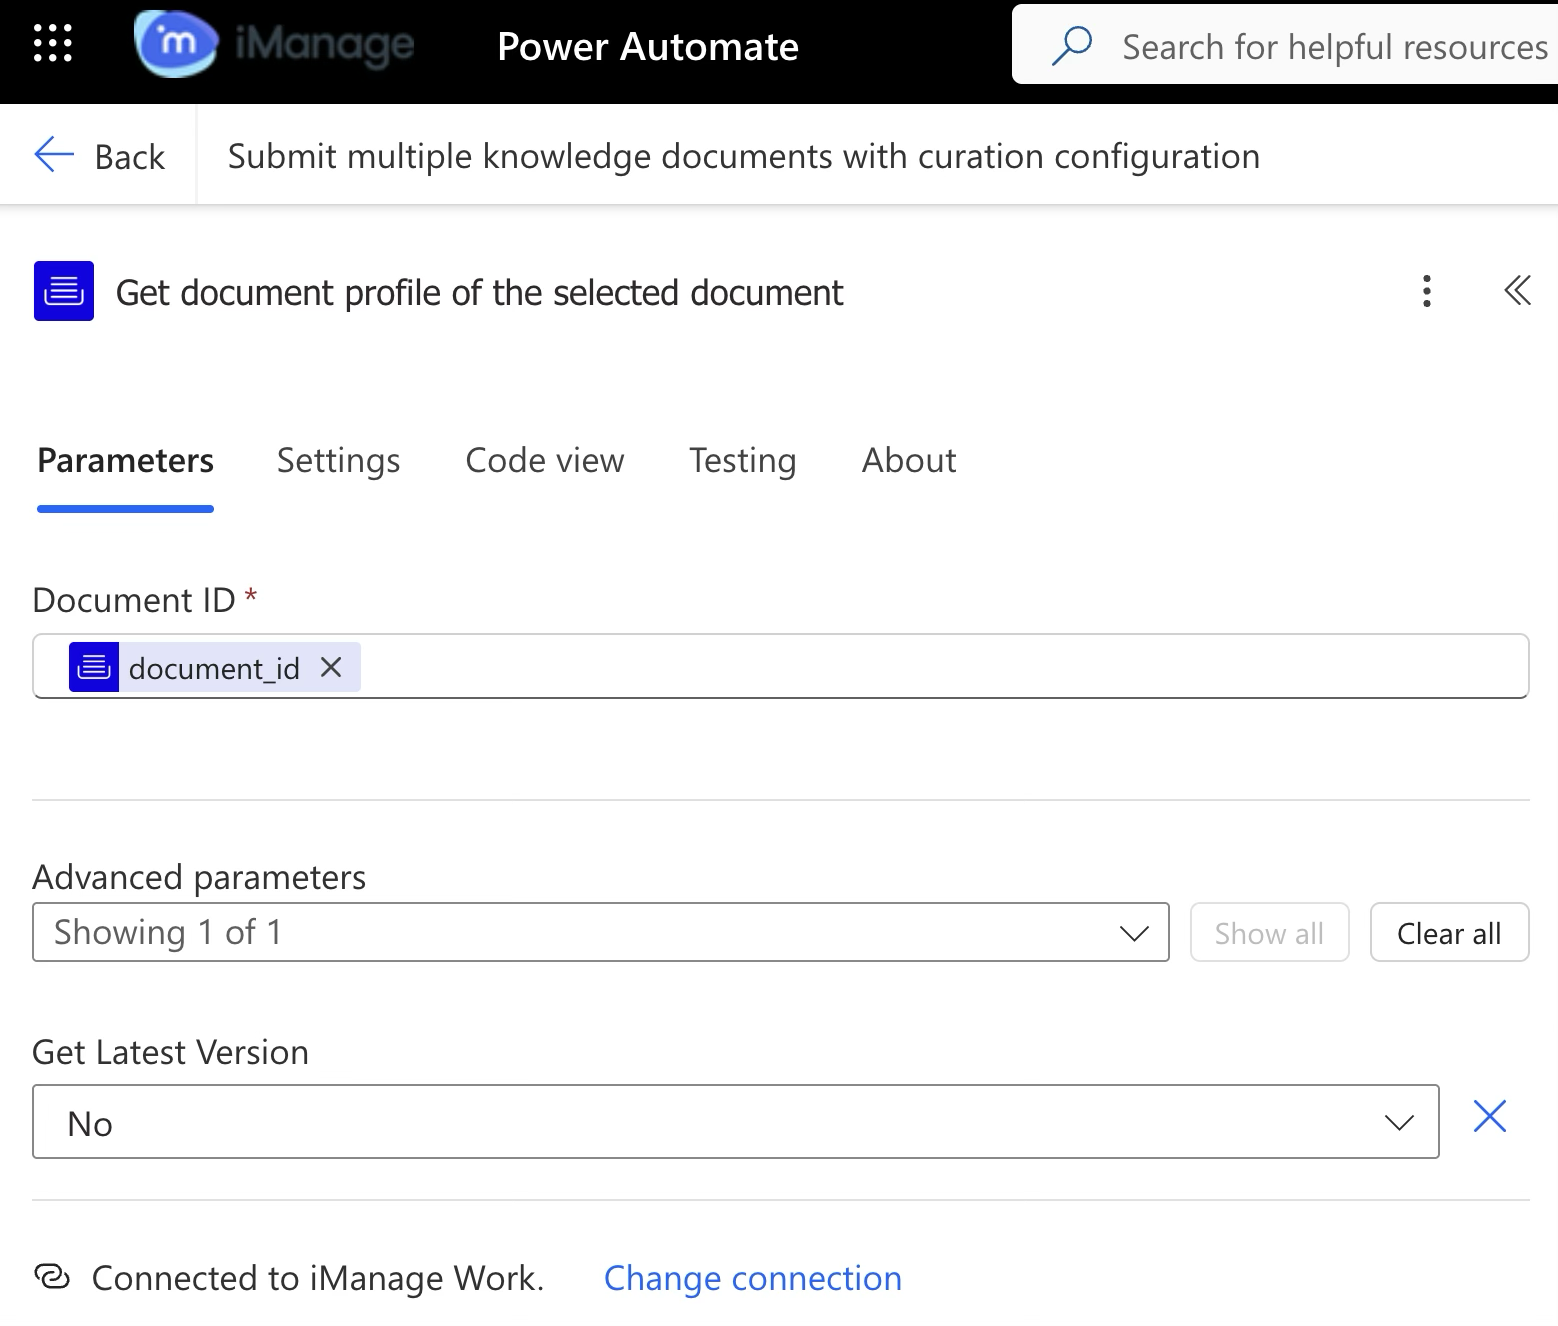 | iManage Work Connector Gets the document properties associated with a specific document ID. This is used to retrieve the document properties linked to a specific document ID to ensure the original profile and name are preserved.
|
3.2.2 | 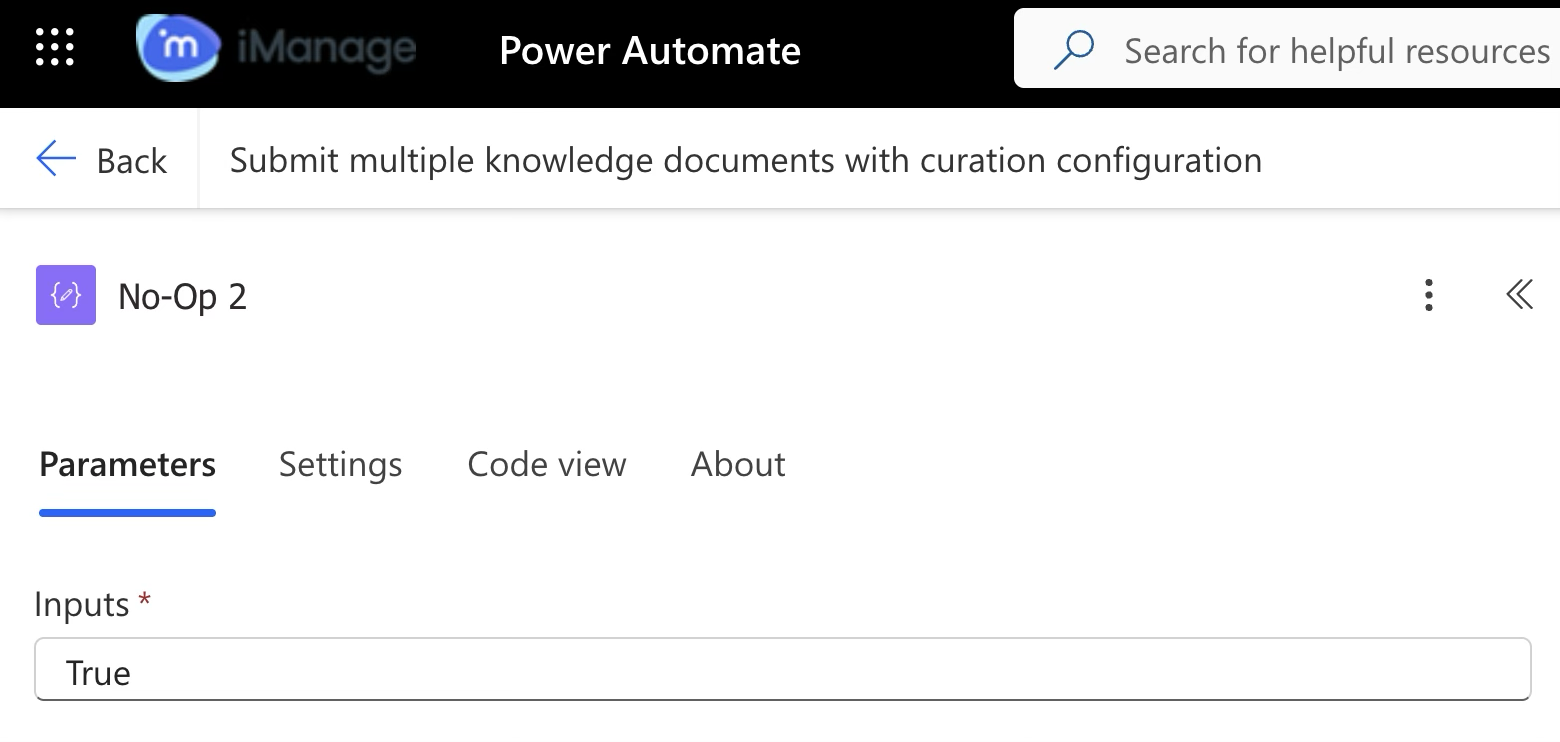 | No Operation block (Data operation) |
3.2.3 | 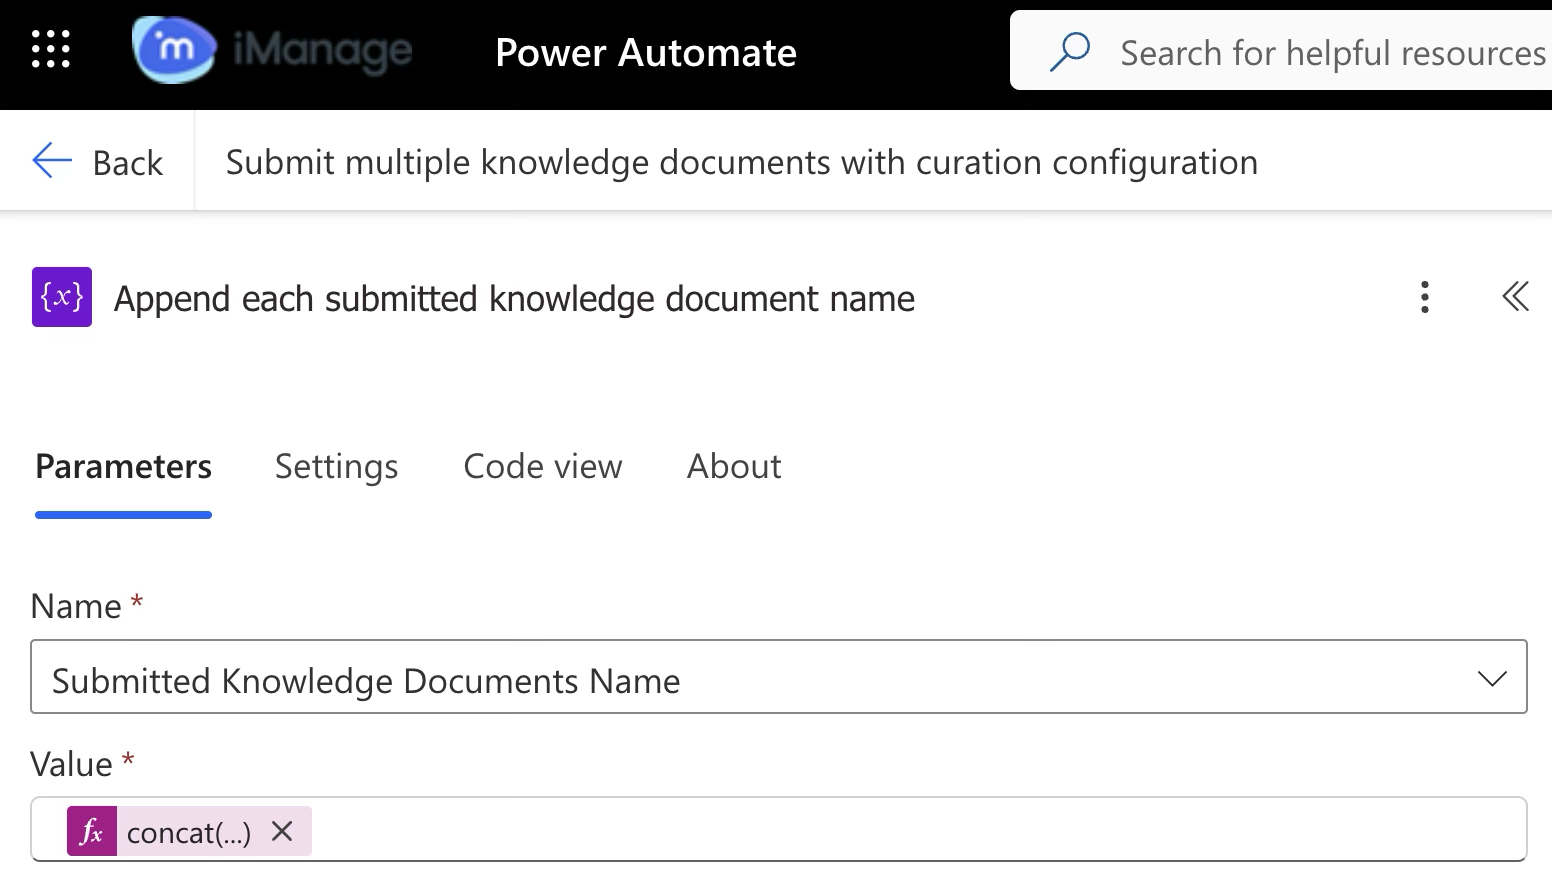 | Append each submitted knowledge document name (Variable) It adds each of the submitted documents as an ordered list, which is then utilized to send email to users. |
3.2.4 | 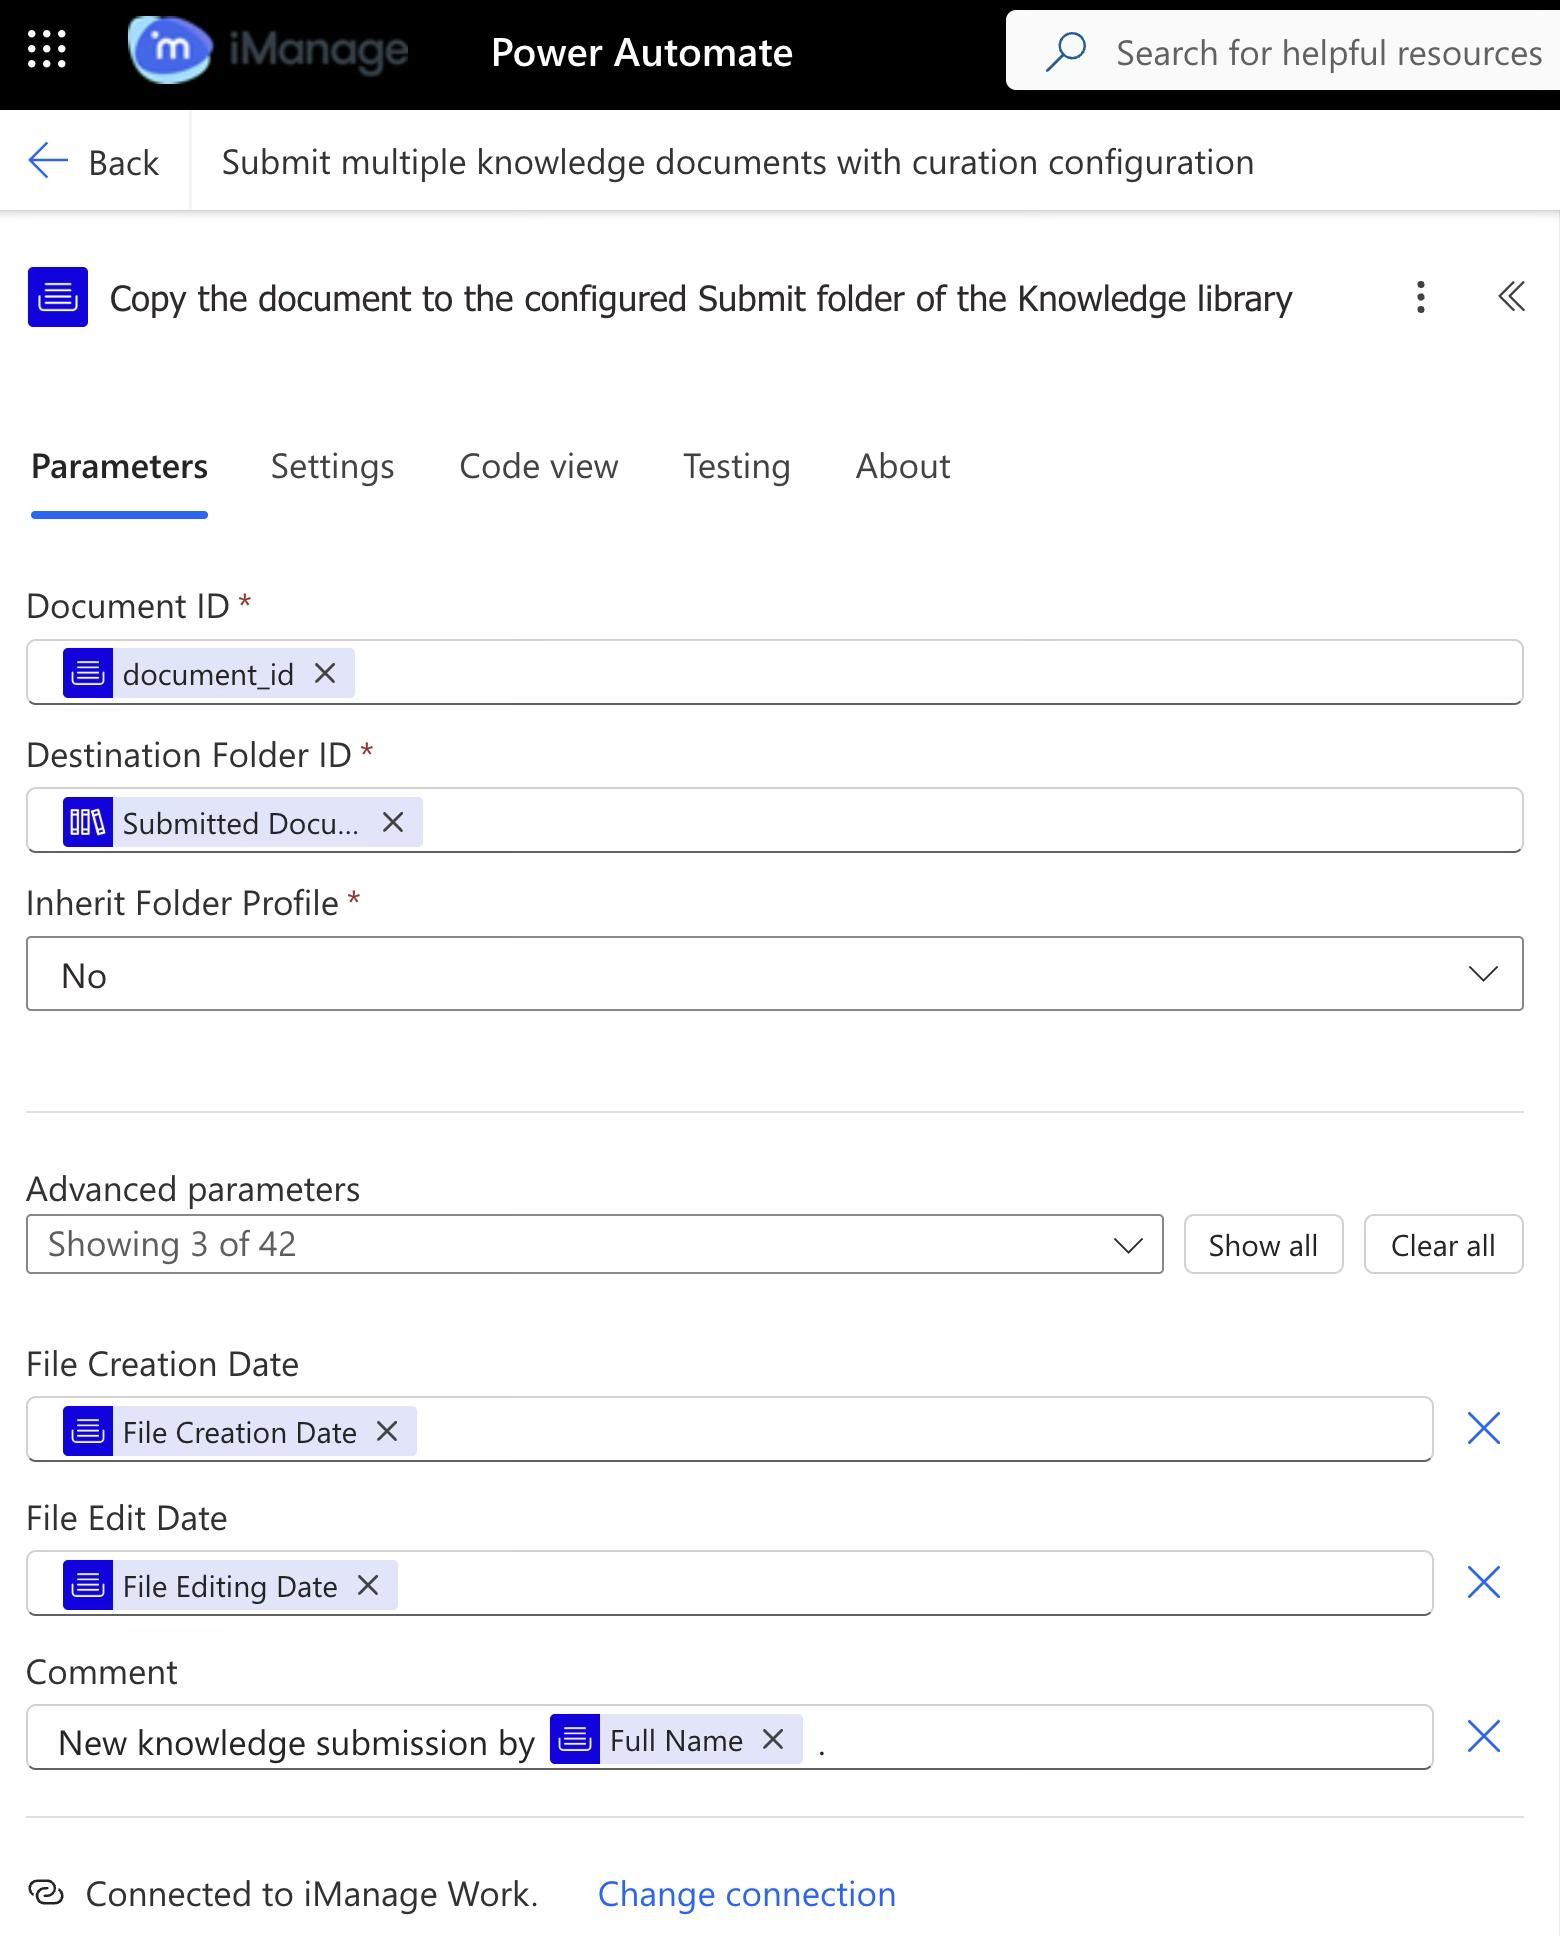 | iManage Work Connector Copies a document to the specified folder within the same library or across libraries. |
3.2.5 | 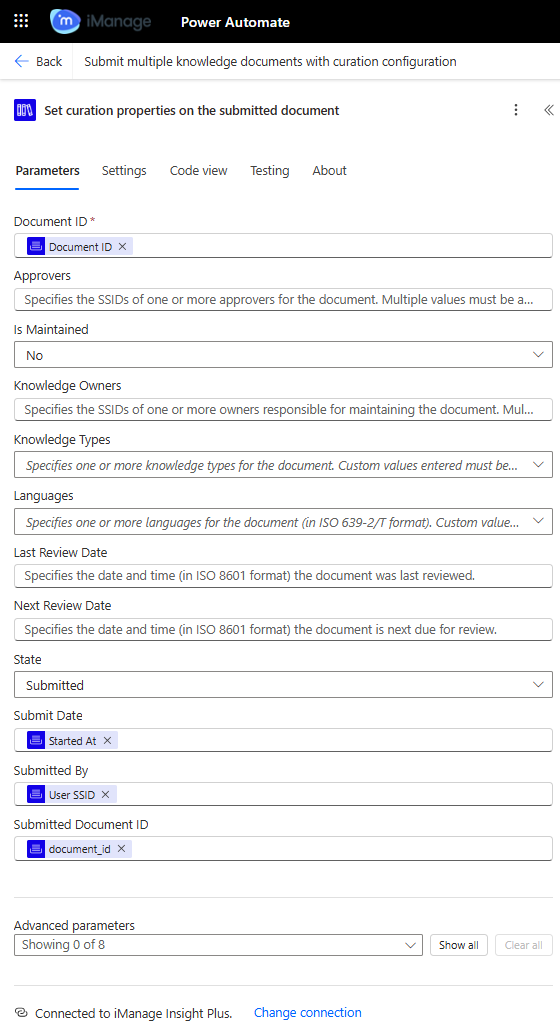 | iManage Insight Plus Connector Sets curation properties on the uploaded document. |
3.3 | 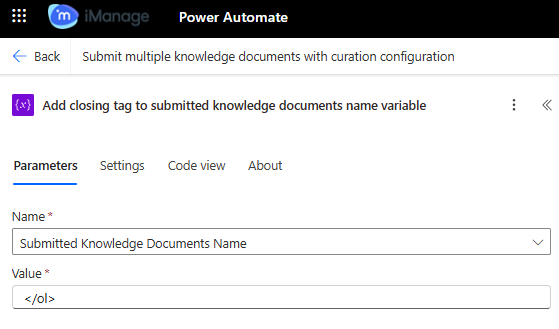 | Add closing tag to submitted knowledge documents name variable (Variable) Adds a closing tag to the submitted knowledge document's name variable. This is based on Declare variable for Submitted Knowledge Documents Name. |
3.4 | 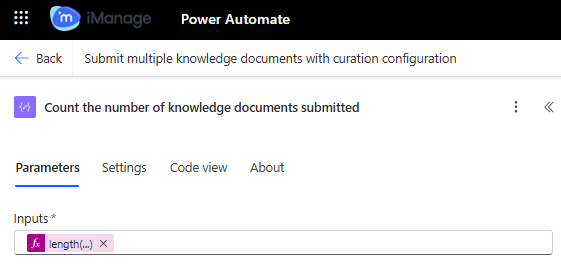 | Data operation Counts the number of knowledge documents submitted, which is utilized to send email to users. |
3.5 | 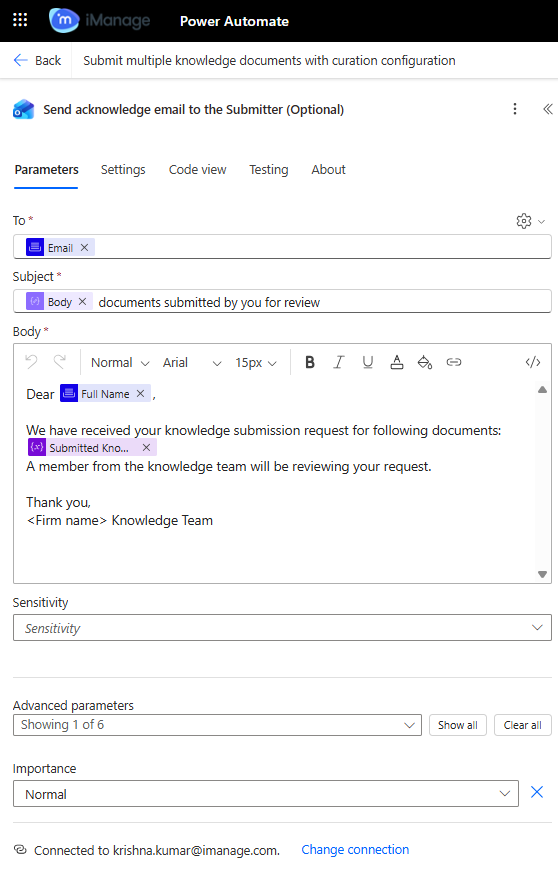 | Office 365 Outlook Connector Sends an email message with information of the documents submitted successfully. |
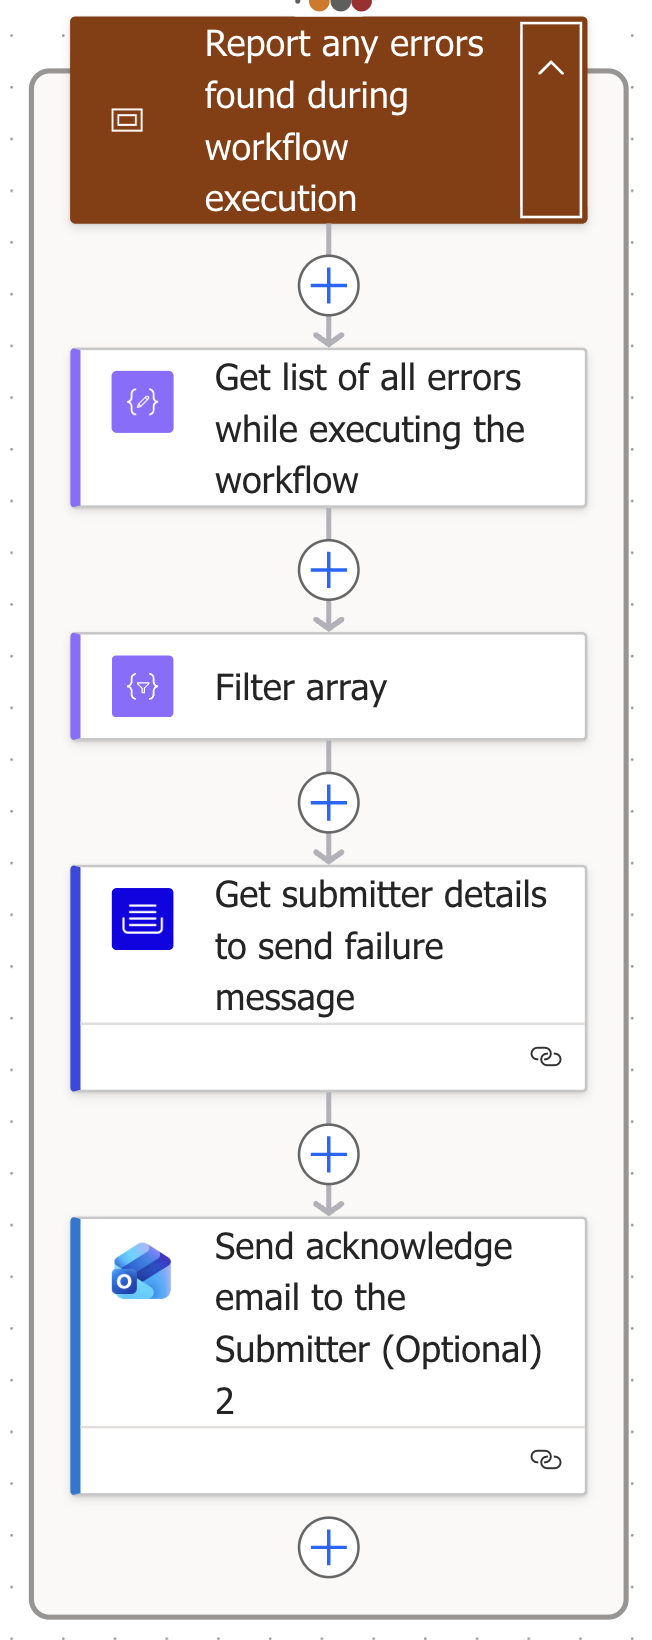
Block 4: Report any errors found during workflow execution
If the main block (Block 3) fails at any given step, then block 4 is executed. Block 4 gives users information on what failed and the related information.
Step | Figure | Description |
|---|---|---|
4.1 |  | Data operation |
4.2 |  | Data operation |
4.3 |  | iManage Work Connector |
4.4 |  | Office 365 Outlook Connector |