Views Designer lets you make properties available for viewing in the Records Manager client application. By default, some of the properties are selected for each component in Views Designer. These properties are seen in the Available fields list for that component in the Customize View dialog of the Records Manager client application. The properties in the Selected fields list of the Customize View dialog become visible in the main view for that component in the client application.
In this example, the selected fields by default are ID, Name, and OpenDate for the Matter component. These same properties are seen in the main view for the Matter component in the client application.
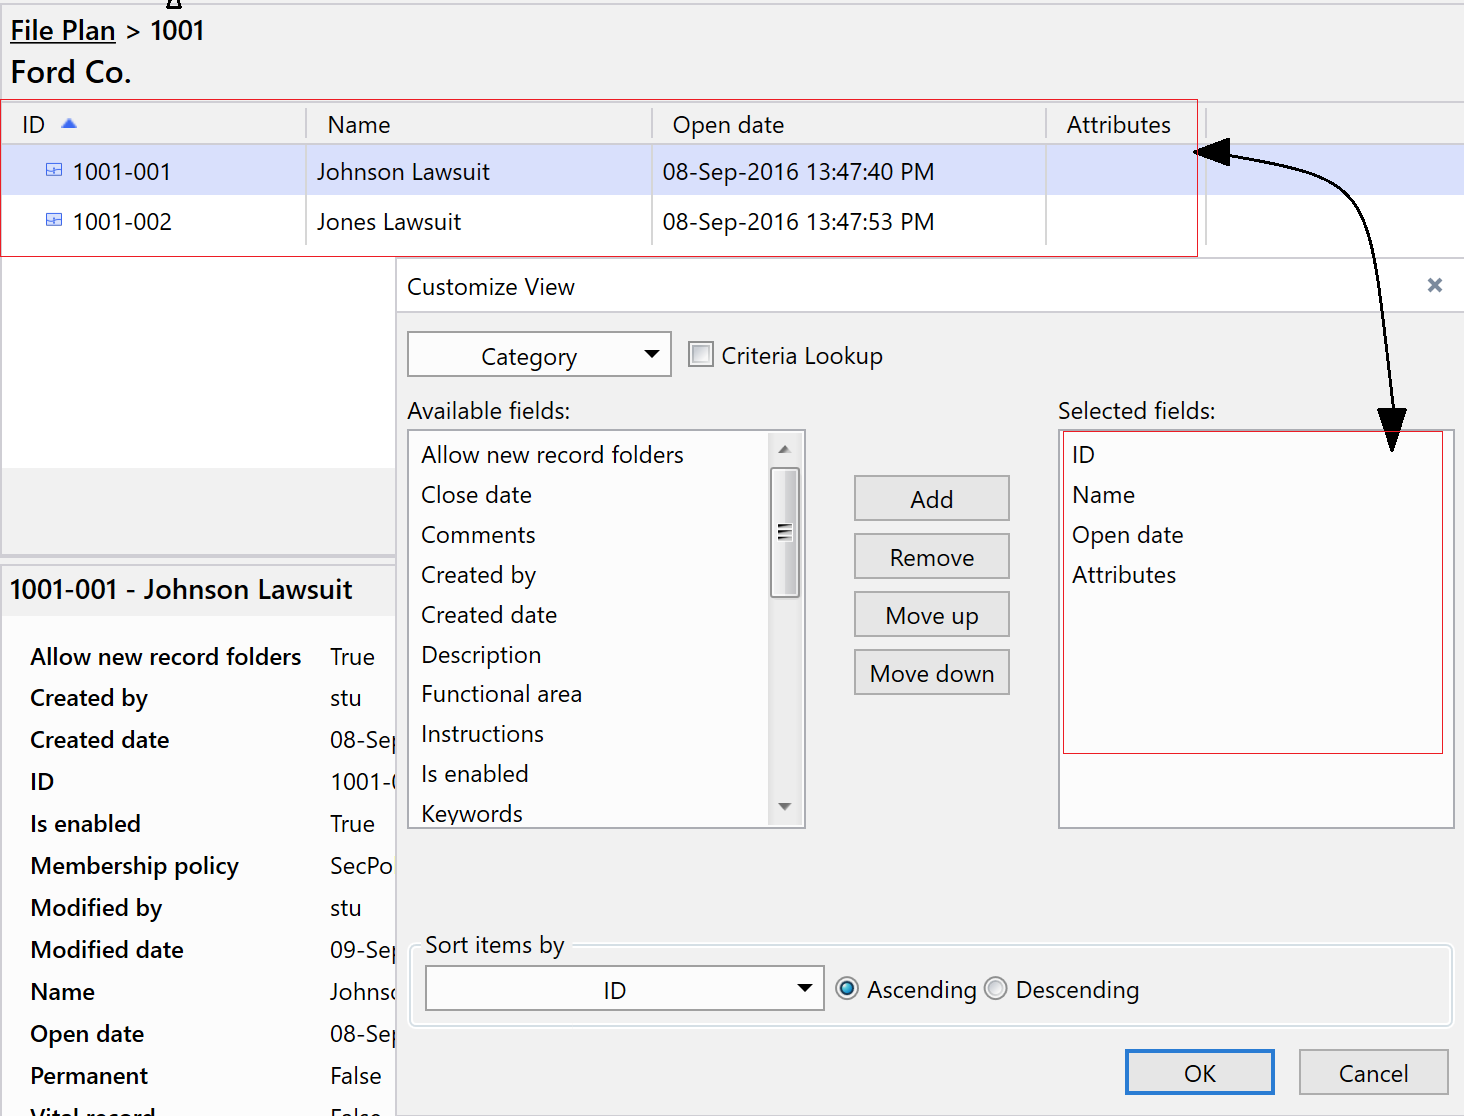
The Criteria look up check box is used to select the properties that should be displayed in Metadata Selection or Browse and Select dialog boxes.
Select the Criteria look up check box, select the properties from the Available field list, and then select Add. The properties are added to the Selected fields list and these properties will be displayed for that component in the Browse and Select or Metadata Selection dialog box.
For example, when you search file parts, select the browse button for the Matter field. The Browse and Select dialog displays the columns ID, Name, and Open Date.
In this sample, you'll use Views Designer to make all the extended properties Primary_Practice, Sub_Practice, Managing_Partner, and Fiscal_Year available for selection in the Customize View dialog of the client application.
The following section describes the procedure to make these properties available for selection in the Customize View dialog of the client application.
In Application Designer Navigation Pane, select the Views icon.
Views Designer opens. The metadata tables that you added using Object Modeler are included in the list of views in the left pane. (extPrimaryPractice, andextSubPractice). TheFiscal_YearandManaging_Partnerproperties are seen under the matter object.Select the
extPrimaryPracticeview.
The properties available for theextPrimaryPracticetable are seen under the Columns for extPrimaryPractice in the right pane.
In phase 1 (Object Modeler), you added onlyPrimary_Practice_Nameas a property for thePrimary_Practicemetadata table. However, the Columns for extPrimaryPractice in the right pane shows several other properties. These other properties are all system or auto-generated.Select the Primary Practice Name check box under the Columns for extPrimaryPractice.
The selected property name is displayed in the middle column.On the toolbar, select Save.
Select the
extSubPracticeview.Select the Sub Practice Name check box under Columns for extSubPractice.
The selected field is displayed in the middle column.On the toolbar, select Save.
Select the Matter view.
Locate and select the check box for all the extended properties, including
Managing_ PartnerandFiscal_Yearunder the Columns for matter.
The selected fields are displayed in the middle column.On the toolbar, select Save.