As a client and matter administrator, client and matter manager, or applicable type of local matter administrator, you can modify the excluded systems, access request settings, email notification template, and memo defined at the matter level for a matter.
- Accessing Matter Security settings
- Matter Security Policy
- Access Requests
- Security Memo
- Scheduled Awareness Reminders and one-off Awareness Reminders
- Exclude systems from policy
- Updating custom properties
- Holds
Accessing Matter Security settings
You can access matter security settings from the SPM Admin Console. It is also possible to make such access requests directly from iManage Work, if your SPM integration with iManage Work has been configured with the SPM Edit Policy for Work application.
The following options are available:
- Accessing matter security in SPM Admin Console
- Accessing matter security from iManage Work
Accessing matter security in SPM Admin Console
On the Matter Details page, click Security tab. The Security page appears.
Alternatively,
On the Matter Details page, in the Overview tab, click View Security Policy. The Security page appears.
Accessing matter security from iManage Work
The SPM Edit Policy for iManage Work application provides an Edit Security Policy option on a Matter page in Work. Selecting this opens SPM at the dashboard of that matter.
The option is available:
- On the matter context (kebab) menu of a matter in the Matters list (as shown in Figure 1a below)
- On the matter context (kebab) menu of a matter page
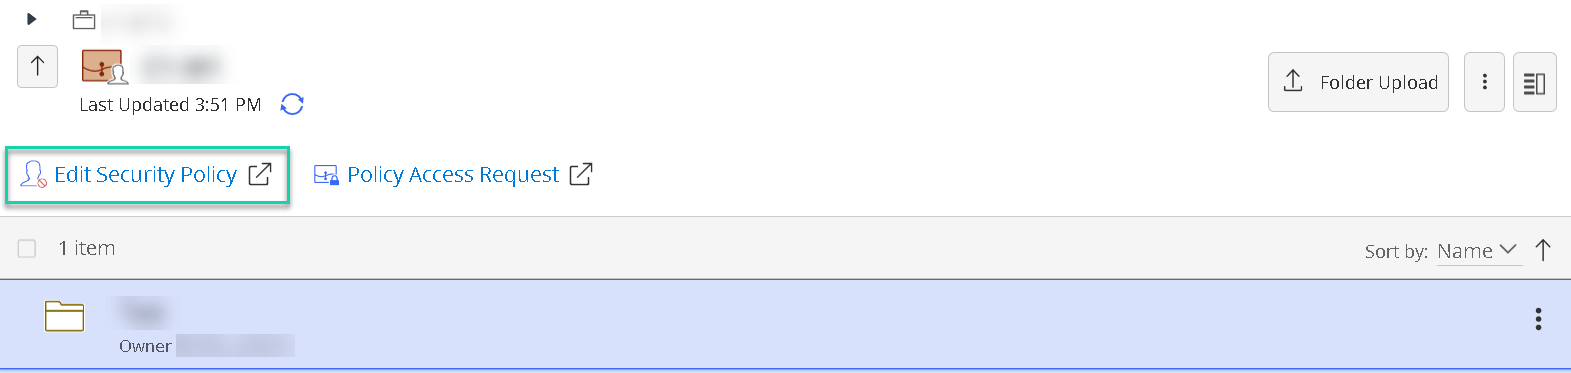
- On the matter page (as shown in Figure 1b below)
Figure 1a: Example of Edit Security Policy option on the matter context (kebab) menu in iManage Work
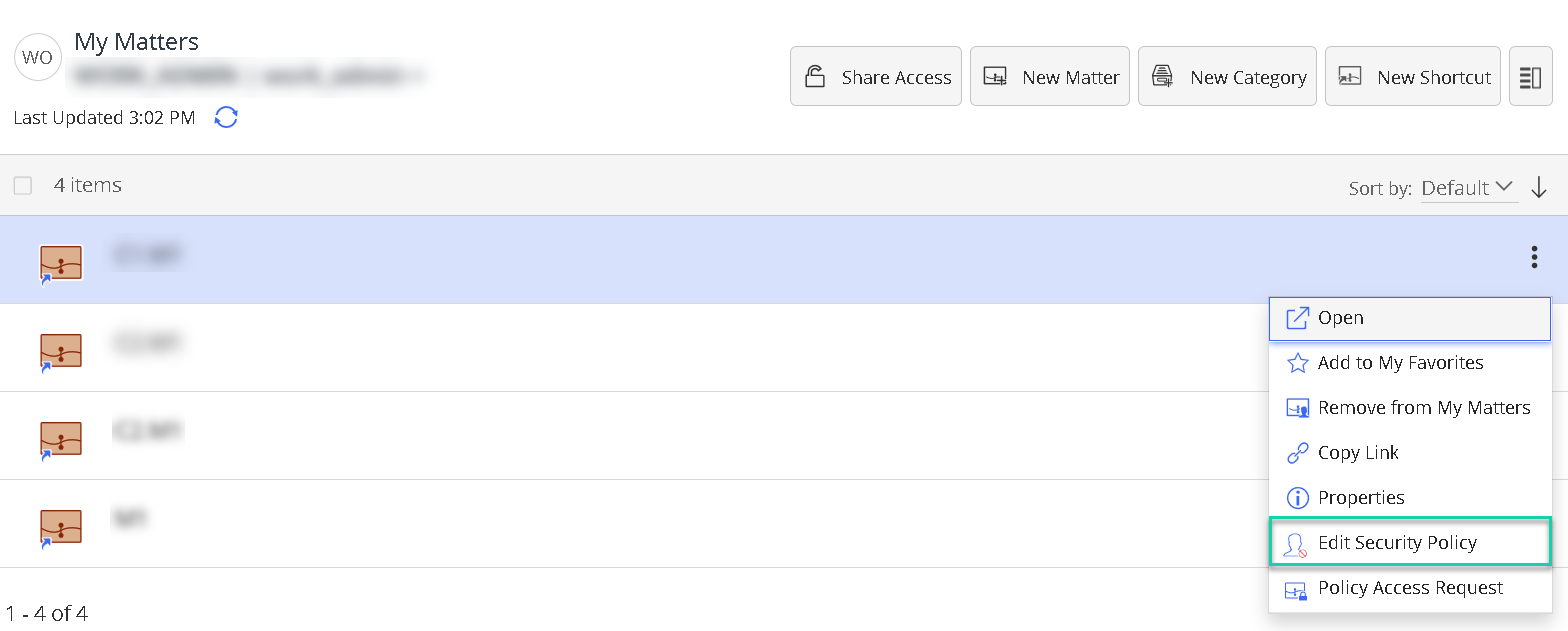
Figure 1b: Edit Security Policy option on the matter page in iManage Work
Matter Security Policy
Select the Policy pane to update the security policy for the matter.
The security policy options listed here are influenced by the security policy defined for the 'parent' asset. If the security policy defined for the 'parent' asset is- Open – then, for the matter, choose from one of the following options: Open or Restricted.
- Open means that the matter is matching the open security of the parent asset and all non-excluded/non-conflicted users can access the matter.
- Restricted means that you can define a staffing team for the matter, in turn restricting access to those users defined. You can select the matter staffing list from any of the staff members of the firm.
- Restricted (Limited to users named under <Asset> staffing) – then, for the matter, choose from one of the following options: Restricted by <Asset> or Restricted.
- Restricted by <asset> in this case then means that the matter staffing is the same as that of the asset staffing.
- Restricted means that you can define the staffing at the matter level, but the user base from which you can choose the matter staffing has to be from the <asset> staffing.
Restricted (Not limited to users named under <Asset> staffing) – then, for the matter, choose from one of the following options: Restricted by <Asset> or Restricted.
- Restricted by <asset> in this case then means that the matter staffing is the same as that of the asset staffing.
Restricted means that you can define the staffing at the matter level, but the user base from which you can choose the matter team is not limited to the user list defined at the <parent asset> level, but can contain any of the staff members of the firm.
Restricted (if the parent asset is a case) - in this case, the matter security is defined by the case and cannot be modified.
- Open – then, for the matter, choose from one of the following options: Open or Restricted.
Click the required security policy, and then click Save to update the changes.
Access Requests
Click in the Access Requests pane to update the access requests options for the matter.
There are six possibilities for requesting, approving or providing access:
Access cannot be requested by users. Access can be provided by the administrators.
Access requests can be approved by the responsible attorney defined for the matter.
Access requests can be approved by an administrator.
Access requests can be approved by any member of the team.
Access requests are granted automatically and are time limited.
In this scenario, no approvals are required. Upon raising a request by a user, access is automatically granted by the system. The time limit for such requests can be set in Settings. Refer to the Time Limited Access Requests subsection of Settings>General.Access requests are granted automatically.
In this scenario, no approvals are required. Upon raising a request by a user, access is automatically granted by the system.
Select the required access request option, and then click Save to update the changes.
Security Memo
In the Security Memo text field, enter/update the security instructions as required, and then click Save to update the changes.
This memo can be added to relevant notification events, for example to staff members gaining or requesting access to the matter. It is also displayed to users requesting access to the matter.
NOTE:
If the Work URL Template setting is configured under the Settings page, then in the Security Memo field, ![]() icon appears.
icon appears.
- Click
 . The Add Work Link dialog box appears.
 - Select one of the options provided:
- Paste Work Link: You can add a different work document/folder url to the one configured in the Settings page. You can test the link by clicking Test Work Link.
- Select Document by ID and Version: You can add the document Id and version. In this option, the URL configured in the Settings page is considered.
- Select Folder ID: You can add the folder Id. In this option, the URL configured in the Settings page is considered.
- Enter the relevant details based on your selection.
- Enter brief and relevant text that provides a context to the content in the link in the Link Text field. and then click Add Link.
Scheduled Awareness Reminders and one-off Awareness Reminders
You can also schedule Awareness Reminders of the Security Memo to help ensure that users are reminded regularly of their obligations with regards need-to-know access. Scheduled Awareness Reminders are not sent by default, but can be sent on a scheduled or a one-off basis, as follows:
- To set up the sending of a regular, scheduled Awareness Reminder:
- Under Scheduled Awareness Reminders, select Edit Reminder.
- A pop-up window, Edit Scheduled Awareness Reminder displays. Click on the Frequency of Review dropdown.
- Choose the frequency that you would like the reminder to be sent, from the following options: Never, One Week, One Month, Three Months, Six Months, One Year, or Custom.
- If your selection is Never, One Week, One Month, Three Months, Six Months, or One Year, the Due Date of the next Awareness Reminder that will be sent is displayed in accordance with your selection. Click Save.
- If your selection is Custom, there are some additional options to configure, as follows:
- Click the Select Time Period dropdown first. The options available are: Days, Weeks, Months, or Years.
- Click in the Custom Period text field and enter the number of Time Periods (that is, the number of Days, Weeks, Months or Years accordingly to your selection in 1. above) between which you wish to send the Awareness Reminders.
(For example, if you wish to send reminders every 3 months, you would choose Months from the Select Time Period, and the enter the number '3' in the Customer Period text field.) - In accordance with time period you have set, the Due Date of the next Awareness Reminder that will be sent is displayed.
- Depending on the configuration, you may also see the option The Security Memo must be acknowledgement for continued access to the matter. Select the checkbox if this option is required.
- Select OK.
- The Scheduled Awareness Reminders field now displays text of type: "The Security Memo will be sent once every 3 months".
- To set up the sending of a one-off Awareness Reminder, at any time:
- Click on Send a one-off Awareness Reminder now.
- A pop-up window, One-Off Awareness Reminder displays. This gives a reminder that proceeding will cause the memo to be sent to all current staffing on the matter.
- Select Send to proceed.
A confirmation pop-up displays "The one-off Awareness Reminder has been sent."
NOTE:
Under Staffing tab, icon appears next to all the existing and non-excluded users till they acknowledge the security memo.
Exclude systems from policy
You can exclude specified systems from policy. This feature should be used cautiously with full awareness of security implications. The matter will be 'Open' in the excluded system, regardless of the security policy specified in SPM.
To exclude a system:
- Click Add Excluded System. The New Excluded System dialog box appears.
- Enter the agent system name you want to exclude in the System Name field. As you type the value, the system will suggest the system names based on the string entered.
- Enter the reason for excluding the system in the Reason field.
Click OK. The system is excluded for the current matter.
Updating custom properties
As a Client and Matter Administrator or Client and Matter Manager, you can define custom properties for assets, under the Settings page. These custom property fields will appear either under the General Details page or the Security page of an asset, based on how you have defined them. See Custom Properties for more information on how to define custom properties.
Depending on how the individual properties have been configured and defined, you may be able to add/update the values in the custom property fields from the General Details page or the Security page of the asset. If a property has the tooltip Read-only or Secured by Client, this property is not editable (in current configuration).
To edit an editable property, click on the property value and, depending on the type or property (for example Date, Number), an appropriate editor will be available (for example text cursor, date picker).
If a custom property under the property set is configured to accept 'text' values, then the ![]() icon appears upon clicking the property field and entering any character. Click the
icon appears upon clicking the property field and entering any character. Click the ![]() icon to add the value, or click Save.
icon to add the value, or click Save.
If you have configured an iManage Work link, in Settings > General Settings > Work Document and Folder Links, you can add a iManage Work link that you want to direct the user to, in place of adding text in the field.
- Click . The Add Work Link dialog box appears.
- Select one of the options provided:
- Paste Work Link: You can add a different work document/folder url to the one configured in the Settings page. You can test the link by clicking Test Work Link.
- Select Document by ID and Version: You can add the document Id and version. In this option, the URL configured in the Settings page is considered.
- Select Folder ID: You can add the folder Id. In this option, the URL configured in the Settings page is considered.
- Enter the relevant details based on your selection.
- Enter brief and relevant text that provides a context to the content in the link in the Link Text field. and then click Add Link.
- Click Save.
Holds
You can view and add related holds. For more information, see Holds.