A Default Policy is provided already. You can manage or update it or add more access policies as needed.
NOTE: The Default Policy cannot be deleted.
Managing MCP access policies
In the left pane in iManage Control Center, select Extensions > MCP Settings > Access Policies.
In the MCP Access Policies section, select Manage next to the policy you want to configure. The Manage <policy name> access policy dialog opens.
(Optional) In the Policy name field, enter a new name for the policy. The red asterisk indicates that this is a mandatory field.
The character limit is displayed on the right along with the number of characters used for the policy name you’ve entered. For example, the policy name in the below figure uses 14 out of the 128 characters allowed for this field.
Figure: Character limit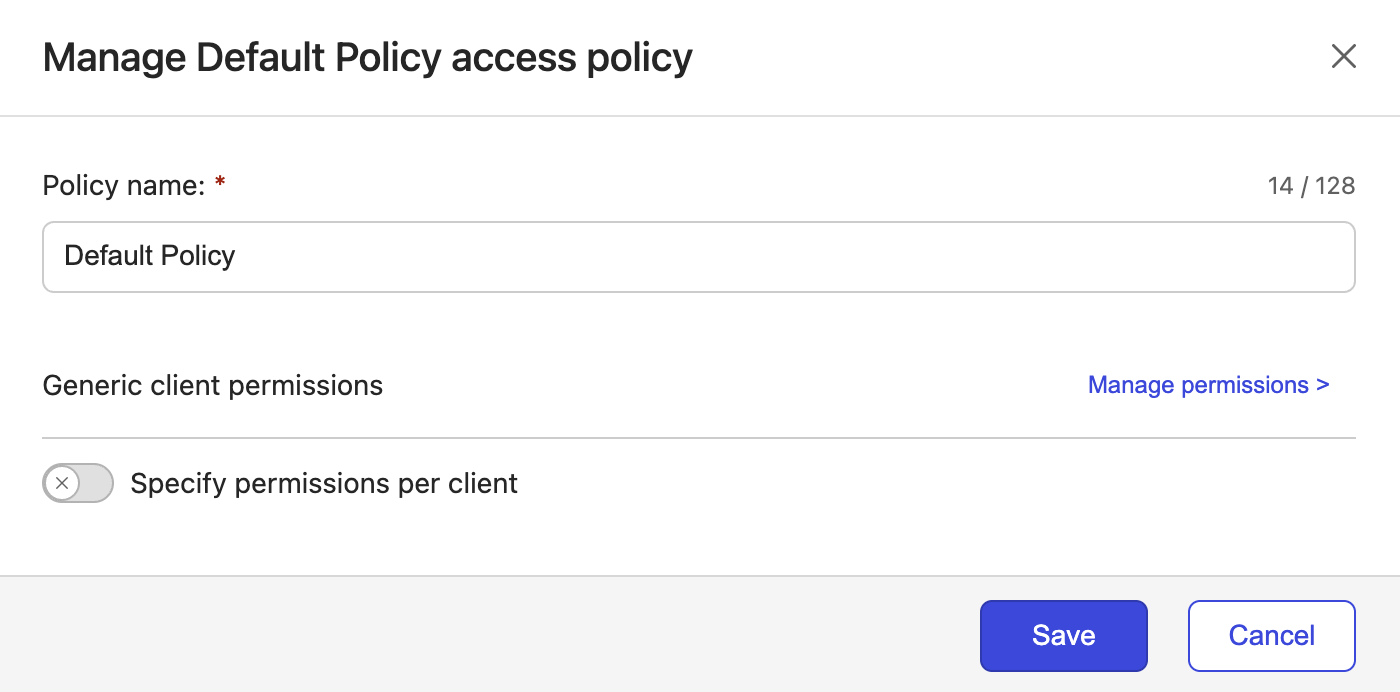
Configure the policy as described in the Generic client permissions or Specify permissions per client sections below.
In the Manage <policy name> access policy dialog, select Save.
Adding an access policy
In the left pane in iManage Control Center, select Extensions > MCP Settings > Access Policies.
In the MCP Access Policies section, select Add more.
In the Add access policy dialog, configure the policy as described in the Generic client permissions or Specify permissions per client sections below.
In the Add access policy dialog, select Save.
Deleting an access policy
In the left pane in iManage Control Center, select Extensions > MCP Settings > Access Policies.
In the MCP Access Policies section, select the
 icon for the custom policy you want to delete.
NOTE: The Default Policy cannot be deleted.
In the confirmation dialog that informs you about the users and groups assigned to this policy getting removed too, select Delete. The Default Policy gets assigned to these users and groups.
Generic client permissions
To set permissions that apply to all MCP-enabled clients using the Manage <policy name> access policy or Add access policy dialog:
Select Manage permissions next to Generic client permissions.
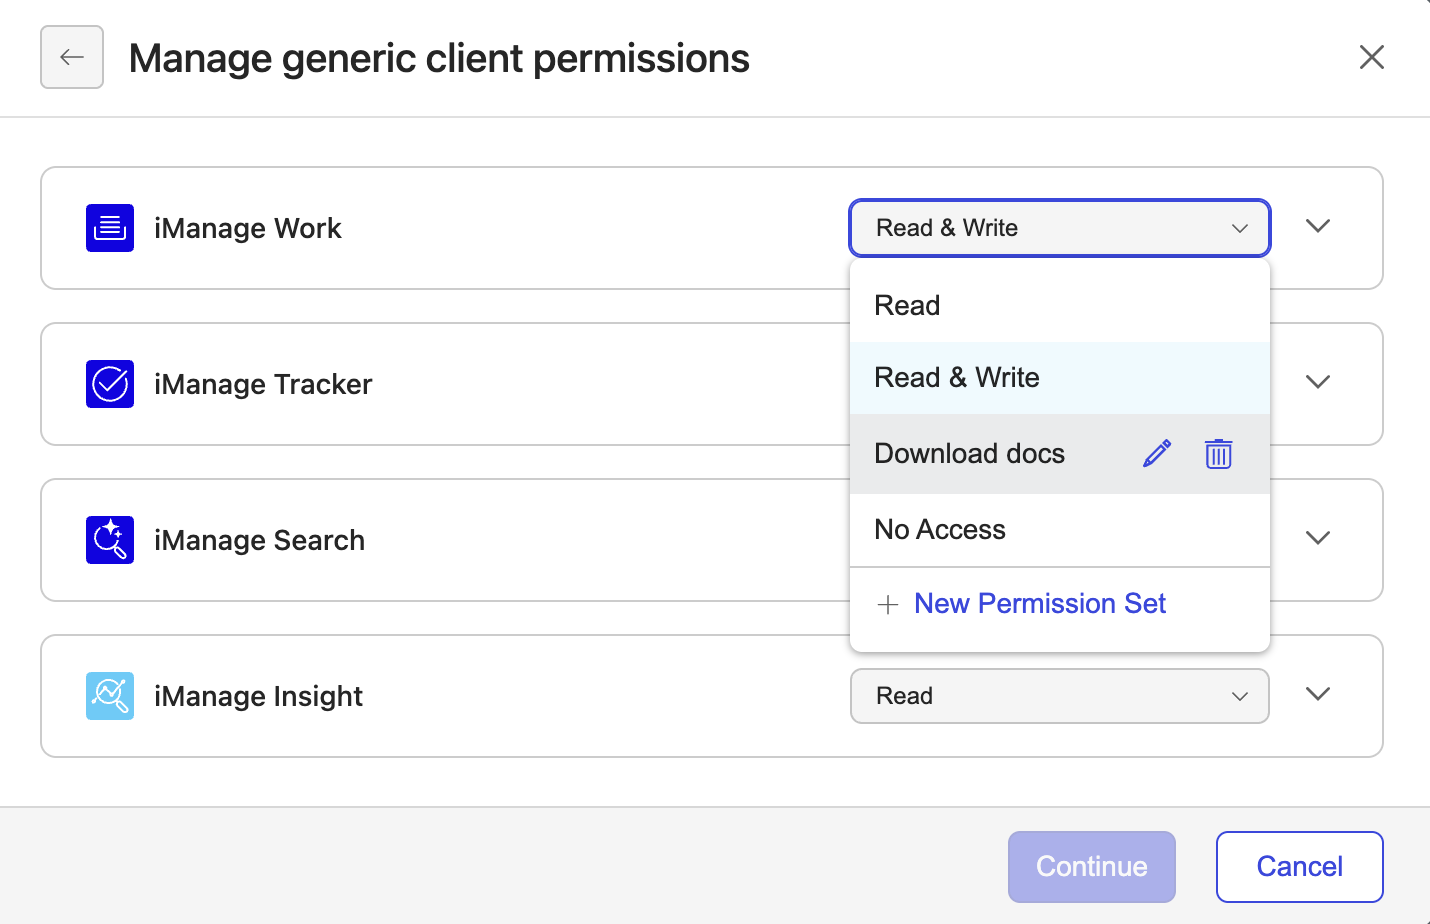
In the Manage generic client permissions dialog, select the Read, Read & Write, or No access from the permissions drop-down list for each iManage MCP service.
NOTES:
Depending on the iManage MCP service, some or all of these options may be available in the permissions drop-down list.
For the Insight+ iManage MCP service, the default permission level is No access. Change this as needed.
Alternatively, create a custom permission set by selecting New Permission Set. For more information, refer to Setting the permissions for each iManage MCP service in a policy.
(Optional) Select the expand
 icon next to the permissions drop-down list for an iManage MCP service to view the individual tools included in the selected permission level. It changes to the collapse
 icon.
icon.Hover over the
 icon to display information about the tool. Figure: Viewing tool information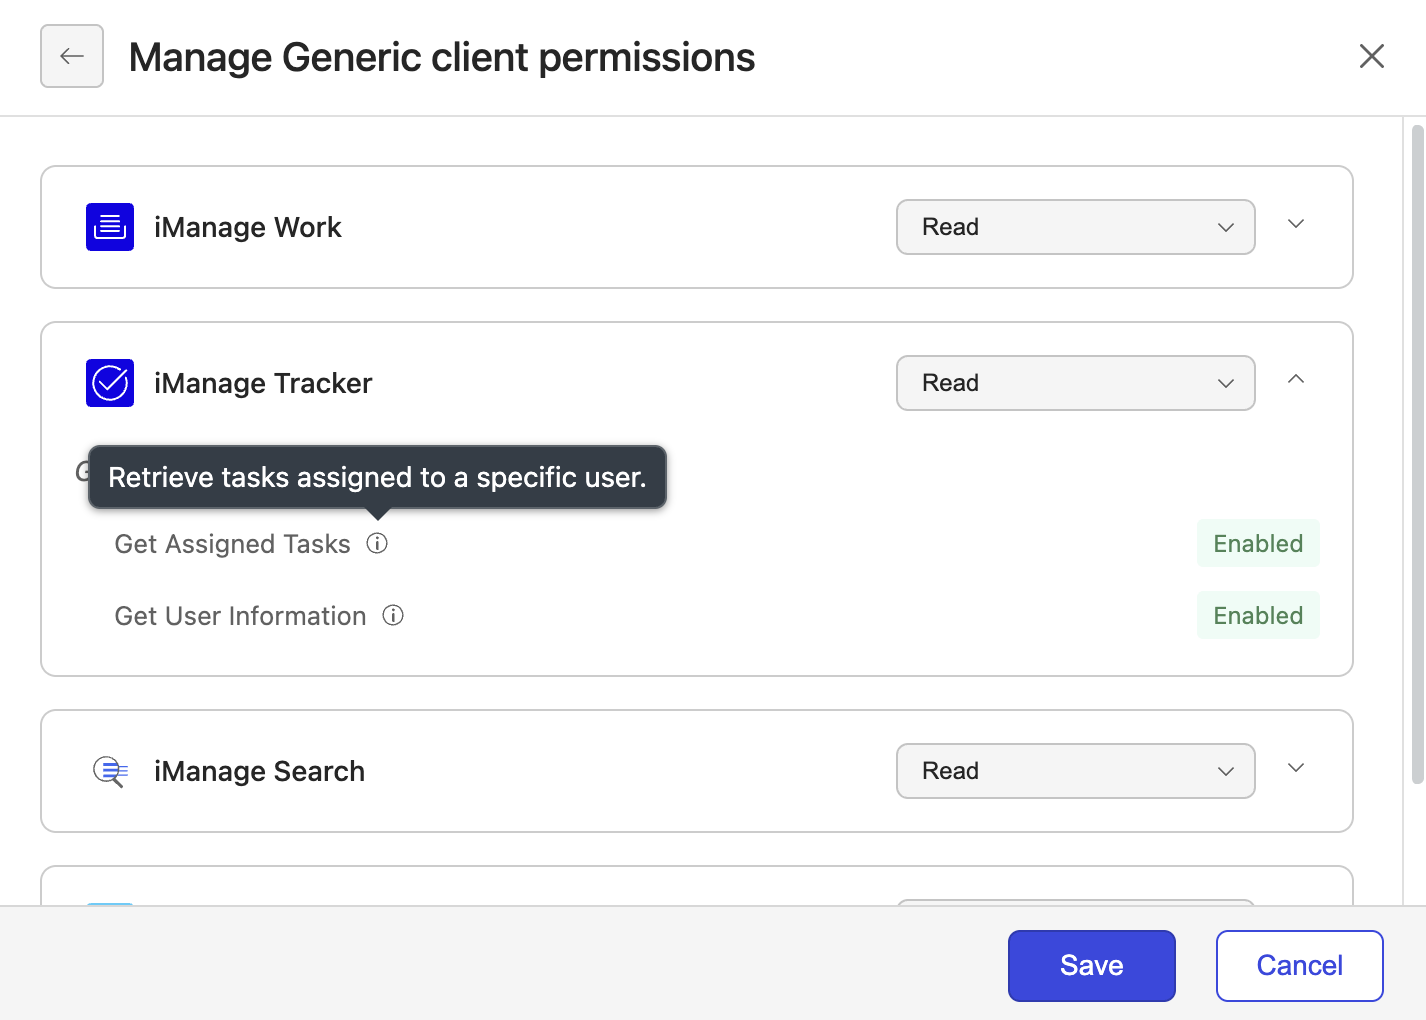
Select Save.
Specify permissions per client
To set different permissions for individual clients using the Manage <policy name> access policy or Add access policy dialog:
NOTE: These per-client permissions override the Generic client permissions entirely for that client.
Slide the Specify permission per client toggle to the right.
By default, each MCP-enabled client that’s included in the MCP Clients > Allowed MCP clients section is listed with the default Allowed permission.
To configure permissions for a specific client, select Manage permissions next to it. The Manage <client name> client permissions dialog opens.
From the drop-down list next to the client name, select one of the following:
Allowed: The client can access iManage MCP services (default setting).
Blocked: The client is denied access to iManage MCP services.
For each iManage MCP service, select Read, Read & Write, No access, or New Permission Set from the permissions drop-down list.
NOTE: For the Insight+ iManage MCP service, the default permission level is No access. Change this as needed while adding or updating an access policy.
For example, your organization has obtained Claude licenses for all employees and want them to use this MCP-enabled client mainly for their tasks. So, you can set Read & Write permissions for all iManage MCP services for Claude while the other MCP-enabled clients that employees use can have Read access only set for all iManage MCP services.
For more information, refer to Setting the permissions for each iManage MCP service in a policy.
(Optional) For each iManage MCP service, select the expand
 icon next to the permissions drop-down list for the service to view the individual tools included in the selected permission level. Then, hover over the icon to display information about the tool.
 Select Save.
Setting the permissions for each iManage MCP service in a policy
While setting generic client permission or specify permissions per client, you can assign one of the following permissions to each iManage MCP service:
Read: Grants access to read tools only. Use these tools to look up content in iManage.
Read & Write: Grants access to read and write tools. Use these tools to look up and add content in iManage.
Read, Write & Delete: Grants access to read, write, and delete tools. Use these tools to look up, add, and delete content in iManage.
No access: Denies access to all tools for that iManage MCP service.
NOTE: For the Insight+ iManage MCP service, the default permission level is No access. Change this as needed while adding or updating a policy.
New Permission Set: Creates a custom permission set with a specific combination of tools for each iManage MCP service. Use this when the standard permission levels do not meet your requirements. For example, if personal assistants in your organization need to download files from iManage Work but shouldn't be allowed to perform any other activity, you can create a custom permission set with only the Download A Document tool enabled.
After you select New Permission Set from the drop-down list, the <iManage MCP connector name> - Create permission set dialog opens. Perform the following steps:
NOTE: For the Name and Description fields, the red asterisk indicates that these are mandatory fields. The character limit is displayed on the right along with the number of characters used for the text you’ve entered.
In the Name field, enter a name for the permission set.
Ensure that it's a unique name and not the same as the options already provided in the permissions drop-down list or a custom permission set that you created previously.In the Description field, enter a description that explains the purpose of this permission set.
In the Tools section, slide the toggle to the right of each tool you want to enable.
By default, all tools are disabled and grouped under categories such as Read or Write.NOTE: Not all tool categories are available for all iManage MCP services.
To enable all tools in a category at once, slide the toggle to the right of that category.
Select the collapse
 icon next to a tool category to collapse the list of tools in it. It changes to the expand
  icon.
icon.
Select Save. The custom permission set is assigned to the current iManage MCP service (where you’re creating it) and available in the drop-down list for all policies for this iManage MCP service.
Editing or deleting a custom permission set
In the left pane in iManage Control Center, select Extensions > MCP Settings > Access Policies.
Select Manage > Manage permissions for any policy (including the Default Policy).
In the permissions drop-down list for an iManage MCP service, hover over the custom permission set and then select the edit
 or delete
  icon.
icon.Edit: In the <Name of iManage MCP service> - Edit permission set dialog, make the required changes and select Save. Select Confirm in the dialog that displays the list of policies which will get updated as a result of these edits.
Delete: If a custom permission set is assigned to an iManage MCP service in one or more policies and you try to delete it, a message displays the list of policies for which the permission set is assigned and informs you that the set can't be deleted.
Assign a different permission set to that service to the iManage MCP services in those policies and then delete the custom permission set.
Figure: Edit and delete icons for custom permission set