Step 1: Accepting and submitting the disclaimer
In the left pane in iManage Control Center, select Extensions > MCP Settings. A disclaimer is displayed until it’s accepted.
Read the entire disclaimer carefully and then select the I agree to the terms and conditions check box.
Select Accept. A message is displayed to inform you that the consent is saved and the MCP Settings page gets enabled.
Figure: MCP Settings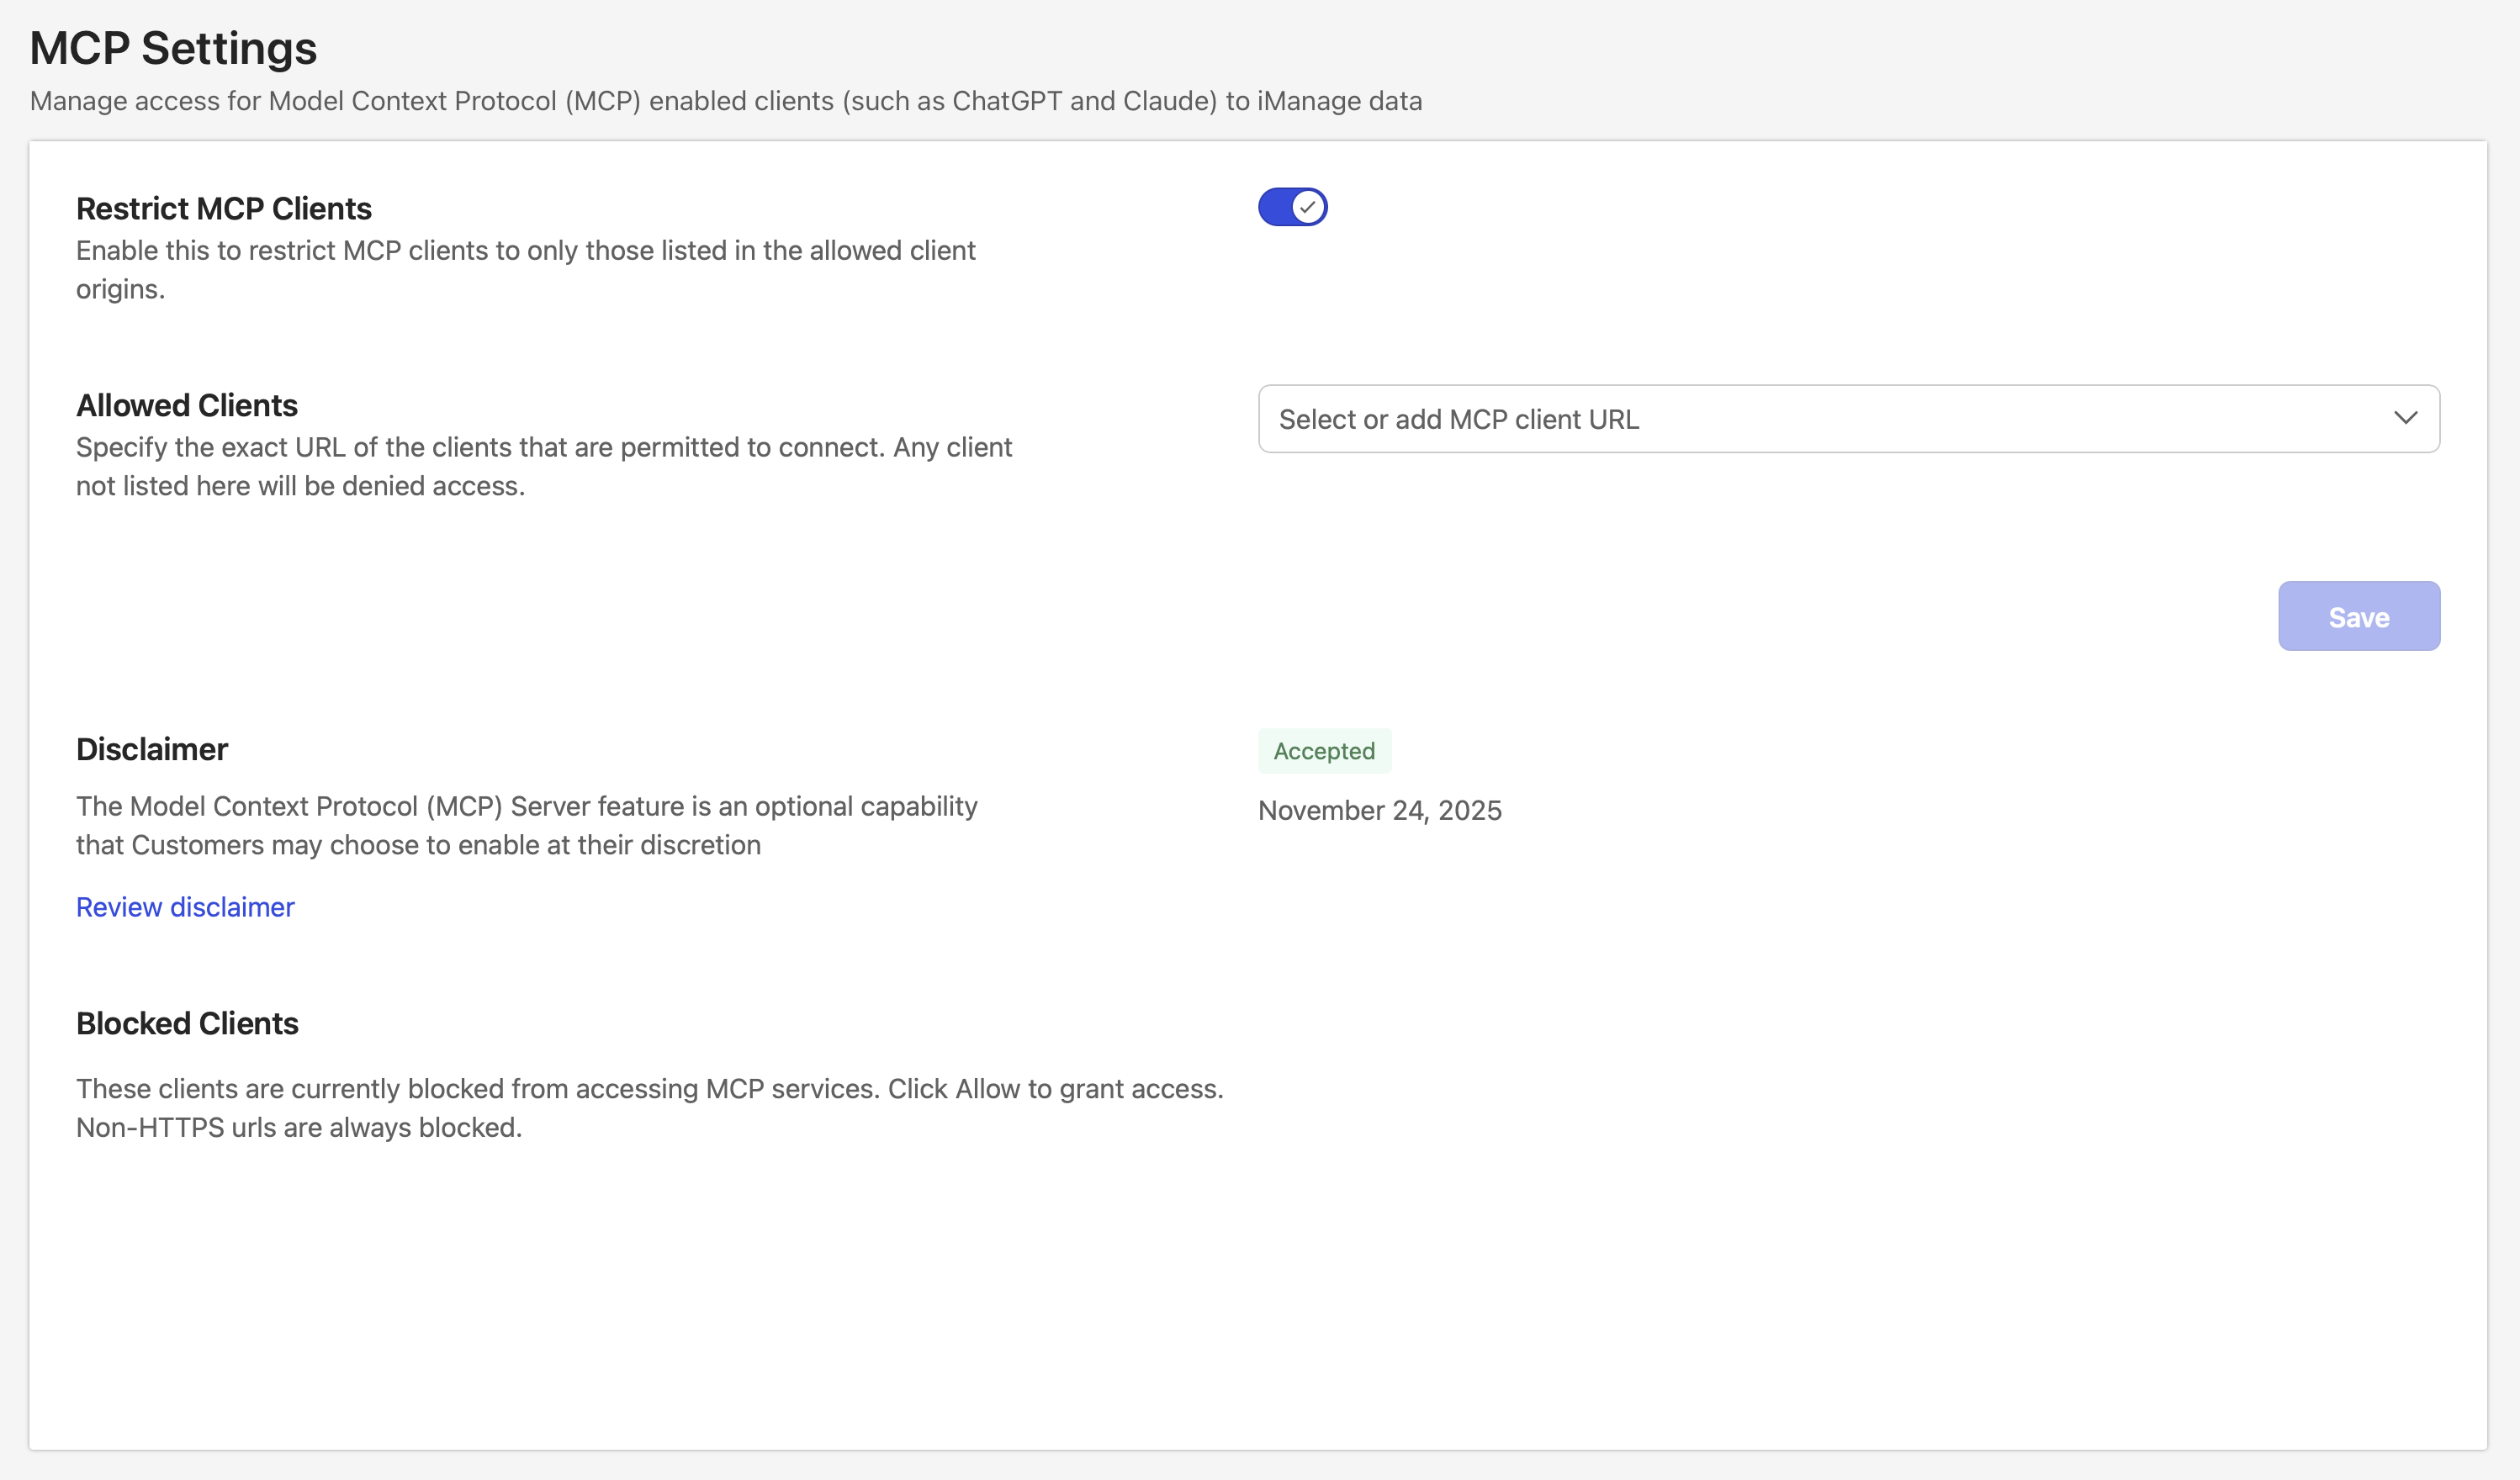
(Optional) To go through the disclaimer again or to access it later, select Review disclaimer.
Step 2: Selecting or adding MCP clients
From the Select or add MCP client URL drop-down list, select one or more of the following LLM-enabled clients:
Claude
ChatGPT
Copilot Studio
Alternatively, add the URL for the required client in the https://<domain> format. Non-HTTPS URLs are always blocked.
Select Save. These client(s) will be allowed to connect to iManage Work.
Removing MCP clients
While selecting or adding MCP clients or any time later, to remove a client from the list of allowed clients:
Select the remove
 button next to the name of the client.
Repeat this for every client that you want to remove from the list.Select Save.
Step 3 (Optional): Allowing blocked clients
If the users in your organization try to access iManage MCP services from any MCP-enabled clients, other than the ones that are selected or added per Step 2 above, the clients will be blocked. The Blocked clients list displays the following for each client (refer to the image below):
URL of the client that was blocked
User who tried accessing
Time when the client was block
Allow button
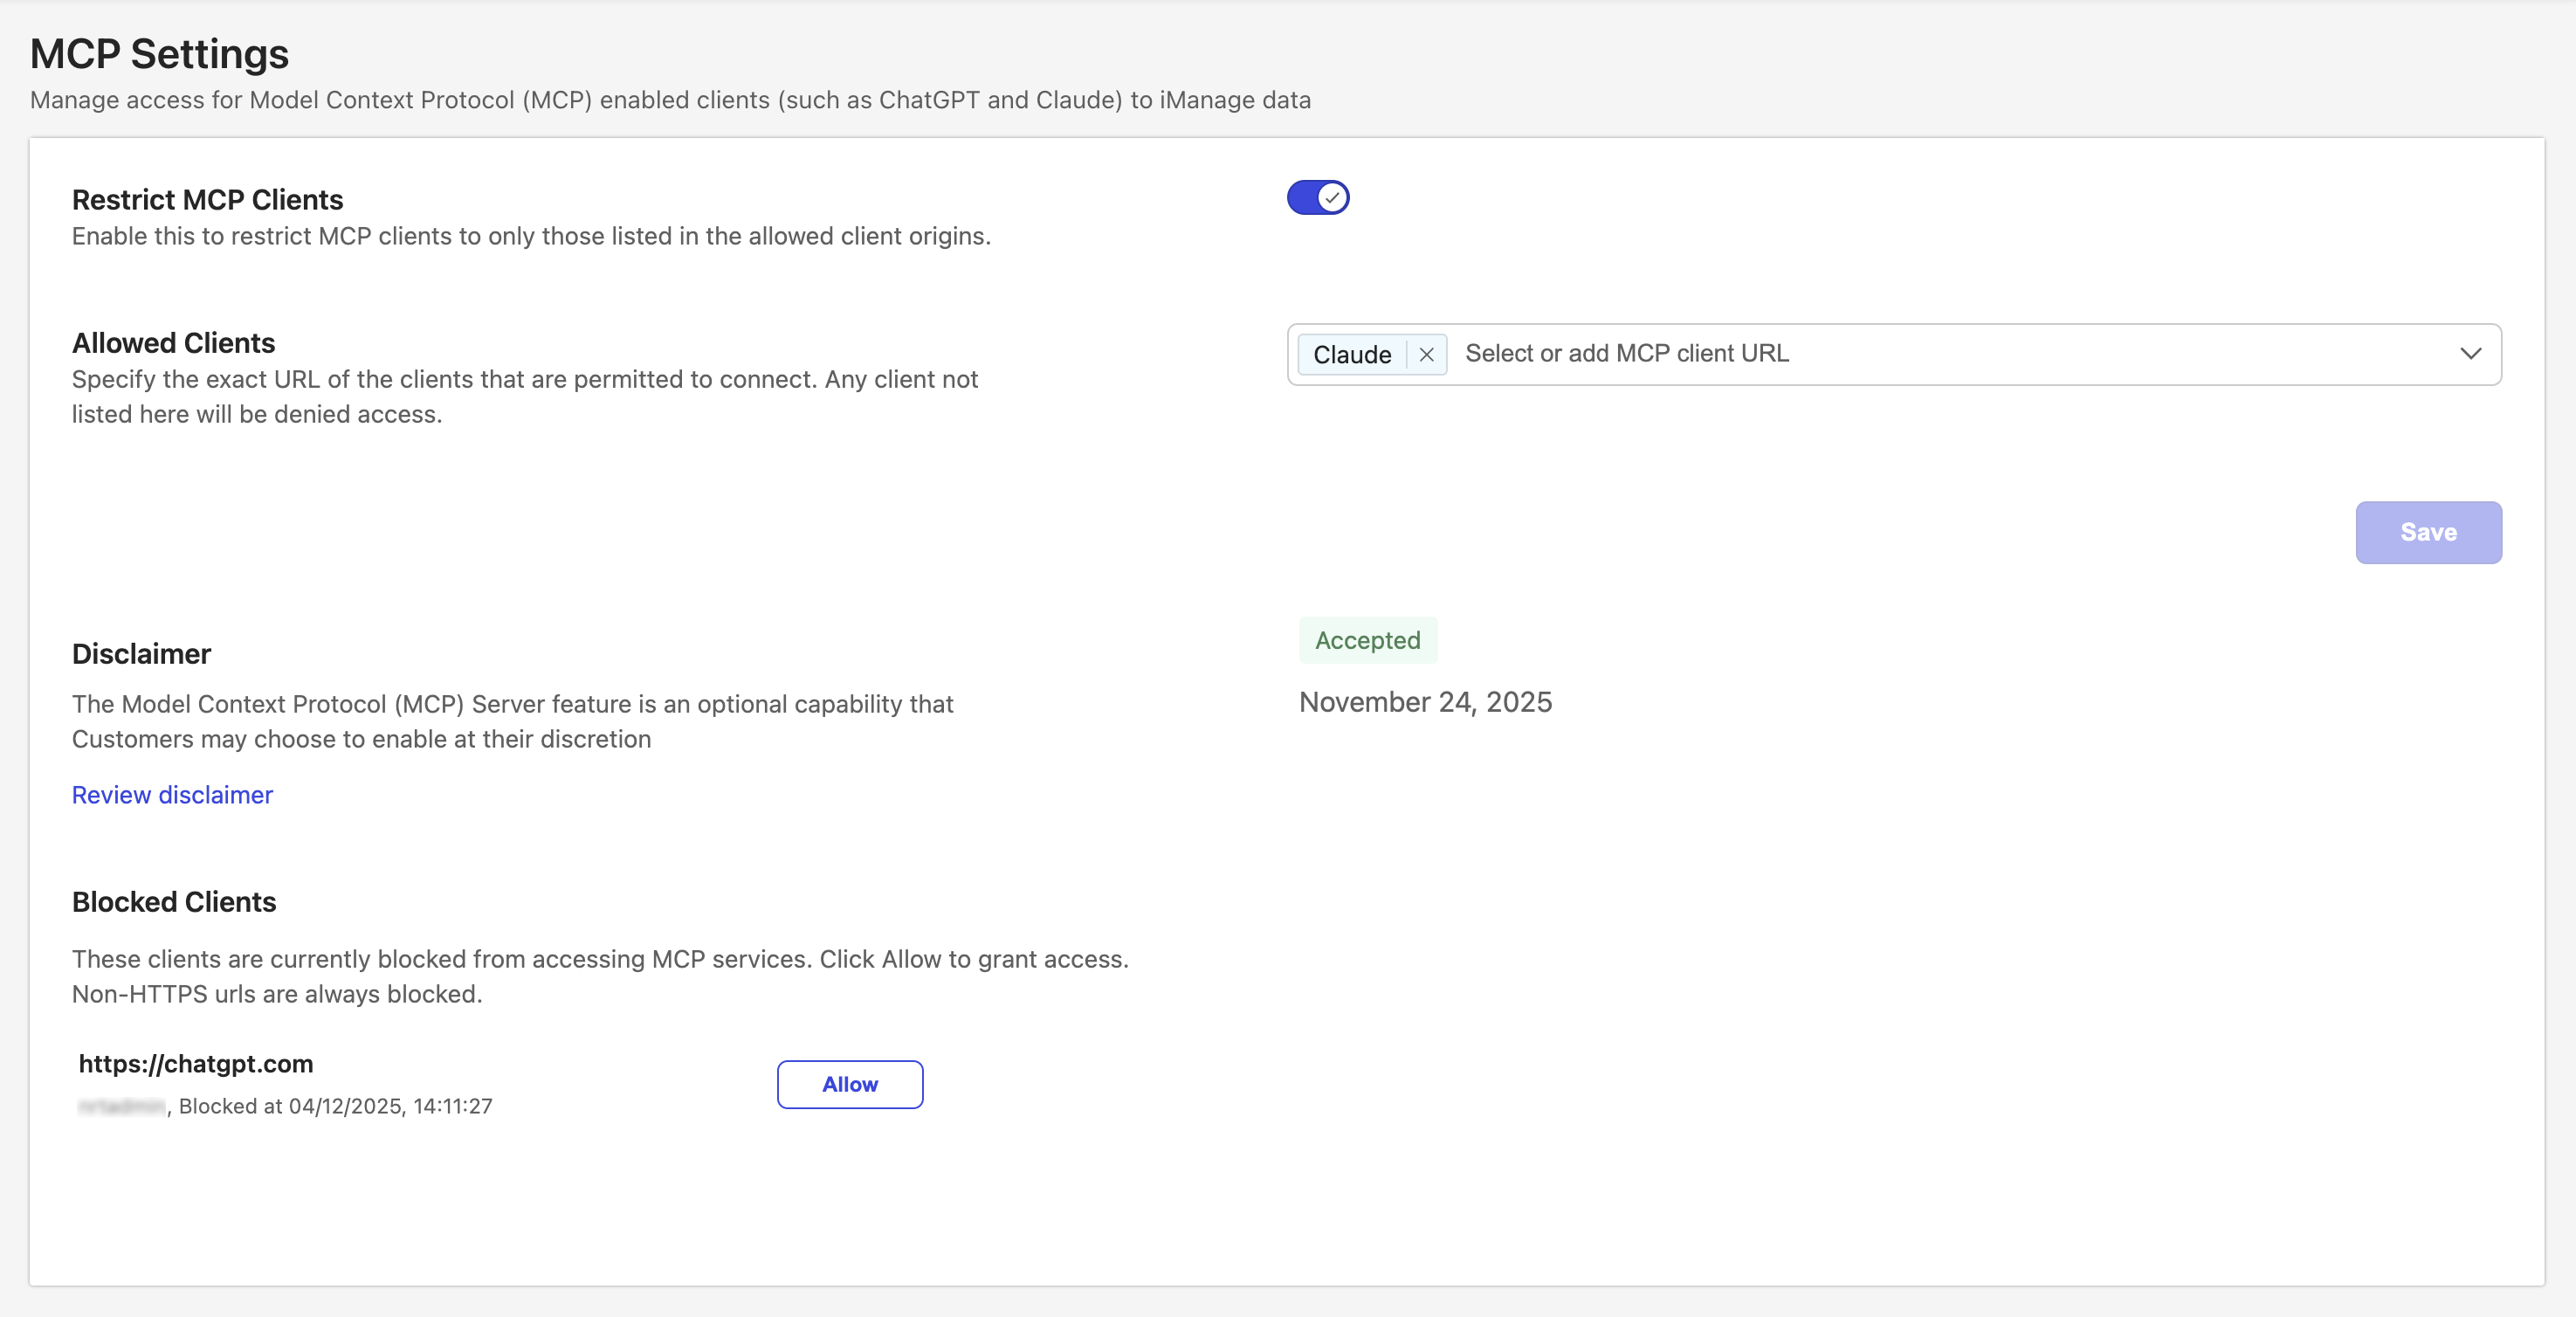
To grant access to blocked clients:
Review the Blocked Clients list.
Select Allow for each client that you want to unblock.
Select Save.
Turning off MCP client restrictions
By default, the Restrict MCP Clients option is enabled, indicating that users in your organization can access iManage MCP Server only from the MCP-enabled clients that you add and grant access to.
To allow iManage MCP Server to be accessed from any MCP-enabled client, turn off the Restrict MCP Clients option by completing the following steps:
NOTE: When this option is turned off, the Allowed Clients option (the Select or add MCP client URL drop-down list) becomes unavailable.
Slide the Restrict MCP Clients toggle to the left.
Select Save.