The Documents tab on the Collaboration page lets you view and manage all documents shared with collaboration links for a specific library. To access this tab in iManage Control Center, browse to Settings > Collaboration and then select the Documents tab.
NOTE: To stop sharing documents, the user must be a member of the NRTADMIN group. For more information, refer to Creating an NRTADMIN User.
Documents that have been shared for collaboration are displayed in a table that includes document details. An example of the Documents tab is shown in the figure below.
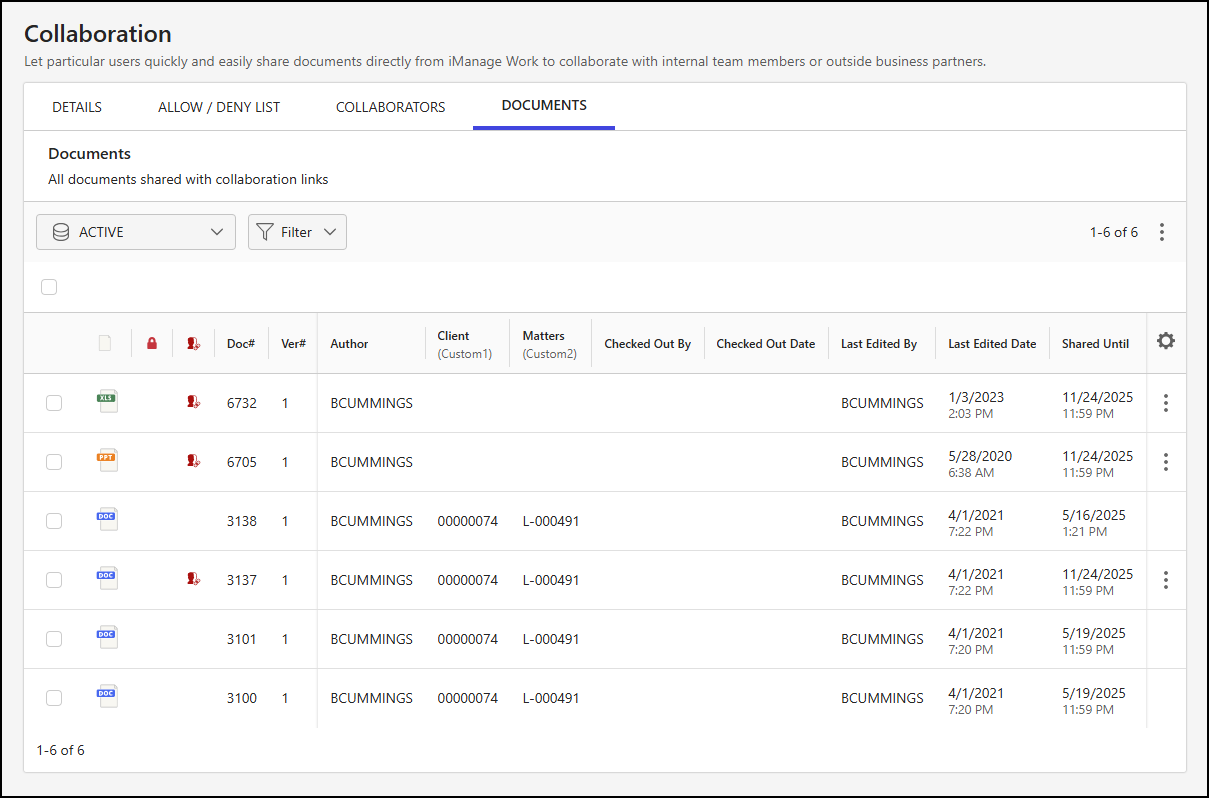
In the Documents tab output table:
The
 icon displays when the document is checked out.
The
 icon displays when the document is checked out using iManage Work Next Generation Co-authoring.
The
 icon displays when the document is being shared. If the icon isn't visible, it means the document was shared at some point but isn't currently being shared.
Documents table data output options
The following data output options are available for the Documents table:
Library: Choose the database to display document collaboration details.
Filter: Filter the data output using the following criteria:
Active Sharing: Filter based on whether a document is currently being shared.
Yes
No
Checked Out: Filter based on whether a document is currently checked out.
Yes
No
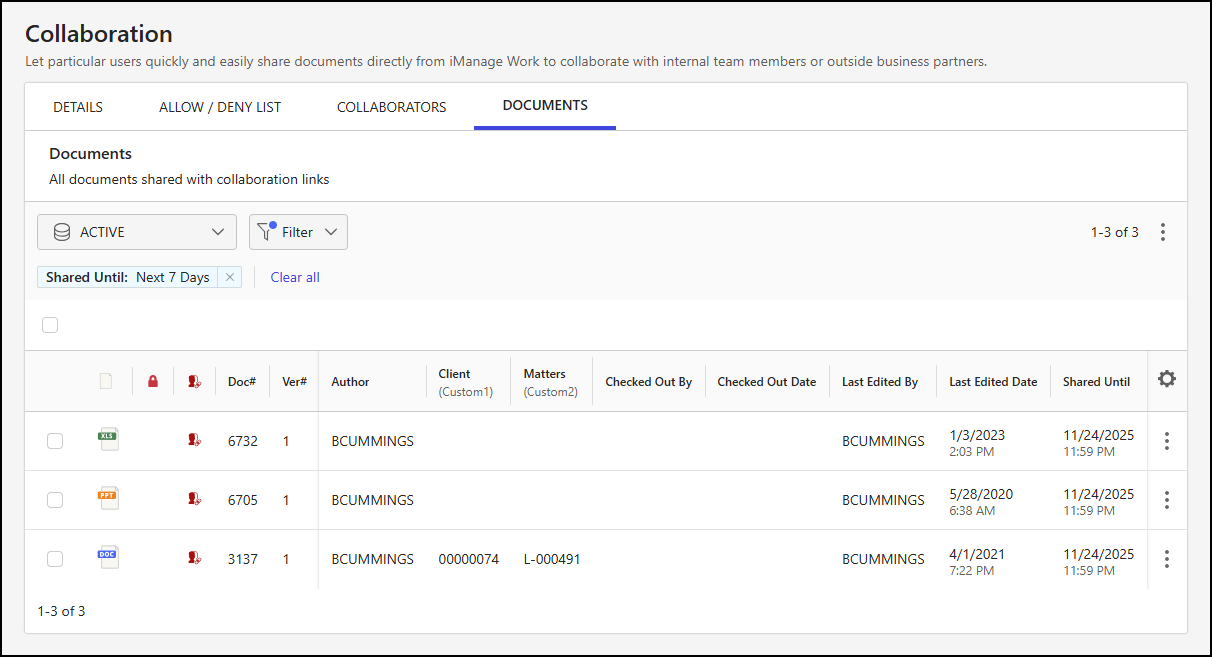
Shared Until: Filter based on the date or date range up to which a document is shared.
Today
Next 7 Days
Next 30 Days
Date drop-down
Exact date
After
Before
Between
The following figure shows an example of filtering applied to documents in the Active library that have collaboration sharing set to expire within the next seven days.
Manage document sharing
You can manage documents shared through collaboration on the Documents tab of the Collaboration page.
NOTES:
In iManage Control Center, you can only stop document sharing. To start sharing again, a user with the proper privileges needs to resend the collaboration link through iManage Work Web.
When the Document sharing feature is disabled, the Documents table remains available so you can view which documents have been shared. However, the option to stop document sharing is disabled, and the following banner message is displayed at the top of the Documents tab:
“Collaboration is disabled on <LibraryName> library. These documents are no longer shared for collaboration.”
Selecting documents
In the Documents table, you can choose one, multiple, or all documents currently shown on the page and perform actions on them.
To choose all documents, select the check box above the Documents table.
To choose one or more documents, select the check box next to each document within the table.
When one or more documents are selected, actions are displayed on the toolbar menu, as shown in the following figure.
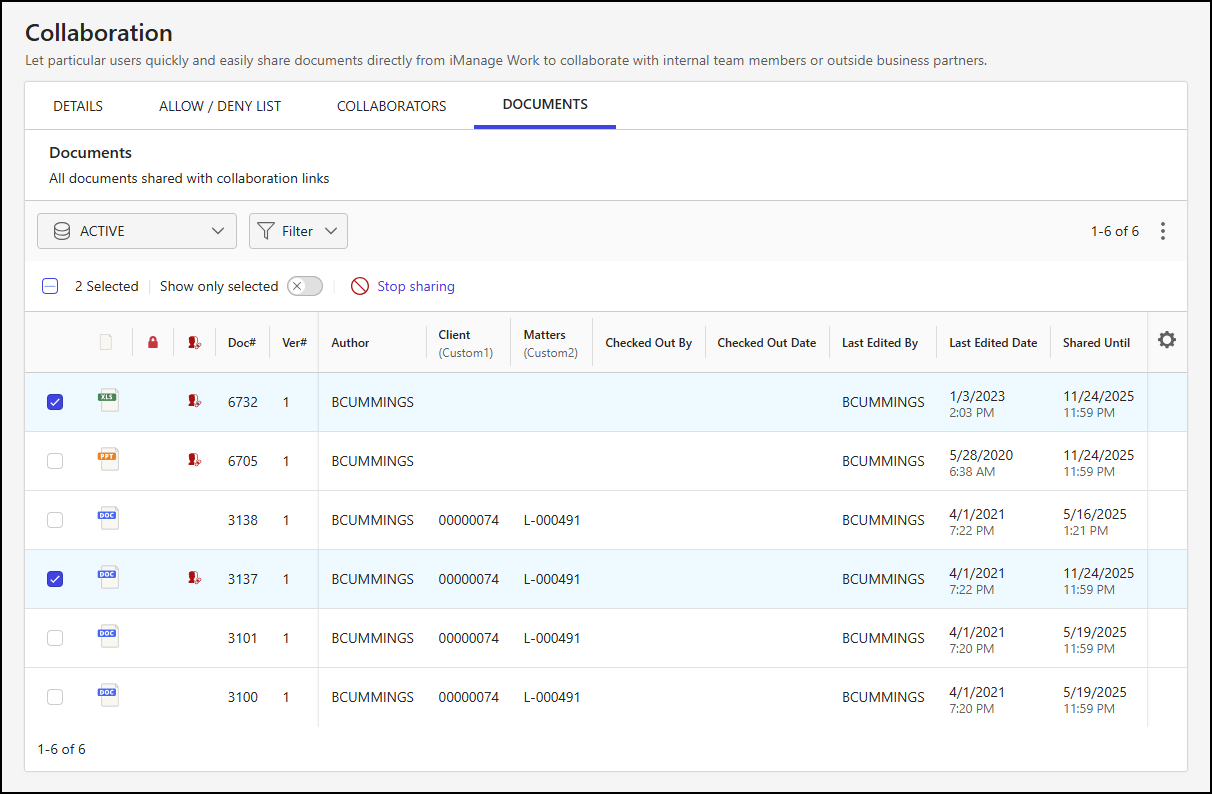
The following toolbar menu actions are available when one or more documents are selected:
Show only selected: Displays only the selected documents.
Stop sharing: Stops sharing the selected documents that are currently being shared.
Managing document sharing
You can manage document sharing for one or more documents by following the guidance in Selecting documents, or by either right-clicking a document row or selecting the kebab menu of an individual document.
Follow these steps to manage sharing:
In iManage Control Center, browse to Settings > Collaboration.
Select the Documents tab.
Select the library from the library drop-down list.
Locate the document(s) for which you need to manage sharing.
Using either the toolbar, right-click menu, or kebab menu, select Stop sharing to stop the sharing of the document. This disables the collaboration link for the document and removes access to the document through the link to all recipients.
Figure: Collaboration page - stop document sharing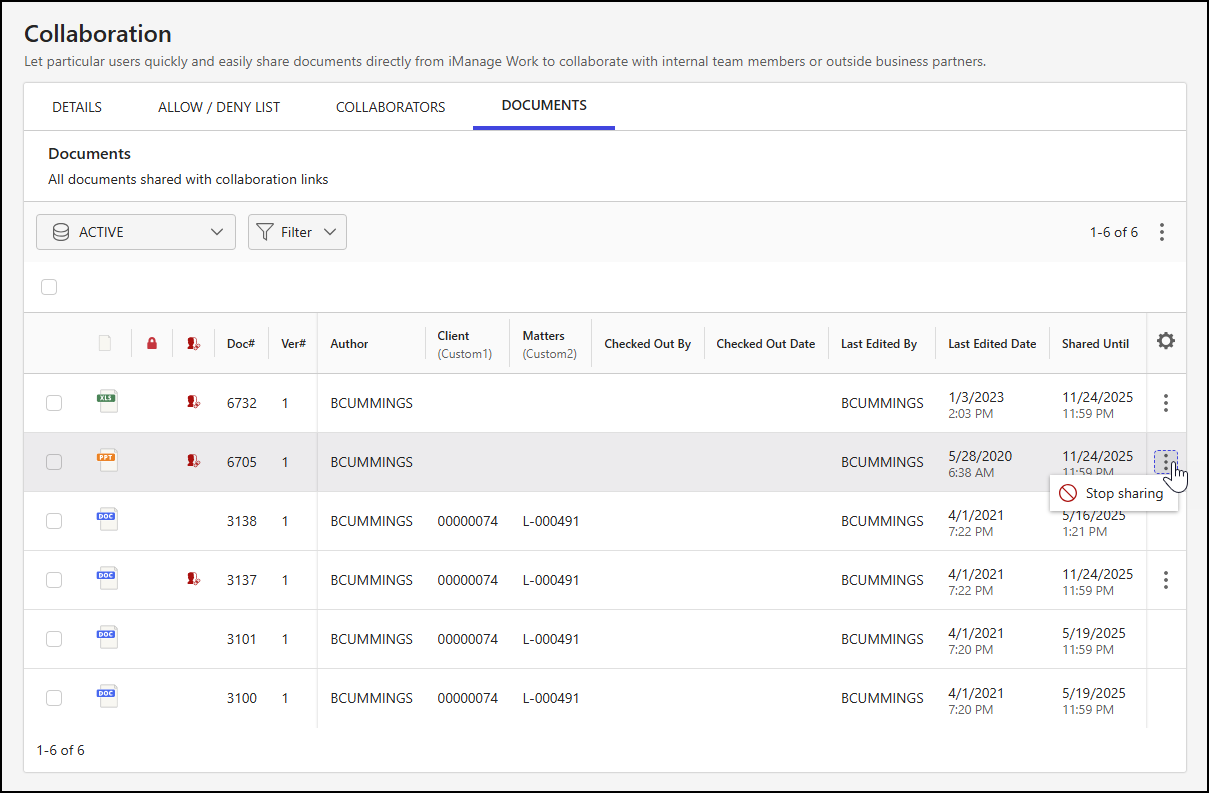
In the Stop sharing alert, select Stop sharing.
Figure: Stop sharing alert
Configure the Documents table
Documents shared for collaboration are displayed in a table in the Documents tab of the Collaboration page. By default, the following columns are displayed in this table:
File Type
Checked Out
Shared
Doc#
Ver#
Author
Client (Custom1)
Matters (Custom2)
Checked Out By
Checked Out Date
Last Edited By
Last Edited Date
To add, remove, or reorder the columns, select the  icon at the far right of the Documents table.
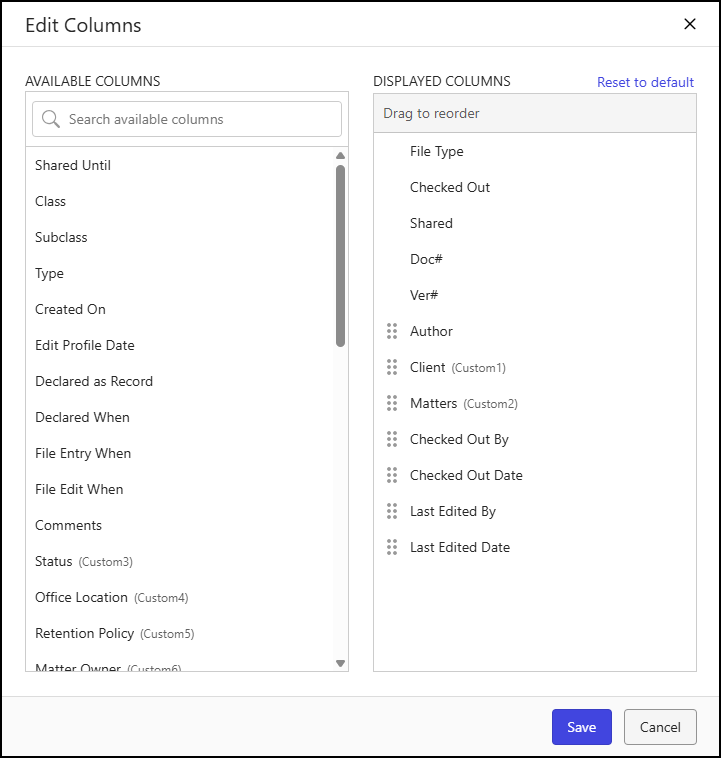
In the Edit Columns dialog:
To add a column to the output: Hover over the column name in the Available Columns panel and select the + icon. This action moves the column to the Displayed Columns panel.
To remove a column from the output: Hover over the column name in the Displayed Columns panel and select the X icon. This action moves the column to the Available Columns panel.
To reorder columns: Select and drag a column in the Displayed Columns panel.
To return to the default column display and order: Select Reset to default.
To save column display: Select Save to save your column display and order changes or Cancel to abandon your changes.
NOTE: The File Type, Checked Out, Shared, Doc#, and Ver# columns are required and can’t be removed or reordered.
Download the Documents table
To download the Documents table to your device, select the icon in the upper-right portion of the Documents tab, and then select Download as CSV.