The following example provides the steps for setting up a custom field in iManage Control for a disposition reviewer. We've used custom3 field to define disposition reviewer. This section contains the following:
NOTE: The aliases you defined aren’t automatically displayed in iManage Disposition Manager. After defining them in iManage Control Center, you must match them using Metadata Mappings in iManage Disposition Manager.
Adding alias to the custom3 field
Sign in to iManage Control Center.
Browse to Metadata > Properties > Custom Fields.
Select the library for which you want to add aliases.
Figure: Select the library to add disposition reviewer
Select custom3 and then select Edit Caption to edit the caption, if not already edited.
Figure: Edit the caption for custom3 field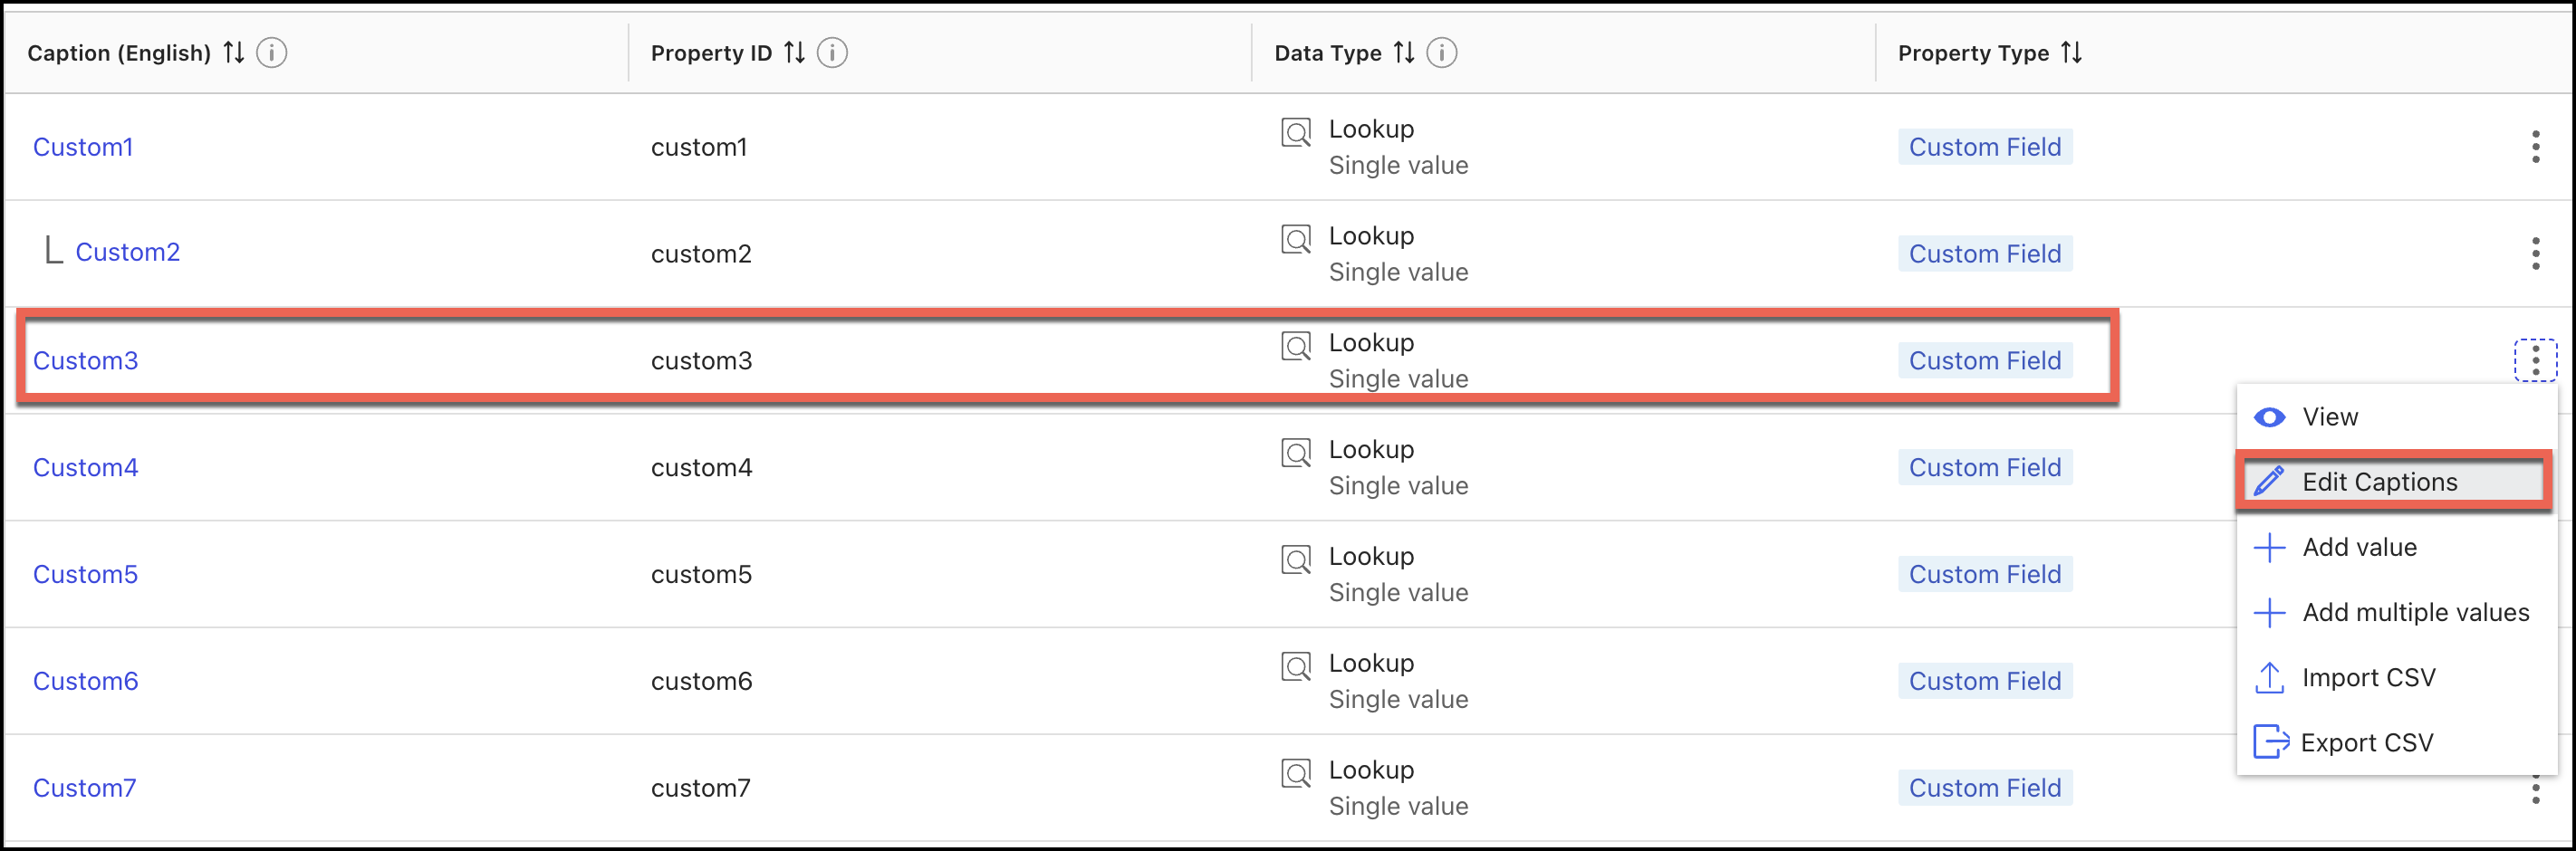
In the Edit dialog that displays, enter the alias as Reviewer 1.
Figure: Enter the alias for custom3 field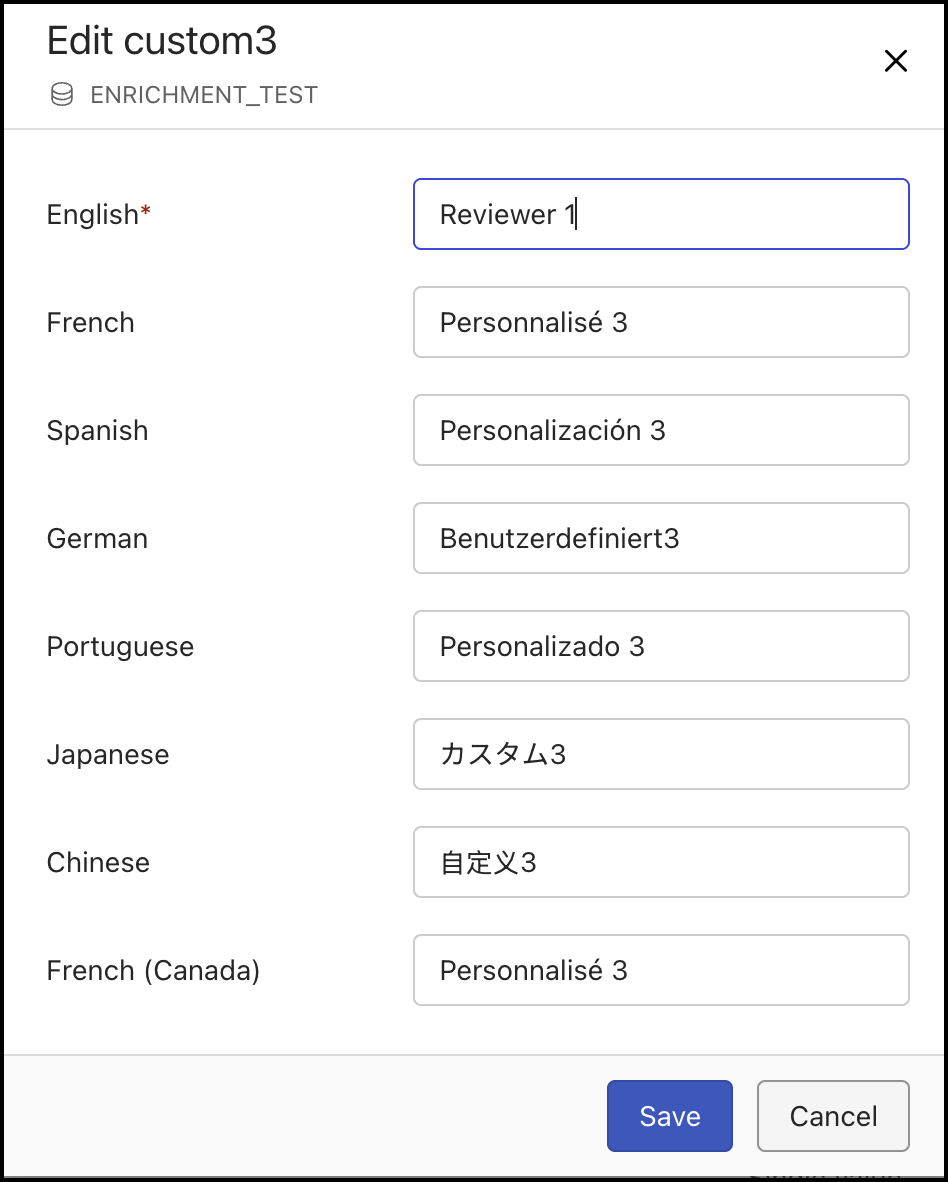
Adding values to the custom3 field
In iManage Control Center, browse to Metadata > Properties > Custom Fields.
Select the library for which you want to add retention policies.
Figure: Select the library to add retention policiesSelect Add value and in the Properties page that opens, enter the value in the Alias field and the description in the Description field and then select the
 icon to add the value.
 For example, for Reviewer 1, you can add ACASE in the Alias field and adam.case@goimanage.com in the Description field.
Figure: Add reviewers in iManage Control Center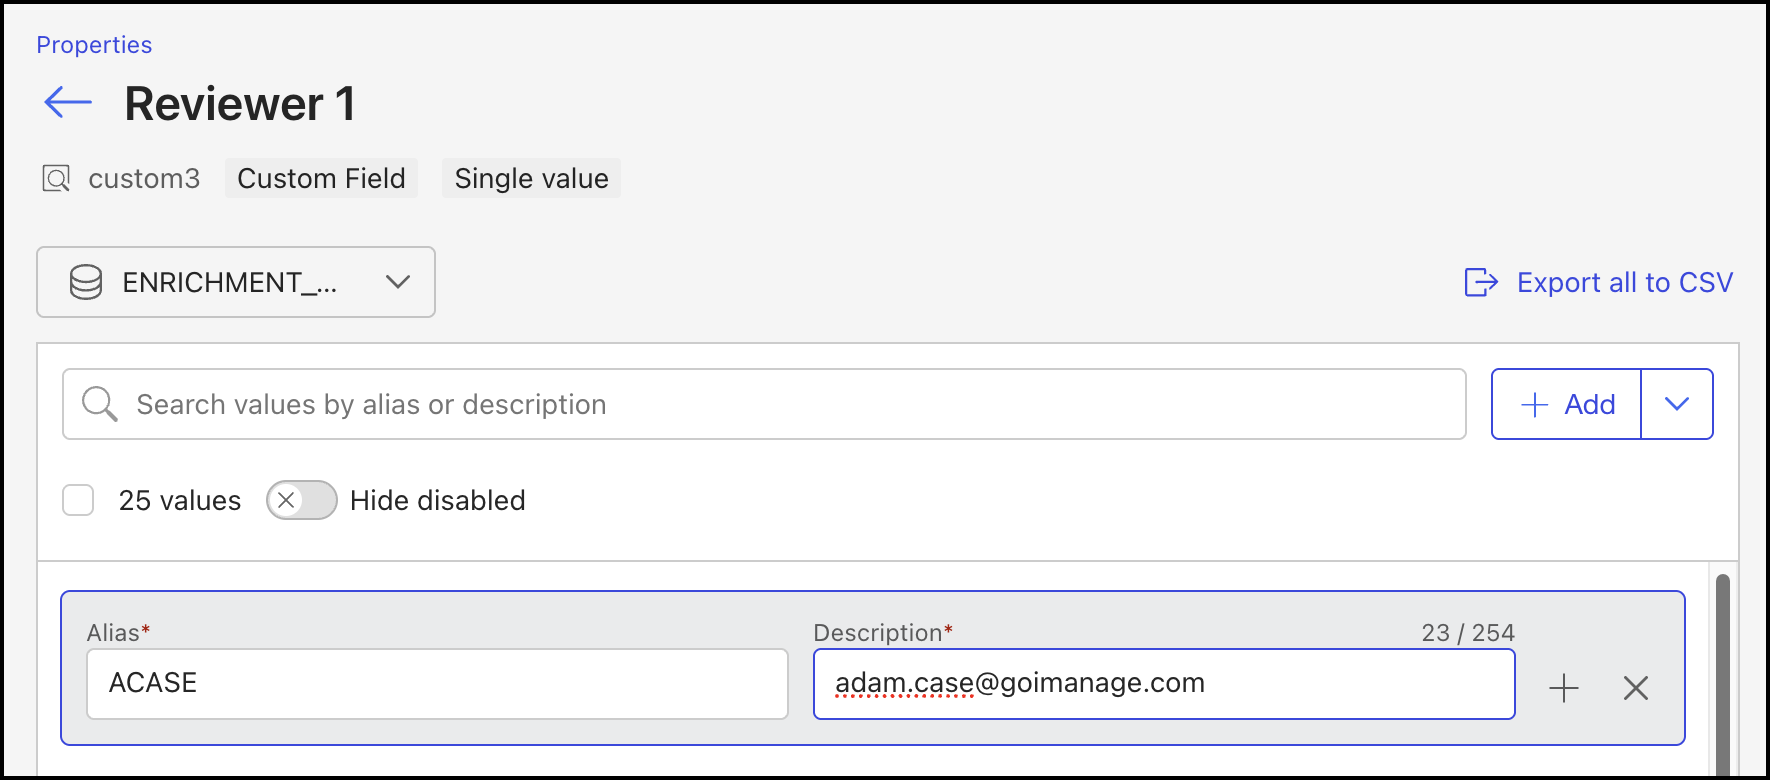
Additionally:
To modify an existing value, select
 Edit next to the value you want to modify and make the necessary changes.
 To enable or disable an existing value, select
 Enable/Disable next to the value you want to enable or disable.
 To delete an existing value, select
 Delete next you to the value you want to delete.
NOTE: When you add a reviewer in the alias field, you must match the first 32 characters (maximum characters that can be added) described in iManage Control Center in iManage Disposition Manager.
Select Save.
Applying the defined values in iManage Work
After you've added values to custom fields in iManage Control Center, these fields are displayed with the alias and the enabled values in the Properties pane in iManage Work.
To apply the defined iManage Work values,
Sign in to iManage Work at cloudimanage.com.
Browse to the matter or folder for which you want to add values and then select Properties.
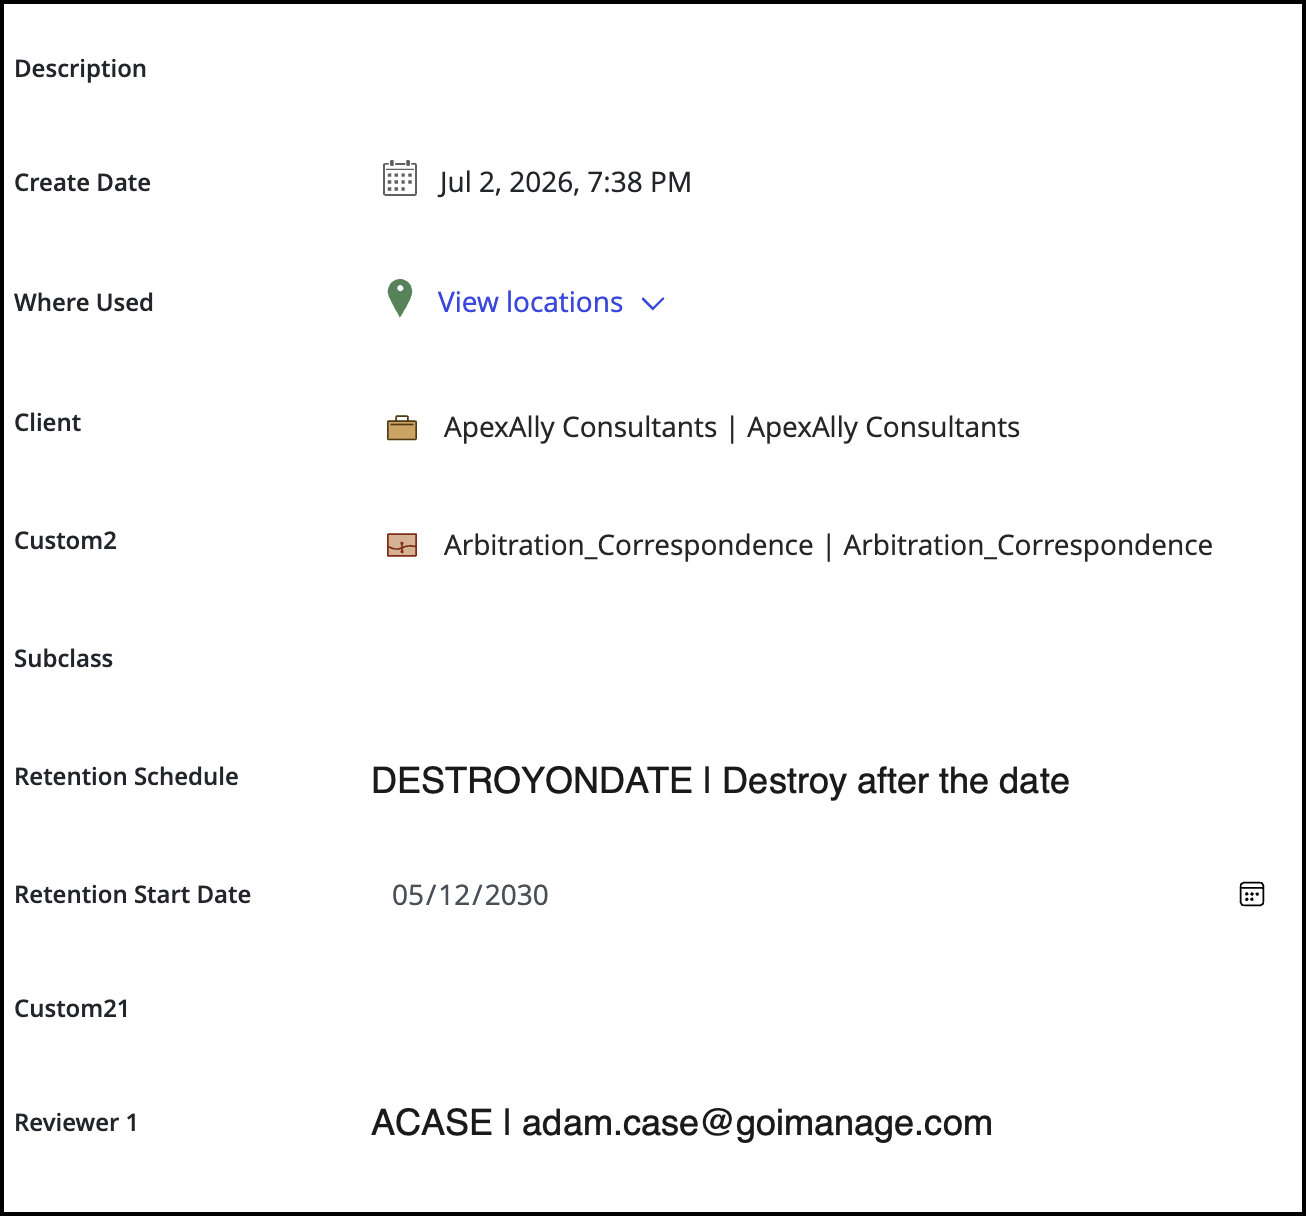
In the Properties pane, find the alias displayed for custom3 (Reviewer 1) and select the value as ACASE.
Figure: Set reviewer in iManage Work