This step guides you through reviewing and configuring key system settings in iManage Threat Manager, including time zone, date ranges, risk score mappings, user exclusions, and email notifications. These settings ensure accurate data processing, alerting, and system behavior tailored to the needs of your organization.
To configure settings:
1. Open settings
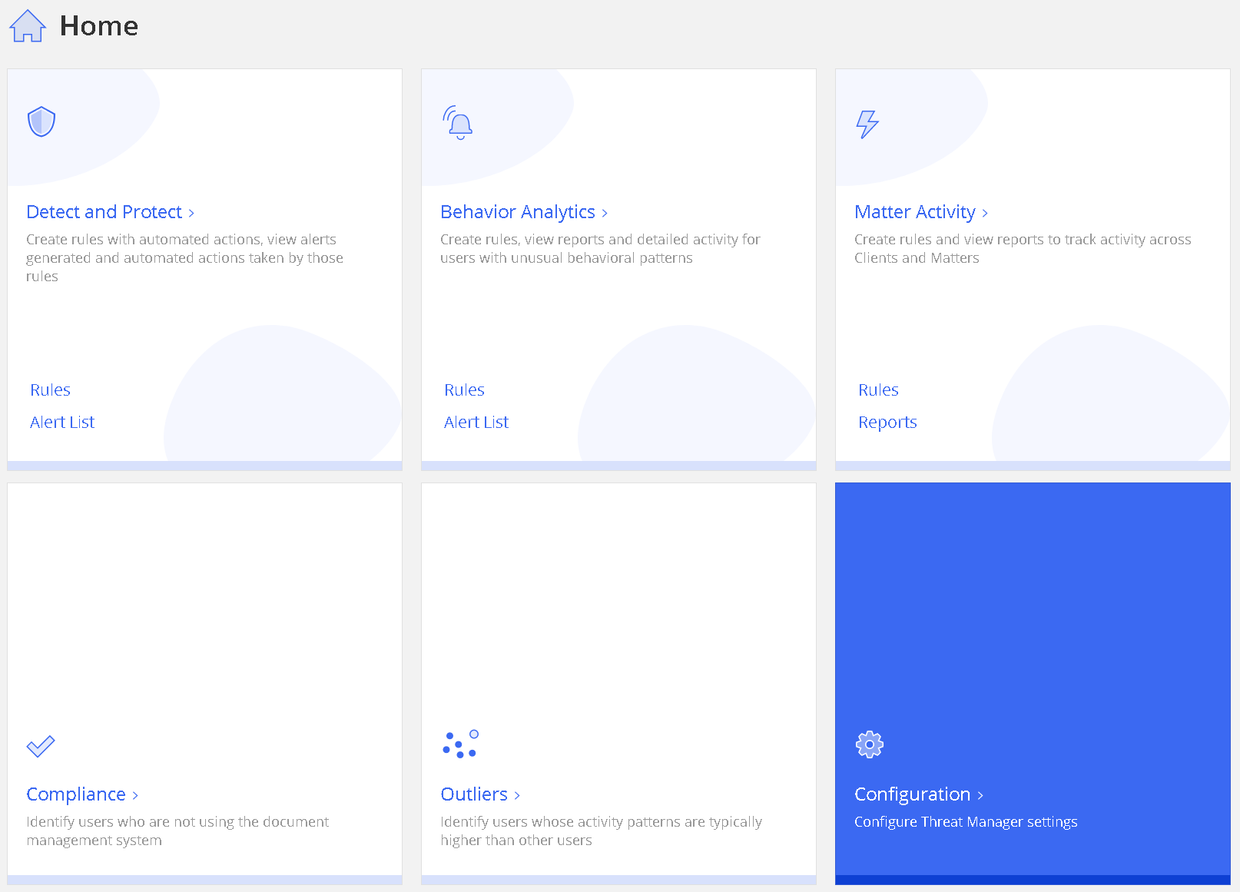
On the Home page, select the Configuration tile at the lower right. Alternatively, use the sidebar to browse to Configuration > Settings > General. The General tab is displayed.
2. Set or verify the default time zone
To ensure correct activity logging and notifications, verify that the default time zone of your organization is correctly configured in iManage Threat Manager:
Browse to Configuration > Settings > General.
In the Default Time Zone field, review the currently selected time zone to ensure it matches the primary location of your organization. Select the time zone where most of your users are located—for example, America/New_York.
If the time zone is incorrect:
Select the drop-down list for the Default Time Zone field.
Select the appropriate time zone for your region.
Select Save to apply the change.
NOTE: If your organization is located in a non-standard UTC offset (for example, UTC+6:15 or UTC-5:30), contact iManage Support. They'll confirm that the DATAIMPORTER_ACTIVITYRESOLUTIONMINUTES= setting in the docker-compose_v1-3.yaml file is correctly configured (to 15, 30, or 45) to match your time zone offset.
3. Validate the default date ranges
In Configuration > Settings > General, verify that the default date ranges match the values shown in the table below.
If the values are correct, no further action is needed. Continue to the next step.
If the values are different, use the drop-down selectors to update each date range accordingly. Then, select Save to apply the changes and proceed to the next step.
Table: Default date range settings
Property | Default value |
|---|---|
Behavior Analytics Rule - Threshold | Last Month |
Behavior Analytics Rule - Simulation | Last Week |
Behavior Analytics Rule - Run Once | Last Week |
Behavior Analytics Reports | Last Month |
Behavior Analytics Alerts - Alert List | Last Month |
Alert List Detail | 10 Days before 10 Days after |
Detect and Protect Alerts - Alert List | Last Month |
Matter ID Activity Rule - Run Once | Last Month |
Matter ID Activity Reports | Last Month |
Compliance | Last Month |
Outliers | Last Week |
Analyze - Threshold | Last Month |
Analyze | Last Week |
Statistics | Last Month |
Roles History | Last Month |
Robot Training Inputs | Last 6 Months |
4. Validate the score settings
A score setting defines how different threat levels (such as low, medium, or high) are translated into numerical risk scores, which iManage Threat Manager uses to prioritize and classify alerts.
From the Configuration > Settings > General tab, verify that the threat levels are correctly mapped to risk scores based on the recommended values.
IMPORTANT: Accurate mapping of threat levels to risk scores is critical. The recommended values provided here serve as a general starting point for most organizations.
Incorrect mappings can cause alerts to be misclassified, leading to serious threats being overlooked. To maintain security, review and adjust these settings regularly to reflect the specific risk tolerance and policies of your organization.
On the General tab, scroll to Score Settings. The initial values for mapping the threat level to the risk score in a production use of iManage Threat Manager should match those shown in the figure below.
Change the values to meet your specific needs.
CAUTION: iManage isn't responsible for missed threats caused by incorrect risk score mappings.
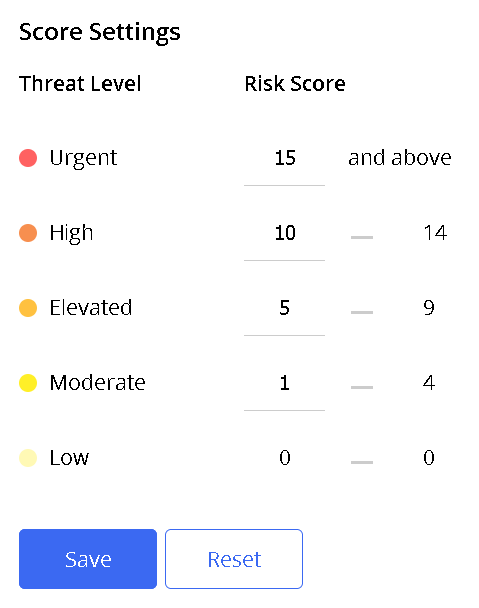
Changing the values (if required)
To apply the recommended values above (if not already set):
Double-click the number in a risk score field and enter the new one. Risk scores are defined as ranges with upper and lower limits. Adjusting the lower limit of a threat level will automatically update the ranges for lower threat levels. For best results, begin by updating the score limits for the highest relevant threat level and work downward.
Select Save to apply your changes.
NOTE: Avoid selecting Reset. The system defaults may differ from the recommended values for iManage Threat Manager in production environments.
5. Review Users Excluded from Future Ingestion list
The Users Excluded from Future Ingestion list is intended for automated or robot accounts whose activity patterns differ from normal users and can distort analytics baselines. Excluding such accounts helps keep thresholds and alerts meaningful.
NOTE: Typical high-volume bursts are handled within supported capacity—exclusions aren't required for volume alone. Exclude only accounts whose behavior would materially affect analytics quality.
Review the list to check if any of the default excluded users are relevant to your organization:
Browse to Configuration > Settings > Exclusions.
Review the Users Excluded from Future Ingestion list. These are often default system or bot accounts excluded to reduce unnecessary data ingestion.
Determine whether any listed accounts are relevant to your organization and shouldn't be excluded. If an account isn't applicable or won’t generate excessive activity, select Remove next to the user name.
Figure: Users Excluded from Future Ingestion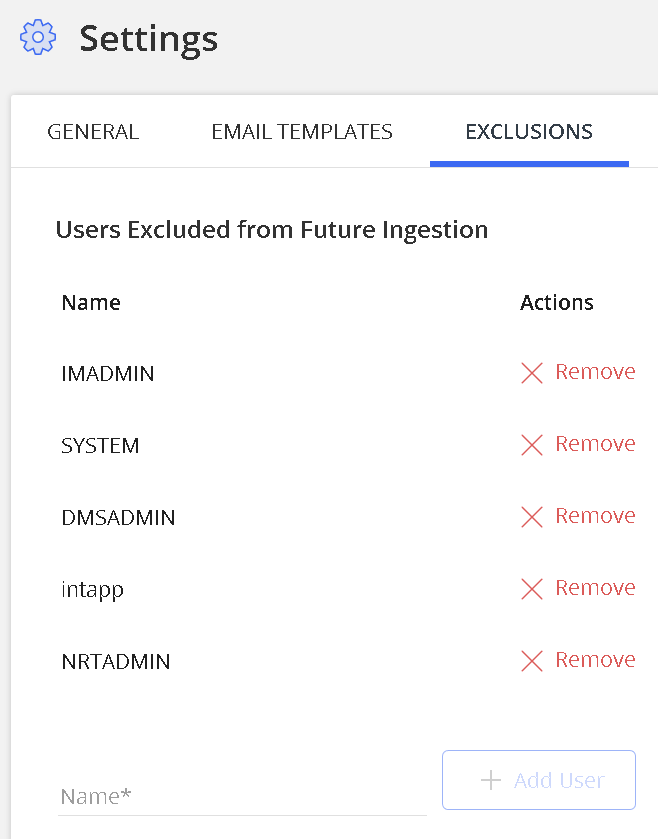
6. Set up system email notifications
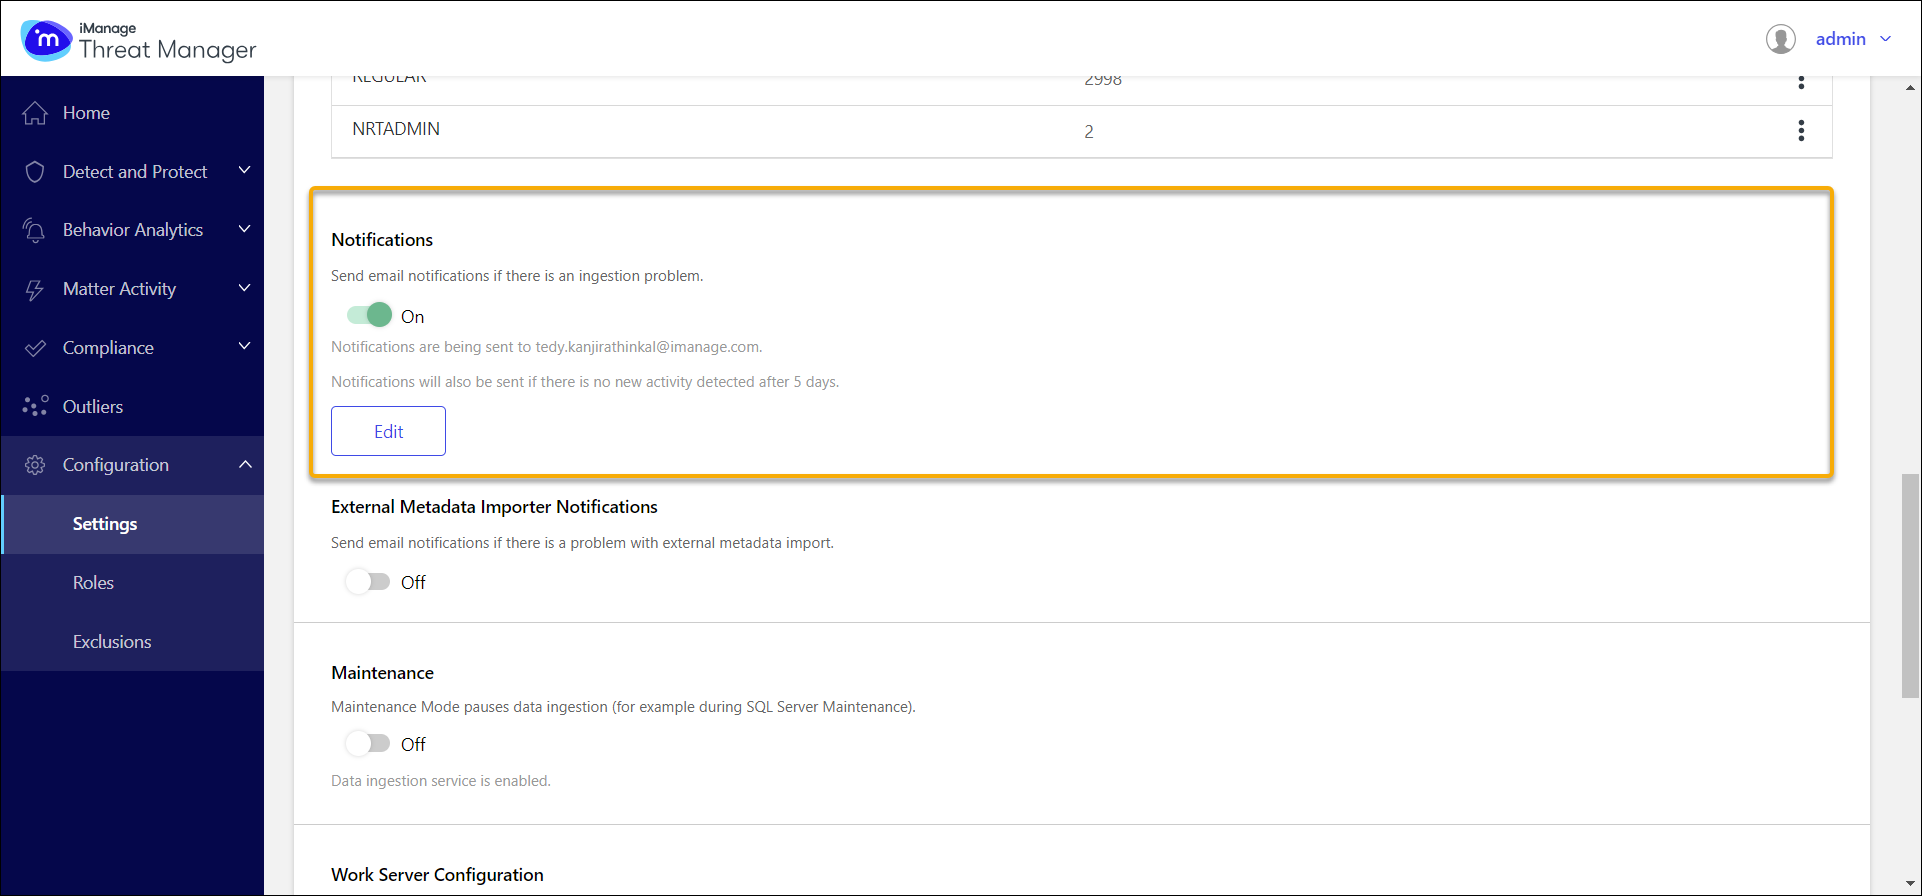
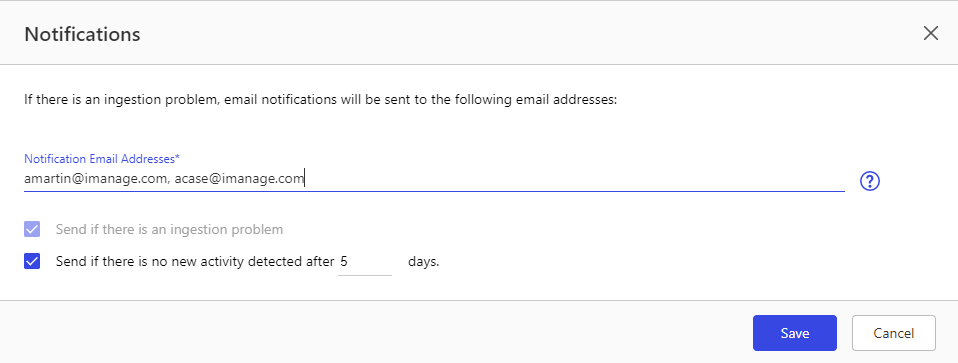
You can configure email alerts to be notified when iManage Threat Manager detects:
Ingestion failures
No audits received within a specified number of days
To enable notifications and define recipients:
Go to Configuration > Settings > System.
In the Notifications section, slide the toggle to On.
Select Edit to open the Notifications dialog and enter the email addresses of the notification recipients.
Select Save to apply your changes.
7. Configure Detect and Protect notification emails
No organization is immune to security threats—data loss can happen quickly and at a large scale. That’s why it’s important not just to detect threats, but also to take proactive steps to prevent them before damage occurs.
Detect and Protect rules help you do exactly that. These rules automatically respond when specific risk patterns are detected, minimizing the risk of data loss. Running continuously in the background, they work around the clock to help keep your information secure.
NOTE: You'll review the Detect and Protect rule in Step 4: Validate Detect and Protect rule.
When a Detect and Protect rule is triggered, two types of notification emails are sent:
An Alert Notifications email is sent to designated Admin recipients.
A Notify User email is sent directly to the affected users.
In this section, you’ll review and, if needed, edit the content of these notification emails.
Customize the Alert Notifications email template
This email template is used to notify designated Admin recipients that a Detect and Protect rule has been triggered.
To customize the template:
Browse to Configuration > Settings > Email Templates.
In the Alert Notifications section, edit the following fields as necessary:
From: This is the email address that'll be displayed as the sender. It is read-only.
Subject: This is the subject line of the email address. The default text is iManage Threat Manager. Modify as needed.
Top Text: Is displayed directly below the subject (in the header area). The default text is Please review the information below. Modify as needed.
Bottom Text: Is displayed below the alert table. This is blank by default. Modify as needed.
Disclaimer Text: Pre-populated with standard disclaimer text. Modify as needed.
Select Save to apply your changes.
Customize the Notify User email template
This email template is used to notify a user who has triggered a Detect and Protect rule.
To customize the email template:
Go to Configuration > Settings > Email Templates.
In the Notify User section, update the following fields as necessary:
From: This is the email address that'll be displayed as the sender. It is read-only.
Subject: The default subject is iManage Threat Manager—Concerning Activity Detected. Modify as needed.
Top Text: Is displayed below the subject line. The default text is Please review the information below. Modify as needed.
Include Criteria: Selected by default. Shows a summary of the breached rule criteria. Use the toggle to disable it.
Bottom Text: Is displayed below the alert table. The default text is: Please contact the compliance teams with any questions/concerns. Modify as needed.
Disclaimer Text: Pre-filled with standard legal text. Edit it if necessary.
Select Save to apply your changes.