Detect and Protect > Disabled Users in iManage Threat Manager lets you monitor, investigate, and manually re-enable accounts disabled by Detect and Protect rules or manual administrative actions.
This feature applies only to iManage Work access. Disabling or re-enabling a user here doesn’t affect their status in Active Directory or other integrated systems. The reverse is also true: if directory synchronization is enabled, Active Directory may re-enable a user automatically. That change isn’t logged in the History tab, and the user may still appear as Disabled in the Disabled Users list until manually updated.
In this section:
Disabled Users tab
The Disabled Users tab in Detect and Protect > Disabled Users lists all users who have been disabled, showing the rule or action that triggered the disablement, when it happened, and the user’s current status.
Page layout and features:
Name: Full name, user name, and email address. Select the name to open the Configuration > Roles page, where you can view additional details, including the user’s assigned Groups and Roles.
Alert: Date and time the alert was triggered. Select the alert timestamp to open Detect and Protect > Alert List for more details, including the action taken and the associated Documents, Trends, and Rule Details.
Rule: Name of the rule that triggered the Disable User action. Select the rule to open Detect and Protect > Rules where you can view rule details and history.
Status: Indicates whether the user is currently Enabled or Disabled.
NOTE: This reflects the user’s state in iManage Threat Manager only, not their actual status in Active Directory or iManage Control Center. If a user is re-enabled through Active Directory sync or another system, they may still appear as Disabled here until manually updated.
 Actions icon: Select this icon to View user details (same result as selecting the user’s Name) or Enable the user.
 Items check box: Select one or more users for bulk re-enablement. Enabled users are grayed out and can’t be selected.
NOTE: Users may appear multiple times if disabled and re-enabled repeatedly. Each entry represents a separate disablement event. The Status column always reflects their most recent state.
Customize the Disabled Users tab display
You can adjust the display of the Disabled Users list:
Filter by keyword: Use the Filter by Item field to search for usernames, rules, and more.
Filter by status: Use the Filter drop-down menu to view All, Enabled, or Disabled users
Customize columns: Select the
 icon to hide or show the Rule and Status columns. The Name and Alert columns are always visible.
Task: Re-enable a disabled user
When you re-enable a disabled user, their status updates to Enabled and the action is logged in the Detect and Protect > Disabled Users > History tab. Email notifications are also sent automatically to the re-enabled user and to the recipients on the rule’s Notification List. For details, refer to User enablement notifications.
NOTE: Re-enabling an account doesn’t reset the rule that disabled it. A Detect and Protect rule triggers only once per user within its 24-hour window, so it won’t automatically disable the account again that same day, even if the user’s activity continues to meet the rule’s criteria. If the rule triggers again in a later 24-hour window, it takes its configured action again, for example, disabling the account a second time. (For details on the 24-hour window, refer to the Detect and Protect rule: General details section in Creating a Detect and Protect rule.)
To re-enable an account manually:
Browse to Detect and Protect > Disabled Users.
In the Disabled Users tab, check the box beside one or more Disabled users. Enabled users are grayed-out and can’t be selected.
Select Enable.
In the Add a comment dialog, enter a reason for the action.
Select Save to confirm or Cancel to discard. The action and comment are logged in the Disabled Users > History tab.
History tab
The Detect and Protect > Disabled Users > History tab logs manual re-enablement actions taken directly through Detect and Protect > Disabled Users.
IMPORTANT:
Only manual re-enablement actions performed through Detect and Protect > Disabled Users are recorded here.
Actions from Active Directory sync or external systems aren't logged.
For each entry, the log shows:
Timestamp: When the user was re-enabled.
Administrator Username: Who performed the action.
Re-enabled User: Which user was affected.
Comment: The reason provided during the re-enablement. The Comment column accommodates entries of up to 2,000 characters, and each comment can be selected to view the full text.
User enablement notifications
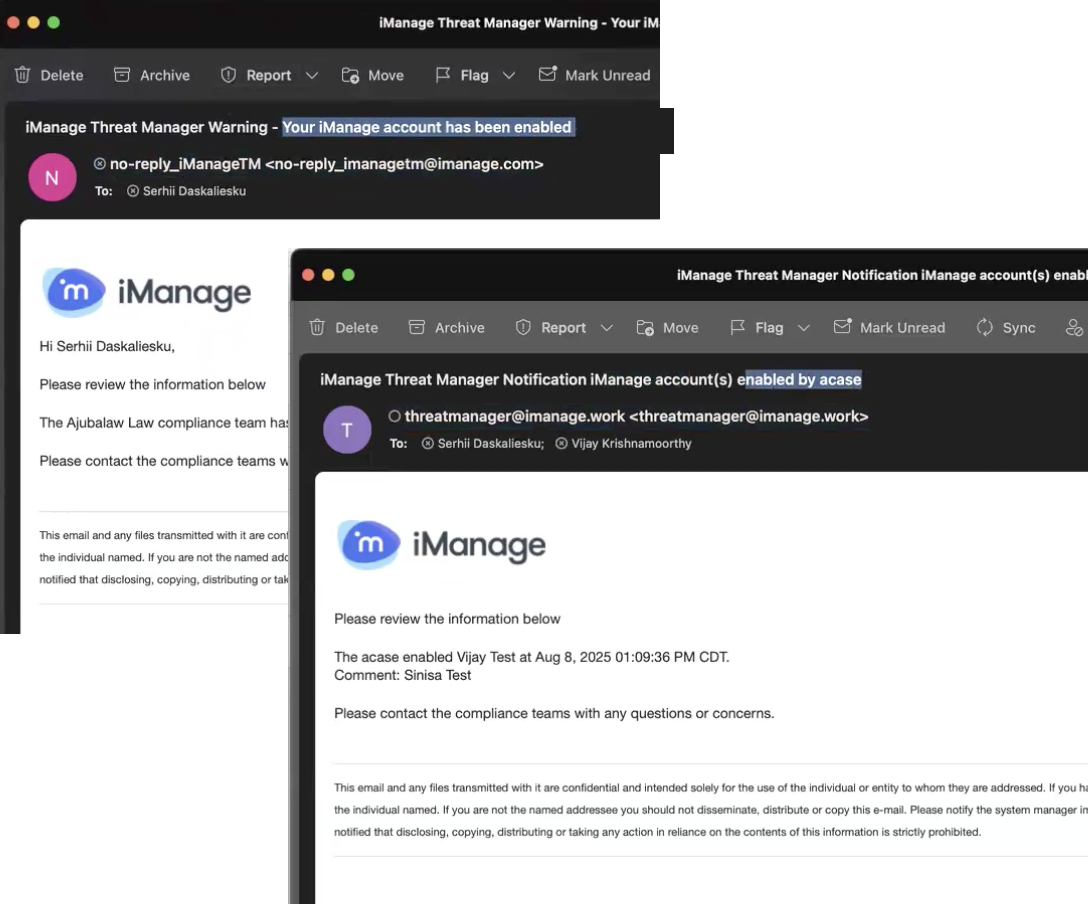
When a user is re-enabled through the iManage Threat Manager application, the system automatically sends two email notifications. Both can be customized at Configuration > Settings > Email Templates.
The first email is sent to the user whose account was enabled.
The second email is sent to all recipients on the rule’s notification list (primary, CC, and BCC), using the same list configured for the original Detect and Protect rule that disabled the user.
Email to the user
Subject: “Your iManage Account has been enabled.”
Recipients: Sent directly to the user whose account was enabled.
Content includes:
The user’s name, compliance team, and company name.
A comment, if provided when the user was enabled.
Customization: To customize this email, go to Configuration > Settings > Email Templates > Enable Account.
Email to the notification team
Subject: “…iManage account(s) enabled by <user name>.”
Recipients: Sent to the recipients on the Detect and Protect rule’s Notification List.
Content includes:
The name of the user who performed the action.
The usernames of all enabled users (comma-separated if multiple)
The date/time of the action.
The comment entered during enablement.
Customization: This email can't be fully customized. You can modify the top, bottom, or disclaimer text through Configuration > Settings > Email Templates > Alert Notifications.
NOTE: Changes made in the Alert Notifications section apply to all emails that use this configuration, not just the user enablement notification.