The Mailbox Management tab on the Email page lets you manage user and shared mailboxes for iManage Work for Outlook. In this tab, you can:
View the list of mailboxes enrolled in iManage Work for Outlook
Enroll user mailboxes in iManage Work for Outlook
Enroll shared mailboxes in iManage Work for Outlook
Enable/disable mailboxes
Edit the owner of a mailbox
Unenroll a mailbox from iManage Work for Outlook
NOTE: In Control Center, you must add the mailboxes through the Mailbox Management tab on the Email page after adding it to the mail-enabled security group in Microsoft Azure. For more information, refer to the Create a mail-enabled security group section.
If you use the Auto Enrollment feature, you don’t have to manually add or enroll each user mailbox here. After a user is added to the mail-enabled security group and sees Work for Outlook in Outlook, they can authenticate to complete the enrollment and user activation flow.
Admins must still manually enroll shared mailboxes. Auto-enrollment applies only to user mailboxes.
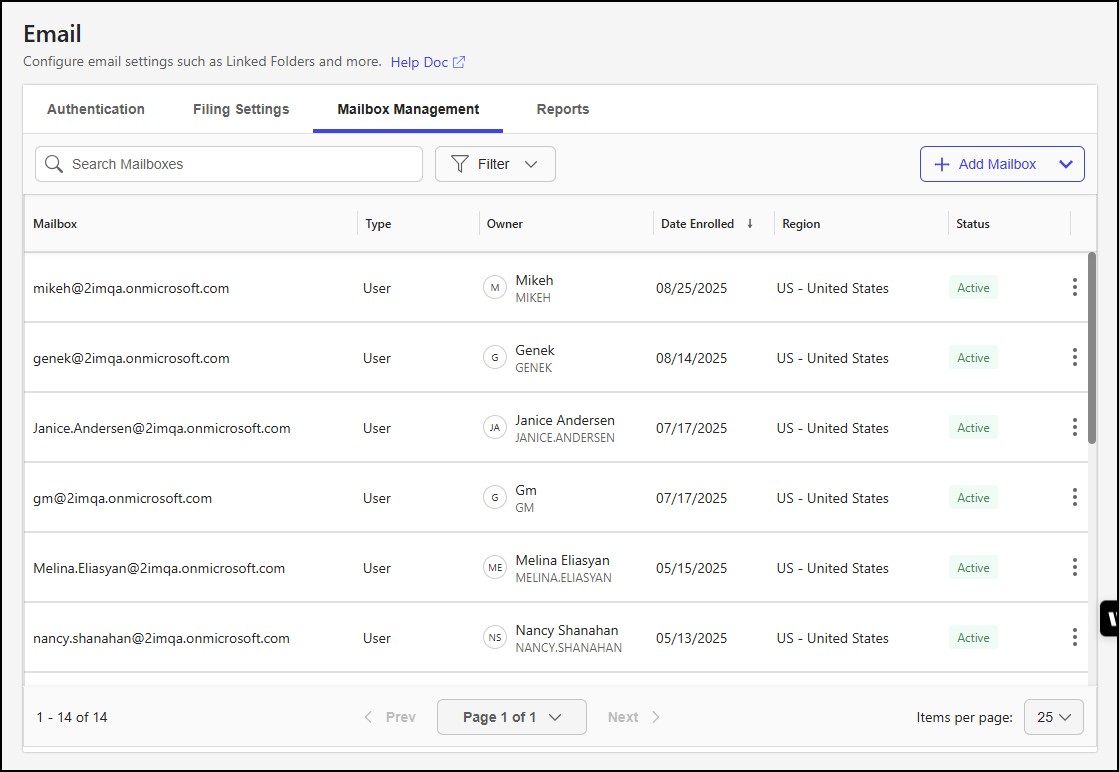
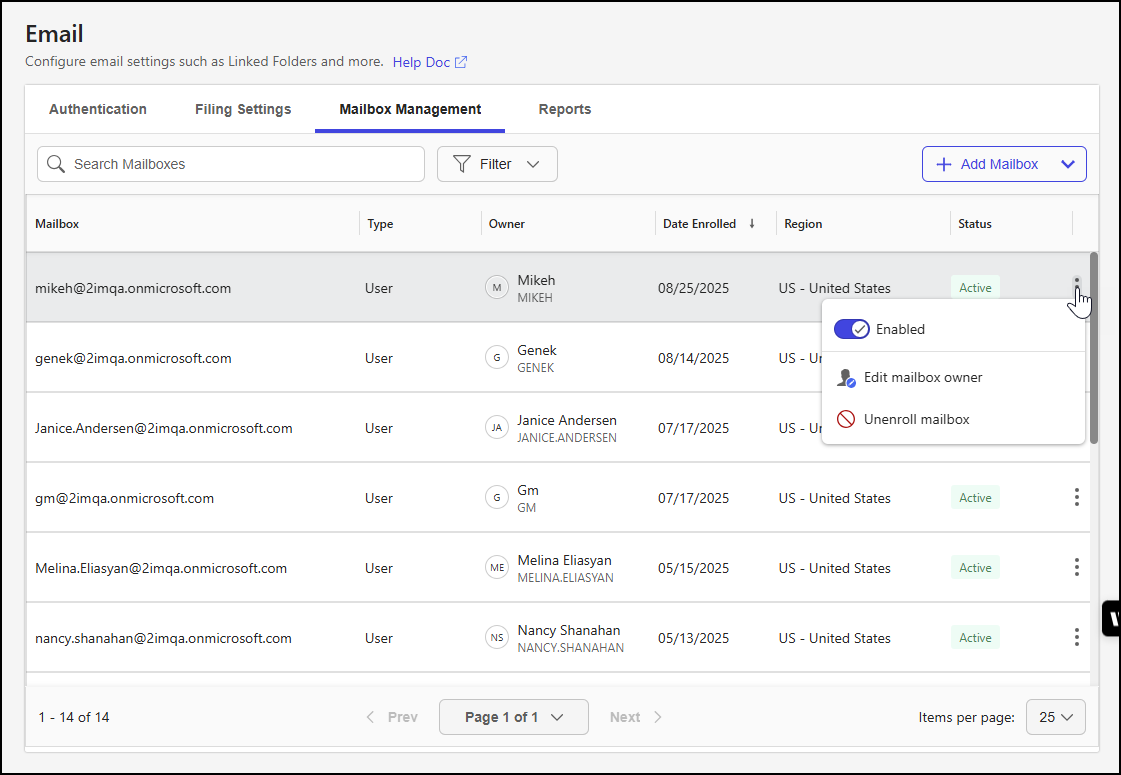
Enrolled mailboxes are listed in a table that includes the following details:
Mailbox: The mailbox address, in the format local-part@domain.
local-part: The unique string that identifies the specific mailbox within the domain, often a user name or initials.
@ symbol: The symbol that separates the local-part from the domain.
domain: The fully qualified domain name (FQDN) of the email server hosting the mailbox.
Type: The mailbox type, either User or Shared.
Owner: The owner of the mailbox.
Date Enrolled: The date the mailbox was enrolled for iManage Work for Outlook.
Region: The region to which the mailbox is assigned.
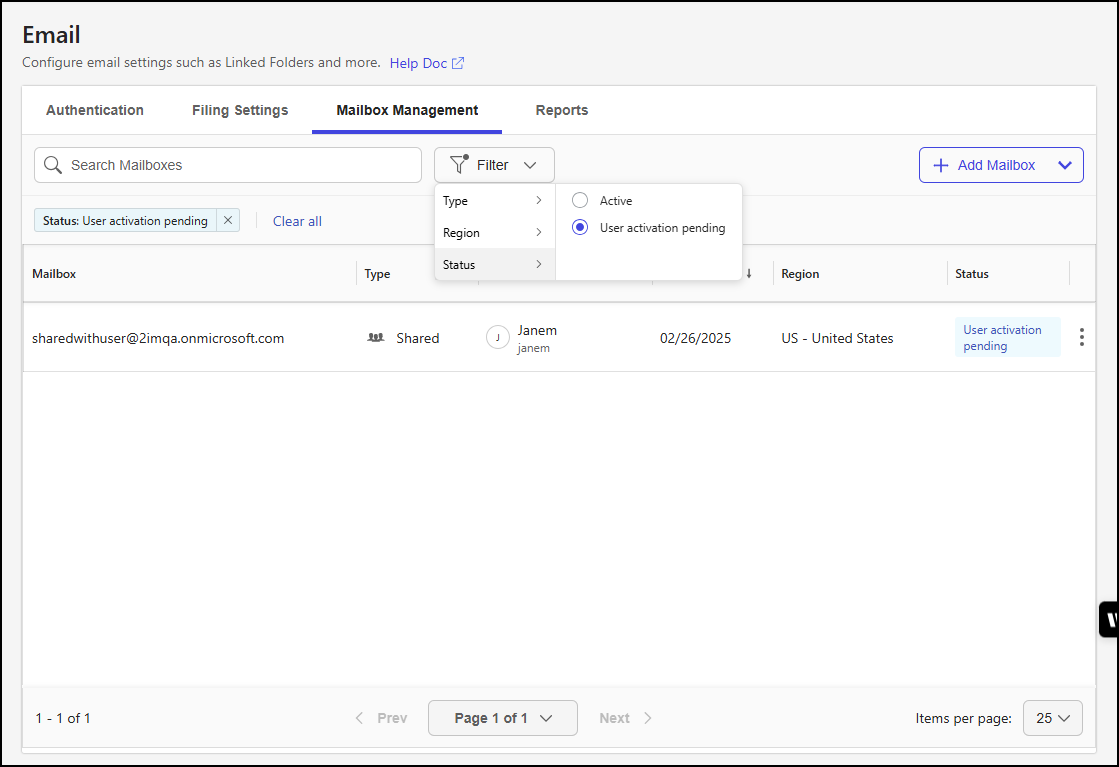
Status: The enrollment status for the mailbox.
Active: iManage Work for Outlook is enabled.
Disabling: A request to disable iManage Work for Outlook is being processed.
Disabled: iManage Work for Outlook is disabled.
Enabling: A request to enable iManage Work for Outlook is being processed.
User activation pending: A request to enable iManage Work for Outlook is pending user activation.
NOTE: This status means the user hasn't activated iManage Work for Outlook for their mailbox by authenticating in the iManage Work for Outlook in new Outlook.
An example of the Mailbox Management tab is shown in the figure below.
Enroll a mailbox
To enroll a mailbox in iManage Work for Outlook, follow these steps:
In iManage Control Center, browse to Extensions > Email.
Select the Mailbox Management tab.
From the + Add Mailbox drop-down menu, select one of the following options:
User Mailbox: Select this to enroll a mailbox for an individual user.
Shared Mailbox: Select this to enroll a shared mailbox, which multiple users can access to read and send email messages.
If you’re adding a user mailbox, the Add User Mailbox dialog is displayed and lists all user mailboxes for the tenant.
Figure: Add User Mailbox dialog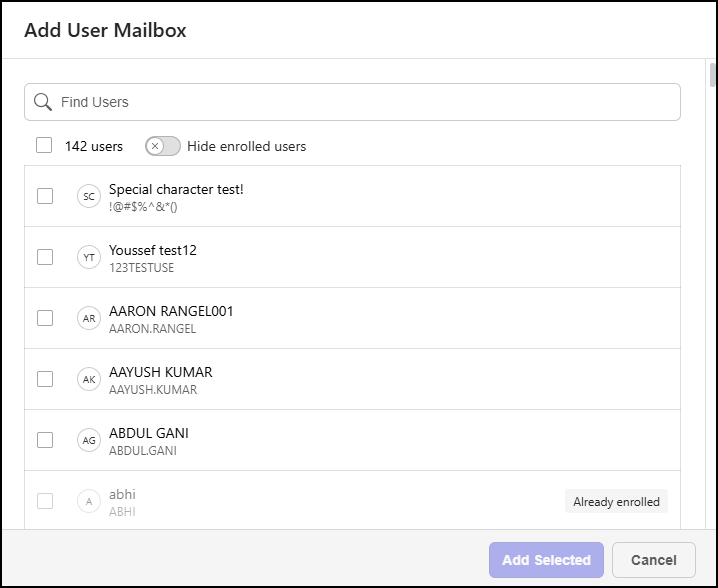
In the Add User Mailbox dialog, you can:
Search for a mailbox by entering a search string in the Find Users field.
Hide users who are already enrolled in Cloud email management by toggling the Hide enrolled users option.
Select all users by selecting the check box in the toolbar menu.
Find and select one or more mailboxes to enroll.
NOTE: Mailboxes that are already enrolled can’t be selected.
c. Select Add Selected.
If you’re adding a shared mailbox, the Add Shared Mailbox dialog is displayed.
Figure: Add Shared Mailbox dialog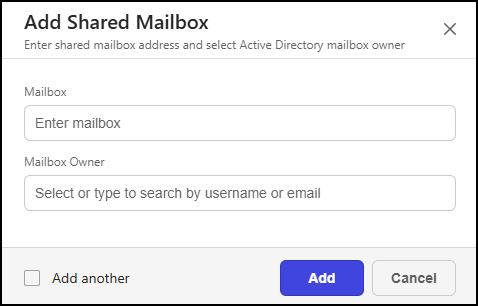
Provide the following details:
Mailbox: The mailbox address, in the format local-part@domain.
local-part: The unique string that identifies the specific mailbox within the domain, often a user name or initials.
@ symbol: The symbol that separates the local-part from the domain.
domain: The fully qualified domain name (FQDN) of the email server hosting the mailbox.
Mailbox Owner: The iManage Work user that we use to save the email to iManage Work.
Select Add another if you want to add another shared mailbox.
Select Add.
Mailbox management actions
On the Mailbox Management tab, you can perform the following actions for a mailbox:
Enable or disable iManage Work for Outlook
Edit the mailbox owner
Unenroll the mailbox from iManage Work for Outlook
You can access each of these actions by selecting the kebab menu for a mailbox, as shown in the figure below.
Enable or disable iManage Work for Outlook
To enable or disable iManage Work for Outlook for a mailbox:
In iManage Control Center, browse to Extensions > Email.
Select the Mailbox Management tab.
Locate the mailbox in the mailbox table.
Select the kebab menu for the mailbox and slide the Enabled/Disabled toggle to the right to enable iManage Work for Outlook or left to disable it.
Edit the mailbox owner
At times, it may be necessary to change the owner of a mailbox, such as when a user who was previously designated as a shared mailbox owner stops being a participant in the mailbox.
To edit the owner for a mailbox, follow these steps:
In iManage Control Center, browse to Extensions > Email.
Select the Mailbox Management tab.
Locate the mailbox in the mailbox table.
Select the kebab menu for the mailbox and choose Edit mailbox owner.
In the Edit mailbox owner dialog, select the Mailbox owner search field. A list of mailboxes for the tenant displays.
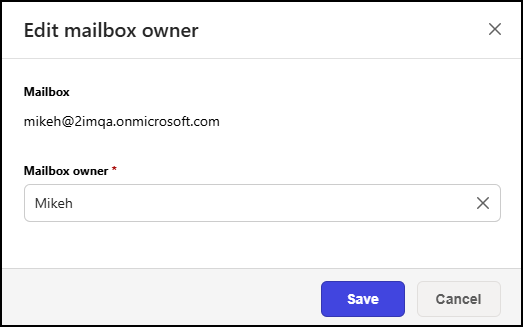
Find and select a mailbox by scrolling through the list or entering a search term to filter the results.
Select Save.
Unenroll a mailbox from iManage Work for Outlook
To unenroll a mailbox from iManage Work for Outlook, follow these steps:
In iManage Control Center, browse to Extensions > Email.
Select the Mailbox Management tab.
Locate the mailbox in the mailbox table.
Select the kebab menu for the mailbox and choose Unenroll mailbox.
In the Unenroll mailbox dialog, select Unenroll.
Figure: Unenroll Mailbox dialog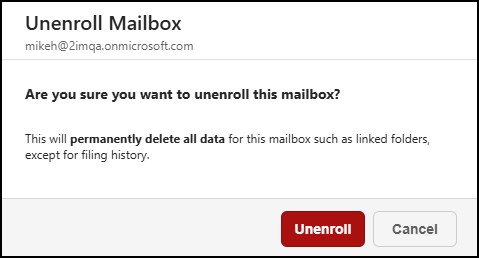
NOTES:
Unenrolling a mailbox from iManage Work for Outlook will permanently delete all data in the mailbox. However, any emails that were previously filed with cloudimanage.com from that mailbox will be unaffected.
After successfully unenrolling a mailbox, it might take up to five minutes for the mailbox to be removed from the table in the Mailbox Management tab.
Mailbox table data output options
The following data output options are available for the mailbox table:
Search Mailboxes: Filter the data by mailbox address.
Filter: Filter the data output based on values in the following columns:
Type: Filter by the mailbox types listed in the Type column.
Region: Filter by the regions found in the Region column.
Status: Filter by the states found in the Status column.
Column sort: Sort the table data by selecting a column heading. Selecting the same heading again reverses the sort order.
An example of filtering applied to mailboxes where the enrollment status is User activation pending is shown in the figure below.