This section contains the following topics:
- Add web extensions to iManage Control Center for iManage Work
- Add web extensions to iManage Control Center for cloudimanage.com
- Add the Sync & Open in File Explorer option to the context menus
- Add the Sync & Open in File Explorer option to the toolbar
- Syncing web extension values specified in iManage Control Center
NOTE:
If you’re using a dynamic port in your environment, web extensions won't work and users won’t be able to sync their files directly from iManage Work.
Add web extensions to iManage Control Center for iManage Work
Sign in to iManage Control Center as an NRTADMIN.
In the left navigation pane, under Settings, select Applications.
Select Add application
Figure: Settings > Applications option and the Add Application dialog box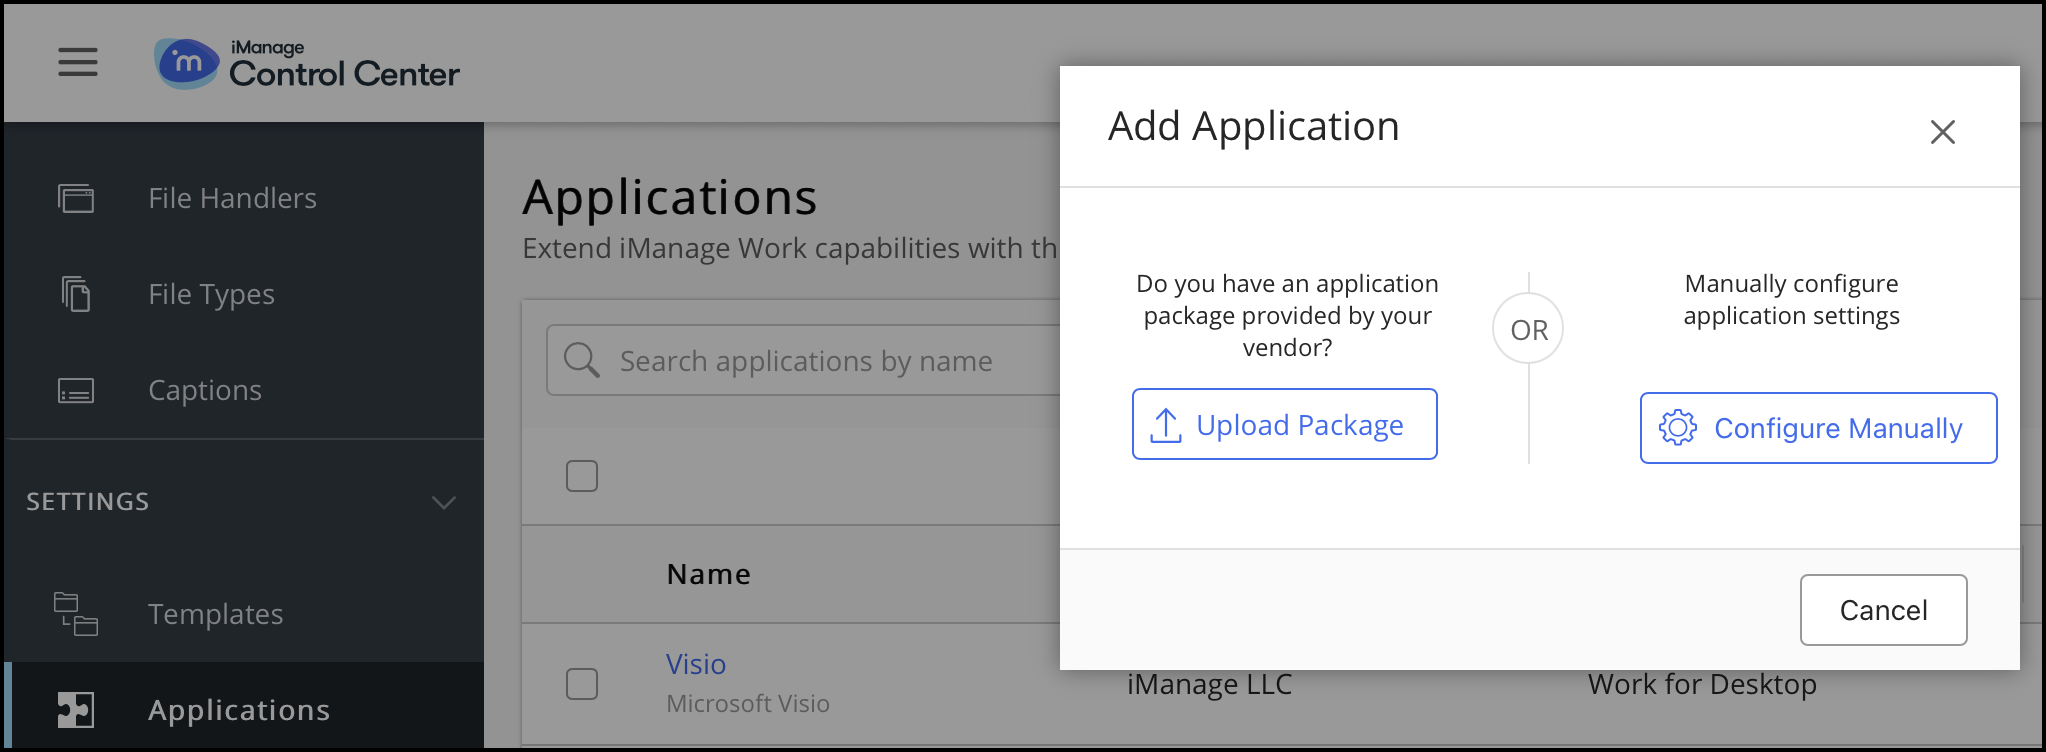
Select Upload Package.
Browse to the drive_web_extensions.zip file, select it, and select Open.
Select Authenticate.
Set iManage Work Authentication Required? to No and then select Access.
Figure: Authenticating the add-on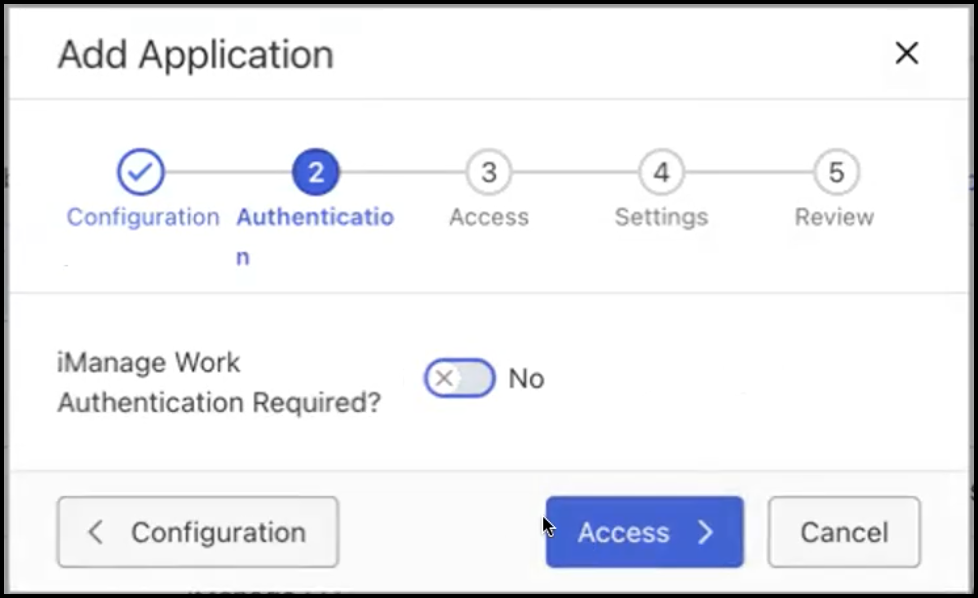
NOTE:
If you are turning on the web extension, set Allow Refresh Token to Yes in iManage Control Center. For more information, refer to Enabling refresh token in iManage Control Center.
Make the necessary selections and then select Settings.
Set the imanage drive api port and imanage drive api token values and then select Review. We recommend that you don’t change the default values. From iManage Drive 10.11.0 onwards, then iManage Drive syncs and make sure the values match if these values do not match values specified in the admin_settings.yaml file.
Figure: General settings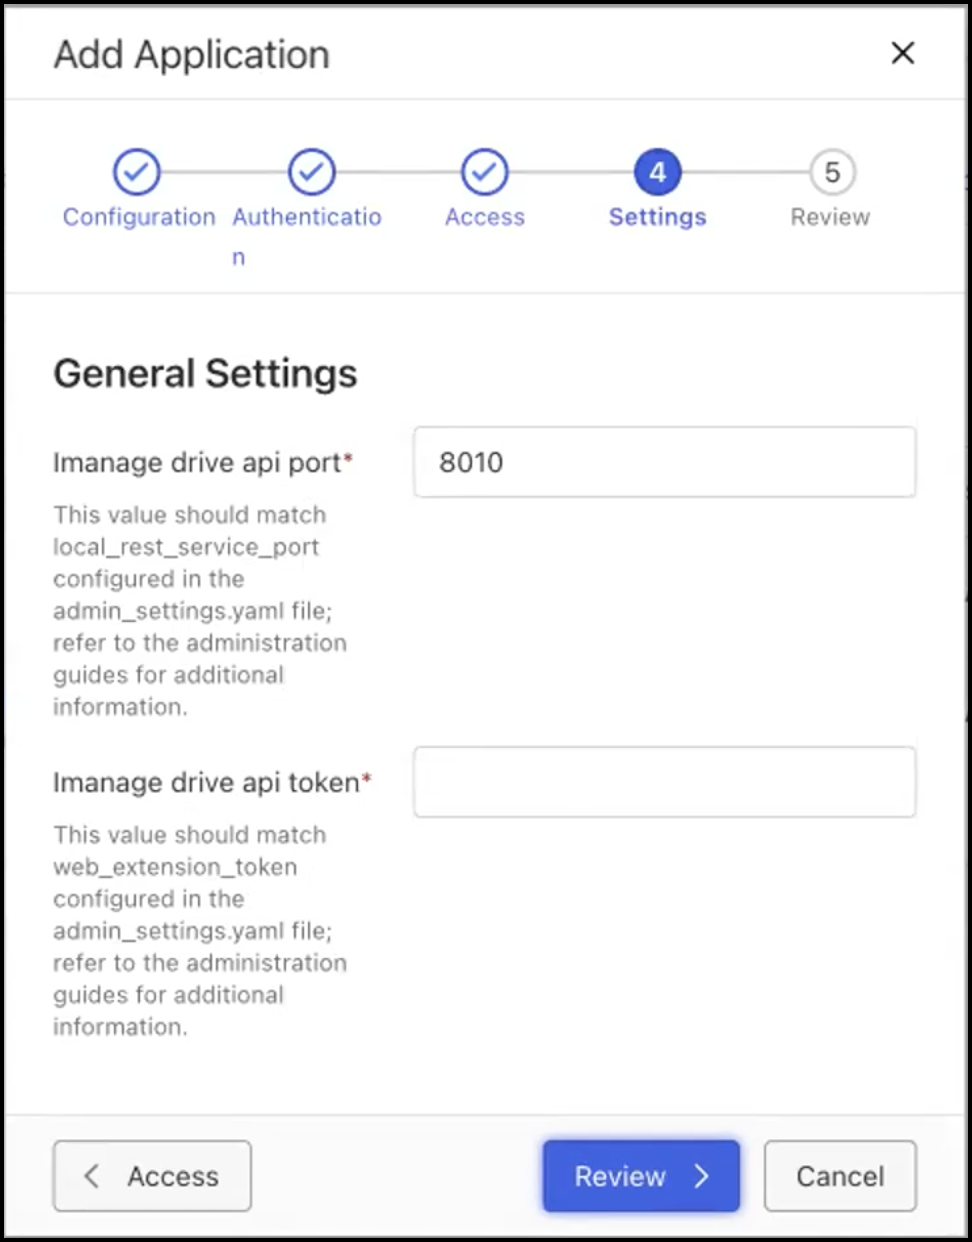
Select Custom to add users. Search and add users using the Allow access field.
Figure: Adding a user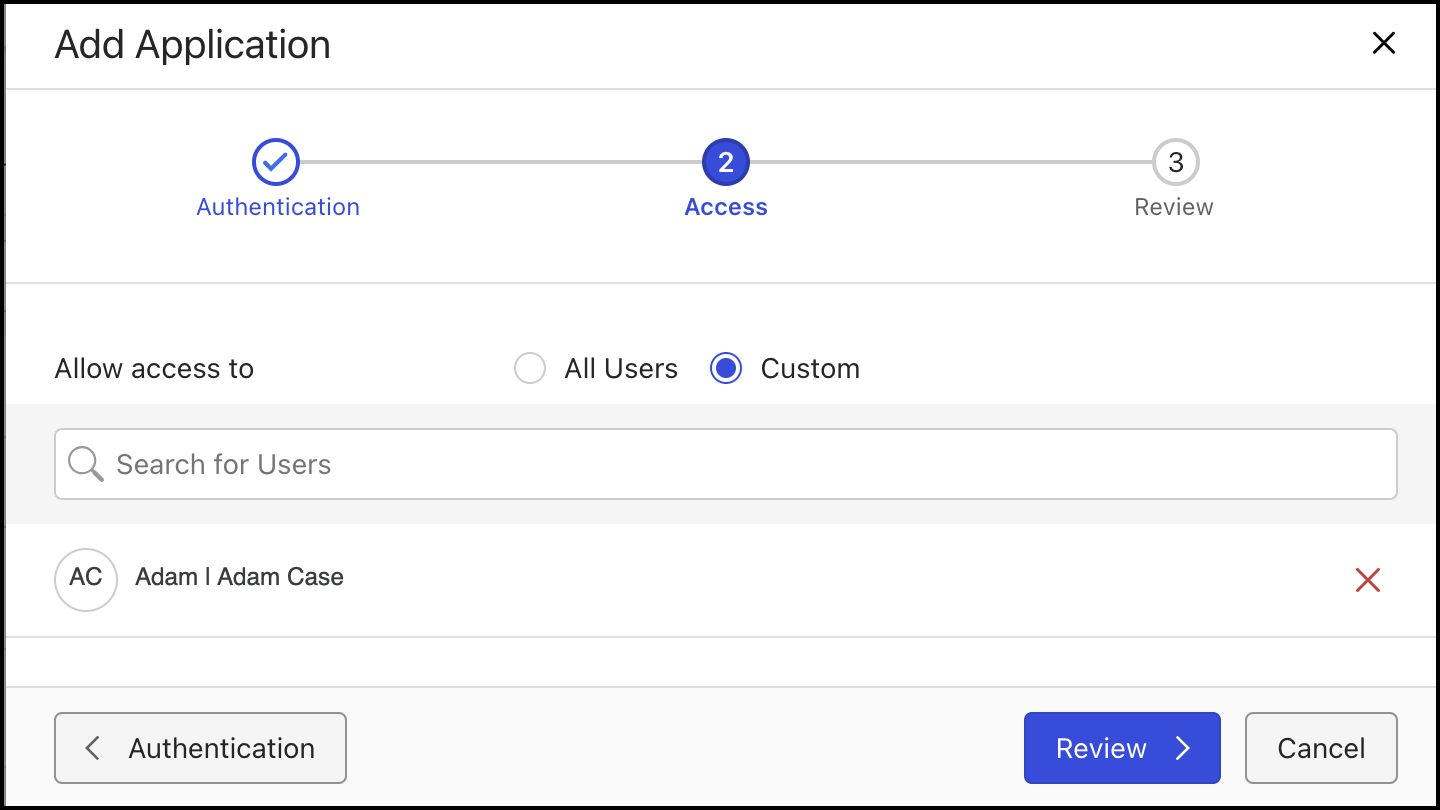
Select Review.
Figure: Review button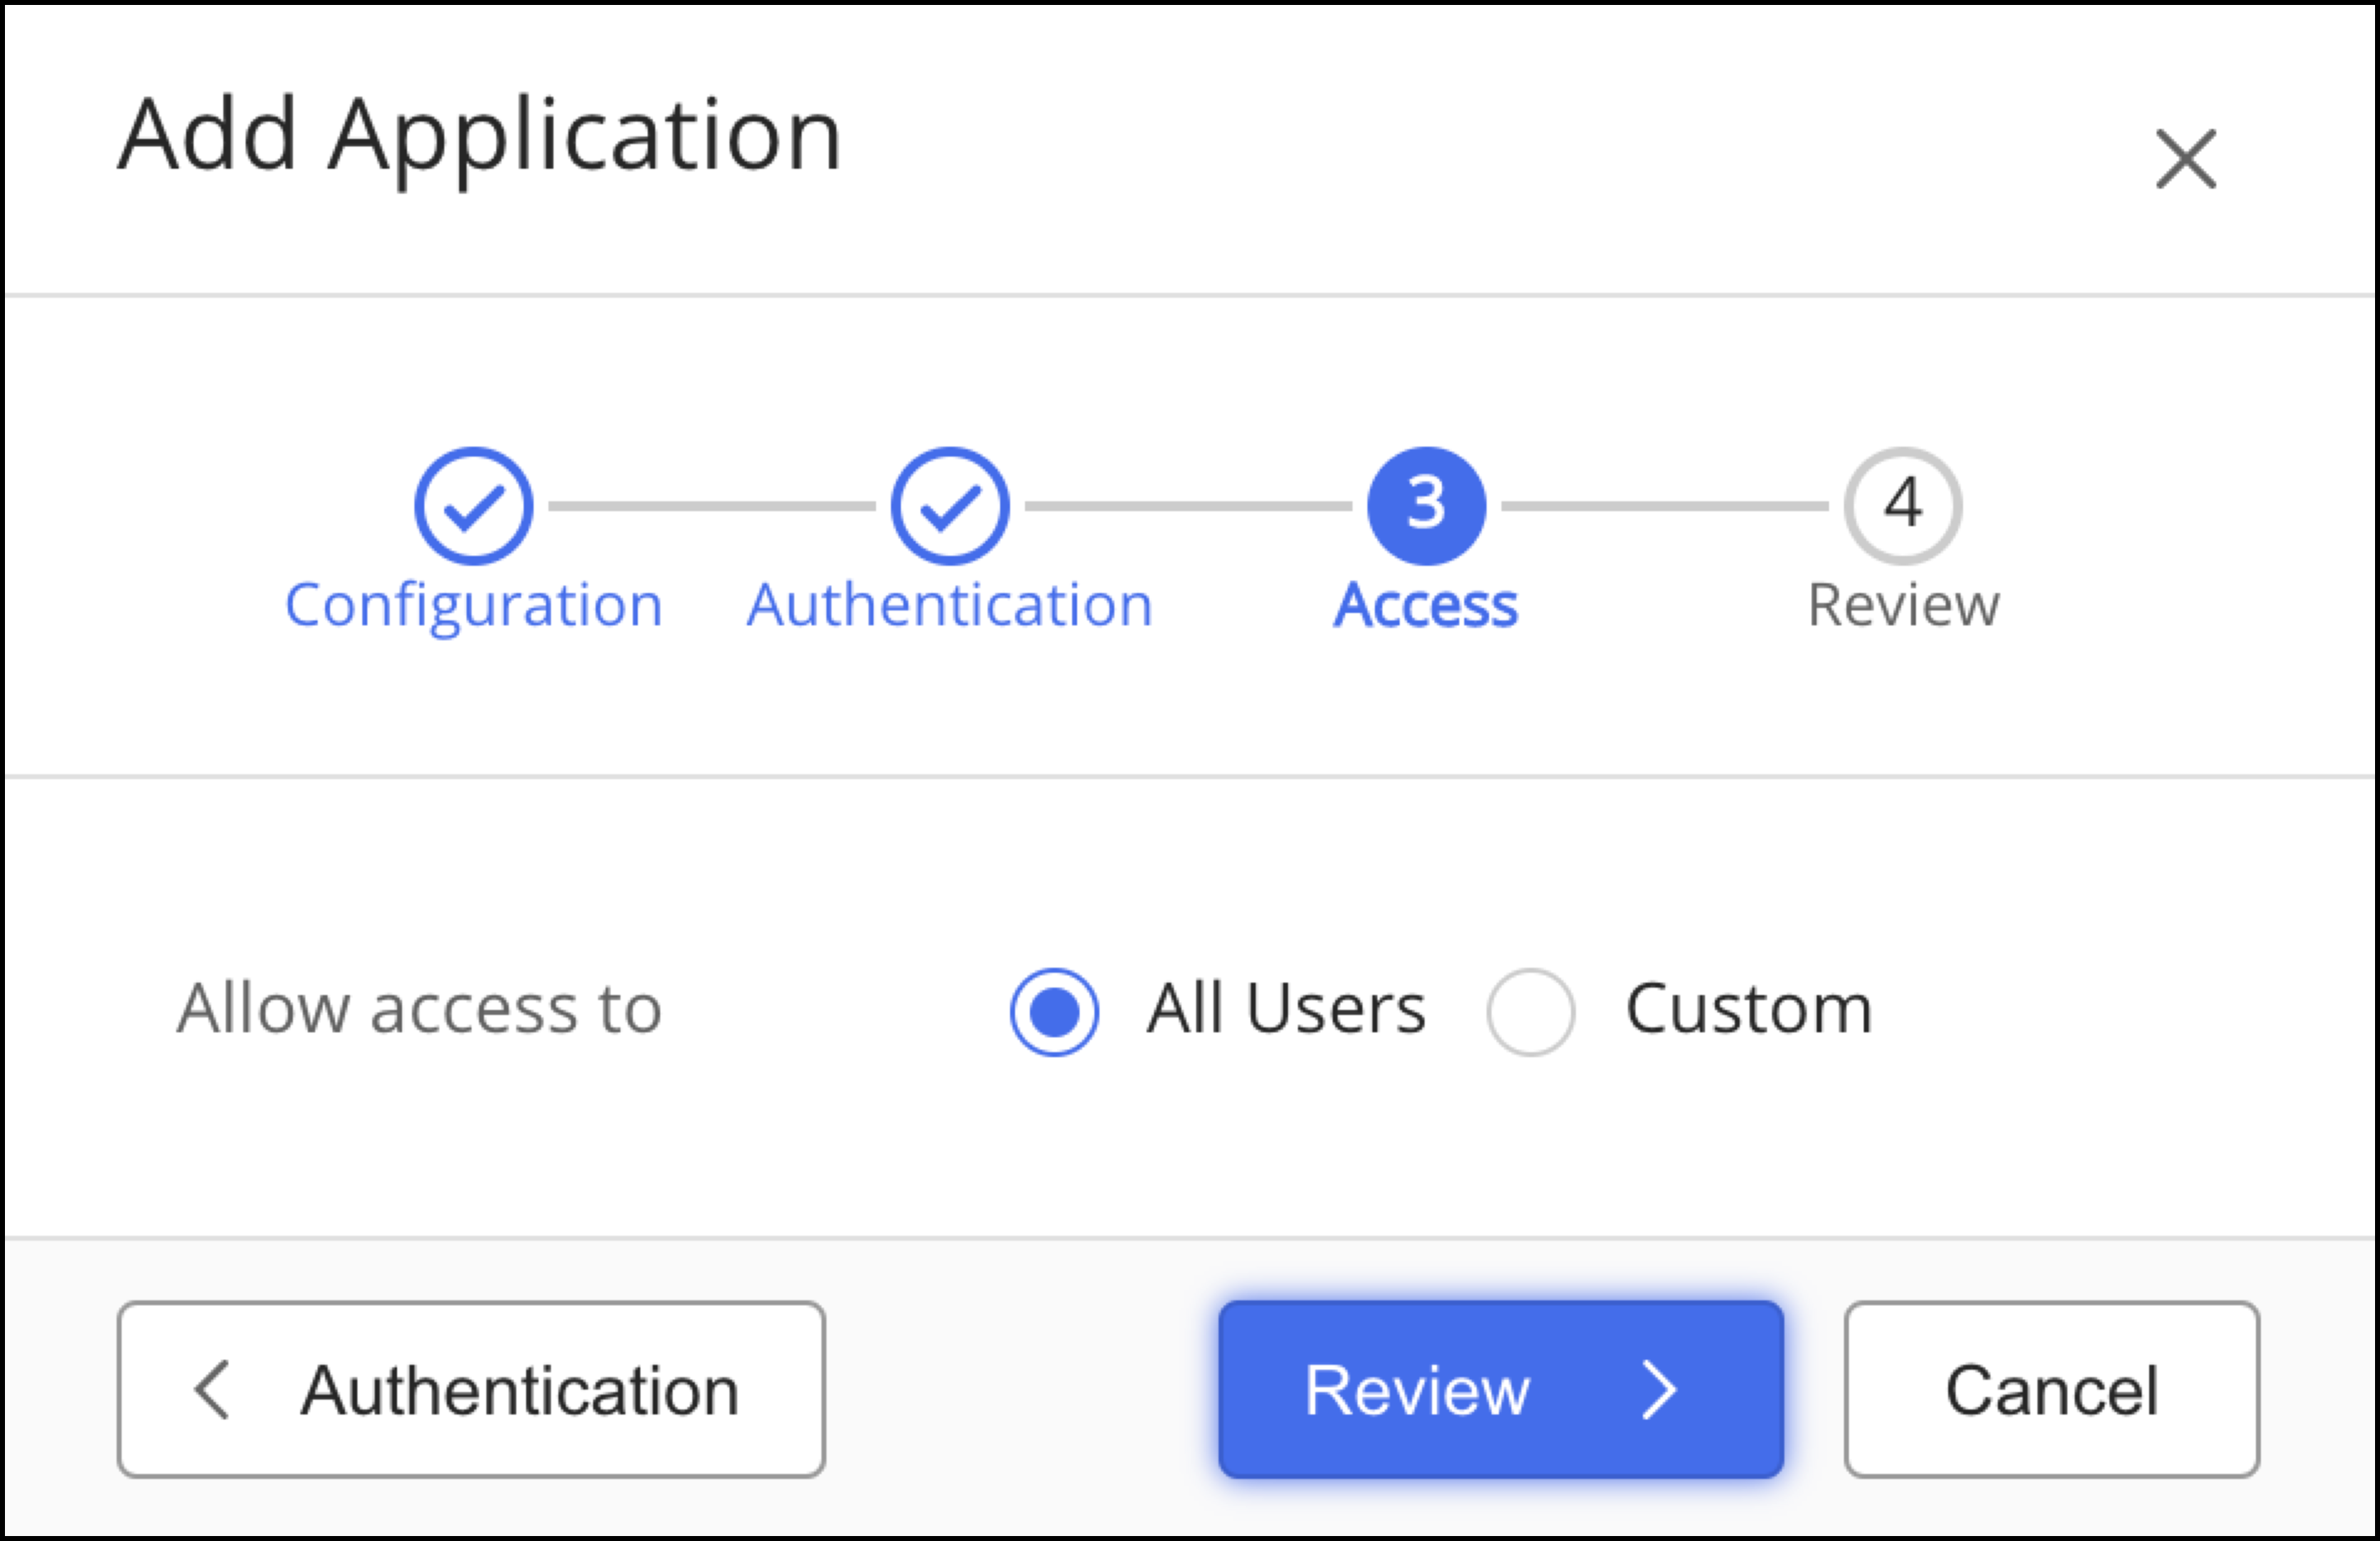
Review the details and select Finish. The application is successfully added and displayed in the Applications list in iManage Control Center.
Add web extensions to iManage Control Center for cloudimanage.com
Sign in to iManage Control Center.
In the left navigation pane, under Settings, select Applications.
Select Add application.
Search for iManage Drive web extension and then select Authenticate.
Set iManage Work Authentication Required? to No and then select Access.
Set the Allow Refresh Token to Yes. For more information, refer to Enabling refresh token in iManage Control Center.
Make the necessary selections and then select Settings.
Set the imanage drive api port and imanage drive api token values and then select Review. The imanage drive api port value should match the
local_rest_service_portand the imanage drive api token should match theweb_extension_tokenconfiguration settings available in the admin_settings.yaml file. For more information, refer to Configuring user settings.
If the default value is 8010, we recommend that you don’t change this value. This is because from iManage Drive 10.11.0 onwards, if port and token isn't defined in the admin_settings.yaml file, iManage Drive syncs the settings from the server. If they are specified in the admin_settings.yaml file, then the application uses these values specified in the file.Select Review.
Review the details and select Finish. The application is successfully added and displayed in the Applications list in iManage Control Center.
For more information, refer to Adding an application in iManage Control Center Help.
Add the Sync & Open in File Explorer option to the context menus
Sign in to iManage Control Center.
Browse to Web Client and select Context menus.
On the Documents tab, select
 and then Add action.
 Select the Sync & Open in File Explorer option for Documents context menu available on the Documents tab.
Repeat step 4 for the Email, Matter, and Folders tabs.
For more information about using context menus, refer to Context Menus in iManage Control Center Help.
Add the Sync & Open in File Explorer option to the toolbar
NOTE:
This section is optional. Perform the steps outlined only if you have previously modified the toolbar.
Sign in to iManage Control Center.
Browse to Web Client.
Select Toolbars.
Hover the mouse pointer over the options for Folders and select
.Figure: Toolbars in iManage Work
Add Sync & Open in File Explorer to the menu option and then drag it before the menu. Select Save.
Repeat steps 4 and 5 for Matters.
NOTE:
If your users are already connected to iManage Work and can't view the Sync & Open in File Explorer option, they have to sign off from iManage Work and sign in again.
Syncing web extension values specified in iManage Control Center
From iManage Drive 10.11.0 onwards, iManage Drive periodically syncs the values specified for web extensions from iManage Control Center. The number of times iManage Drive syncs with iManage Control Center is based on the refresh_web_extension_settings_frequency admin setting available in the admin_settings.yaml file. The default value for this admin setting is1d.
With this change, you no longer have to:
Match the imanage drive api port value with the local_rest_service_port configuration setting.
Match the imanage drive api token with the web_extension_token configuration settings.
Specify the values in the local_rest_service_port and web_extension_token configuration settings.
However, if you have specified a value in the local_rest_service_portand web_extension_token configuration settings available in the local admin_settings.yaml file and the values are different from those specified in iManage Control Center, the values specified in the local admin_settings.yaml file takes precedence.