NOTE:
Make sure that you have:
a valid subscription to iManage Tracker. Contact your iManage account representative to ensure that you have subscribed to iManage Tracker.
adequate permission to perform all the tasks mentioned here, ensure that you're a user with the NRTADMIN role.
Stage 1: Adding the iManage Tracker application in iManage Control Center
Perform the following steps to add iManage Tracker as an application in iManage Control Center. This ensures that iManage Tracker can communicate with iManage Work Server and is available in iManage Work.
Sign in to iManage Control Center as an NRTADMIN.
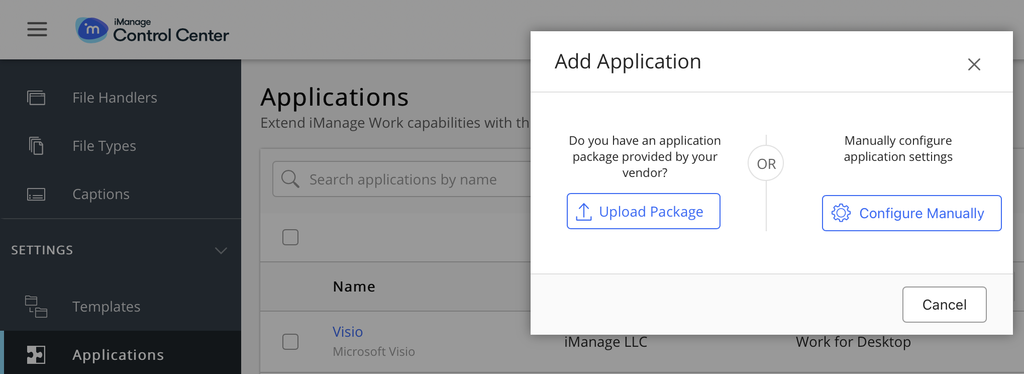
In the left navigation pane under Settings, select Applications.
Select Add application.
Figure: Settings > Applications option and the Add Application dialog boxSelect Upload Package.
Locate the iManage Tracker 1.X zip file that applies to your region and/or Pod on this page on iManage Help Center.
Download the Tracker Application for your local region, for example iManage Tracker 1.3 - AUE.zip.
Extract the Zip file. Within the extract there should be two additional zip files.
Upload the zip file called tracker-imanage-work-imcc-dist-extension-prodPvtCloud.
Complete Authentication (steps 6 – 8), then return to step 5e.
Upload the zip file called tracker-imanage-work-dist-extension-prodPvtCloud.
Complete Authentication (steps 6 -8).
Now you can progress to Stage 2.
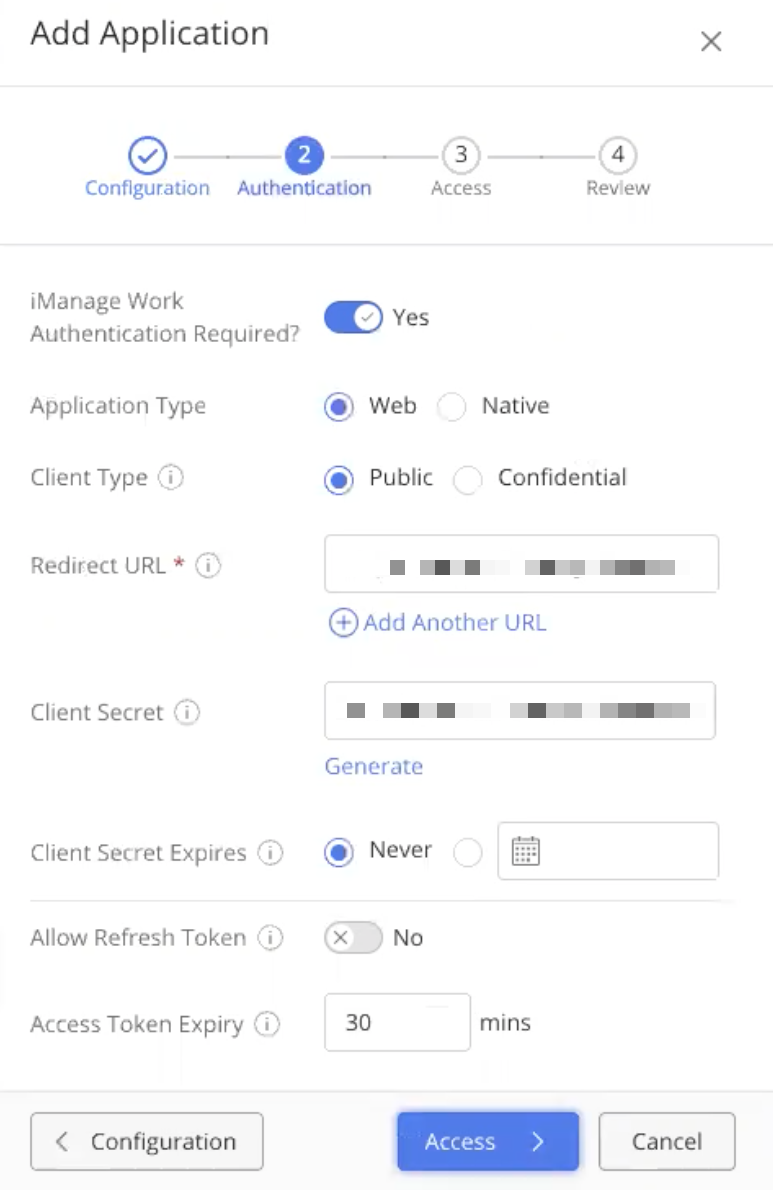
Select Authenticate and then select Access.
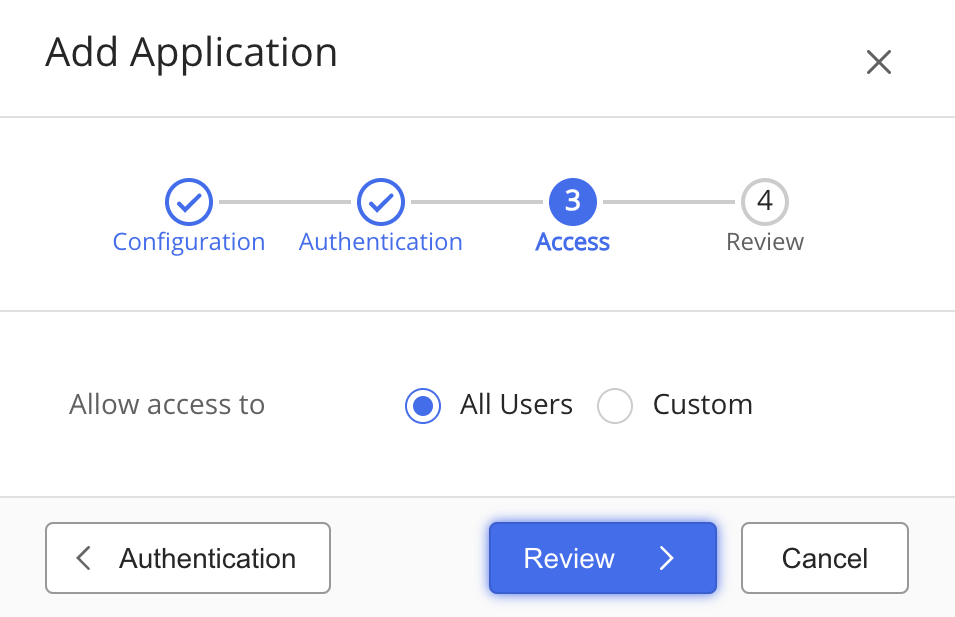
Figure: Authenticating the add-onSelect Review.
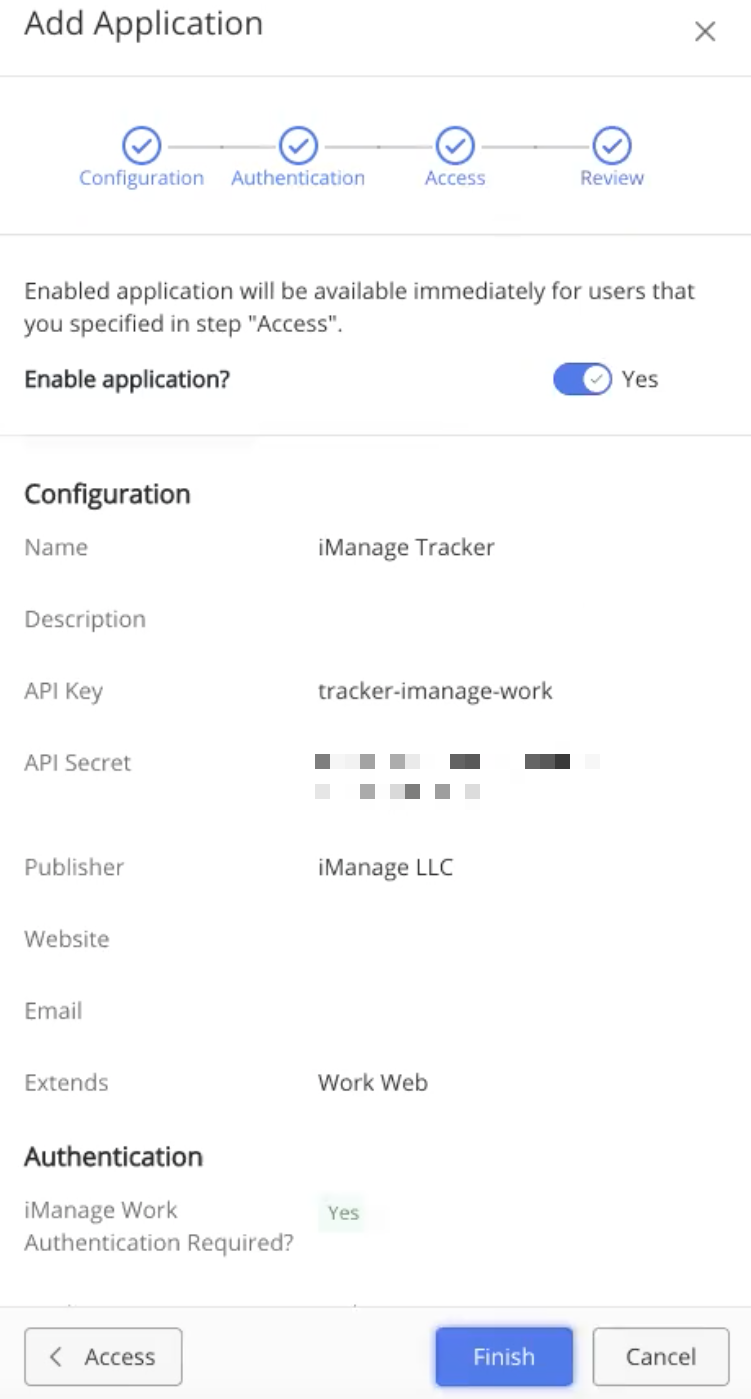
Figure: Review buttonReview the details and select Finish.
Figure: Finishing the registration
The application is successfully added and displayed in the Applications list in iManage Control Center.
Users in your organization can now access iManage Tracker in iManage Work. For more information, refer to iManage Tracker Help.
The following animated GIF shows the process mentioned in this section.
Stage 2: Enabling refresh token
To ensure that iManage Tracker displays the latest data from iManage Work, refresh tokens should be enabled.
When enabled, the application is automatically synced in the background and iManage Tracker users need not perform a manual sync by selecting whenever they want to view the latest information.
NOTE:
Complete Steps 3 and 4 below so that SPM policies are applied to iManage Tracker and the relevant libraries are authorized for the activation of Tracker/SPM agent.
Sign in to iManage Control Center as an NRTADMIN.
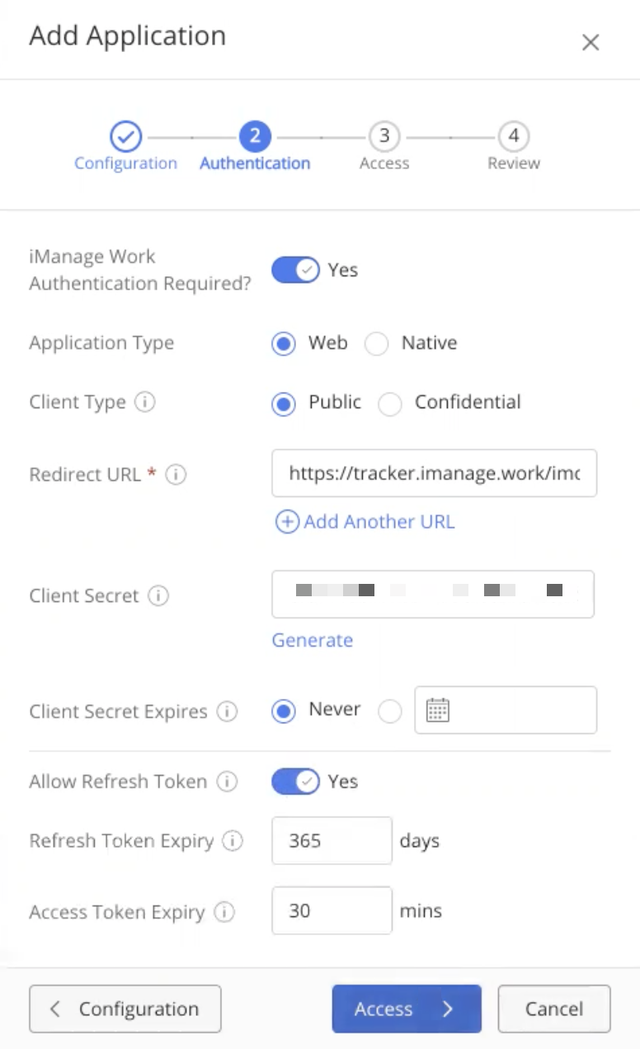
Upload tracker-imanage-work-imcc-dist-extension-prod.zip and repeat the steps in the previous section (Stage 1). Additionally, on the Authentication screen, enable the Allow Token Refresh option.
Figure: Allow refresh token
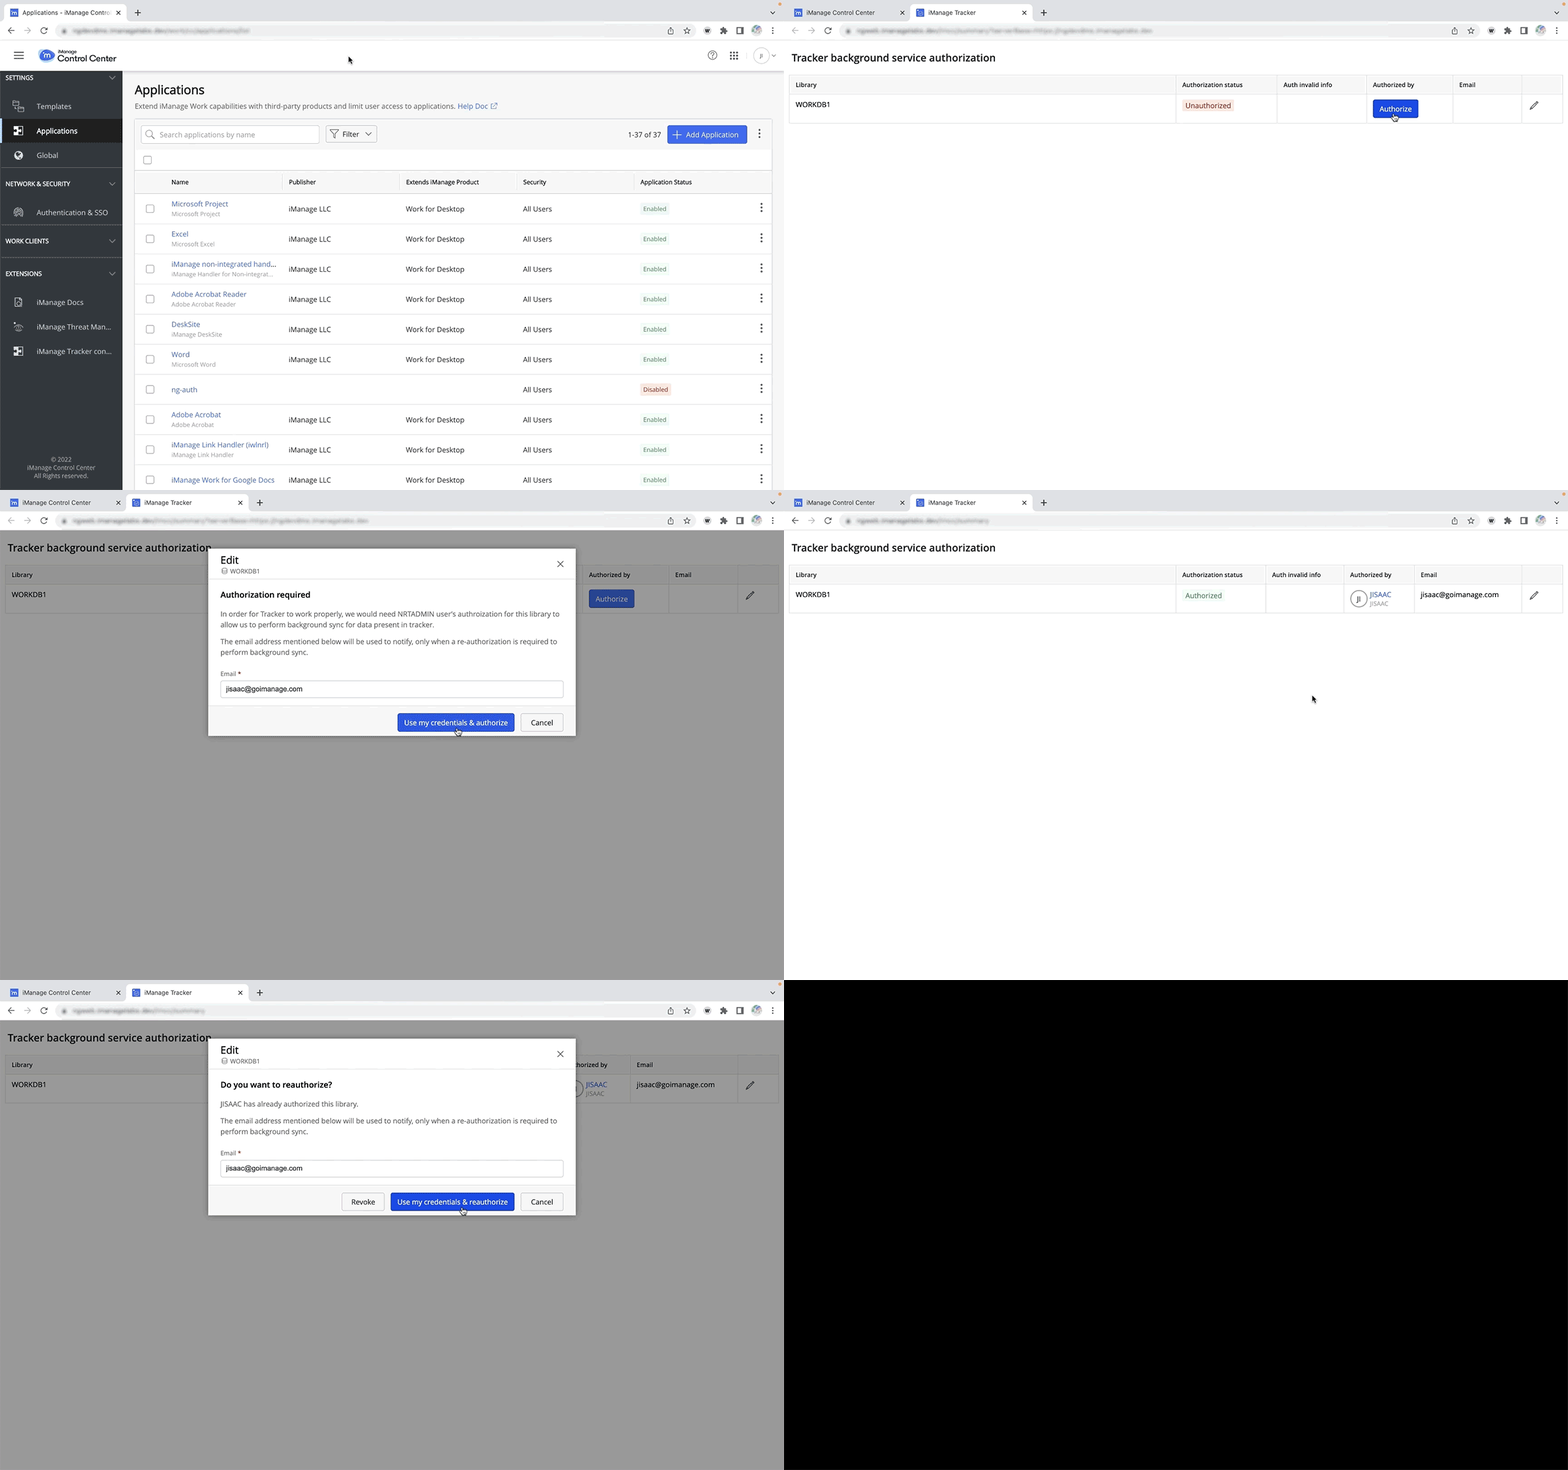
iManage Tracker configuration is listed under Extensions in iManage Control Center. Sign out and sign in again if the option isn't immediately visible.
Select iManage Tracker configuration and then select Open Tracker configuration.
The Tracker background service authorization page appears. It lists the iManage Work libraries for which you have NRTADMIN access with their status displayed as Unauthorized.
NOTE: Library authorization is mandatory, as any policy changes might not be up-to-date without authorization. Email digests also require library authorization.
Select Authorize for each library, enter your email ID, and then select Use my credentials & authorize.
Your user name is displayed for each library. This indicates that iManage Tracker uses your refresh token when fetching data from iManage Work.
The following animated GIFs show the process mentioned in this section.
After completing these tasks, perform all the tasks mentioned in Configuring the UI elements.
Then install iManage Work Desktop for Windows to access the iManage Tracker pane in Microsoft Outlook. This lets users access the iManage Tracker panel in Microsoft Outlook.
