Configure iManage Work Mobility for Intune as a Managed App
iManage recommends that you deploy iManage Work Mobility for Intune as a Corporate Managed App. The Managed Apps are pushed to the user devices after the device registration.
Administrators can use the Intune administrator portal to remote-wipe an application and its data if the device is lost or stolen, or when an employee is no longer with the organization.
NOTE:
The following steps are accurate as of this release. These steps may be subject to change as Microsoft updates their Intune Endpoint Manager portal.
To add iManage Work Mobility from the App Store as an Intune Managed App and configure access and app behavior:
Sign in to the Microsoft Endpoint Manager: https://endpoint.microsoft.com/
TIP:
For an introduction to Intune, see this tutorial walkthrough: https://docs.microsoft.com/en-us/intune/fundamentals/tutorial-walkthrough-intune-portal
Select Devices.
- Create a Device configuration. The following steps enable you to block the sharing of corporate documents from a managed app to an unmanaged app.
- Select Configuration Profiles.
- Select +Create profile.
- In the Platform field, select iOS/iPadOS.
- In the Profile Type field select Device restrictions, then select Create.
- Enter a Profile Name, Description, then select Next.
- In the Configuration settings step, select App Store, Doc Viewing, Gaming.
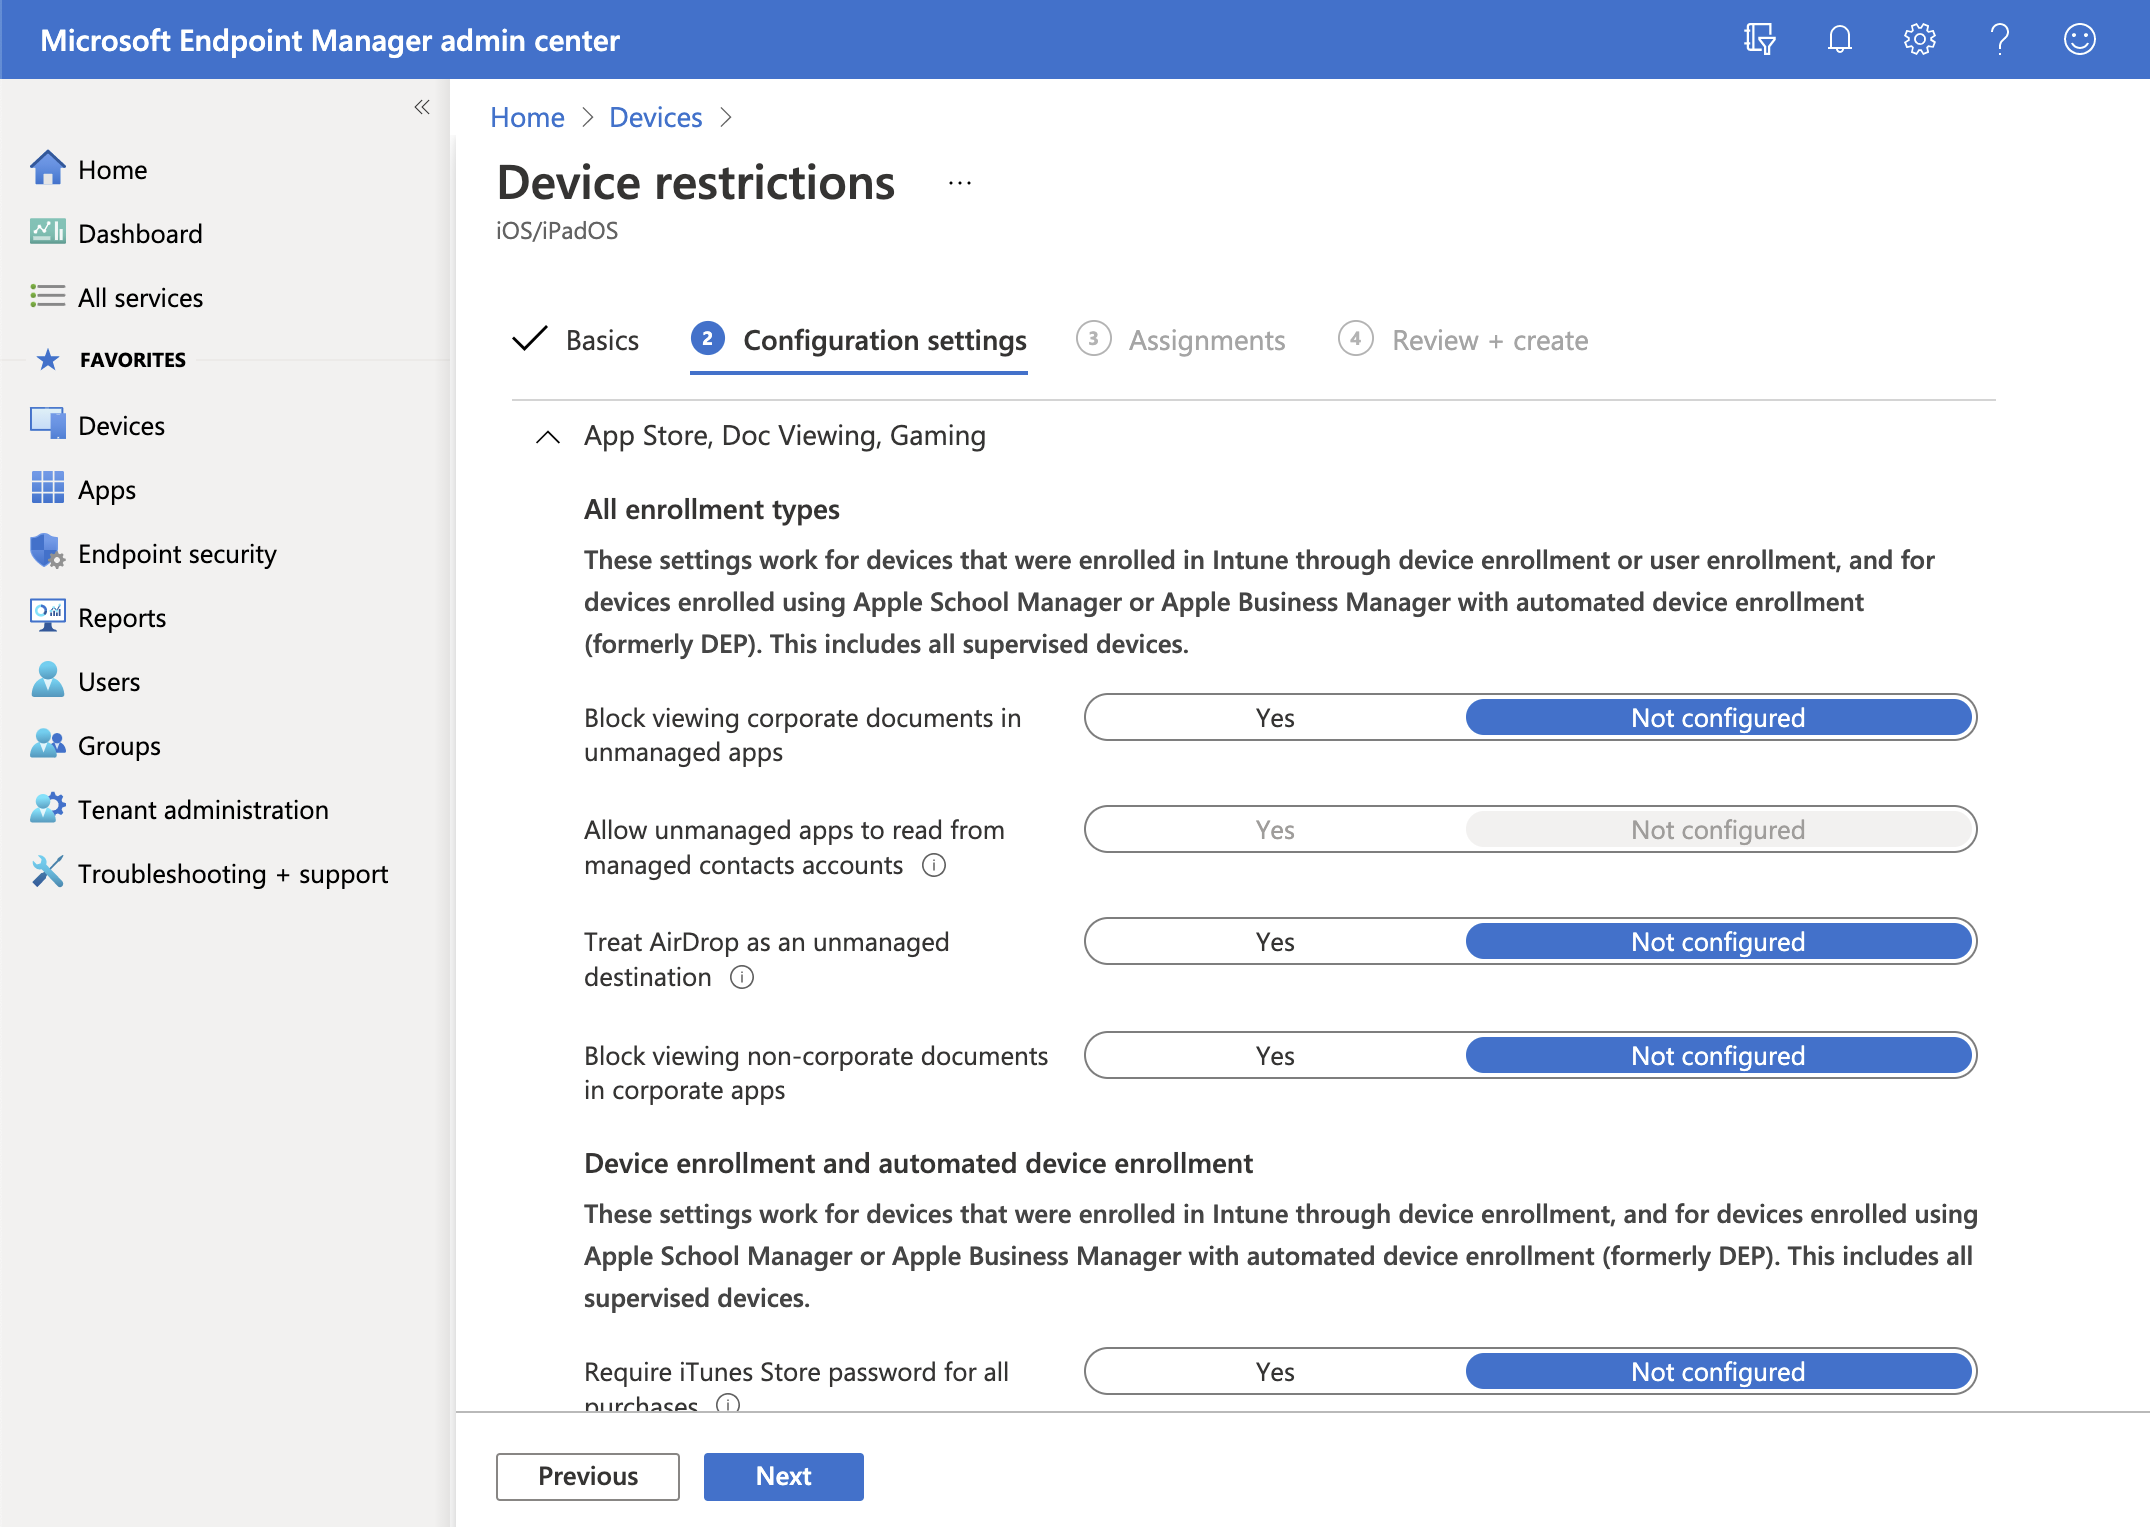
- Under All enrollment types, set Block viewing corporate documents in unmanaged apps to Yes.
- Select Next.
- Create assignments for this device profile. The following steps enable you to set which groups will receive the device configuration.
See https://docs.microsoft.com/en-us/intune/fundamentals/groups-add for more information about using groups in Intune.- On the Assignments page, use the Included groups section to add specific groups (Add groups), all users (Add all users), or all devices (Add all devices).
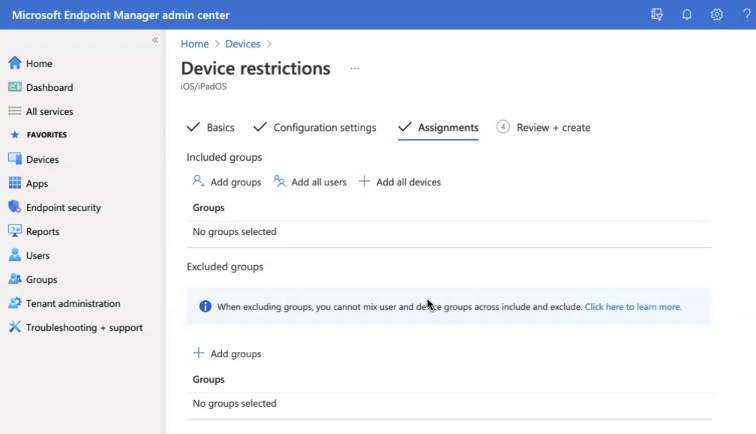
- When you have finished defining which users or devices should receive this configuration, select Next.
- On the Assignments page, use the Included groups section to add specific groups (Add groups), all users (Add all users), or all devices (Add all devices).
- Review your settings, then select Create.
- Add the iManage Work 10 Mobility for Intune app to the device profile:
- Navigate to
 Apps > All apps.
 - Select +Add.
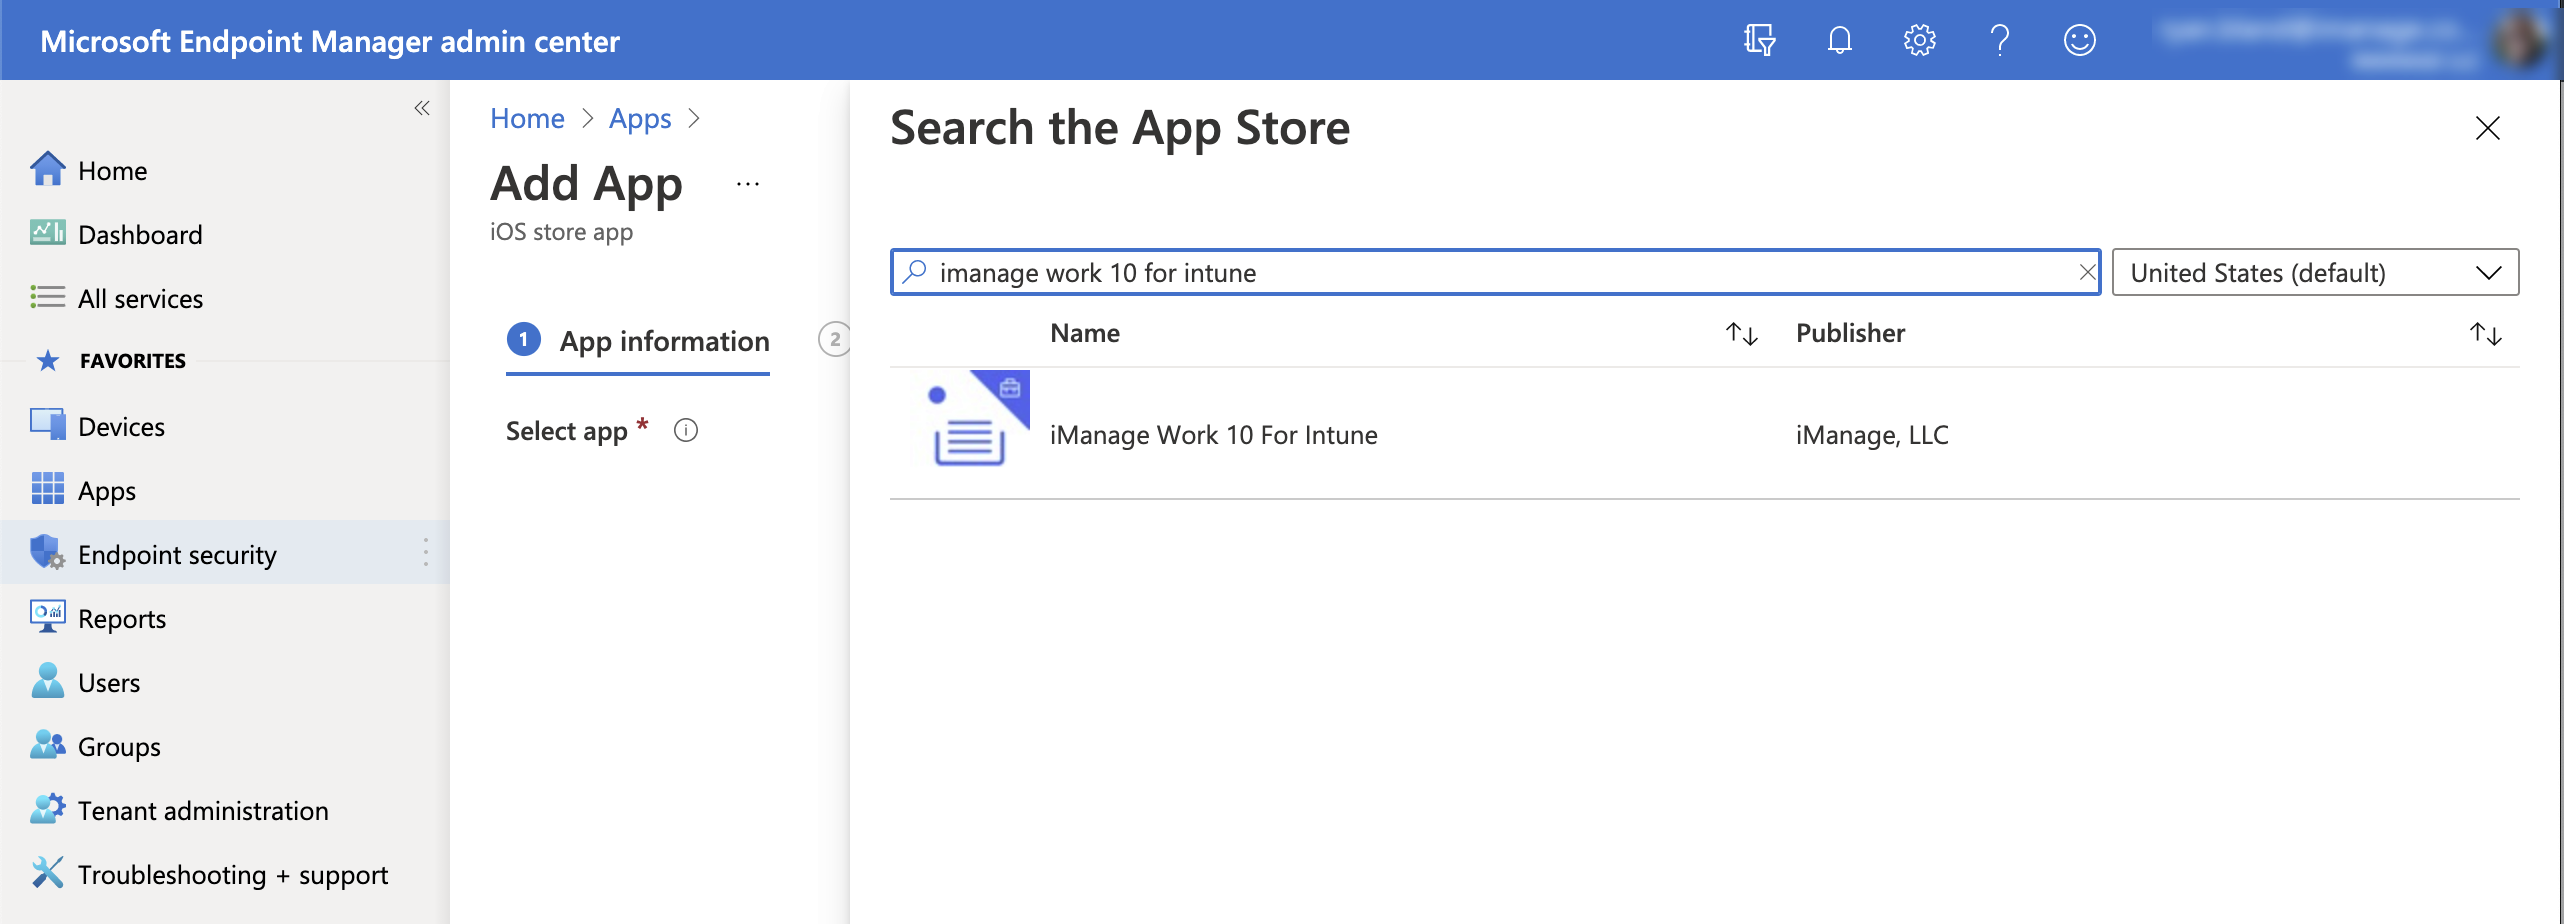
- From the App type menu, select iOS store app, then click Select.
In the Search the App Store search field, enter iManage Work 10 for Intune, select the app from the results list, then click Select.
TIP:
Optionally add any other apps to this device profile, such as Microsoft Word or Microsoft Outlook. This simplifies deployment of all apps using a single application policy instead of having to create separate policies for each app.
- Select Next.
- On the Assignments page, configure how users are given access to the iManage Work Mobility app.
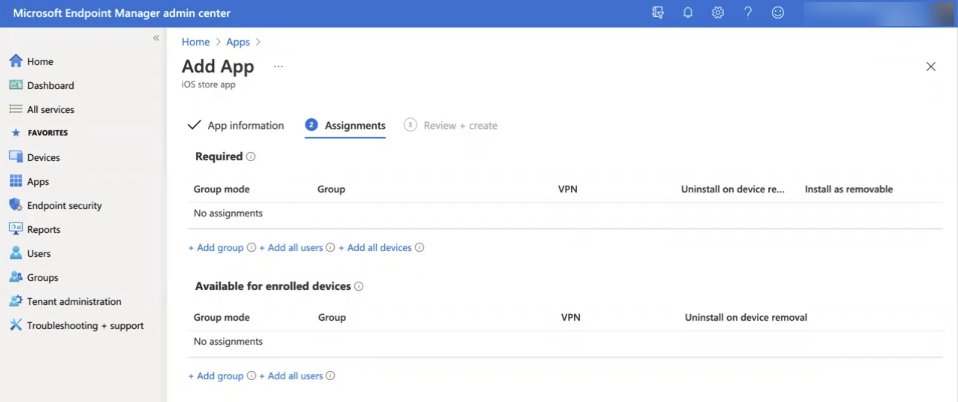
- Add specific groups (Add groups), all users (Add all users), or all devices (Add all devices) under one of the following recommended options:
- Required: The user will receive a push notification to install this app.
- Available for enrolled devices: The app is available for enrolled users to download from the Intune portal.
See https://docs.microsoft.com/en-us/intune/apps/apps-inc-exl-assignments for more information. - Click Next.
- Add specific groups (Add groups), all users (Add all users), or all devices (Add all devices) under one of the following recommended options:
- Review your configurations, then select Create.
- Navigate to
- Add an App protection policy to the Client app you just added. This controls which apps your users can save and share data between, including Copy and Paste.
- In the navigation panel on the left, select Apps.
- In the Policy section, select App protection policies.
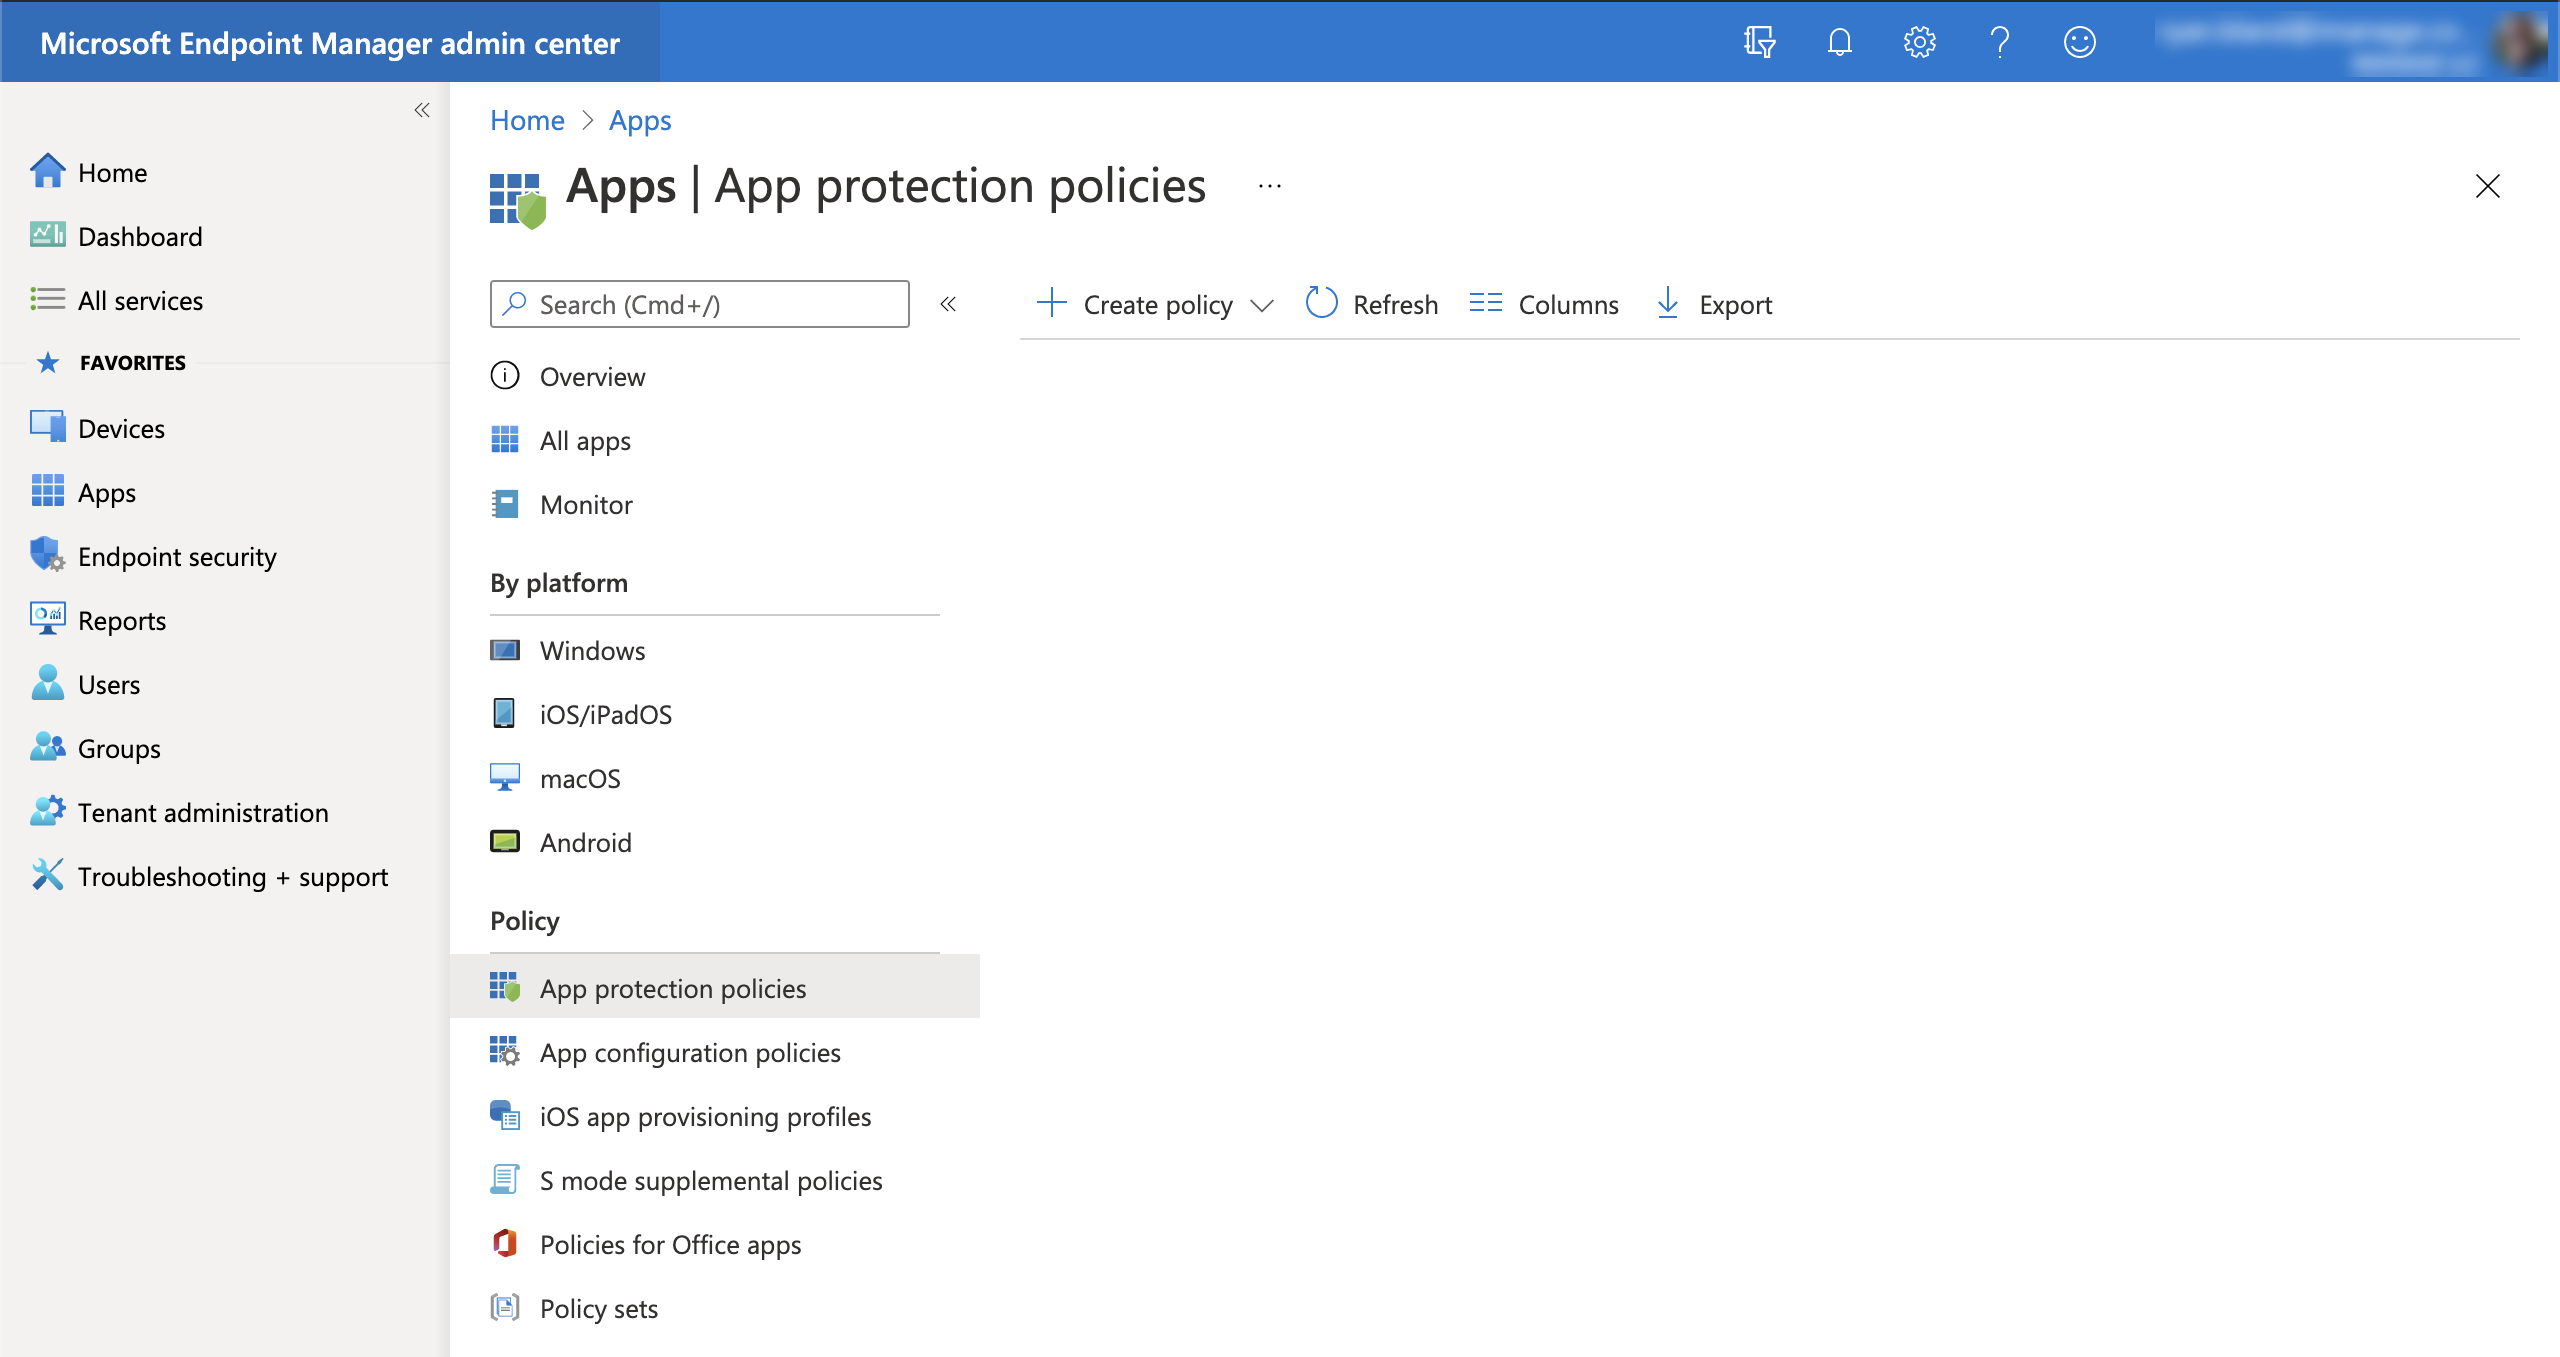
- Select +Create Policy > iOS/iPadOS.
- On the Basics page, enter a Name and Description of the policy, then click Next.
- On the Apps page, set what apps to target with this policy, either all (Yes), Intune managed devices (No > Managed), or Intune unmanaged devices (No > Unmanaged). The unmanaged option is useful when using a 3rd-party MDM solution as an overarching MDM together with Intune. For more information, see https://docs.microsoft.com/en-us/intune/app-protection-policies#target-app-protection-policies-based-on-device-management-state
- Select +Select public apps. In the list of apps displayed on the right, select iManage Work 10 for Intune.
- Select Next to proceed to the Data protection page.
- The Data protection screen shows the data loss prevention (DLP) controls, like cut, copy, paste, and save-as restrictions. These settings determine how users interact with data in the apps.
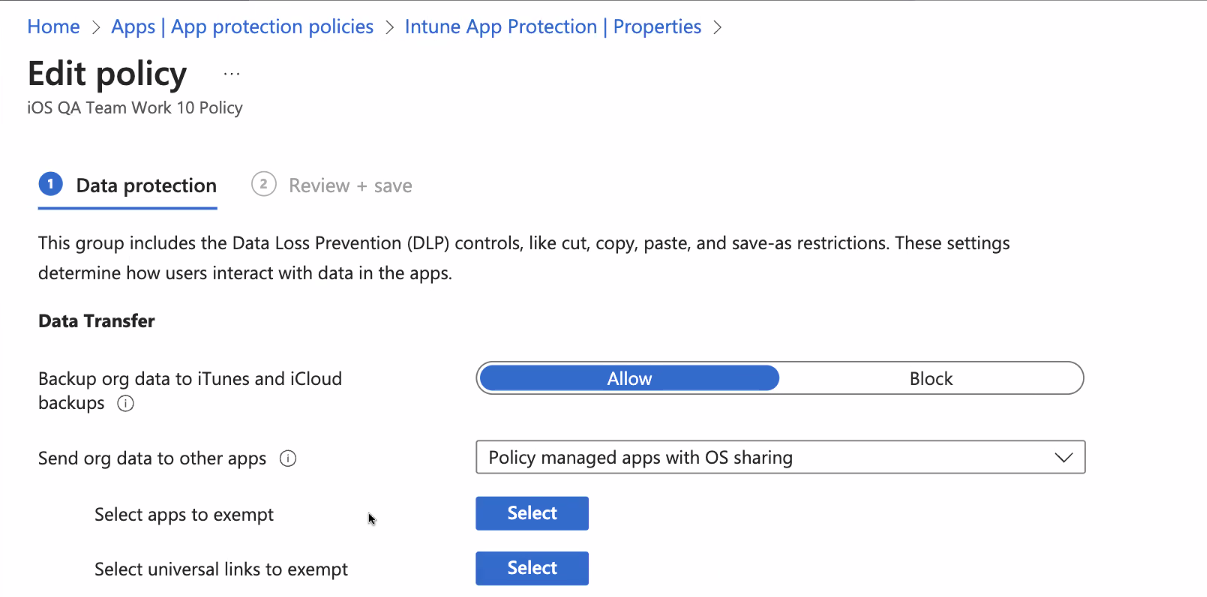
Configure the following recommended settings:Set Send org data to other apps to Policy Managed with OS Sharing. This enables users to share data to other apps that are managed and block the opening of documents in any unmanaged apps.
We recommend this setting because it allows iManage Work Mobility for Intune to interact with other corporate apps that are not supported by Intune. If you select Policy Managed Apps (the most restrictive option) only, it would allow iManage Work Mobility for Intune to send data to only Intune supported apps.IMPORTANT:
If you select any of the other options, this will block the Edit in place capability.
Set Receive data from other apps to All Apps. This option enables your users to receive documents and data from all apps, regardless if they come from a different org or account.
NOTE
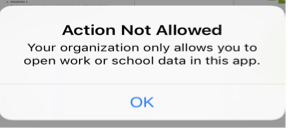
The Policy managed apps option will trigger the following error if the user tries to send data from an unmanaged app or managed app.
Do not select the None setting as users will not be able to perform any edits to their documents.
- To block cloud storage providers (CSPs) such as DropBox, set Save copies of org data to Block. When the user logs in to a CSP as a personal identity, they'll be prevented from saving iManage documents to any CSP.
- To allow users to save copies to their local system, expand Allow user to save copies to selected services and select Local Storage as an exception. Local Storage must be an exemption to edit documents. Word/Excel/Powerpoint require you to save a local copy of the document it receives before you can edit.
Set Restrict cut, copy, and paste between other apps to Any app. This controls whether text can be cut, copy, or pasted from the iManage Work for Intune app to other apps.
NOTE:
If your organization uses managed apps, set this instead to All apps.
If your organization uses only policy managed apps (which utilize the Intune SDK), set this to Policy managed apps with paste in.Set Encrypt org data to Not required. All data is already encrypted.
IMPORTANT:
If you set it to required, iManage users will not be able to open or use the documents as they will be stored in the Work server as encrypted files.
- Click Next.
- Configure the Access requirements as needed, such as PIN and credential requirements that users must meet to access apps in a work context. Click Next.
- Configure the Conditional launch requirements for this access protection policy. This sets sign-in requirements for your access protection policy. See the on-screen Intune instructions for more information. Click Next.
- Configure the Assignments to determine groups which should receive this specific policy, under either Included groups or Excluded groups. Click Next.
- Review the App protection policy, then select Create to create the policy.
Add an App configuration policy specifically assigned for iManage Work for Intune. The settings available for configuration are explained in detail in App policy configurations.
NOTE:
When using a 3rd-party MDM (for example AirWatch or Mobile Iron), do not set Managed App Configuration using the 3rd party MDM. Instead, the Managed App Configuration must be set in the Intune Portal as described in the following steps.
- Navigate to Apps > App configuration policies.
To add iManage Work for Intune using a managed app policy, select +Add > Managed apps.
NOTE:
Manage app policies are recommended for when the device belongs to the user, commonly referred to as Bring Your Own Device (BYOD).
or
To add iManage Work for Intune using a manage device policy, select +Add > Managed devices.NOTE:
Managed device policies should only be used if the devices are provided by the company.
- On the Basics tab, enter a Name and Description for this App configuration policy.
- Select +Select public apps or Select app.
- In the Select apps to target panel on the right, search for and then select iManage Work 10 for Intune. Click Select to proceed.
- Select Next.
On the Settings tab, define all of the Name and Value pair settings for iManage Work for Intune. See the settings available on App policy configurations. This includes the specific iManage Work system(s) to which your users will connect.
NOTE:
When configuring a managed device policy, Intune requires that you enter the Value Type for each setting (key). The value type for each setting is listed in App policy configurations.

IMPORTANT:
When configuring a Managed device policy, you must include the IntuneMAMUPN key with a value set to {{UserPrincipalName}}.
- When you have completed adding all of the necessary settings, select Next.
- On the Assignments tab, select Add groups, then search for and pick your group(s). When you choose a group, you are choosing an Azure AD group.
- Select Select.
- Select Next.
- Select Create.
- Navigate to
You have now completed all of your Intune configuration. Your users will receive a notification within 8 hours.
TIP:
For assistance in diagnosing and solving issues with your Intune configuration, see this Troubleshooting mobile application management article from Microsoft.