10.4.8
Enabling bulk security actions
A new configuration option has been introduced for administrators to allow iManage Work users to perform bulk security updates for documents, emails, workspaces, and folders. For more information about these capabilities, refer to:
Selecting multiple documents in a folder and aligning security to that of the folder
Updating folder security and applying changes to its children
These new capabilities expand on the ability to edit user/group permissions of files in bulk, introduced in release 10.4.2. For more information, refer to iManage Work Web Server Release Notes 10.x.
By default, these capabilities are turned off.
IMPORTANT: Bulk security updates applied by your users can be overwritten by the Refile Service. If you're using Refile Service to perform background security updates, we recommend you review the information in Considerations when using the Refile Service for security updates before activating this feature.
To turn on these new capabilities for users:
Sign in to iManage Control Center and browse to Work Clients > Web Client > Settings > Features.
Set Allow users to perform bulk security updates to Yes.
Select Save.
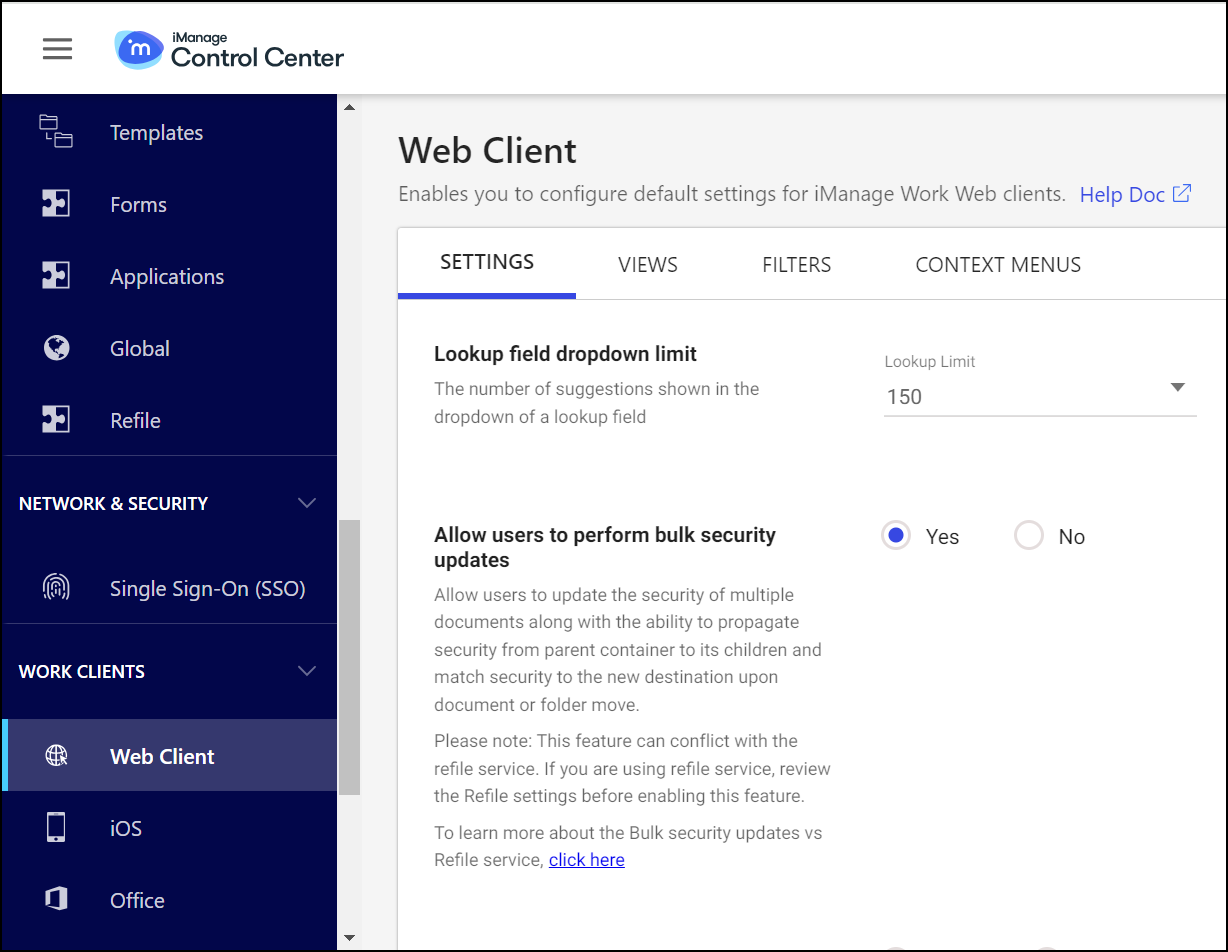
NOTE: In on-premises environments, Asynchronous Task Framework must be enabled in iManage Work Server to use this feature. If Asynchronous Task Framework isn't enabled, this setting won't appear in iManage Control Center. For information about enabling Asynchronous Task Framework, refer to the Asynchronous Task Framework section in iManage Work Server Administration Guide.
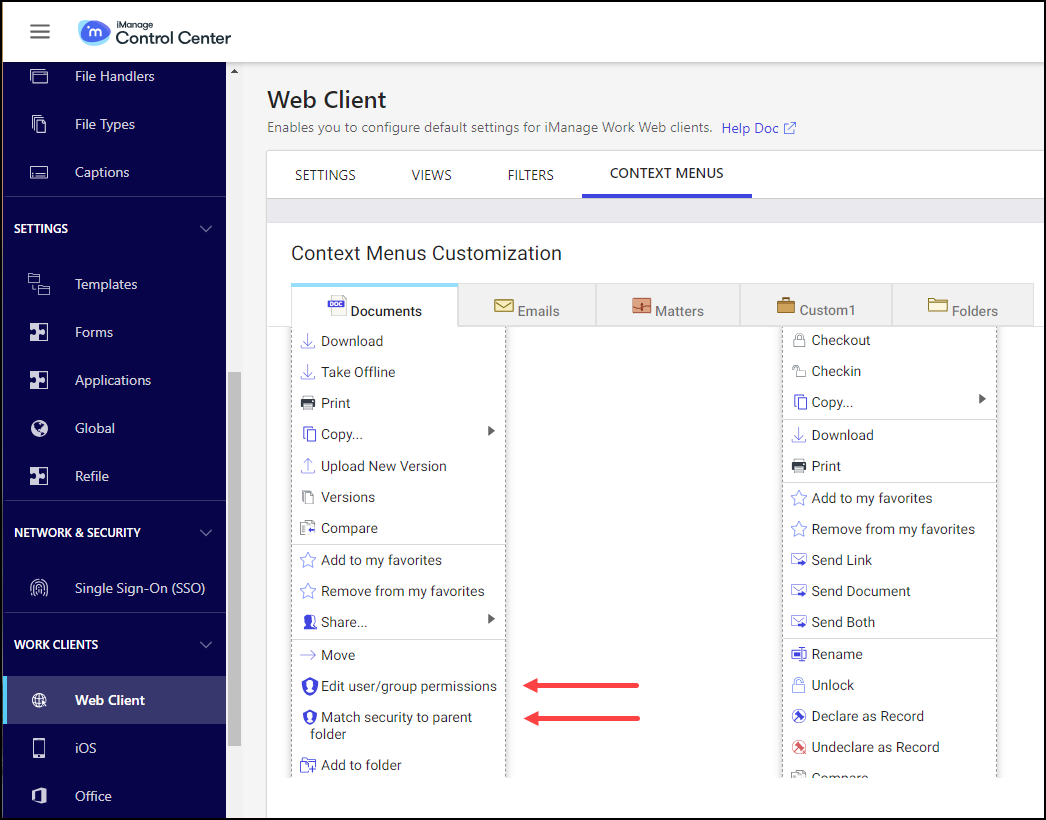
After turning on Allow users to perform bulk security updates, the following actions are available in the Context Menus tab within iManage Control Center:
Table: Context Menus
Tab | Action | Description |
|---|---|---|
Documents | Edit user/group permissions | Allows user/group permissions to be updated for one or more documents. |
Match security to parent folder | Allows for the security of one or more documents to be aligned with its parent folder. | |
Emails | Edit user/group permissions | Allows user/group permissions to be updated for one or more emails. |
Match security to parent folder | Allows for the security of one or more emails to be aligned with its parent folder. | |
Matters | Apply security to contents | Allows for workspace security settings to be propagated to its children. |
Folders | Apply security to contents | Allows for folder security settings to be propagated to its children. |
IMPORTANT: You must add these actions to the appropriate context menus in iManage Control Center.
For instructions on adding these actions to the respective menus, refer to Context menus in the iManage Control Center online help.
The following figure shows an example of the new actions added to the Context Menus Documents tab:
In addition to the new Context Menus actions, the following workflows are enabled in iManage Work when Allow users to perform bulk security updates is set to Yes:
The option to “Apply security changes to children” when workspace security is changed.
The option to “Apply security changes to children” when folder security is changed.
The option to “Match security to destination” when folder(s) is/are moved.
The option to “Match security to destination” when document(s) is/are moved.
IMPORTANT: Before this release, the Edit user/group permissions action was available for addition to the documents and emails context menus. With this release, this action is now controlled by the Allow users to perform bulk security updates setting. The Edit user/group permissions action will be removed after the upgrade is applied, since this setting is disabled by default.
You must turn on the Allow users to perform bulk security updates setting after upgrading to release 10.4.8 to make this action available to your users again. If the Edit user/group permissions action was added to the documents and/or emails context menus before upgrading to release 10.4.8, it'll automatically reappear when Allow users to perform bulk security updates is set to Yes.
Updated navigation pane
In this update, the Authentication & SSO option is renamed to Single Sign-On (SSO) in the Control Center navigation panel.
10.4.7
There are no new features or enhancements in this update. This update includes all enhancements provided in previous updates.
10.4.6
Customizing your table views
This enhancement allows you to modify the columns shown in iManage Control Center tables. The following figure shows a sample table, with a section of the table highlighted to show columns that can be customized:
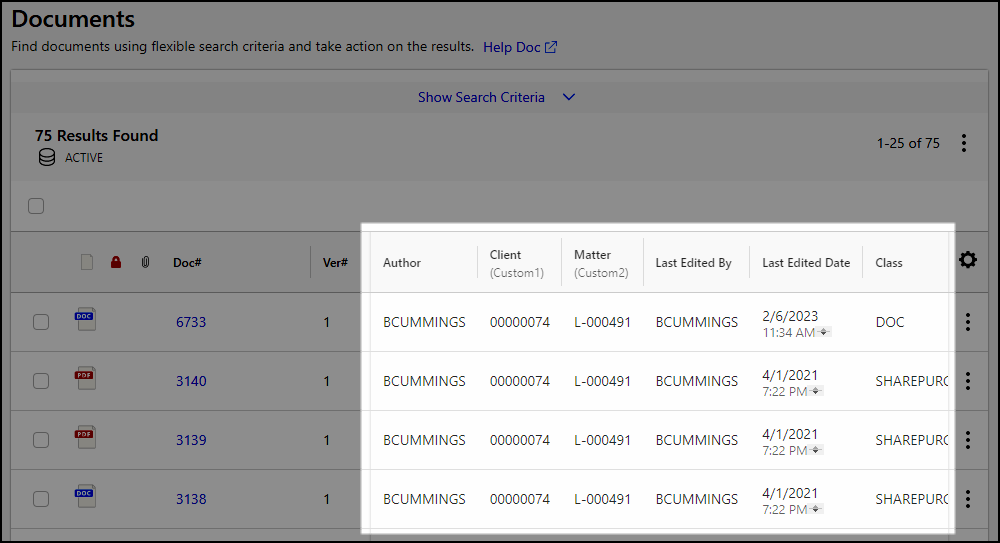
NOTE: When many columns are present in the customizable section of a table, some columns may be hidden from view. You can view these columns by using your browser’s horizontal scrolling capability.
Whereas columns in the fixed sections of a table can't be altered, you can do the following in the customizable section:
Specify which columns are displayed, and
Change the order in which columns are shown.
Your browser automatically remembers the customizations you made to each table.
Adding and removing columns
Each table has a default table view that consists of a pre-defined set of columns, displayed in a preset order. To change which columns are displayed, select the gear ![]() icon. The Edit Columns dialog box appears.
icon. The Edit Columns dialog box appears.
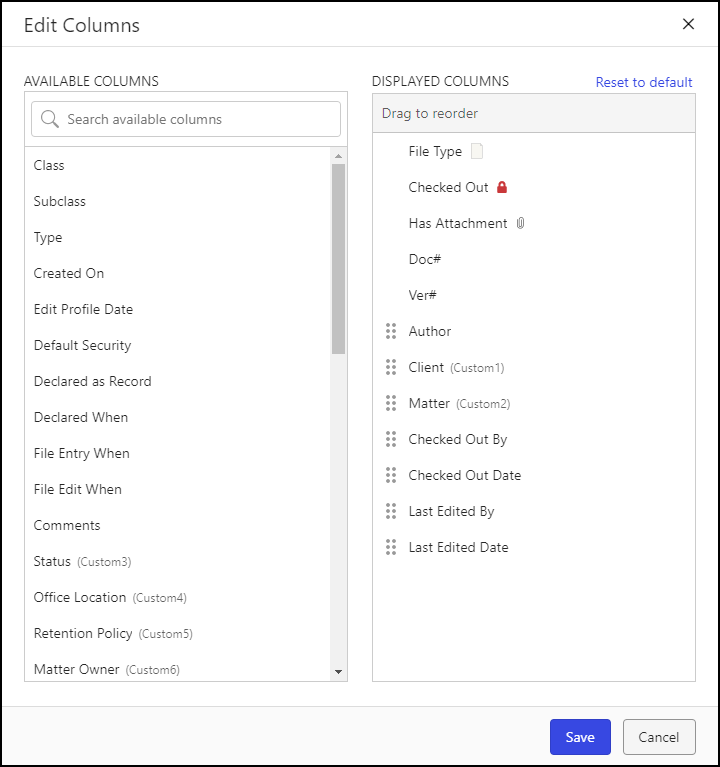
You can perform the following actions to select which columns are displayed in a table and to reorder them:
To display a column in a table, hover over the column name in Available Columns, then select the add
 icon.
icon.To remove a column from a table, hover over the column name in Displayed Columns, then select the remove
 icon.
icon.To change the column order, select the column in Displayed Columns and drag it to the desired location in the list.
To restore the table view’s default column list and order, select Reset to default.
NOTES:
Columns are displayed in a table in the order in which they appear in the Displayed Columns list.
Columns that can be reordered and removed from the Displayed Columns list are denoted by the edit icon . Columns without this icon are fixed in place and can’t be reordered or removed.
NOTES:
To search for a column in the Available Columns list, begin typing the column caption name or ID in the Search available columns search box.
When you add a column to the Displayed Columns list, it's automatically added at the bottom of the list.
Changing column order
Column order can be changed either through the Edit Columns dialog box (refer to Adding and removing columns) or by dragging and dropping the column heading to the desired location.
NOTE: Only columns in the customizable section of a table can be reordered.
Improvements for Download as CSV
Your column selection and order preferences are now respected when table results are downloaded as a CSV file.
Updated user menu in iManage Control Center
The Control Center user menu now displays your email address.
Ability to enable opening emails filed from Gmail in Gmail
A new configuration has been introduced for administrators to enable the option to open Gmail emails, filed using the iManage Gmail extension, in the native Gmail application.
The new Enable open in Gmail configuration option allows you to specify that Gmail emails are opened in the native Gmail application. This setting is available in iManage Control Center in Work Clients > Web Client > Settings > Features.
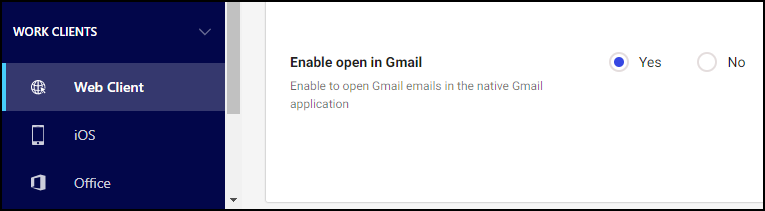
When set to Yes, Gmail emails filed using the iManage Gmail extension are opened in the native Gmail application from the Open context menu in iManage Work. By default, this option is set to No (disabled).
10.4.5
Updated theme for iManage Control Center
This update introduces a new look and feel for iManage Control Center. While the functionality remains the same, the user interface is now updated with new fonts and color themes to align with iManage branding.
Restore Trash items to another location
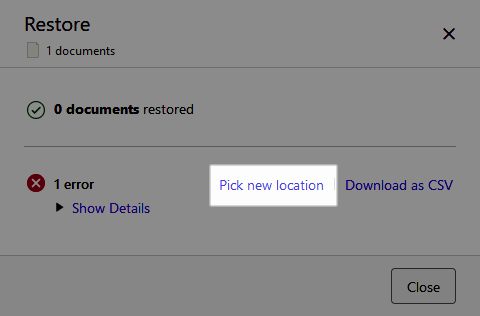
Using a new menu option in iManage Control Center titled Restore to new location, administrators can now selectively restore items from Trash to a specific folder in iManage Work.
This restoration workflow is especially useful when the original folder no longer exists. If it is known that the target folder no longer exists, the administrator can select Restore to new location. However, if they do not know in advance, and they select Restore, then the feature still applies.
Selecting the Restore option will always attempt to restore to the folder where it resided at the time of deletion. However, if while restoring the document or email, iManage Work returns an error, you can now select Pick new location directly from the Restore dialog box.
For more information about this capability, refer to Trash.
10.4.4
There are no new features or enhancements in this update. This update includes all enhancements provided in previous updates.
10.4.3
This update includes all enhancements provided in previous updates.
Ability to disable web-based email sending
A new configuration has been introduced for administrators to disable the option to send documents and links directly through iManage Work Web's email service for users who have not installed the iManage Work Desktop for Windows or iManage Work for Mac clients on their machines.
When users without iManage Desktop clients installed use the Share menu options (Send Document, Send Link, Send Both) in iManage Work Web, the resulting email is sent using an web-based email service provided by iManage. This basic email service lacks enhanced security capabilities like encryption and authentication.
The new Enable web-based email sending configuration option enables you to prevent users from sending potentially sensitive content using an email server that is not customer-owned and managed. This setting is available in iManage Control Center in Work Clients > Web Client > Settings > Features.
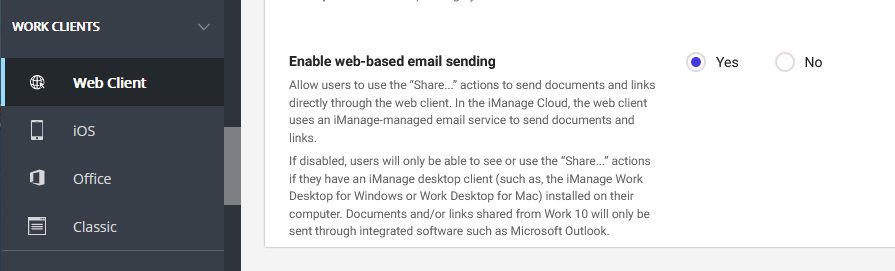
When set to No, the Share action is removed from iManage Work Web, and documents and links cannot be shared using this unsecure web-based email service. By default, this setting is set to Yes (enabled).
NOTE: Users who have iManage Work Desktop for Windows or Work Desktop for Mac installed can always see and use the Share menu actions to send documents and links. The resulting emails are sent using the email application (Outlook), and not the web-based email service.
10.4.2
This update includes all enhancements provided in previous updates.
Enhanced requirements for password security
User passwords must now contain at least 12 characters, including:
one uppercase letter,
one lowercase letter, and
one number or one special character from the following list:
*().&-_[]`~|@$%^?:{}!',/\#+<>;"= (including the space character)
Administrators can see these requirements when they create a password for a new user, or when changing an existing user's password.
Control Center now also provides responsive tips when creating or updating a new password. As you type, the Password requirements panel updates to show the remaining password requirements.
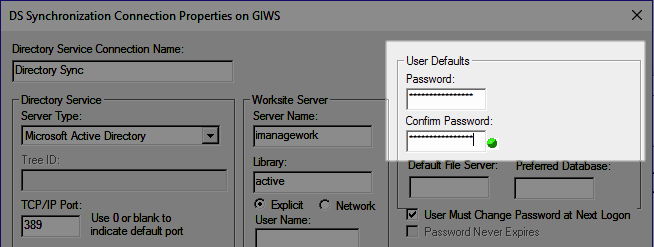
IMPORTANT: When using iManage Directory Synchronization to perform automated one-way synchronization of users and groups from Active Directory to iManage Work, you must update the default password to adhere to these new password requirements.
If you do not update the default password, new users will not be added. A message is reported in the iManage Work Server logs if this occurs: "Password does not meet minimum requirements"
Canadian French language support
This update introduces support for the Canadian French language. Administrators can now set the default language to Canadian French, which displays all text within iManage Control Center in Canadian French. To set the default language, browse to Web Client > Settings.
Additionally, administrators can now set Canadian French captions for iManage Work items under Metadata > Captions.
New platform for usage analytics
This update introduces a new platform for collecting anonymous usage analytics in iManage Cloud on Azure. iManage has partnered with Twilio Segment for our analytics implementation. Segment is an industry leader in product analytics and counts companies like Google, IBM, Intuit, and Zendesk among their customers. Segment shares our commitment to security and data privacy and has obtained many of the same security attestations as iManage such as ISO 27001, ISO 27017 and 27018.
In accordance with global data privacy regulations, you must opt-in to allow iManage to gather this information. Opting in will provide benefits both for your organization as well as for iManage.
Gathering anonymous user analytics information allows iManage to:
Make data-driven decisions based upon real-world insights into how our end users are using our products.
Make essential decisions about which features of our products to continue to invest in.
Build a foundation upon which we can securely share this data with our customers so they can also measure adoption and usage of the products they have invested in.
This data gathering also forms the foundation of our future reporting strategy for iManage Cloud customers. By gathering this data, iManage will also share this data with you so you will be better position to:
Better understand adoption of iManage products within your organization.
Gain insights into how your users are using the products to better target additional training and change management initiatives.
iManage has implemented the following standards and controls with respect to the collection of analytics data:
All analytics information collected is limited to end user usage of our products only.
This information is gathered in a fully anonymous fashion, and user activity can never to connected back to any individual person.
We will never share with Segment:
Company names
User names
User email addresses
Document, workspace, folder names and related metadata.
Segment provides controls on data ingress to ensure only data elements that have been explicitly pre-permitted by iManage are gathered.
If you have additional questions about the implementation of analytics at iManage, contact ux@imanage.com.
To enable sharing of anonymous usage analytics with iManage you may do so at any time in iManage Control Center by browsing to Settings > Global > Enable analytics.
iManage Work Web usage analytics previously collected by Google Tag Manager is no longer supported. The Enable Google Tag Manager tracking setting has been removed from iManage Control Center in Work Clients > Web Client > Settings.
10.4.0
This update includes all enhancements provided in previous updates.
Manage SAML single sign on
This update enables administrators to configure and manage Security Assertion Markup Language (SAML) single sign on (SSO) authentication within iManage Control Center.
iManage Work in the Cloud administrators no longer need to contact iManage Support staff when they are onboarding or when IdP certificates are nearing expiration and need to be updated.
iManage Work on-premises administrators can manage their SAML SSO settings from iManage Control Center, and no longer need to manage and maintain SSO using registry keys on the Work Server.
This update aligns iManage with standard SSO practices as a Service Provider and initiator of SSO authentication requests.
The following steps outline the steps to migrate from an existing SAML SSO configuration to the new Service Provider-initiated configuration.
Gather the necessary information from iManage Control Center and use it to configure SSO in your identity provider (IdP). iManage Control Center enables you to download this information as an XML or text file.
After configuring the necessary information in your IdP, download the SAML SSO metadata XML settings from your IdP. This file includes your IdP certificate.
Enable SAML SSO for all iManage users in Control Center using the Service Provider SAML SSO option.
Import the metadata XML file you downloaded in Step 2 and import it into iManage Control Center.
Confirm users are able to sign in to iManage Work.
Administrators can review the settings in Control Center, including the certificate expiration date, and can also revert to their legacy SSO authentication settings in the event of a configuration issue.
To configure SAML SSO, navigate to Network & Security > Authentication & SSO.
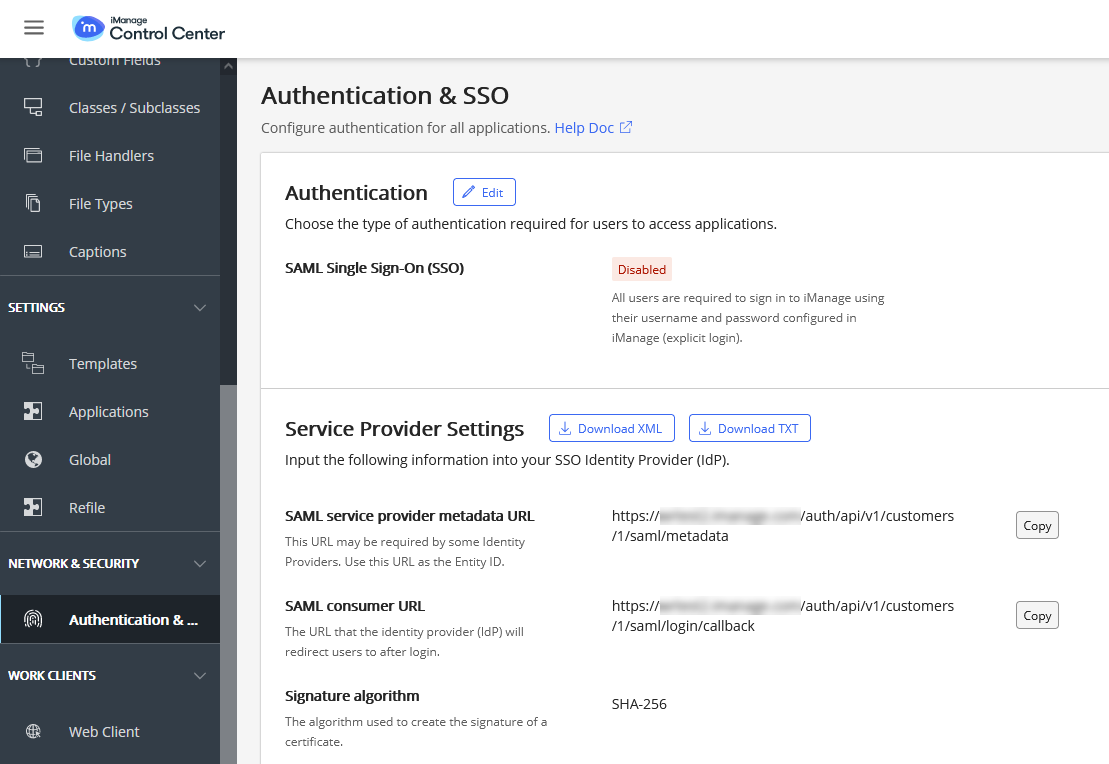
For detailed instructions, refer to Authentication & SSO.
Requirements
Work Desktop for Windows 10.2.4 and later
DeskSite or FileSite 9.3.6 and later
Additionally, authentication using Oauth2 is required for these applications. For more information, refer to the following advisory:
https://help.imanage.com/hc/en-us/articles/1260806477829-ADVISORY-Work-Desktop-for-Windows-will-no-longer-support-the-use-of-the-Microsoft-Internet-Explorer-web-browser-control
Control the creation of required folders from template
Administrators now have finer control over the creation of folders from a workspace template.
Users often collaborate on matters across departments. For example, a litigation matter may need some tax advice, so the tax attorney needs to create some relevant tax folders to store their documents. They can easily create these folders by selecting the appropriate workspace template, such as a tax template. When the tax attorney selects a different template, iManage Work automatically creates all of the folders that are marked as Required or Workspace Creation from the selected template, even though the tax attorney may not need or want all of the folders created.
This could result in the creation of a number of extra unused folders in the workspace.
iManage Control Center now provides an option to control which folders are created in this scenario.
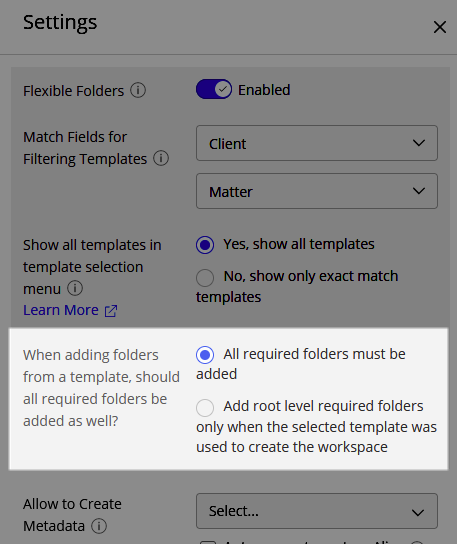
All required folders must be added: When a user selects a template different than the recommended template in the New Folder dialog, iManage Work creates all folders and subfolders from the newly-selected workspace template. This is the default option.
Add root level required folders only when the selected template was used to create the workspace: When a user attempts to create a new folder using a template that was not used to create the workspace, the user is given the option to select which root folders are to be created. This is the case even if the root level folder are configured as Required or Workspace Creation folders in the newly-selected template.
There is no change to the behavior of subfolders as this is driven by the parent folder. If a subfolder is marked as Required or Workspace Creation in the template, they are automatically created at the time the parent folder is created, regardless of this setting.
To access this setting, browse to Settings > Global.
For more information about this capability, refer to Global settings.
Inherit empty values from parent during refile
Administrators now have the capability to configure how metadata changes are applied when the workspace has no value set for a property.
By default, the Refile Service applies metadata values to the folders and documents within it to ensure consistency. In the scenario when the workspace has no value for a given field, it updates all folders and documents within the workspace, potentially removing metadata information that is present in these items.
A new setting enables you to prevent the Refile Service from removing the metadata values from the child items in this scenario.
To access this capability, navigate to Settings > Refile. Select a library to open the Setup Refile dialog.
The Inherit empty values from parent setting is available on the Metadata section of the dialog.
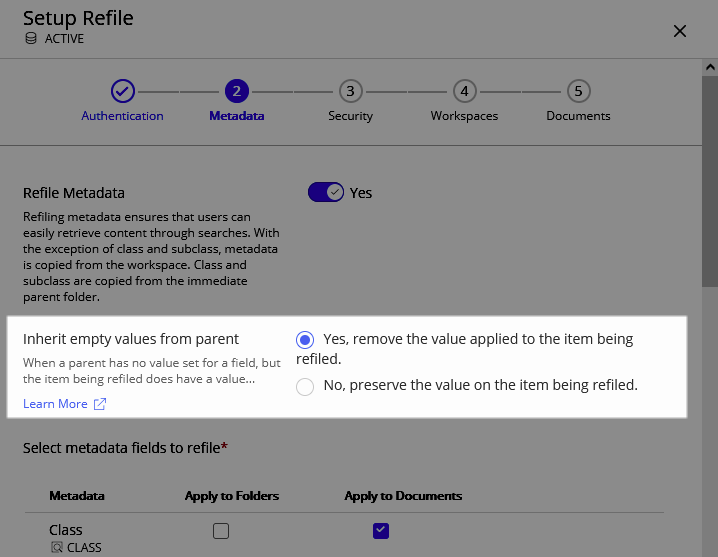
For more information about this capability, see Configuring Refile.
Customize toolbar actions
iManage Work toolbars can now be customized in this update. Administrators can re-order, remove, group or add custom toolbar actions for containers like Recent Matters, My Matters, Workspace, Folder and so on. All available actions can either be shown as commands along the top toolbar or, be placed under the action menus. When the available space in the toolbar reduces for the added actions, they are responsively added to the action menu.
To customize toolbars in iManage Control Center, browse to Web Client > Settings > Toolbar.
NOTE: The toolbar kebab menu actions for Folders or Matters continue to reference their respective context menus untill the toolbar actions are customized.
Toolbar customizations in iManage Control Center apply to iManage Work Web, Work Panel & mobile views.
The Upload Folder action is not supported in iManage Work Panel. To upload a folder from Work panel, drag-and-drop a folder into a workspace or another folder.
Customize workflow for New Folder creation
Administrators can now show or hide the option to users the ability to create a new folder. Administrators can also choose a custom command (provided by a third-party tool) to create a new folder in the iManage File/Location Selection dialog. This allows administrators to define a custom workflow for New Folder creation from both Work Web and File/Location Selection dialog, based on organizational requirements.
In iManage Control Center, navigate to Web Client > Settings > Features > New Folder in iManage File/Location Selection dialog.
Organize nodes in the side navigation panel
Administrators can now re-order, show or hide the nodes displayed in the side navigation panel in iManage Work. To customize the navigation panel in iManage Control Center, navigate to Web Client > Settings > Navigation. These customizations are also displayed in mobile views.
Third-party extensions can also be enabled or disabled as nodes in the side navigation panel. To configure these extensions, see the iManage Work Web SDK Guide.
NOTE: Extensions can be configured to selectively appear or be hidden in the Mobile view or Work panel navigation in Microsoft Outlook.
Ability to configure the Details panel
Administrators can now configure the default tab shown to users in the Details panel, and also set the order of the tabs (including custom tabs) that appear.
To configure the Details panel, browse to Web Client > Settings > Navigation > Details Tabs.
Custom tabs in the Details panel can also be invoked through a context menu, which can be configured as part of the custom tab configuration and can be managed by the administrators in the context menu configurations.