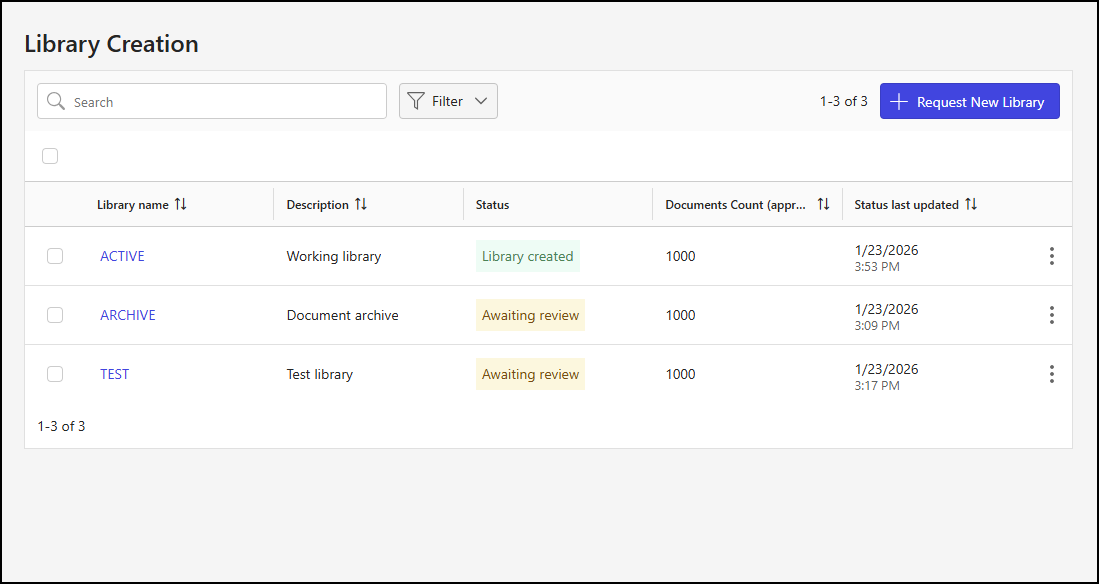
The Library Creation page provides an easy way to request a new iManage Work library for your tenant. A guided dialog prompts you for the information iManage needs to evaluate your request and create the library, ensuring that all the necessary details are collected.
This page also lets you track the progress of your requests and review their associated details. The search, filter, and sort page controls help you easily locate and review your requests.
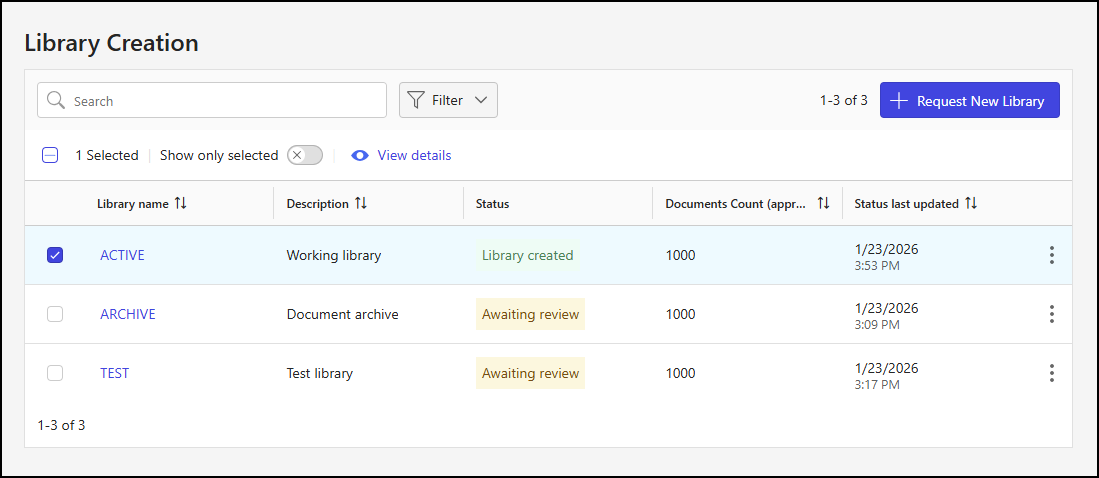
An example of the Library Creation page is shown in the following figure.
This section includes the following topics:
Library Creation page actions
On the Library Creation page, you can:
Request a new library: Submit a request for a new library. For detailed steps, refer to Request a new library.
View library details: Check the details of a library request. For detailed steps, refer to View library details.
Request a new library
To submit a request for a new library in iManage Admin Portal, follow these steps:
Go to https://cloudimanage.com/admin/ and sign in with your iManage credentials.
NOTE: To request a new library, the user account used to sign in to iManage Admin Portal must be assigned the Onboarding Management scope and Operator role for customer onboarding. For more information about granting user access, refer to Onboarding Access.
Browse to Customer Onboarding > Library creation.
On the Library Creation page, select + Request New Library.
In the Library details step of the Request New Library dialog:
Figure: Request New Library dialog - Library details step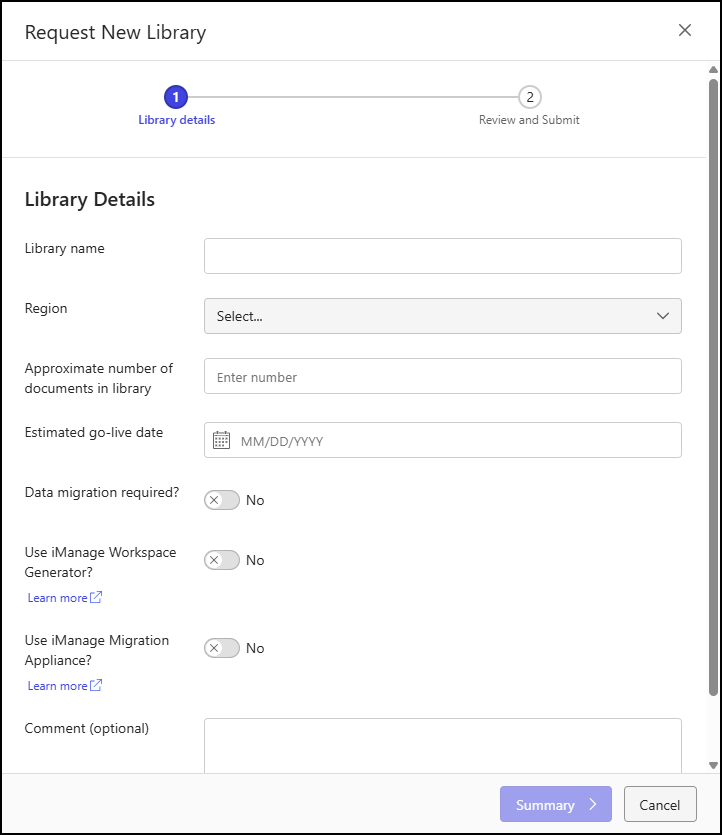
Fill in the details:
Library name: The name of the library. Enter a value that meets the following criteria:
Length: 1–32 characters
Alphanumeric: a–z, A–Z, 0–9
Special characters allowed: _
Spaces allowed: No
Region: The region that will host the library. Choose a value from the Region drop-down list.
Approximate number of documents in library: The estimated number of documents that will reside in the library. Enter a number.
Estimated go-live date: The date when the library is expected to go live. Enter a date or select one using the date picker.
Data migration required: Specifies whether data needs to be migrated to this library.
No (default): Data doesn’t need to be migrated.
Yes: Data needs to be migrated.
Estimated migration start date: Specifies the migration start date if data needs to be migrated. Enter a date or select one using the date picker.
NOTE: This field is shown only if Data migration required is set to Yes.Use iManage Workspace Generator: Specifies if iManage Workspace Generator will be used to automate the process of creating workspaces.
No (default): Workspace Generator won’t be used.
Yes: Workspace Generator will be used.
Use iManage Migration Appliance: Specifies if iManage Migration Appliance will be used to migrate data to the library.
No (default): iManage Migration Appliance won’t be used.
Yes: iManage Migration Appliance will be used.
Comment: A description that provides more details about the library request.
Select Summary to proceed to the next step.
In the Review and Submit step, review and confirm the library details.
Figure: Request New Library dialog - Review and Submit step
If you need to make any changes, select Back to return to the previous step.
When everything is correct, select Submit Library Request to submit the new library request.
NOTE: When you submit a request for a new library, iManage reviews it and decides whether to approve or deny it. The status (and reason for denial, if applicable) will be provided in the user interface.
View library details
To view library details, follow these steps:
Go to https://cloudimanage.com/admin/ and sign in with your iManage credentials.
NOTE: To view library details, the user account used to sign in to iManage Admin Portal must be assigned the Onboarding Management scope and either the Operator or Monitor role for customer onboarding. For more information about granting user access, refer to Onboarding Access.
Browse to Customer Onboarding > Library creation.
On the Library Creation page, choose a library from the library table and use one of the following methods to select it:
Select the library in the Library name column.
Select the library checkbox and then select View details in the toolbar menu.
Select the kebab on the library row and then select View details.
Right-click on the library row and then select View details.
An example of the right-click menu is shown in the figure below:Figure: Library Creation page - right-click View details action
The Library Details page displays, showing the status and details for the library.
Figure: Library Details page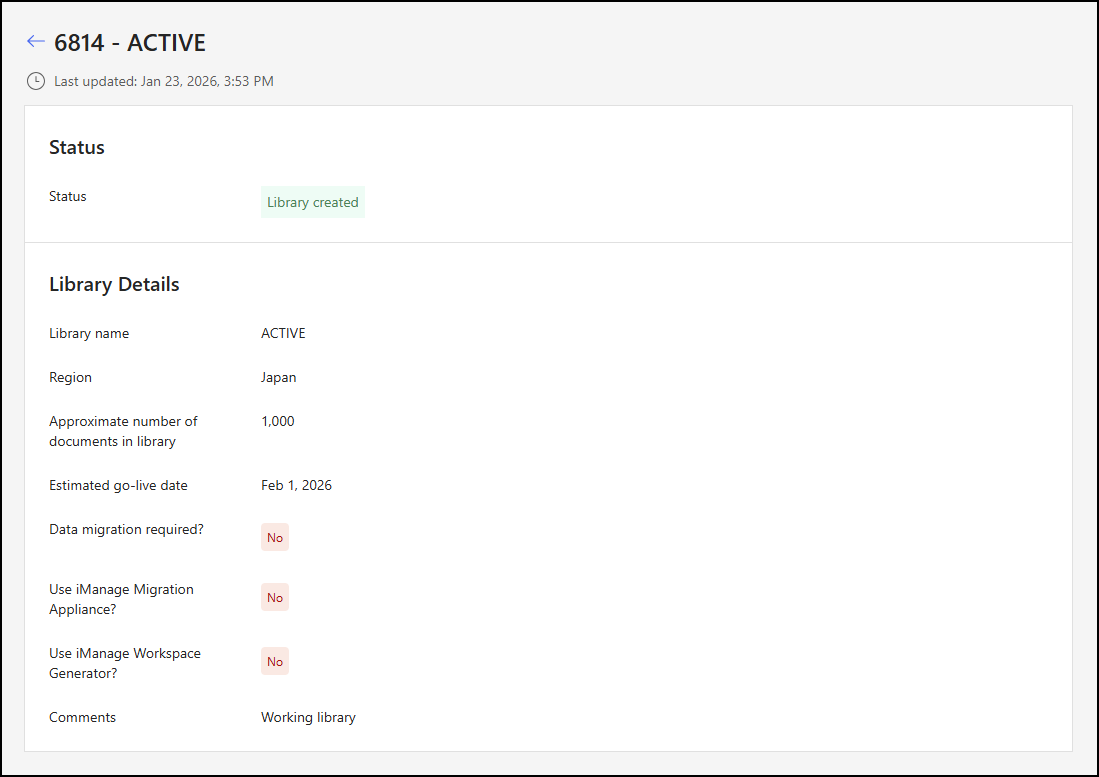
Library table data output options
On the Library Creation page, you can:
Search for requests: Use a library name or description search string to filter the results in the library table. For more information, refer to Search for library creation requests.
Filter the output: Filter data in the library table based on values in the Status column. For more information, refer to Filter by library creation status.
Sort the output: Organize the results in the library table by selecting a column header to sort by the values in that column. For more information, refer to Sort library table output.
Select requests: Select and view library creation requests. For more information, refer to Select library creation requests.
Search for library creation requests
To search the library table, enter a search string in the Search field.

Filter by library creation status
Filter data output based on values in Status column of the library table.
Select Filter > Status to display the status options, and then choose one or more options.
Figure: Status filter options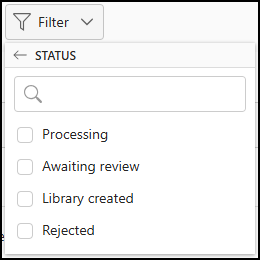
An example of the library table filtered by status is shown in the following figure.
Figure: Library Creation page - Status filter
To remove status filtering:
Select X next to the Status filter display.
Select Clear all.
Sort library table output
In the library table, select a column header to sort the output by the values in that column. In the following figure, the table output is sorted in ascending order by the values in the Status last updated column.

Select library creation requests
In the library table, you can choose one, multiple, or all library creation requests to filter or view the selected requests.
To select all requests, select the check box above the library table.
To select one or more requests, select the check box for each request within the library table.
When one or more requests are selected, actions are displayed in the toolbar menu, as shown in the following figure.
The following toolbar menu actions are supported:
Show only selected: Shows only the selected library creation requests.
View details: View the details of a library creation request. For more information, refer to View library details.
NOTE: The View details toolbar menu action appears only when a single library creation request is selected.
The View details action is also available for individual requests by:
Right-clicking a library creation request row.
Selecting the kebab in a library creation request row.
An example is shown in the following figure.
