When a tenant is given access to iManage Customer Onboarding, the provisional administrator automatically receives admin permissions for the Customer Onboarding section in iManage Admin Portal. This allows them or a trusted third party, like a Partner, to request new libraries and tenants, submit cloud service requests, and manage who else can access Customer Onboarding.
NOTE: For most customers, the provisional admin account is cloudadmin@<domain>.com—the initial administrative account created during tenant setup.
The Onboarding Access page in the Customer Onboarding section is where an administrator manages who may use onboarding functions. From this page, they can add or remove users as needed. Only users with the customer onboarding access management Admin role may open and manage the Onboarding Access page.
The following table shows the onboarding access scopes and roles that can be assigned to tenant users.
Table: Onboarding Access scopes and roles
Scope | Role |
|---|---|
Access Management Lets the user manage other users’ access to onboarding features. | Admin Lets the user control user access to onboarding functionalities. |
Onboarding Management Lets the user monitor or create and manage onboarding requests. | Monitor Lets the user view and track onboarding requests and their statuses. |
Operator Lets the user perform onboarding activities, including requesting new libraries and tenants and submitting cloud service requests. |
An example of the Onboarding Access page is shown in the following figure.

This section includes the following topics:
Onboarding Access page actions
On the Onboarding Access page, you may:
Grant user access: Grant customer onboarding access to a user. For detailed steps, refer to Grant access to a user.
Remove user access: Delete onboarding access for a user. For detailed steps, refer to Remove onboarding access.
Grant access to a user
To grant customer onboarding access to a user in iManage Admin Portal:
Go to https://cloudimanage.com/admin/ and sign in with your iManage credentials.
NOTE: To add a user, the user account used to sign in to iManage Admin Portal must be assigned the customer onboarding Access Management scope and Admin role.
Browse to Customer Onboarding > Onboarding Access.
On the Onboarding Access page, select + Add.
In the Add Member dialog, select the Users field. A list of users assigned to the customer in iManage Control Center is displayed.
Figure: Add Member dialog
Find and choose a user by scrolling through the list or entering a search term to filter the options.
NOTE: You may enter multiple user names in the Users field. All selections made in the following steps will be applied to each user.
In the Scope drop-down, select the management scope for the user:
Access Management: Manage other users’ access to onboarding features.
In the Role drop-down, select the access management role for the user:
Admin: Control user access to onboarding functionalities.
Onboarding Management: Monitor or create and manage onboarding requests.
In the Role drop-down, select the onboarding management role for the user:
Monitor: View and track onboarding requests and their statuses.
Operator: Perform onboarding activities, including requesting new libraries and tenants and submitting cloud service requests.
Select Submit.
NOTE: In the Add Member dialog, you may assign only one scope and role pair at a time. If you need to assign another scope and role pair to the same user, you’ll need to repeat the above steps.
Remove onboarding access
Onboarding access for users can be removed through either of the following actions:
Right-click a user row and select Remove.
Select the kebab menu in a user row and select Remove.
To remove auditing access for a user, follow these steps:
In iManage Admin Portal, browse to Customer Onboarding > Onboarding Access.
Choose a user from the onboarding access user table.
Use the right-click menu or the kebab menu to select Remove. An example of the right-click menu is shown in the following figure.
Figure: Onboarding Access page - right-click Remove action
NOTE: If a user has multiple scope or role assignments and you intend to remove them all, you must perform the removal action separately for each assignment.
User table data output options
In the onboarding access user table, you can:
Search for users: Filter the output in the user table by user name or email address search string. For more information, refer to Search for users.
Filter the output: Filter the output in the user table based on user access scope or role. For more information, refer to Filter by user access scope or role.
Sort the output: Organize the results in the user table by selecting a column header to sort by the values in that column. For more information, refer to Sort user table output.
Search for users
The following data output options are available for the auditing access user table:
Search: Filter data output to match the provided user search string. For example, enter Jack in this field to display users Jack Miller and Jackie Smith.
Figure: Search field
Filter by user access scope or role
Filter: Filter data output based on values in the Scope and Role columns of the onboarding access user table.
Select Filter > Role to display the role options and then choose one or more options.
Figure: Role filter options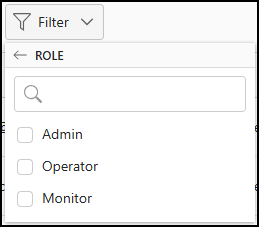
Select Filter > Scope to display the scope options and then choose one or more options.
Figure: Scope filter options
An example of the onboarding access user table filtered by role and scope is shown in the following figure.
Figure: Onboarding Access page - Role and Scope filters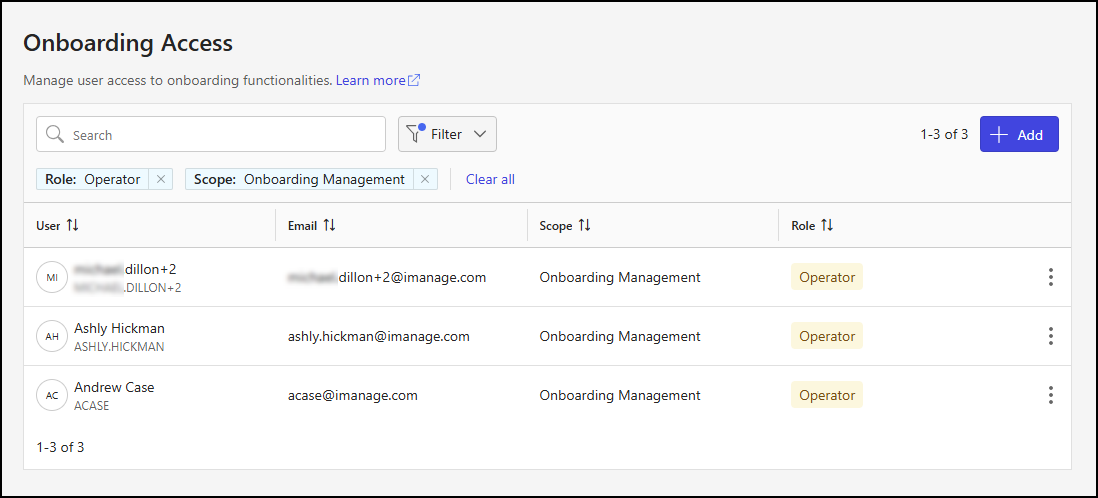
To remove filtering:
Select X next to the Role or Scope filter display.
Select Clear all.
Sort user table output
In the onboarding access user table, select a column header to sort the output by the values in that column. In the following figure, the table output is sorted in ascending order by the values in the User column.
