NOTE: To perform operations on the Web Client page, the user must be a member of the NRTADMIN group, or be assigned to a role with Tier 2 access to Control Center. For more information about the specific operations allowed, refer to Understanding tiers.
Access the Web Client settings page by navigating in Control Center to Work Clients > Web Client > Settings.
The Settings page contains the following tabs:
General: Configure general iManage Work 10 Web settings.
Defaults: Customize different default options for the iManage Work 10 Web.
Access: Define which groups can sign in to iManage Work 10 Web.
Navigation: Select what navigation tabs are displayed as nodes and their order in iManage Work 10.
Toolbars: Configure or customize actions for containers like Recent Matters, My Matters, Workspace, Folder and so on, in iManage Work 10.
Configure general settings
To configure Work Web general settings, browse to the General tab. The following figure shows the top portion of this tab.
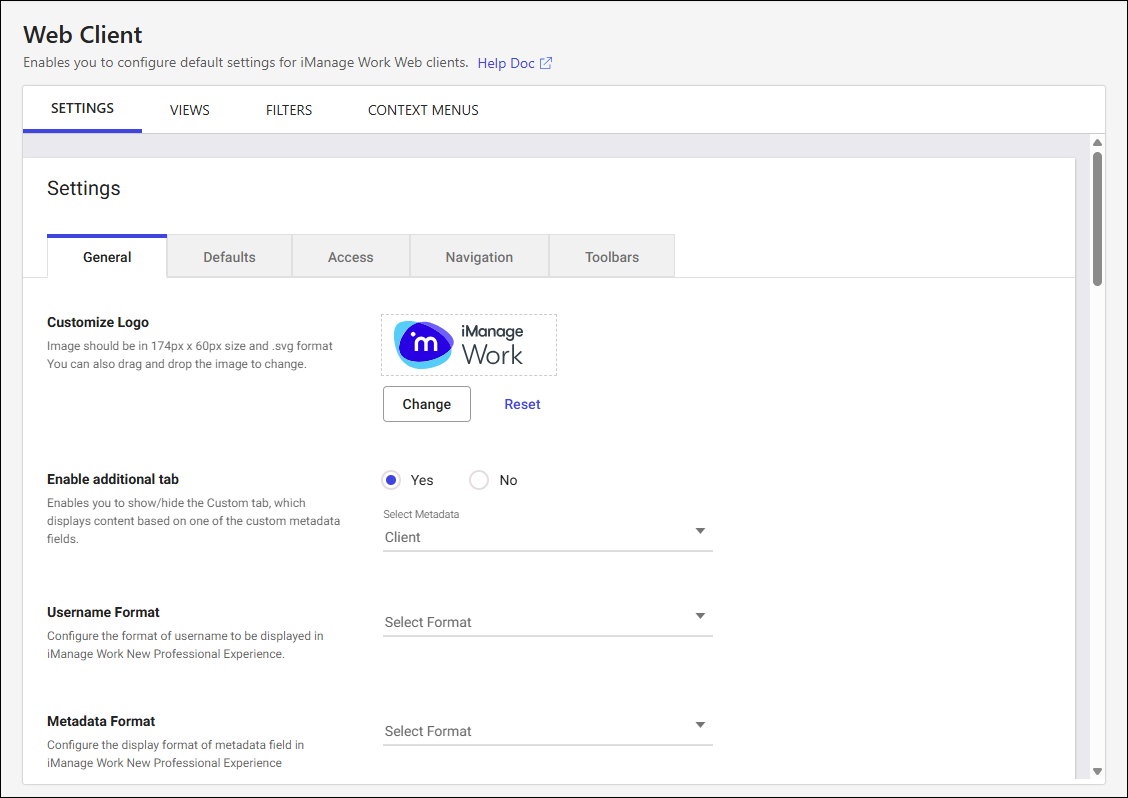
Table: General settings
Option | Steps/description |
|---|---|
Customize Logo | This option lets you customize or change the logo displayed in iManage Work. For details about customizing or changing the logo, refer to Customizing the logo. |
Enable additional tab | Enables and configures an additional tab on the iManage Work home page. By default, this setting is disabled. When enabled, the additional tab displays a list of clients based on the user's recent activity. It is populated using the Custom1 metadata field. You can also choose a different metadata field between Custom1-12 and Custom29-30. This setting is enforced over the legacy registry setting "Custom View Metadata Field". Select Yes to add an additional tab, then select the metadata from the drop-down list. Optionally, select METADATA > Captions, and update the captions for |
Username Format | Select the format of username to be displayed in iManage Work. |
Metadata Format | Select Alias & Description or Description Only or both as the format for custom metadata fields to be displayed in iManage Work. |
Lookup field dropdown limit | Configures the number of suggestions displayed in the drop-down list of iManage Work Web lookup fields. This option can be set to:
|
Allow users to perform bulk security updates | Allows iManage Work users to perform bulk security updates for documents, emails, workspaces, and folders. For additional information, refer to Enabling bulk security actions. |
New Folder in iManage File/Location Selection dialog | Allows you to show or hide the option to create a New Folder or choose a custom command to create a New Folder in the iManage File/Location Selection dialog. The default command for creating New Folder is iManage "New Folder" command. |
Enable static asset delivery via Microsoft Azure’s Content Delivery Network | Enabling this feature allows a faster and more responsive user experience in iManage Work Web by automatically loading the static content from the user's nearest Microsoft Azure content delivery network (CDN) point-of-presence (POP) location. Static assets are files required to run the application such as icons, images, HTML, JavaScript and CSS. Customer content stored within iManage Work is never placed on any CDN and will only ever be hosted from the data center to which it was uploaded. This setting is disabled by default. TIP: To test this setting before enabling it for all users, include the
|
Enable Work 10 Desktop for Windows Auto Updates App Banner | Select the Windows check box if you want your end-users to see the Enable Work 10 Desktop for Windows Auto Updates App Banner in the iManage Work application (Work Web client). By default, this check box isn't selected. Only those users who don't have iManage Work Desktop for Windows will see the banner. |
Enable Search Language Selection | Configures whether the language search selection option is visible for simple and advanced searches in iManage Work.
|
Enable web-based email sending | Disables the ability for users to send documents and links directly through the web client's email service for users who do not have iManage Work Desktop for Windows or iManage Work Desktop for Mac clients installed on their computer. This helps administrators safeguard their users from using a non-secure SMTP protocol to share documents and links externally.
|
Main Content Security Policy Header | Enhances security by applying Content Security Policy (CSP) to the entire Work Web application, protecting it against common scripting attacks, and preventing the application from being framed by malicious sites. This setting is supported by the following fields:
Figure: Main Content Security Policy Header 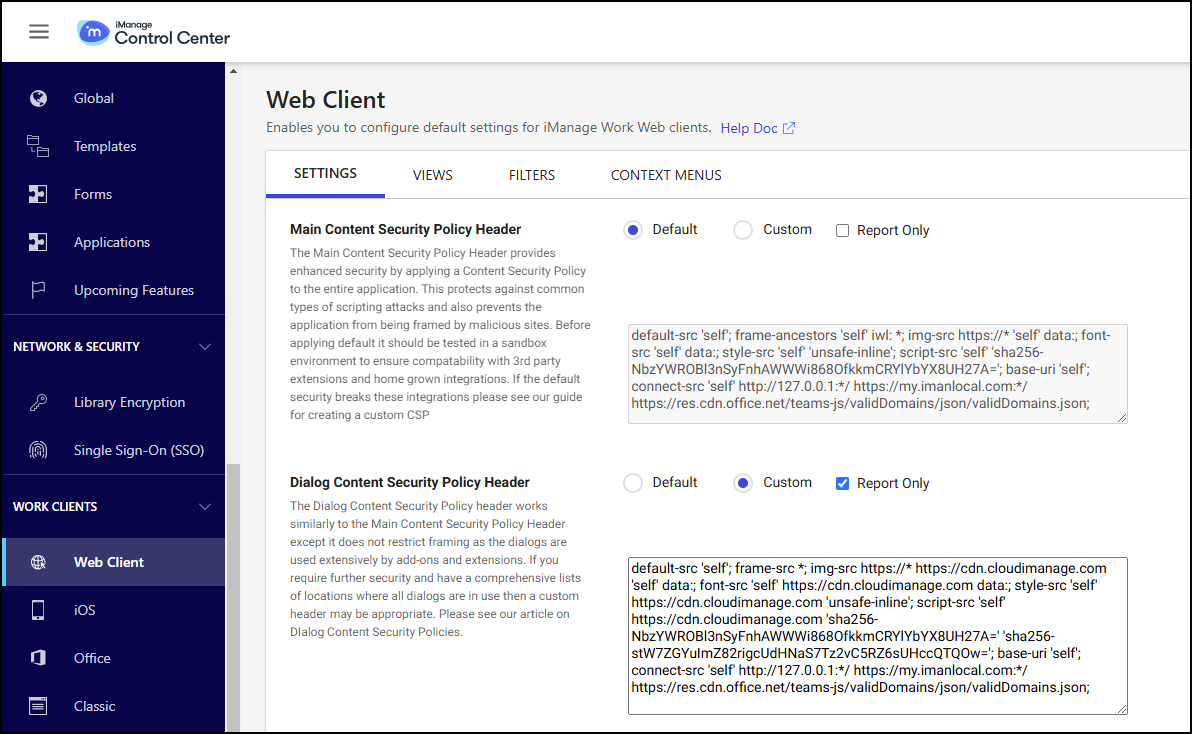 NOTE: For more information about configuring CSP headers, refer to Content Security Policy implementations in iManage Work Web. |
Dialog Content Security Policy Header | Offers enhanced security that’s similar to the Main Content Security Policy Header but doesn’t restrict framing, as dialogs are frequently used by add-ons and extensions. This setting is supported by the following fields:
Figure: Dialog Content Security Policy Header NOTE: For more information about configuring CSP headers, refer to Content Security Policy implementations in iManage Work Web. |
Enable open in Gmail | Enables the option to open Gmail emails, filed using the iManage Gmail extension, in the native Gmail application. When enabled (Yes), Gmail emails filed using the iManage Gmail extension are opened in the native Gmail application from the Open context menu in iManage Work. By default, this option is set to No (disabled). |
Enable iHelp | Configures on-demand help and contextual guidance for iManage Work Web users. Enabling iHelp provides the following user benefits:
Figure: Enable iHelp 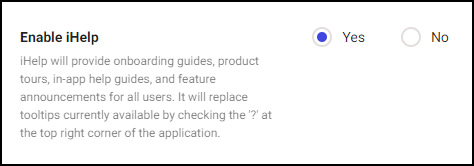 This option can be set to:
|
useiManage/iHelp integration | useiManage is a subscription-based solution that provides essential iManage content to users and admins when they need it, including:
This setting lets useiManage Premium subscribers integrate their useiManage subscription with iHelp, allowing users to engage directly with useiManage. Figure: useiManage/iHelp integration 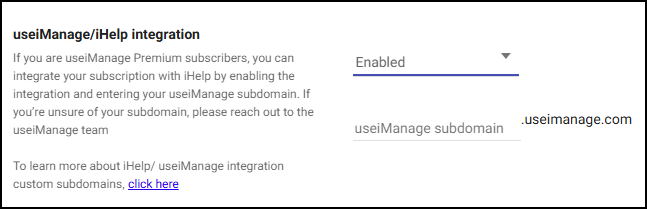 This option can be set to:
NOTES:
|
Save dialog security alert | Specifies if iManage Work users will receive a warning when saving a file to a folder, if the folder’s security differs from the file’s security settings.
|
Customizing the logo
This section describes how to customize or change the logo displayed in iManage Work. The logo appears in iManage Work at the following places:
Page headers (desktop view)
Left sidebar (mobile view)
Custom logo file requirements
The image must be in SVG format. You can't upload an image in any other format such as JPG, PNG, GIF and so on.
The image size should be 174px x 60px. If the size of your image doesn't match, it'll be scaled to 174px x 60 px automatically. However, the logo may appear distorted.
The SVG files exported from tools such as Adobe Illustrator or Sketch work properly without any additional effort. However, if the logo doesn't appear in the UI, open the image file in a text editor to view its
XMLformat. Verify that the <svg> element has bothxmlnsandxmlns:xlinkattributes set. If these attributes are missing, the logo may not render.
For example,<svg xmlns="http://www.w3.org/2000/svg" xmlns:xlink="http://www.w3.org/1999/xlink" … > …. </svg>
To change the logo:
In iManage Control Center, browse to Work Clients > Web Client.
On the General tab, locate the Customize Logo option and select Change.
Figure: Settings General tabIn the File Upload dialog, locate and select the new logo. Select Open.
Alternatively, you can drag and drop the new logo into the Customize Logo area in your browser.Select Save to apply the new logo.
Select Reset to restore the default iManage Work logo.
Configure Work Web defaults
To configure Work Web default settings, browse to the Defaults tab.
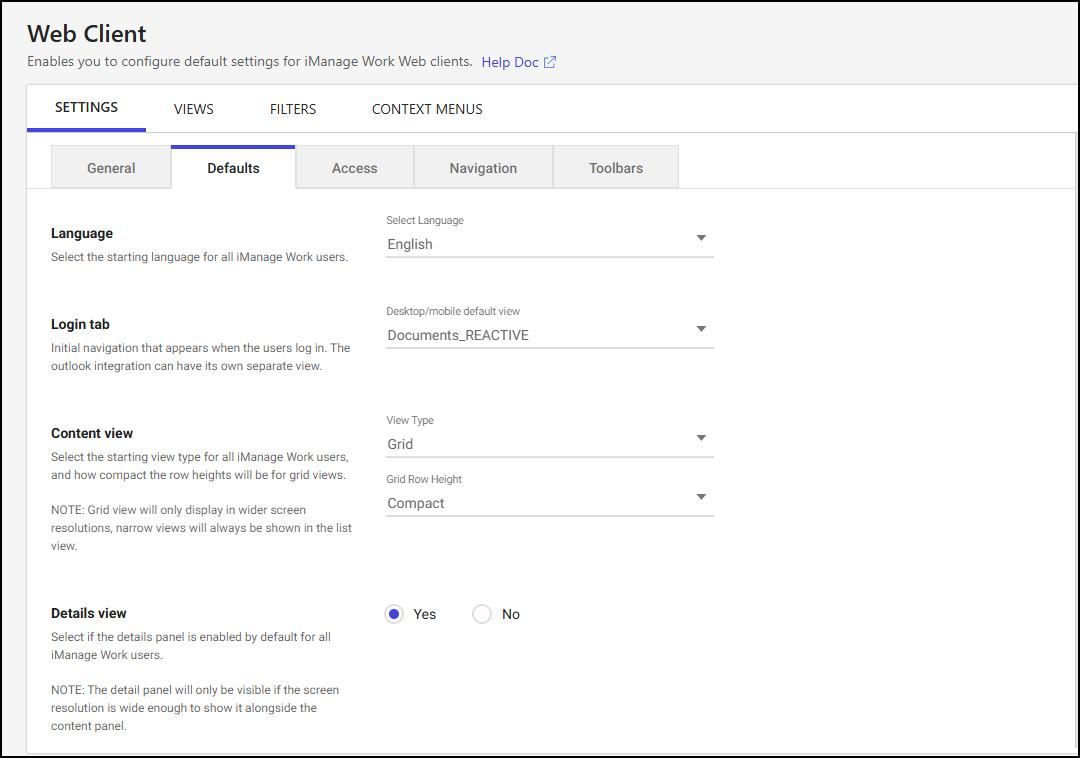
Customize any of the following Work 10 default settings, then select Save.
NOTE: Based on your iManage Work environment, changes to these settings will become visible to users after approximately five minutes and upon their next sign-in session.
Table: Defaults options
Option | Steps/description |
|---|---|
Language | Specifies the default language to be displayed when users open iManage Work or iManage Control Center in their browser. To set the default language, select the desired language from the Language drop-down list, and then select Save. Refresh the page in your browser to display the selected language in iManage Control Center. Individual users may also change their default language in iManage Work Web in the User Settings dialog by setting the Language option. This change applies only to their account and applies wherever they sign in to iManage Work. |
Login tab | Select which tab is loaded when users sign in to iManage Work. If not set, the Documents tab is displayed by default. Users can overwrite this preference and set their Web Default Tab in their User Settings. |
Content view | Specifies the default starting view type in iManage Work Web for all users. This setting includes selections for:
|
Details view | Indicates whether the Details panel is visible by default for all iManage Work users.
|
File open options - Title click | Defines the default behavior when the title of a non-Microsoft 365 file or a file with a legacy Microsoft Office extension is selected.
|
File open options - Double click | Defines the default behavior when the row of a non-Microsoft 365 file or a file with a legacy Microsoft Office extension is double-clicked.
|
Microsoft 365 file open options - Title click | Defines the default behavior when the title of a Microsoft 365 file is selected.
|
Microsoft 365 file open options - Double click | Defines the default behavior when the row of a Microsoft 365 file is double-clicked.
|
NOTES:
The default settings apply to users who have never changed them in iManage Work Web (such as a new user). If a user changes their settings, the user settings take precedence, even if the default settings in Control Center are changed later.
These settings don’t apply to the File Open and File Save As dialogs.
The default behavior for Microsoft 365 files applies to files with Office 365 extensions such as .docx, .ppsx, .pptx, .xlsb, .xslm, and .xlsx.
The default behavior for non-Microsoft 365 files applies to files with older Microsoft Office extensions such as .doc, .ppt, .xls, as well as other file extensions like .pdf, .txt, .zip, .png, .jpeg, and emails.
For File open options, all options other than Preview require iManage Agent to be installed and configured on the user desktop.
For Microsoft 365 file open options, the Edit (Co-author) option requires iManage Work Next Generation Co-authoring to be configured. For more information on enabling Next Generation Co-authoring, refer to Configuring iManage Work Next Generation Co-authoring in iManage Control Center.
Configure access settings
To define which groups can sign in to iManage Work 10 Web, browse to the Access tab.
The users who are not in this list can still access iManage Work using Work Desktop for Windows, Work Desktop for Mac, Work Mobility, and iManage Work classic clients.
This feature is useful for firms who decide to provide the mobile access of iManage Work client application only to specific users, and control the data that is left on the devices. For example, mobile access is provided only to partners and attorneys, while the document support staff and secretaries are restricted.
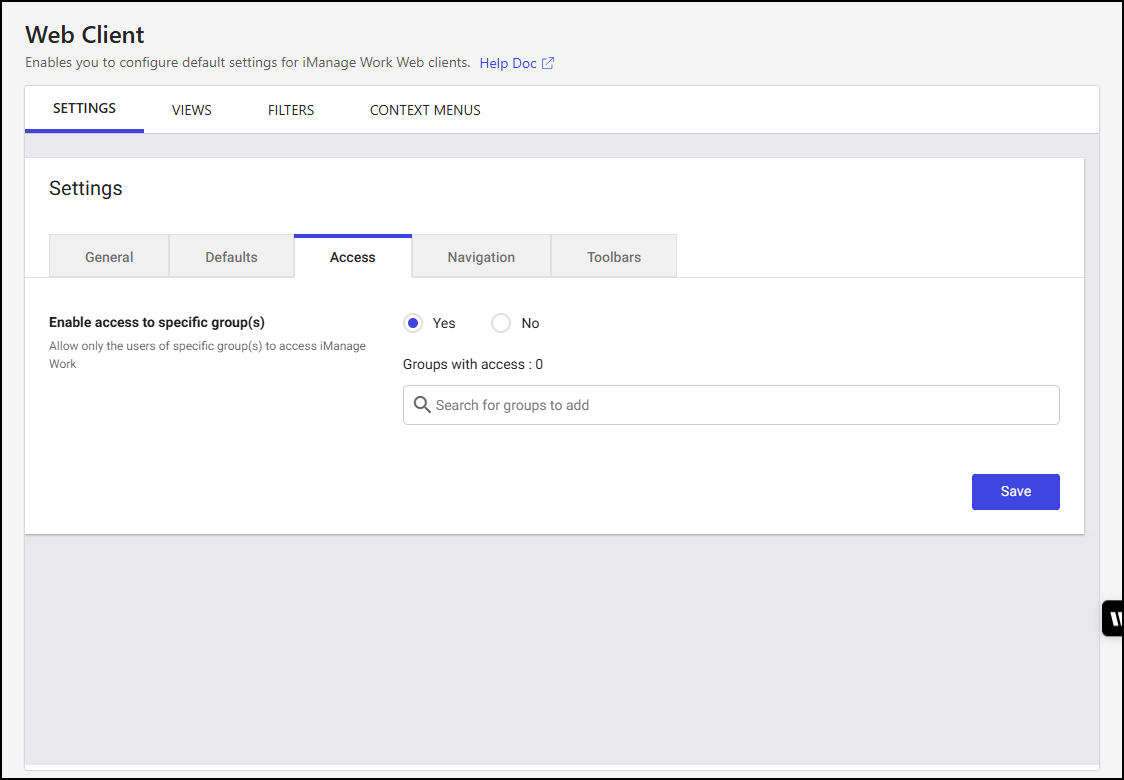
Select Yes to define which groups are allowed access to iManage Work. The field to search for groups appears.
Enter the name of the group to be added, and select Add to provide access to the group.
Select X to remove the group that has already been added.
Select No to prevent access to iManage Work for any users.
Select Save.
Configure navigation settings
To configure which navigation tabs are displayed as nodes in iManage Work Web, open the Navigation tab.
You can select which tabs are displayed and specify the order in which they appear through the Configure Navigation dialog.
Default navigation nodes are always displayed and are denoted without a check box in the dialog box; third party extensions include a check box, allowing you to show or hide them.
To change the display order, drag the tabs within the dialog box.
Browse to Web Client > Settings > Navigation.
Select Edit.
In the Configure Navigation dialog, reorder nodes as required and use the check box to show or hide items.
NOTE: To revert to the original settings at any given time, select Reset to defaults.
Select Save.
Configure the Details panel for iManage Work
You can re-order, show, or hide the tabs (including custom tabs) displayed in the Details panel in iManage Work, based on your organizational requirement. These customizations will be reflected in iManage Work in the desktop view as well as the Open and Location Selection dialogs.
Browse to Web Client > Settings > Navigation> Details Tabs.
Select the tab you wish to configure and then select Edit.
A dialog appears allowing you to set the default tab and change the order.From the Default view drop-down menu, select which tab is displayed by default.
Reorder nodes as required and use the check boxes to show or hide items.
NOTE: To revert to the original settings at any given time, select Reset to defaults.
After making the changes, select Save.
Configure toolbars
The toolbar shown at the top of containers like Recent Matters, My Matters, Workspaces, and Folders can be customized.
You can add, remove, reorganize, or group these custom toolbar actions. All available actions can either be shown as commands along the top toolbar or be placed under the action menus.
When the available space in the toolbar reduces for the added actions, they're responsively added to the action menu.
Browse to Web Client > Settings > Toolbar.
Select the container to customize, and then select the Edit
 icon.
icon.In the Configure Actions dialog, customize the available commands to appear either on the toolbar or in the actions menu.
Select Save to close the Configure Actions dialog.
Select Save.
NOTES:
The toolbar kebab menu actions for Folders or Matters will continue to reference their respective context menus until you customize the toolbar actions.
Toolbar customizations in iManage Control Center apply to iManage Work Web, Work Panel and mobile views.
The Upload Folder action is not supported in iManage Work Panel. To upload a folder from Work panel, drag-and-drop a folder into a workspace or another folder.
Enabling bulk security actions
The Allow users to perform bulk security updates setting allows iManage Work users to perform bulk security updates for documents, emails, workspaces, and folders. For more information about these capabilities, refer to:
Selecting multiple documents in a folder and aligning security to that of the folder
Updating folder security and applying changes to its children
NOTE: Bulk security updates applied by your users can be overwritten by the Refile Service. If you're using Refile Service to perform background security updates, we recommend you review the information in Considerations when using the Refile Service for security updates before activating this feature.
By default, these capabilities are turned off. To turn on these new capabilities for users:
Sign in to iManage Control Center and browse to Work Clients > Web Client > Settings > General.
Set Allow users to perform bulk security updates to Yes.
Select Save.
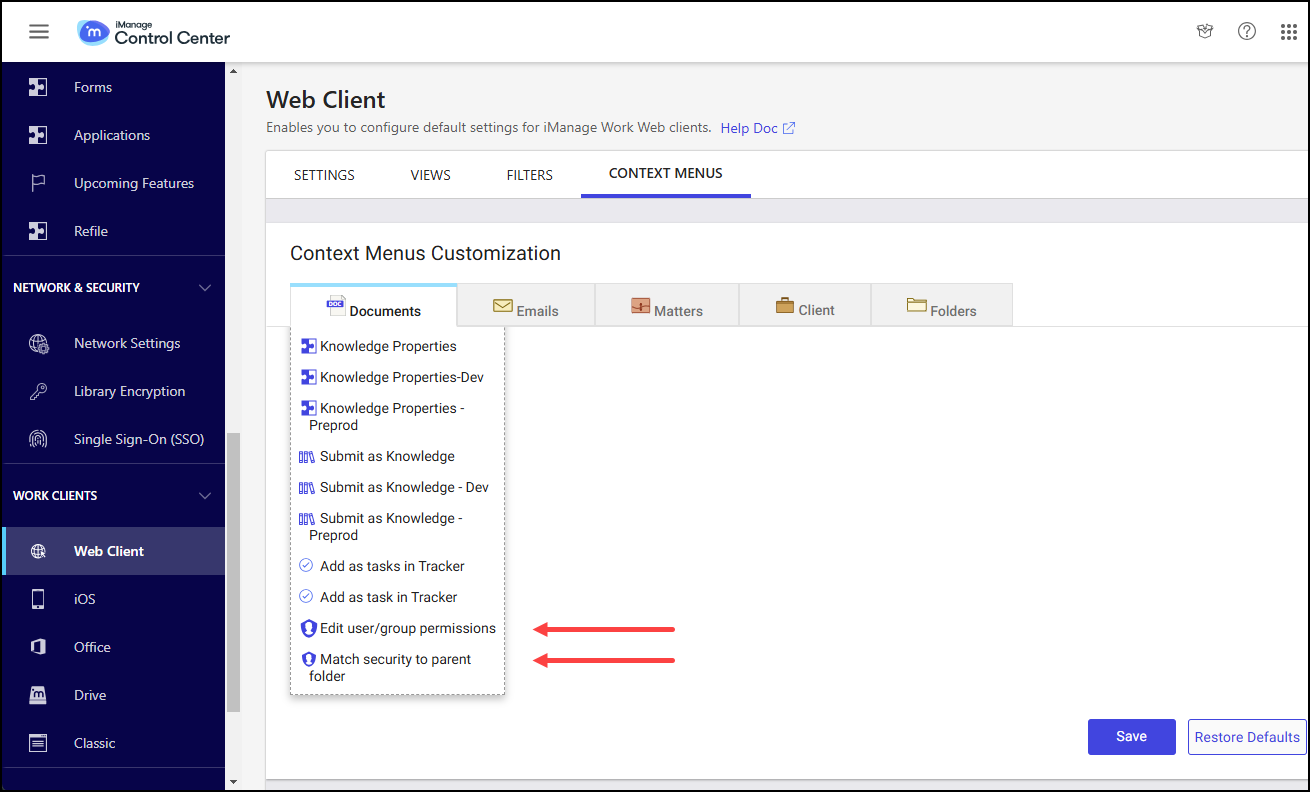
After turning on Allow users to perform bulk security updates, the following actions are available in the Context Menus tab within iManage Control Center.
NOTE: You must add these actions to the appropriate context menus in iManage Control Center. For instructions on adding these actions to the respective menus, refer to Context menus.
Table: Context Menus
Tab | Action | Description |
|---|---|---|
Documents | Edit user/group permissions | Allows user/group permissions to be updated for one or more documents. |
Match security to parent folder | Allows for the security of one or more documents to be aligned with its parent folder. | |
Emails | Edit user/group permissions | Allows user/group permissions to be updated for one or more emails. |
Match security to parent folder | Allows for the security of one or more emails to be aligned with its parent folder. | |
Matters | Apply security to contents | Allows for workspace security settings to be propagated to its children. |
Folders | Apply security to contents | Allows for folder security settings to be propagated to its children. |
The following figure shows an example of the new actions added to the Context Menus Documents tab:
In addition to the new Context Menus actions, the following workflows are enabled in iManage Work when Allow users to perform bulk security updates is set to Yes:
The option to “Apply security changes to children” when workspace security is changed.
The option to “Apply security changes to children” when folder security is changed.
The option to “Match security to destination” when a folder(s) is moved.
The option to “Match security to destination” when a document(s) is moved.