As a user with the Rule Editor role, you can create, modify, delete, or disable Behavior Analytics rules by following the steps in this section.
- 1.) Behavior Analytics rule: Create
- 2.) Behavior Analytics rule: General details
- 3.) Behavior Analytics rule: Rule Frequency
- 4.) Behavior Analytics rule: Users and Groups
- 5.) Behavior Analytics rule: Scope Changes
- 6.) Behavior Analytics rule: Notifications
- 7.) Behavior Analytics rule: Optional advanced settings
- 8.) Behavior Analytics rule: Save and Activate Rule
1.) Behavior Analytics rule: Create
To create a Behavior Analytics rule:
Browse to Behavior Analytics > Rules
Select Add Rule.
Next, enter the General details.
2.) Behavior Analytics rule: General details
Specify the rule name and time zone in the General section of the page.
Rule Name: Enter a name for the Behavior Analytics Rule.
Time Zone of Users: When the rule runs, the system records the alerts generated, in the time zone specified. The time zone also controls the definition of the day boundary for threshold computation and alert generation. For example, if the time zone associated with the rule is set to Eastern Standard time (EST), the day boundary is defined as the 24-hour interval starting at UTC-5 hours, and activity during that 24-hour period is used to compute the daily threshold for each activity.
If you choose to change the time zone on a per-rule basis, select the Time Zone of Users field. The drop-down list displays the time zones available, and you can select the time zone of your region from the list, for example, America/New_York. Any reports or addressable alerts (that is, alerts generated by Continuous or Scheduled type rules, displayed in the Behavior Analytics Alert List) created by this rule contain alerts in the time zone associated with the rule.
3.) Behavior Analytics rule: Rule Frequency
Set the schedule of the rule in the Rule Frequency section of the page.
NOTES:
Behavior Analytics Reports (and associated report IDs) are generated for rules of schedule type Run Once only.
Rules with the Continuous or Scheduled schedule type don’t generate reports (or report IDs) in the Behavior Analytics Reports list. Instead, they generate addressable alerts, which appear in the Behavior Analytics Alert List.
Continuous
The Continuous frequency option gives you the ability to set a rule which tracks activity and triggers alerts as soon as data is ingested. This can help in the effective warning of malicious behavior and enables you to identify such behavior as early as possible. You no longer need to enter a schedule that defines when the rule is to be run. For continuous rules, any new data is assessed upon ingestion for risk per rule parameters.
Select Continuous.
Specify the number of days from which the rule should raise Behavior Analytics Alerts when it first runs. After the first run, continuous scheduling applies.
Alerts generated from rules of Continuous frequency don't generate reports (or associated report IDs) to the Behavior Analytics Reports list, but instead generate addressable alerts.
NOTES: About Continuous rules:
We recommend the rule frequency for any rules created in version 1.4.x or earlier, to be set to Continuous.
For this type of rule, when connectivity is restored after a database outage, Threat Manager will now update existing alerts or generate new alerts to reflect the new information that was ingested. Data will be ingested for the entire outage period. The default period for which existing alerts are updated or new alerts are generated from such newly ingested data is three days, but this can be adjusted as required. (For information on adjusting the period that Threat Manager looks back for missed data, refer to the (On-premises) Advanced Configuration section in iManage Threat Manager Administration Help.)
Scheduled
Set the Rule Frequency by choosing the schedule and recurrence, and specifying the days and the time.
For a Scheduled rule, specify the following:
Repeats: Hourly, Daily, or Weekly.
When: Specify the day of the week upon which the rule will run. This field is enabled if you select Weekly.
Start time: Select the start time. This field is enabled if you select Daily or Weekly.
When the rule first runs it should raise Behavior Analytics Alerts from the last [...] days: Specify the date range for which data will be scanned and alerts generated across, when the rule first runs.
For example, if you choose Weekly, and set When the rule first runs it should raise Behavior Analytics Alerts from the last [...] days to 3 days: the first time the rule runs (which will be at the date and time specified, or when Run Now, if the rule is Run Now before the first scheduled run), addressable alerts (that is, alerts generated by this type of rule, and displayed in the Behavior Analytics Alert List) are generated for the specified 3-day period only. Additional runs of the rule will scan data and generate alerts for the Repeats period, in this case 1 week.
You may wish to use this option to exclude days for which data is absent (for example, before a library is added) or otherwise not fit for inclusion in analysis.
Alerts generated from rules of Scheduled frequency don't generate reports to the Behavior Analytics Reports list, but rather generate addressable alerts. That is, they generate output to the Behavior Analytics Alert List.
NOTE: For this type of rule, when connectivity is restored after a database outage, Threat Manager updates existing alerts or generates new alerts to reflect the new information that was ingested. Data will be ingested for the entire outage period. The default period for which existing alerts are updated or new alerts are generated from such newly ingested data is three days, but this can be adjusted as required.
(For information on adjusting the period that Threat Manager looks back for missed data, refer to Advanced Configuration in the iManage Threat Manager Administration Guide.)
Run Once
The Run Once option allows you to run the Behavior Analytics Rule over any period in the past. You can specify the date range and alerts will be shown across that period in the past.
Run Once rules generate reports with unique report IDs, both of which can be viewed in the Behavior Analytics > Reports dashboard.
NOTE: Rules of frequency Run Once don’t generate addressable alerts; that is, they don't output alerts to the Behavior Analytics Alert List. Rules of frequency Run Once generate reports with unique report IDs.
To create a Run Once rule:
Select Run Once.
Specify the date range of the data to use from the drop-down list. The Custom option allows you to select a From and To date.
4.) Behavior Analytics rule: Users and Groups
Specify the users and groups to include in or exclude from scanning.
Specify the Users & Groups whose activity will be scanned for malicious behavior. By default, Everyone is included, and the Global Exclusions List is excluded (to prevent robot or service accounts from skewing baselines and alerts). This suggests that the Behavior Analytics Rule will look for malicious behavior across all users, excluding those in the Global Exclusions List.
You can specify users and groups to include and/or users and groups to exclude, from the scope of the rule. Users in scope are included in threshold calculations and their activity is eligible for generating alerts.If you want to adjust the users or groups included in the scope of the rule, select Edit in the Include panel. The People to Include dialog appears and a list of available users and groups is displayed.
Use the filters as required and select the check boxes for the users and groups, to include those users or groups in the scope.
After you've included all the users and groups required, select OK. A list of the included users and groups is displayed on the Include panel.
For more information, refer to Table: Types of users.
If you want to adjust the users or groups excluded from the scope of the rule, select Edit in the Exclude panel. The People to Exclude dialog appears and a list of available users and groups is displayed. Users excluded from a rule aren't included in threshold calculations; their activity won't generate alerts.
The Global Exclusions List is excluded by default. The Global Exclusions List consists of those users or accounts with a legitimate reason to behave differently from the general population of users in your firm and who shouldn't, therefore, be included in the analysis. The Global Exclusions List is typically reserved for accounts that enforce ethical walls, import documents, perform agent functions, otherwise administrate the system, and so on. When computing the at-risk pattern for the users or groups scoped in the current rule, it's important to exclude the behavior of such users or accounts, unless you're setting up a monitoring rule specifically for such accounts.Use the filters as required and select the check boxes for the users and groups, to exclude those users or groups from the scope.
After you've excluded all the users and groups required, select OK. A list of the excluded users and groups is displayed on the Exclude panel.
Table: Types of users
Icon | Type | Description |
|---|---|---|
 | Active User | An active and valid user in the system. |
 | Disabled User | The user ID exists in the system. However, it's in a disabled state. |
 | Group | An active and valid group in the system. |
 | Disabled Group | The group ID exists in the system. However, it's in a disabled state. |
 | Deleted User | The user ID doesn't exist in the Users table. There may be multiple reasons for this scenario. For example, deleted users arise when the user doesn't exist in the doc-users table but audit entries on the user's behalf exist in the audit table. This typically arises when third-party developers write customizations that make these entries directly into the database. |
5.) Behavior Analytics rule: Scope Changes
Under Scope Changes, you can choose to Ignore Group Thresholds. Group thresholds can be ignored when creating or editing a rule if there's a need to eliminate the impact that peer-group behavior has on the generation of alerts for that rule. When group thresholds are ignored, alerts are prioritized based on deviations from a user's normal behavior only. This can help improve accuracy in detecting anomalous behavior in privileged accounts. By default, group thresholds aren't ignored.
If you have chosen to Ignore Group Thresholds, then you also have the option to enable analysis to be performed on any Scope Changes to the rule, over a specified time period. This function can be used to look backward in time to analyze the behavior of newly added users, to understand if those persons have exhibited anomalous behavior during the past period specified. Any potential threat identified in a newly scoped user's behavior will generate retrospective alerts. Based on this notification, the activity of the user across the (configurable) past period can be reviewed, for example by a compliance officer. When alerts generated over past periods for users newly added to a rule are displayed in the Behavior Analytics Alert List, a banner is displayed at the top of the Behavior Analytics Alert List, and a blue dot is displayed in the risk score of that alert. Refer to Display of past period alerts.
Set the Generate past period alerts slider to the right.
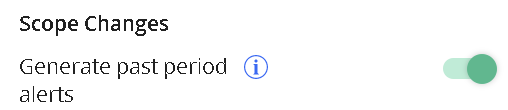
Enter the number of day(s) that the rule will look back to assess the behavior of any newly scoped users. The default value is 60 days.
6.) Behavior Analytics rule: Notifications
Behavior Analytics email notifications let you know when unusual user activity is detected by a rule. These notifications include the user’s name, their risk score, and the number of unusual activities found. You’ll also see details for the top ten alerts with the highest risk scores. Each notification includes an Open Alert link that navigates directly to the alert’s Alert Details page in Threat Manager.
You can send notifications to both iManage Work users and people outside your organization by adding them as main recipients, CC, or BCC. This helps make sure the right people (like compliance teams or managers) get the information they need.
When a Behavior Analytics alert is triggered, the email notification includes:
The names of the users who triggered the alert
Their risk scores
The number of unusual activities found
The number of times certain activities showed anomalies
Details for the top ten alerts with the highest risk scores
A link to the Alert Details page in Threat Manager for quick review
To specify notification recipients:
Under Notifications, select the required notification option from:
Never Notify: When this option is selected, no notifications are sent.
Only When Threats Detected: If you select this notification option, each time a rule is run, you're notified about new alerts if they meet the minimum threat level of the rule to trigger notification, or if an alert is escalated to a higher threat level. You can select the threat level at or above which notifications will be sent. Notifications can only be set for threat levels at "Elevated and above" or higher. If you choose to send notifications, then it's required to select at least one user to whom the notifications must be sent. (You’ll do that in the following step.) You'll be notified once for an alert that a user generates at or above the specified threat level for which notifications are set.
On Every Run: When this option is selected, notifications are sent each time the rule is run. You must select at least one user to whom the notifications must be sent. You’ll do that in the following step.
If you've opted to send notifications either Only When Threats Detected or On Every Run, the Users to Be Notified panel is displayed.
Add iManage Work recipients.
Under To, select Edit.
In the Users to be Notified dialog, use filters as needed and select the checkboxes for iManage Work users or groups who should receive alerts. You must select at least one.
Select OK to confirm. The selected recipients are listed in the Notifications section.
(Optional) Add non-iManage Work recipients.
Under Other Users, enter an email address and then press space, Enter, or comma to add it to the list.
Repeat for additional address, as needed.
To remove an entry, select the X next to its name.
(Optional) Enable the CC and/or BCC options, then repeat Steps 2a and 2b for each one.
Continue to the following Step 7.
7.) Behavior Analytics rule: Optional advanced settings
You can optionally configure advanced threshold settings for the rule, and simulate the rule against historical data to assess the quantity and quality of alerts generated.
To configure advanced settings, select Advanced Settings. The Advanced Settings page opens. It has two sections:
Activity Thresholds
Simulation
Activity Thresholds
Getting threshold recommendations
The threat pattern is manifested by the threshold values that Threat Manager computes.
Thresholds are computed by looking at hundreds and thousands of individual and group transactions over time. Using the correct thresholds is important as they demarcate the level of activity that generates alerts. Thresholds are dynamically recalculated when the rule runs. If a dynamic date range is selected, refer to Date Range.
NOTE: It may take several minutes for the thresholds scan to complete. You can cancel the scan. If you create a rule without scanning for thresholds, the thresholds will be applied and calculated when the rule runs, using the Threat Monitoring activity set.
For more information on how thresholds are calculated, refer to Understanding thresholds and risk scores.
Date Range (Dynamic Date Range)
The date range, which can be selected with the date picker, specifies the period during which the behavior of the users and groups selected (in the scope) will be analyzed to compute the threshold that defines the threat pattern.
NOTE: We recommend you select a dynamic date range for threshold computation, that is Last Month, Last 3 Months, or Last 6 Months. Such a dynamic date range ensures that Threat Manager recomputes the threshold values/threat pattern every time the rule is scheduled to run, looking at the last 30, 90, or 180 days. This is important so that Threat Manager continues to learn as behavior evolves. For example, as people take on new roles, the nature of work done by practice area changes, and so on. Defining a dynamic range for threshold computation ensures that threat patterns are updated as the behavior of users in the firm evolves.
Select the date range from the drop-down list in the Activity Thresholds pane. Select from Last Month, Last 3 Months, Last 6 Months, Last Year, or specify a Custom period. Select Apply. The default date range is Last Month.
By default, the date range selected is the Default Date Range configured by your Configuration Manager. (For more information, refer to the Configuration sections in iManage Threat Manager Administration Help.)
Activities
The default list of activities is displayed in the Activity Thresholds pane, and iManage Threat Manager gives you the recommended group/peer group activity threshold values by analyzing your organization's historical data for the specified time frame.
By default, the pane displays peer-group mean and peer group threshold values for the following activities:
Client
Document
Matter
Checkout
Close
Document Delete
Download to Mobile
Export from DMS
Export to iManage Share
Folder Delete
Mail
Offline Download
Open
Print
View
Workspace Delete
The Add/Remove Activities dialog enables you to select the applicable activity set.
NOTE: iManage Threat Manager automatically computes the group/peer group threshold values for each activity. We recommend that you don't change these thresholds. However, you have the option to modify these values.
Select Add/Remove Activities. The Add/Remove Activities dialog opens.
Select a predefined activity by either:
Clicking Activity Set and selecting an option from the drop-down list. All the activities that are part of that activity set get selected by default.
Selecting or de-selecting the check boxes for the activities as applicable.
Select Update. The updated list of activities is listed in the Activity Thresholds column.
The Activity Thresholds pane also displays the following information in three columns:
Activity
Mean value for an activity defined daily
Recommended group/peer group threshold value for each activity in the list, defined daily
If required, you can Ignore Group Thresholds by moving the slider. Group thresholds can be ignored when creating or editing a rule, if there's a need to eliminate the impact that peer-group behavior has on the generation of alerts for that rule. When group thresholds are ignored, alerts are prioritized based on deviations from a user's normal behavior only. This can help improve accuracy in detecting anomalous behavior in privileged accounts. By default, group thresholds aren't ignored.
TIP: We recommend that the Ignore Group Threshold option be applied to rules for privileged accounts and users that have given their notice.
NOTE: Ignore Group Thresholds is required for Scope Changes (past-period alerts) functionality. If you set group thresholds not to be ignored, Scope Changes (past period alerts) functionality will be disabled for that rule.
Setting a custom dynamic threshold
We recommend that you use the application defaults for threshold computation. Continue to review the information below only if you feel that the system recommended thresholds are insufficient.
Select the three dots icon > Edit Group Threshold in the row of the relevant activity.
Select the Dynamic option.
Enter a number (with decimal places, if required) or use the option to increase or decrease the number of standard deviations that'll be used to calculate the threshold values. The values increase +/- 0.1.
Select Save.
When the group threshold is set to a lot of standard deviations (the default value is 4), then the group threshold is recomputed whenever the rule is run. Standard deviations are used to express the degree of divergence from a normal behavioral pattern: the lower the standard deviation, the closer to the normal pattern, and so the higher the sensitivity at which alerts will be generated, and the other way around. Therefore, if you want alerts to be generated for lower levels of activity, you can set a lower standard deviation.
Modifying recommended thresholds
We recommend that you use the application’s defaults for threshold computation. Continue to review the information below only if you feel that the system’s recommended thresholds are insufficient.
If required, you can modify the recommended threshold values for an activity.
Select the three dots icon > Edit Group Threshold in the row of an activity.
The Edit Group Threshold for the Activity dialog appears.
Set a custom dynamic threshold for the activity in standard deviations, or lock the threshold to a fixed count.
NOTE: Also refer to How is the risk score calculated when the group threshold is greater than zero and the individual threshold is zero? and related questions in Understanding thresholds and risk scores.
Setting a custom fixed ("pinned") threshold
Pinning thresholds ensure that the threat pattern for an activity isn't recomputed every time that the rule is run, but is kept to the defined count specified. For example, if you want an alert when a user has performed more than 100 exports, you can set the value to 100. You can also set to alert to be raised at the Urgent level if the pinned value is exceeded.
Select the three dots icon > Edit Group Threshold in the row of the relevant activity.
Select the Pinned option.
Enter a number (with decimal places, if required) or use the option to increase or decrease the threshold values. The values increment +/- 1.
If required, enable Always raise an Urgent Alert when the pinned Threshold is exceeded by moving the slider to the right.
Select Save.
Resetting a custom threshold value to a default value
You can reset a custom threshold value to a default recommended value, as follows:
On the row of the relevant activity, select the three dots icon.
Select Restore Default
NOTE: In most cases, the recommended threshold settings don't require adjustment for each activity; except for the date ranges for dynamic thresholds which should be wide enough to calculate thresholds effectively. By default, thresholds are computed as 4 standard deviations and these thresholds are recomputed every time the rule is run, so Threat Manager continually learns from changes in behavior. The following example scenarios are possible use cases for why you may want to change the group threshold value for an activity.
Setting a threshold to a fixed count: Your organization may forbid users from doing an export. In that case, you may want to fix the group threshold value to 0, whereby any user who exports a document generates an alert.
Threshold charts
The threshold chart is a graphical representation of the activity thresholds, and displays the recommended threshold values for selected activities, the minimum and maximum activity counts, and the range of mean values for an activity.
Circle: Indicates the group/peer group threshold value for each activity
Top and bottom line: Indicates the highest and lowest group mean values
Middle line: Indicates a range between the highest and lowest means
Pale blue section: Provides a summary
Select Next - Analysis to proceed to the next step. The Analysis page appears.
Analysis
The Analysis page enables you to simulate your Behavior Analytics Rule against historical data to assess the quantity and quality of alerts generated.
NOTE: This step is optional. To skip this step, select Next - Rule Settings. The New Behavior Analytics Rule page is displayed again.
To test and simulate a rule:
Select Set data time range (Last Week, Last Month, or Custom).
Select the type of analysis to perform, from the following options:
Deep Analysis: Recalculates the threshold for each day being analyzed when the threshold period is dynamic. The analysis will take longer to run but will generate more accurate risk scores.
Quick Analysis: Uses pre-calculated thresholds for each day being analyzed. The analysis will run faster but could result in lower accuracy for the risk scores.
Activity counts are the same for Quick and Deep analysis, and both types of analysis give the same output format.
Analysis results are displayed as they are generated and an analysis progress bar is displayed along with a live display of the date range that the analysis has till then completed.
When analysis is complete, Analysis complete displays above the progress bar and a green checkmark is displayed.
If required, you can stop a running analysis with Stop Analysis.
The results of the test analysis are displayed in the following charts:
Detail View
Bubble Chart
Summary Chart
These charts are the same as those generated in Behavior Analytics Reports. For more information on these charts, refer to Behavior Analytics Reports.
Select Next > to proceed to the next step.
8.) Behavior Analytics rule: Save and Activate Rule
After configuring all rule components, select Save and Activate Rule to deploy it. A success message confirms the deployment. To view a summary of the rule, open its Rule Details.
Each rule is automatically assigned a Rule ID by iManage Threat Manager. This non-editable ID reflects the order in which the rule was created.