Creating a form
Sign in to iManage Control Center.
In the left navigation pane, select Extensions and then select Workflow Manager.
Select the library in which you wish to create a new form.
Select Create New Form.
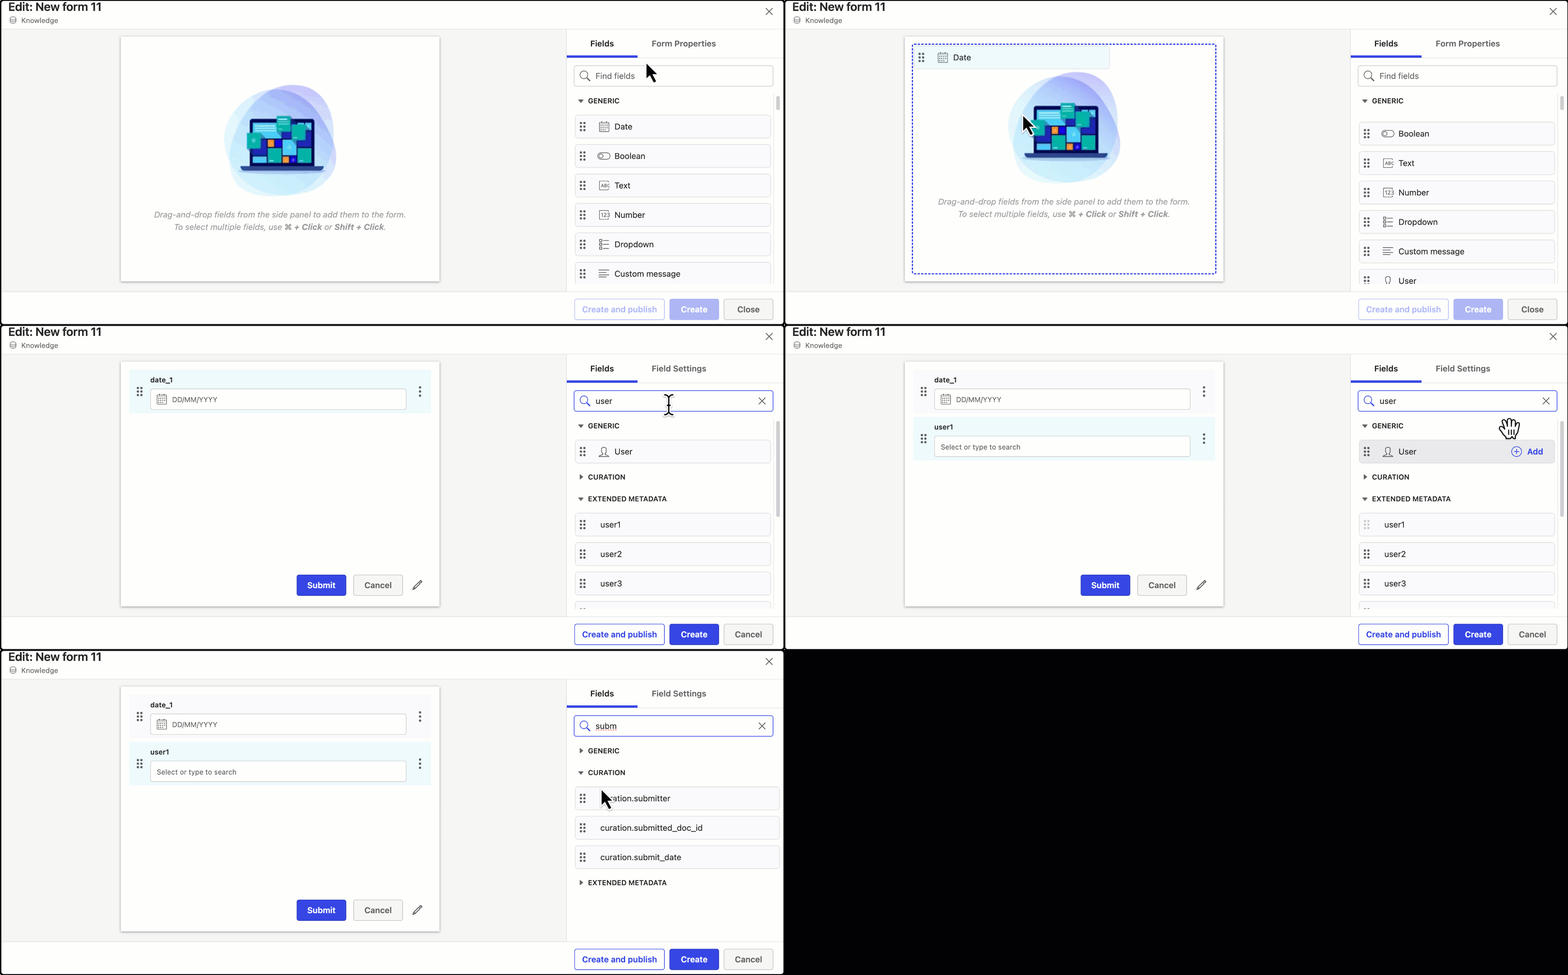
Figure: Library selectionIn the Edit: New form dialog, drag the required (or select Add next to a field) Generic, Curation (available only when a Knowledge library is selected), or Extended Metadata (available only when Curation properties are enabled for the library) fields on the right-hand side, to the form builder.
Figure: Adding fields to a form(Optional)
Use the Find fields search box to search for a particular field type.
Use the Shift+Click (or Cmd+Click for macOS) shortcut to select multiple fields.
Select:
Create: Creates a new form which won’t be available in Microsoft Power Automate until it's published.
Create and publish: Publishes a new form, which will be available for selection in an iManage trigger in Microsoft Power Automate.
Editing a form
After you’ve created and saved a form or created and published a form, you can edit the form later, if required, using form builder.
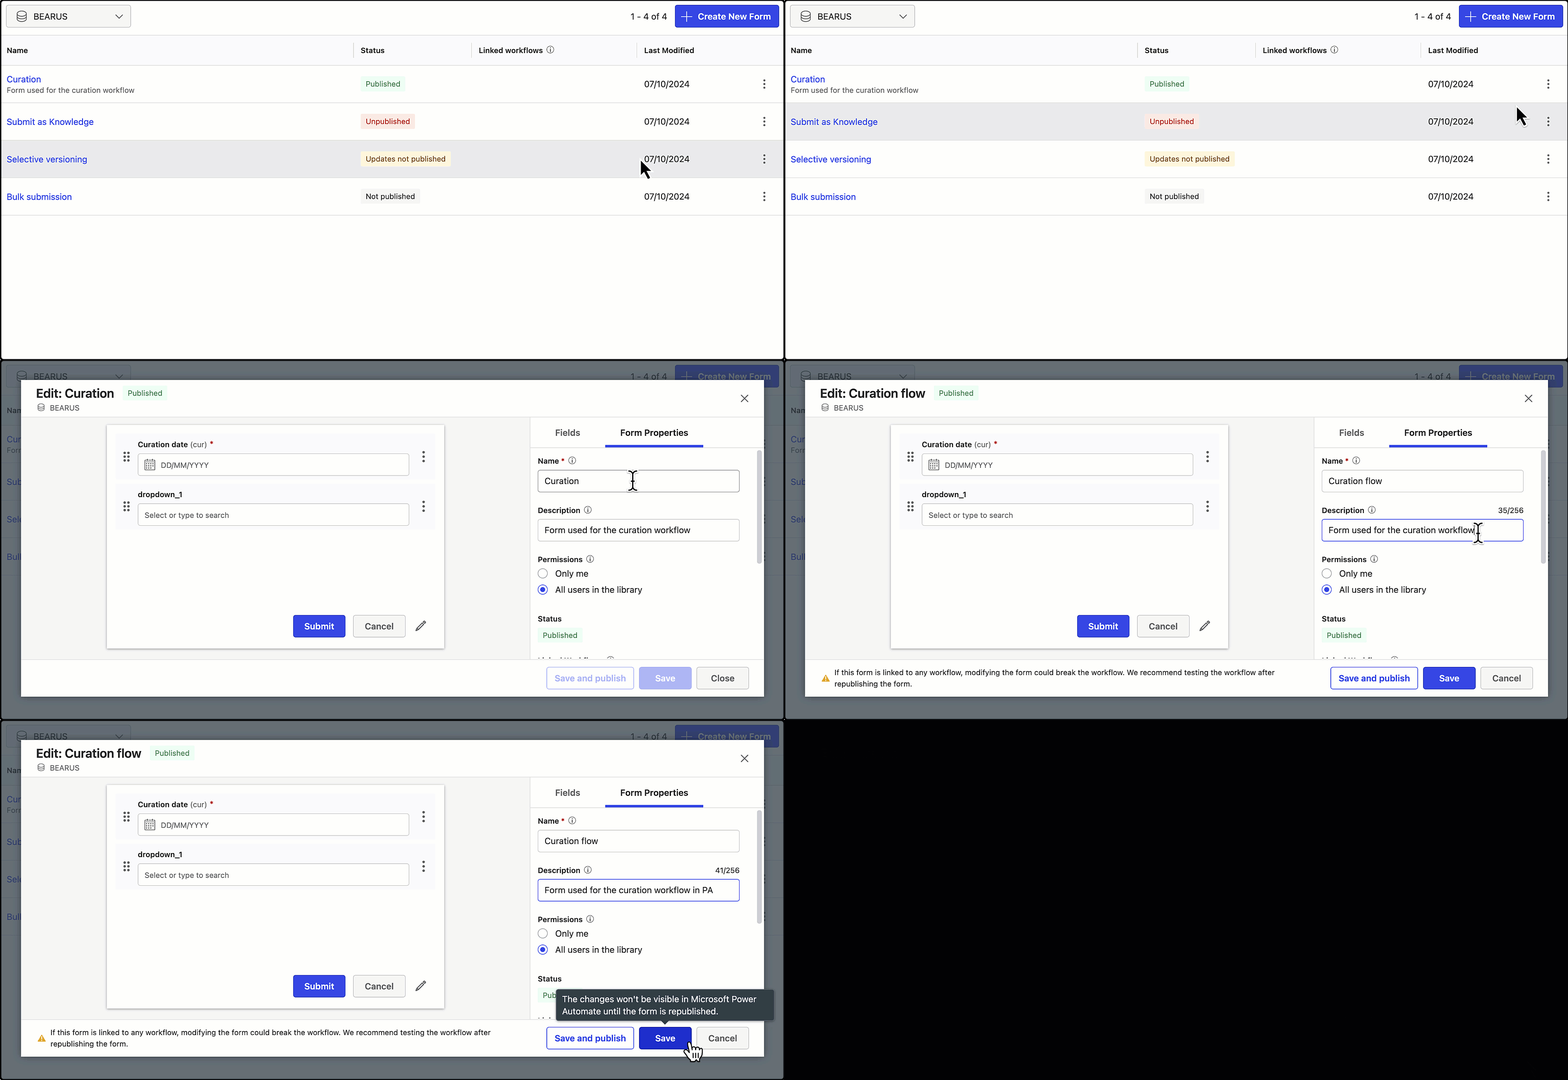
Select Edit from the kebab menu for the required form or by directly clicking on the form name on the landing page.
Perform the required changes.
Based on the current status of the form being edited, the options to proceed vary as explained in the table below.
Table: Edit options based on form status
Form status | Option available in the Edit dialog |
|---|---|
Published |
|
Unpublished | Publish: Makes the changes visible in Microsoft Power Automate.
If you wish to leave the form’s status as Unpublished, select Cancel. |
Not published |
If you wish to leave the form’s status as Not published, select Cancel. |
Updates not published |
If you wish to leave the form’s status as Updates not published, select Cancel. |
NOTE: Editing a form already being used in a workflow could break the workflow. We recommend testing the workflow after republishing the form.
Editing Form Properties
For every form built using the form builder, you can edit a few form properties as per your needs.
Select Edit from the kebab menu for the preferred form.
In the Edit: <form name> dialog, select Form Properties.
Figure: Editing Form Properties in the form builderName: Type in a value in the Name field. This field is compulsory and helps workflow creators find this form by the name when using an iManage Trigger in Power Automate.
Description: Give a brief description of the new form you are creating so that it'll help you identify it later in the list of other forms created using form builder.
Permissions: Configure who can link this form to a Power Automate workflow that uses an iManage trigger.
Select Only me to restrict the linking privileges to yourself.
orSelect All users in the library to provide linking privileges to other users who are a part of the selected library when you started creating this form.
Based on the current status of the form being edited, the options to proceed vary as explained in the Edit options based on form status table above.
Editing Field Settings
Select Edit from the kebab menu for the required form.
Every field available in the form has the following options available in the kebab menu:
Edit Properties: Provides all possible options the further customize the field.
Remove: Removes the field from the form.
Figure: Editing Field Settings
Refer to the Editing Field settings sample below for a better understanding.
Based on the current status of the form being edited, the options to proceed vary as explained in the Edit options based on form status table above.
Editing Field settings sample
Here’s a sample that explains how to edit field settings for a form that is published in the Workflow Manager.
This sample form has two properties:
Date
Custom message
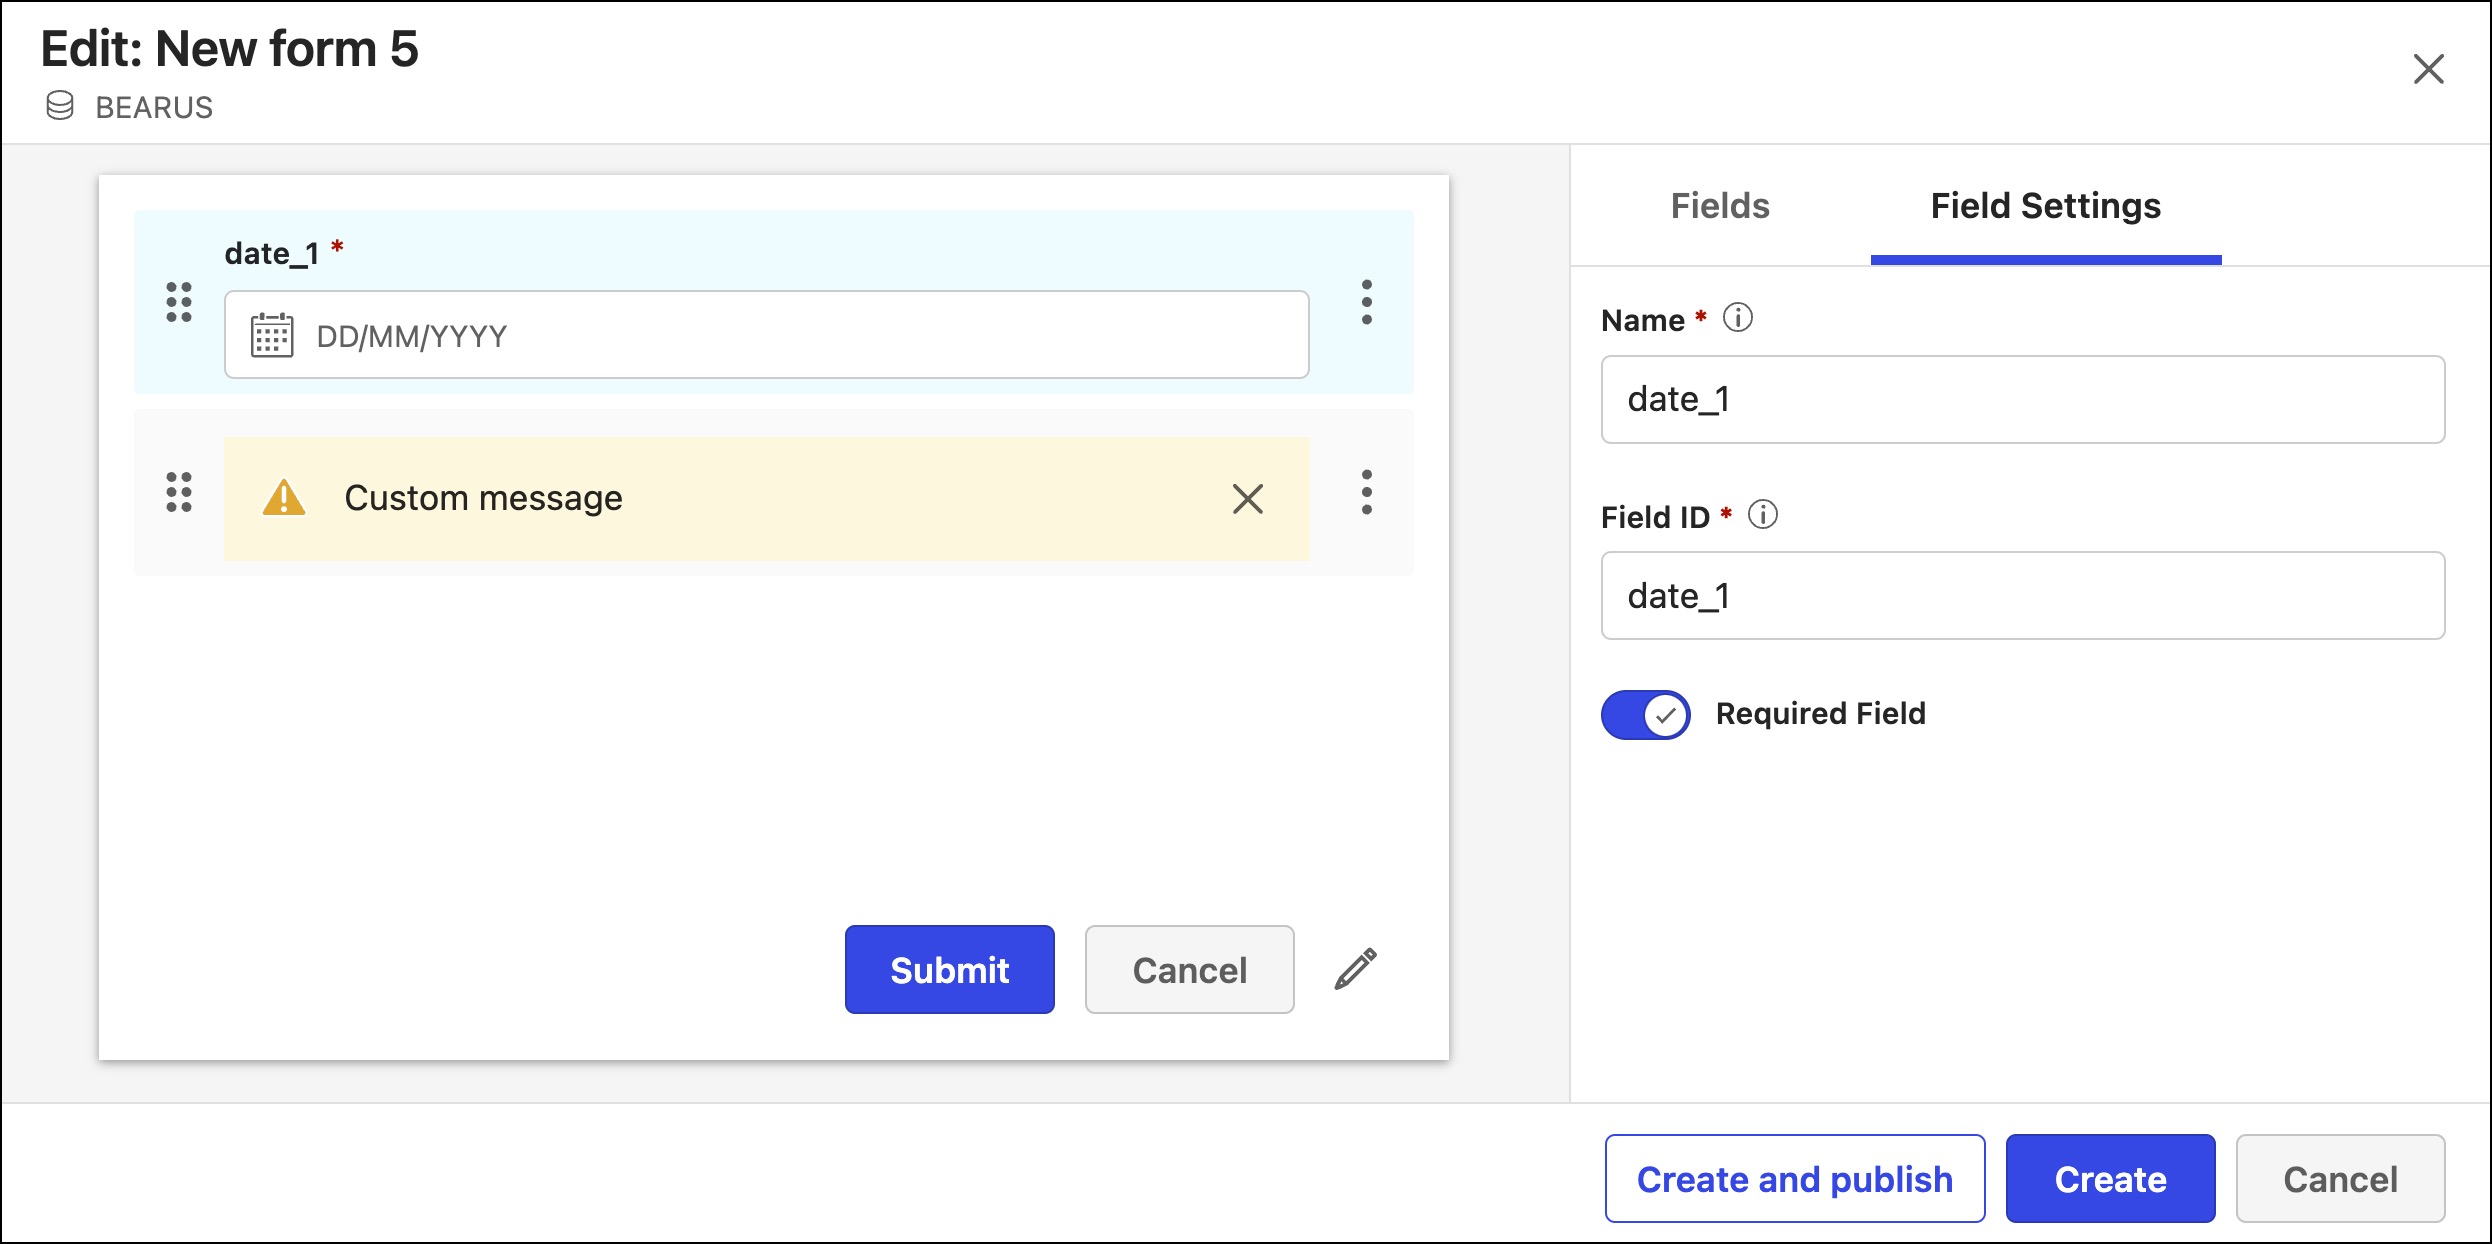
The following options can be edited in the date field:
Name: Will be visible to the user of the form and in the Microsoft Power Automate designer.
Field ID: Will only be visible in the run logs of Microsoft’s Power Automate workflow.
Required field:
Turn on to ensure users must provide a value to the date field to submit the form.
orTurn off to allow users to submit the form without providing a value to the date field.
Figure: Editing the date field settings
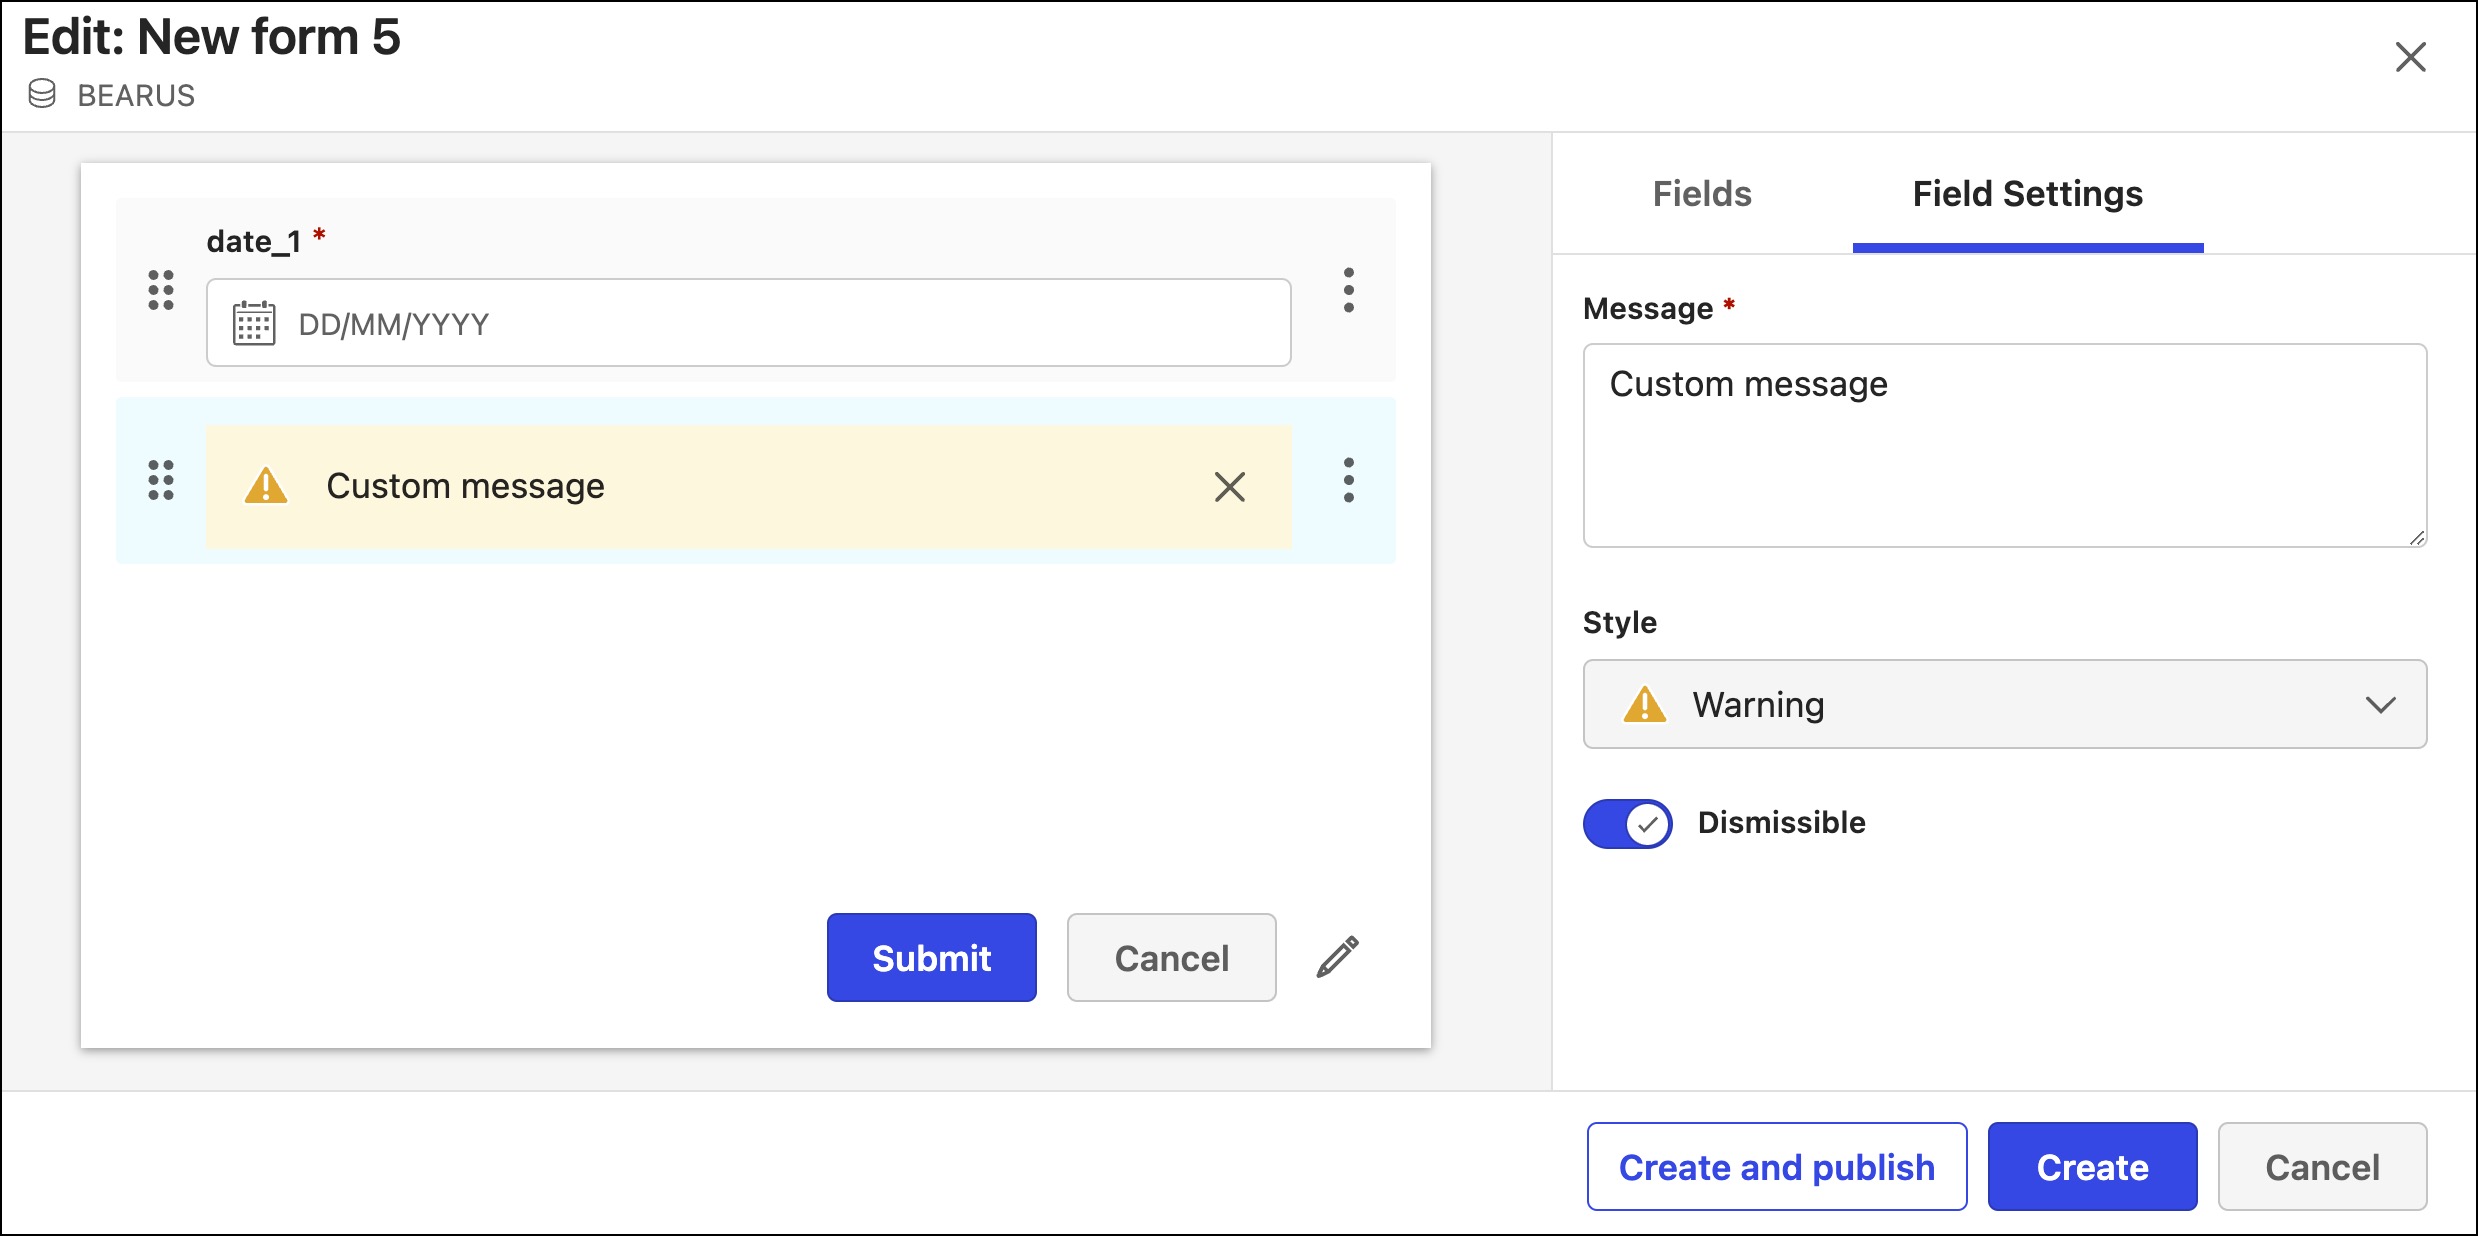
The following options can be edited in the custom message field:
Message: Edit the message content.
NOTE: The custom message field has a character limit of 256.Style: Select if the custom message must be displayed either as an Info or Warning label in the user interface.
NOTE: Select None in the Style drop-down if you don't wish to set any style to the custom message field.Dismissible switch: Select to set the custom message field as dismissible.
Figure: Editing the custom message field settings


