Taxonomy properties
This page provides instructions for working with taxonomy properties. To learn more, refer to Taxonomy properties.
Add values to taxonomy properties
Add individual values
On the Properties page, select the library from the library drop-down menu. Property values are managed separately for each iManage Work library.
Figure: Select a library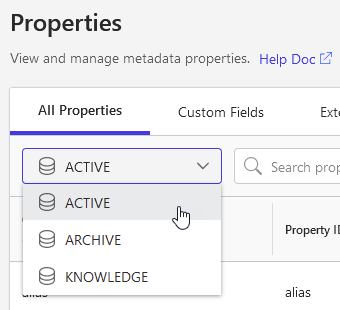
Locate the taxonomy property.
Right-click the property name, and select Add value.
Enter the alias (required) and description for the new value, then press ENTER or select + to submit the value.
To commit the change, select Save.
NOTE:
To reorganize the values in the hierarchy, refer to Reorganize taxonomy hierarchy.
Add multiple values
You can quickly add multiple values for a taxonomy property by copying and pasting the values from another source, such as a spreadsheet or text file.
To import values directly from a CSV file, refer to Import values from a CSV file.
On the Properties page, select the library from the library drop-down menu. Property values are managed separately for each iManage Work library.
Figure: Select a libraryLocate the taxonomy property.
Right-click the property name, and select Add multiple values. The Add Heirarchy dialog box opens.
Enter one alias and description per line for each value.
Separate the alias and description using the // characters.
To add a new tier, use tab to indent.
You can also copy values from another application or document and paste them into the editor.Select Add Hierarchy.
Select Save.
Figure: Adding multiple hierarchy values to a taxonomy property
To reorganize the values in the hierarchy, refer to Reorganize taxonomy hierarchy.
NOTES:
If you are copying and pasting from a spreadsheet, each value in a tier must only be included once in each column, as shown in the following example. An error will be returned if you include Agriculture & Rural Land in all rows in column A, for example.
Figure: Copying values from a spreadsheet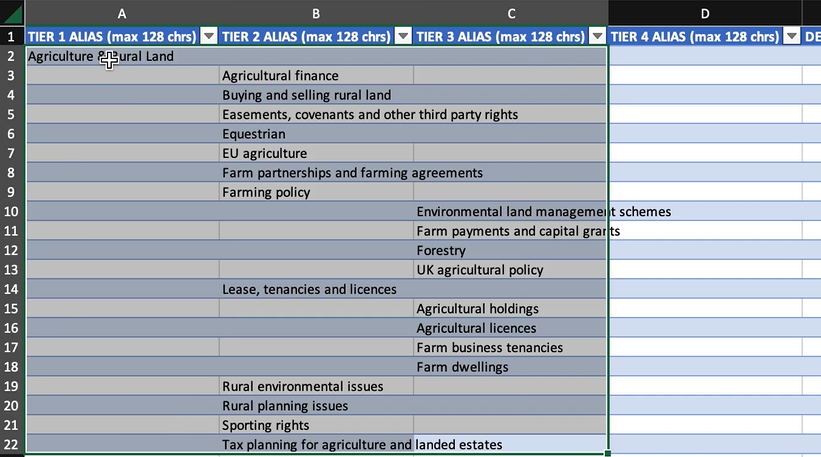
If your session times out while adding values to a lookup or taxonomy property, iManage Control Center may not be able to save your changes.
To prevent any loss of work, use the Export all to CSV option to download the values you entered. Sign in again, and then use the Import from CSV option to reload the values from the CSV file you exported.
Import values from a CSV file
Property values can be imported directly from a comma-separated value (CSV) file.
This enables you to finalize your values in a text editor or spreadsheet tool, like Microsoft Excel.
This is also useful for maintaining consistent values across iManage Work libraries. You can export values from one iManage Work library and import these same values to the property in another library. For more information about exporting values, refer to Export values to a CSV file.
Importing values from a CSV file is allowed only when no other values have previously been added to the property. If you’ve already added values to this property, you can still add additional values using either Add value or Add multiple values.
Downloading CSV template and example files
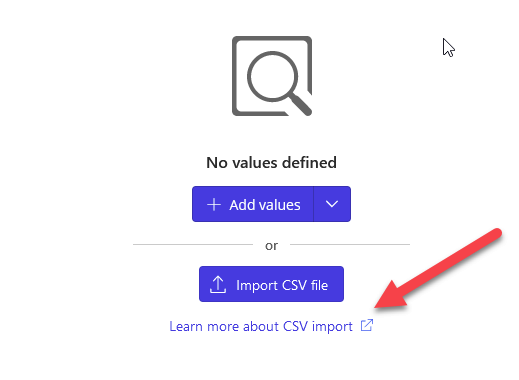
CSV template and example files are available for download on the CSV templates page. You can also access these files from the following link in iManage Control Center.
Figure: Accessing the template and example files from iManage Control Center
Importing from CSV
Before importing values from your CSV file, verify that your CSV file is complete and formatted correctly.
On the Properties page, select the library from the library drop-down menu. Property values are managed separately for each iManage Work library.
Figure: Select a libraryLocate the taxonomy property.
Right-click the property name, and select Import CSV. The Import CSV file dialog box opens.
Drag your CSV file and drop it onto the Import CSV file dialog box as shown in the following example.
Figure: Importing values from a CSV file
Review the imported values, then select Save.
Confirm your changes by selecting Save again.
TIP:
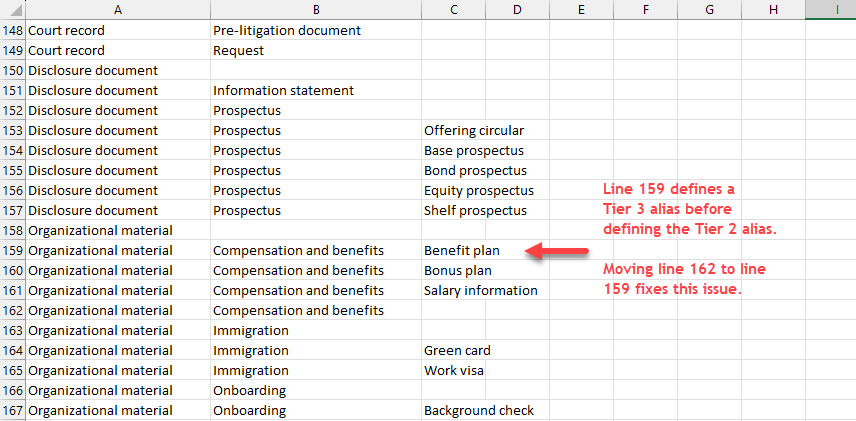
Pay close attention to the format of your values in the CSV file. The following CSV file highlights a common mistake.
In line 159, a Tier 3 taxonomy value has been defined before the parent Tier 2 value on line 162. In this example, iManage Control Center would generate an error if you attempted to import this incorrectly formatted CSV file.
Figure: Resolving issues in CSV files
TIP:
Before importing any values from your CSV file:
Verify that your CSV file is complete and formatted correctly.
If your file contains values with leading zeroes, such as 001 or 00093, note that Microsoft Excel automatically removes these leading zeroes. As a workaround, use a text editor other than Excel to edit files with such values.
If your file contains values with special characters, they might not import correctly. To avoid this issue, make sure your file is fin UTF-8 format. In Microsoft Excel, you can do so by selecting Save As and then selecting CSV UTF-8 (Comma-delimited)(.csv) as the File Format.
Add a single value to an existing hierarchy
To add individual child values to an existing value:
Select the property to view its hierarchy.
Select the parent value and press C.
Alternatively, select + and then select Add Child, as shown.
Figure: Adding a child value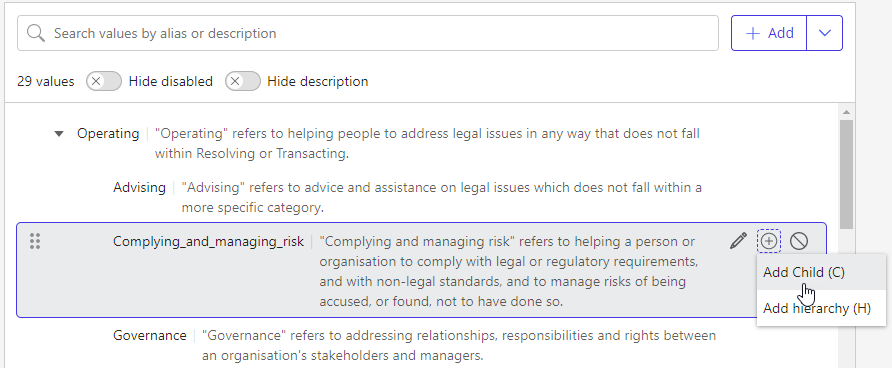
Enter the alias and description for this new value.
Figure: Entering a new child value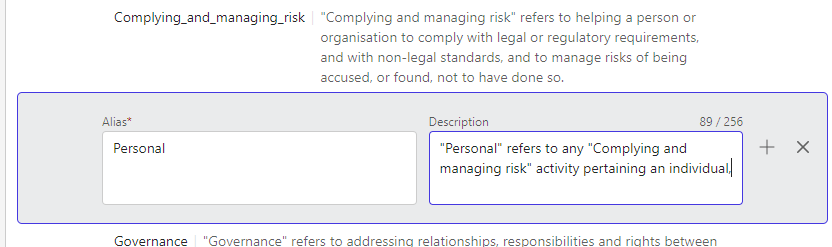
Press ENTER or select the + icon to confirm your entry.
The Add <value> dialog appears.To confirm your changes, select Save.
Add multiple values to an existing hierarchy
If you have already defined hierarchy values for a taxonomy property, you can also add multiple new values at any level:
Select the property to view its hierarchy.
Select the parent value and press H.
Alternatively, select the + icon, and select Add hierarchy.
TIP:
To add values at the top level of the hierarchy, select the +Add dropdown menu, then select Add hierarchy, as shown.
Figure: Adding multiple child values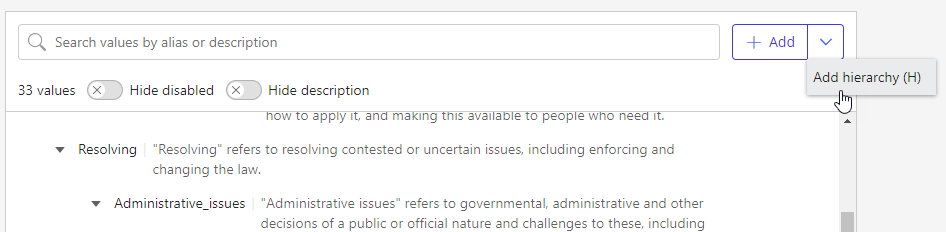
The Add Hierarchy dialog appears.
Add the new child values. In the editor, you can only add values to the parent you selected.
Figure: Entering multiple values into the child editor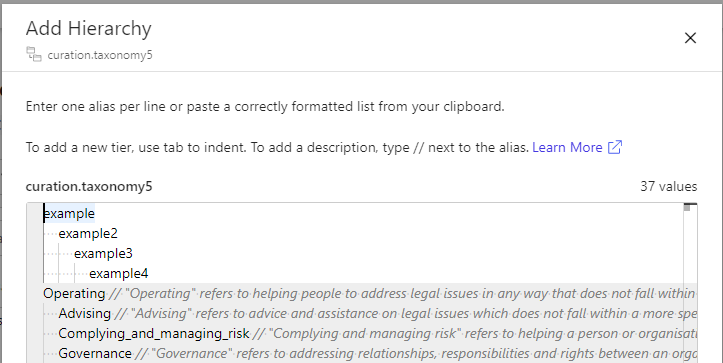
Select Add Hierarchy.
Edit a taxonomy hierarchy value
To change the order or hierarchy of values in a taxonomy property, refer to Reorganize taxonomy hierarchy.
To modify the alias or description for an existing taxonomy value:
Select the property to view its hierarchy.
Select the value you want to edit and press E, or select the pencil icon, as shown.
Figure: Editing the label or description of a value
Modify the alias and description, then press ENTER, or select the checkbox.
Select Save to confirm your changes.
Reorganize taxonomy hierarchy
The hierarchy of values in any taxonomy property can be reorganized:
Select the property to view its hierarchy.
Drag the value to the new location.
Figure: Reorganize taxonomy hierarchy values
The Move dialog appears, showing your changes.
Select Save to confirm your changes.
Disable a taxonomy hierarchy value
To maintain the integrity of the data applied to a document, taxonomy hierarchy values cannot be deleted. Instead, you can disable values.
When you disable a value, the value can no longer be applied to a new or existing document. Disabled values can also be re-enabled at any time.
Any documents with a disabled value applied are not affected:
The disabled value is retained on documents where it's already applied.
You can search for documents that have this disabled value applied.
To disable a taxonomy hierarchy value:
Select the property to view its hierarchy.
Select the value you want to disable and press D, or select the disable icon, as shown.
Figure: Disabling a hierarchy value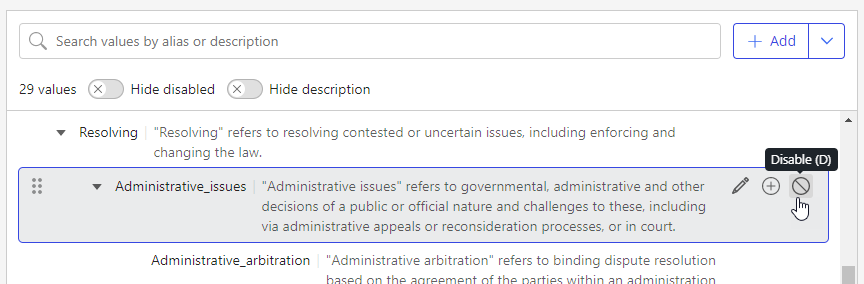
If the value you are disabling has child values, you may also disable all of the child values at the same time by selecting Disable all child values.
Figure: (Optional) Disable all child values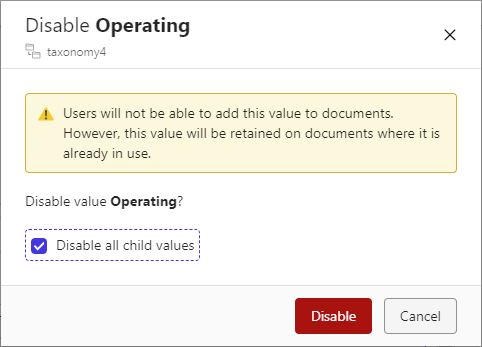
NOTE:
If a parent value is disabled, users cannot apply this value or any of its child values to a document, regardless if the children are enabled or disabled.
To confirm your changes, select Disable.
Troubleshooting
When adding or editing multiple values, errors in the editor are displayed with a red underline, and the specific requirement is marked at the bottom of the dialog.
Figure: Errors when adding or editing values

NOTE:
A maximum of 500 errors are highlighted with red underlines. If there are more than 500 errors, only the last 500 errors are highlighted.