Saving emails and attachments by browsing to a location
- Select the email that you want to save or the email for which you want to save the attachments.
- Select iManage Work from the toolbar. To add the option to the toolbar, refer to Adding the iManage Work option to the toolbar.
In the iManage Work panel that opens, select Browse and file from the Location drop-down list.
The Select Filing Location dialog box appears.NOTE:
You can't select a specific attachment for filing to iManage Work using the File option in this dialog box. You can only file all attachments for a selected email. To select and file only the attachments you want, select the File attachments option in the iManage Work panel.
Figure: Select Filing Location dialog box
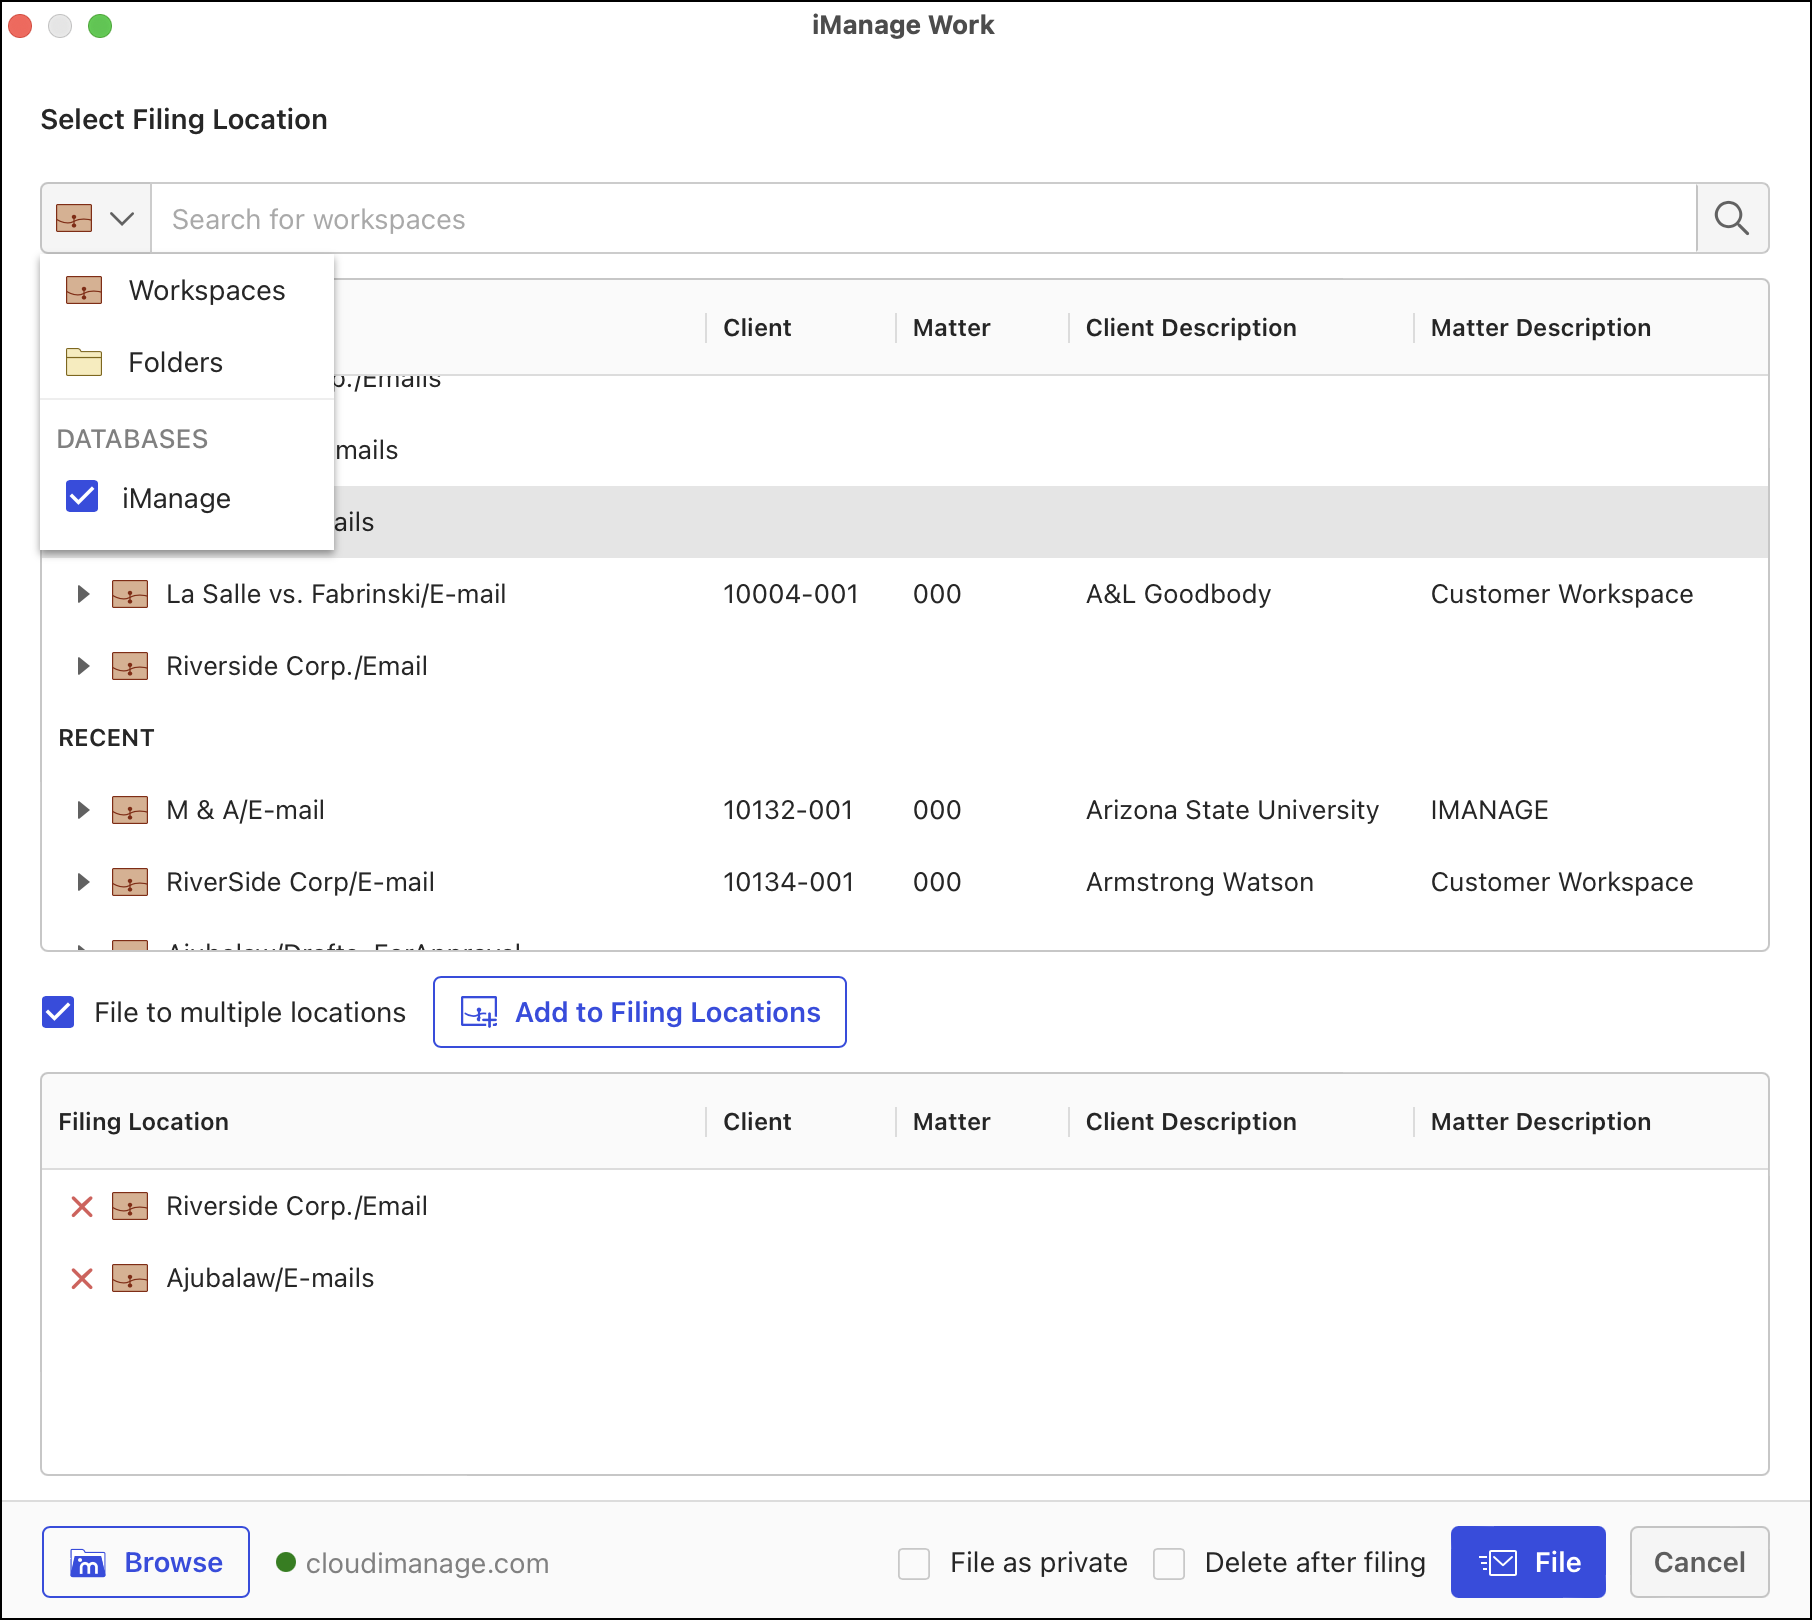
Do one of the following:
- To file to multiple locations:
Select File to multiple locations, select the desired location from the Suggested or Recent locations list, and then select Add to Filing Locations. The location is added to the Filing Location list.
NOTE:
With File to multiple locations selected, you can use the following right-click options for filing locations:
- Add to Filling Locations is available for Browsed, Suggested, and Recent locations.
- Delete Location is available only for Suggested locations (available even when the File to multiple locations option isn't selected).
- Repeat the previous step to select multiple filing locations.
- (Optional) Select
 to remove a location from the list.
 - (Optional) Select the File as private check box to ensure that other users don't have access to the filed email.
- (Optional) Select the Delete after filing check box to ensure that the email gets deleted from Microsoft Outlook after it's filed to iManage Work.
- When all filing locations are selected, select File.
The email and all its attachments are saved to iManage Work.
- To file to a single location:
- In the lower-left corner, select Browse.
- Browse to the desired location in iManage Work.
- Choose Select. The location appears in the Browsed list and is selected by default.
- Select File.
The email and all its attachments are saved to iManage Work.
- To file to multiple locations:
- (Optional) Use the search feature to find one or more filing locations in iManage Work:
- By default, the application searches for workspaces.
(Optional) To search by folders, select the search drop-down list and then select Folders. - (Optional) Depending on the databases that you want to include for the search, select or clear the check boxes for the databases listed.
Enter at least one word from the workspace name and press Enter. The search results are displayed.
NOTE:
The search isn't case-sensitive and it doesn't support wildcard characters.
- Select
 to view the folders in a workspace.
 - Select the filing location and then select one of the following options:
- File: Files the email to the selected location in iManage Work.
- File to multiple locations: Select this option, select a location, and then select Add to filing locations. Repeat for all locations where you want to file the email and then select File.
- By default, the application searches for workspaces.
- (Optional) To view the details of the filed email, select Show filing details.
NOTE:
- With the file all the emails in a conversation feature turned on, if you file one of the emails to multiple locations, then all the emails in the conversation get filed to multiple locations. For more information about filing conversations, refer to File all emails in a conversation thread.
- You can also drag email attachments to the desired folder in iManage Work. For more information, refer to Dragging folders, files, emails, and attachments into iManage Work.
- For Microsoft Outlook emails that are saved to iManage Work, the
 label appears in the list view and to the right-side of the email subject in the reading pane. The filing location is displayed at the top of the iManage Work panel in the Filed to section.