When iManage grants a tenant access to iManage Billing Analytics, the provisional administrator for that tenant automatically receives administrative permissions for the Billing Analytics section in iManage Admin Portal. This access is intended to allow the administrator to delegate ongoing access to appropriate users, while also allowing them to sign in to Admin Portal to view and export usage reports.
NOTE: For most customers, the provisional admin account is cloudadmin@<domain>.com—the initial administrative account created during tenant setup.
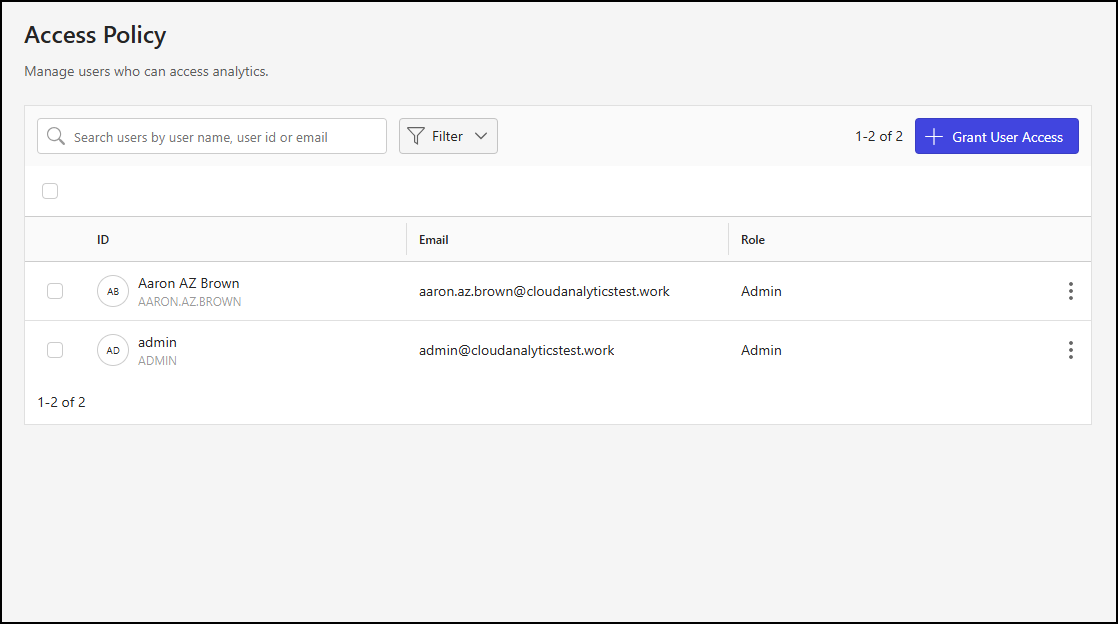
The Access Policy page in the Billing Analytics section is where you control user access to these reports. From this page, you can add, remove, and manage users. Only users who have the Billing Analytics Admin role can open and manage the Access Policy page.
NOTES:
When you grant a user access to Billing Analytics, they automatically receive the same access permission in Cloud Analytics.
You can grant access to Billing Analytics to both internal and external users. Granting access to external users, such as Partners, is useful because it allows them to view your usage reports without providing access to your iManage Work content. Providing Partners with access to your usage analytics helps them assist you with deeper utilization and adoption. For more information, refer to Grant access to an external user.
The following billing analytics access roles are available for assignment to tenant users:
Admin: Users with this role can view and export billing analytics, as well as manage billing analytics roles by adding, removing, and editing user access.
Viewer: Users with this role can view and export billing analytics.
An example of the Access Policy page is shown in the figure below.
This section includes the following topics:
Grant access to a user
To grant billing analytics access to a user in iManage Admin Portal:
Go to https://cloudimanage.com/admin/ and sign in with your iManage credentials.
NOTE: To add a user, the user account used to sign in to iManage Admin Portal must be assigned the billing analytics Admin role.
Browse to Billing Analytics > Access Policy.
On the Access Policy page, select + Grant User Access.
In the Grant User Access dialog, select the Search field. A list of users assigned to the customer in iManage Control Center displays.
Find and choose a user by scrolling through the list or entering a search term to filter the options.
Figure: Grant User Access dialog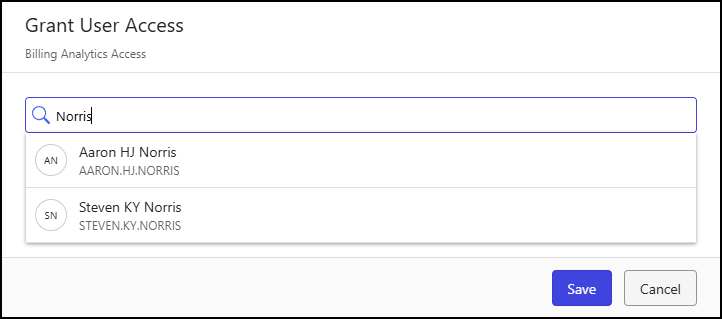
When a user is selected, they’re copied to a workspace in the Grant User Access dialog. In this workspace, you can choose an access level for the user or select X to remove them.
Figure: Grant User Access dialog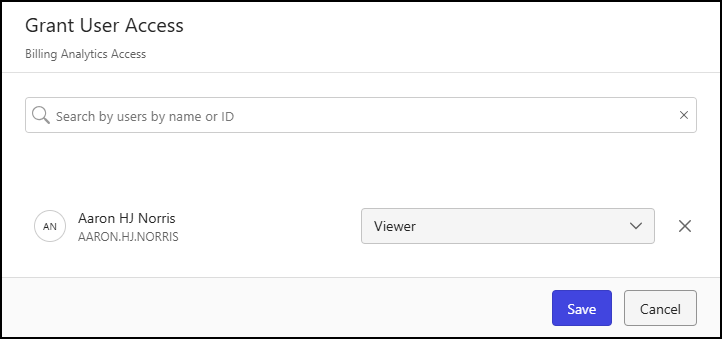
The following access levels are supported:
Admin: Users with this role can view and export billing analytics, as well as manage billing analytics roles by adding, removing, and editing user access.
Viewer: Users with this role can view and export billing analytics.
Repeat Steps 4 and 5 to add more users and assign them billing analytics roles, as needed.
Select Save.
Grant access to an external user
The Billing Analytics feature lets you broaden visibility without increasing risk. It’s not limited to internal teams, either. You can securely invite trusted third parties, such as Partners, to access Analytics and provide them with the insights they need—without giving them unnecessary access. You can achieve this by creating an external user for the third party and setting their sign-in status to disabled in your iManage Work libraries.
To grant access to Billing Analytics while blocking access to iManage Work content, follow these steps:
NOTE: To administer global users, the user signed in to iManage Control Center must be assigned to a Global Role that has the User Management privilege. For more information, refer to the Global privilege descriptions section of Control Center Help.
To administer iManage Work library-level users, the user signed in to Control Center must be a member of the NRTADMIN group, or be assigned to a role with Tier 1 or Tier 2 Control Center access. For more information about the specific operations allowed, refer to the Understanding tiers section of Control Center Help.
Sign in to iManage Control Center and browse to Access > Users.
In the library management drop-down list on the Users page, select Global Management and then select Create User.
Follow the guidance in the Users section of Control Center Help to create the user, ensuring you enable the External User toggle.
In the library management drop-down list on the Users page, select Library-level Management.
In the library selection drop-down list, select a library to which the user created in Step 3 is assigned.
In the Users page output table, locate and select the user created in Step 3.
In the Details tab of the <Username> page, scroll to the Access section and select Edit.
In the Edit Access dialog, set the Sign in status toggle to Disabled and select Save.
Repeat Steps 5–8 for each library to which the user created in Step 3 is assigned.
Follow the steps in Grant access to a user to grant Billing Analytics access to the user created in Step 3. Be sure to assign the Viewer access role to this user.
Inform the external user that they can access Billing Analytics through https://cloudimanage.com/admin/billing-analytics/data-consumption.
Access Policy page actions
In the Access Policy user table, you can choose one, multiple, or all users to perform actions on the selected users.
To select all users, select the check box above the Access Policy user table.
To select one or more users, select the check box of each user within the Access Policy user table.
When one or more users are selected, actions are displayed in the toolbar menu, as shown in the figure below.
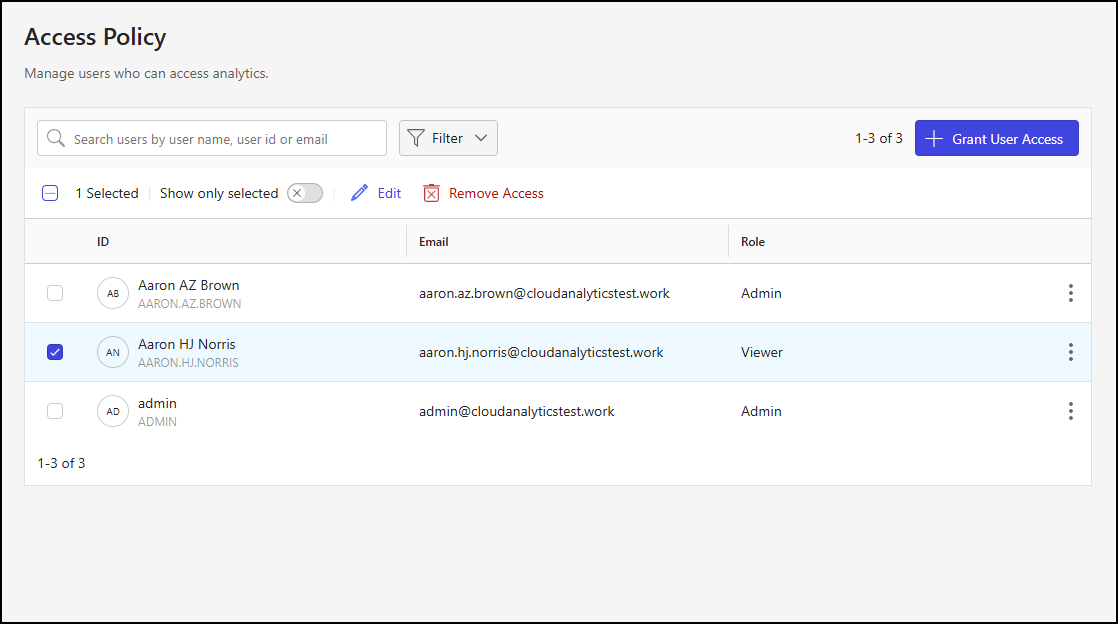
The following toolbar menu actions are supported:
Show only selected: Shows only the selected billing analytics users.
Edit: Lets you update the billing analytics role assigned to the selected users. For more information, refer to Edit a billing analytics role.
Remove Access: Deletes billing analytics access for the selected users. If a user is deleted, they'll no longer have access to the customer’s billing analytics reports. For more information, refer to Remove access to billing analytics.
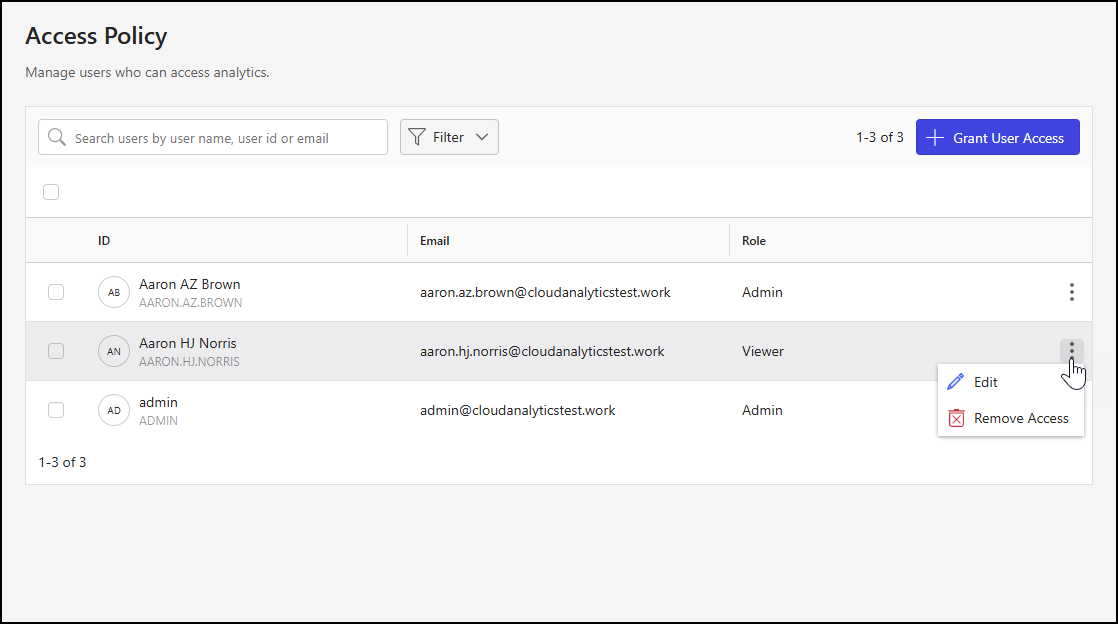
The Edit and Remove Access actions are also available for individual users by:
Right-clicking a user row.
Selecting the kebab in a user row.
An example of the kebab menu is shown in the figure below.
Edit a billing analytics role
To update the billing analytics role of a user, follow these steps:
Go to https://cloudimanage.com/admin/ and sign in with your iManage credentials.
Browse to Billing Analytics > Access Policy.
Choose a user from the Access Policy user table and, using the toolbar, right-click menu, or kebab menu, select Edit. An example of the right-click menu is shown in the figure below.
Figure: Access Policy page - right-click Edit action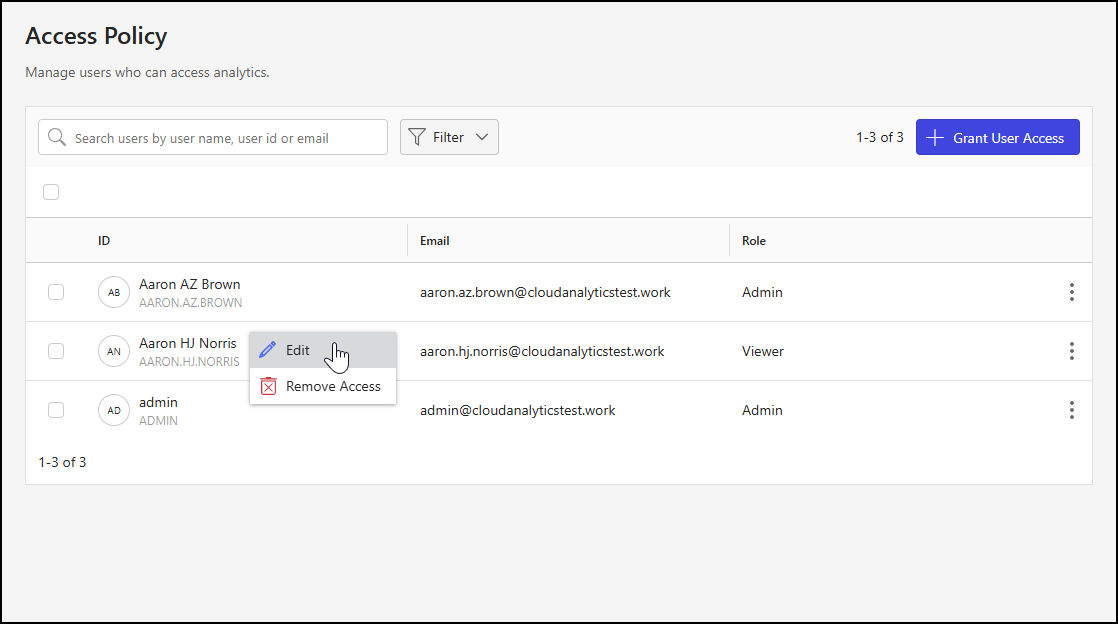
In the Edit User Access dialog, select a role from the Analytics Role drop-down list.
Figure: Edit User Access dialog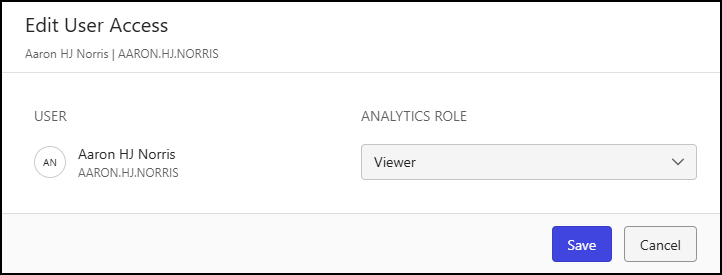
The following billing analytics roles are available:
Admin: Users with this role can view and export billing analytics, as well as manage billing analytics roles by adding, removing, and editing user access.
Viewer: Users with this role can view and export billing analytics.
Select Save.
NOTE: You can update the billing analytics role for multiple users by selecting more than one user check box on the Access Policy user table, and then choosing Edit from the toolbar menu. An example of the Edit User Access dialog when multiple users are selected is shown in the figure below.

Remove access to billing analytics
To remove billing analytics access for a user, follow these steps:
Go to https://cloudimanage.com/admin/ and sign in with your iManage credentials.
Browse to Billing Analytics > Access Policy.
Choose a user from the Access Policy user table and, using the toolbar, right-click menu, or kebab menu, select Remove Access. An example of the toolbar menu is shown in the figure below.
Figure: Access Policy page - toolbar menu Remove Access action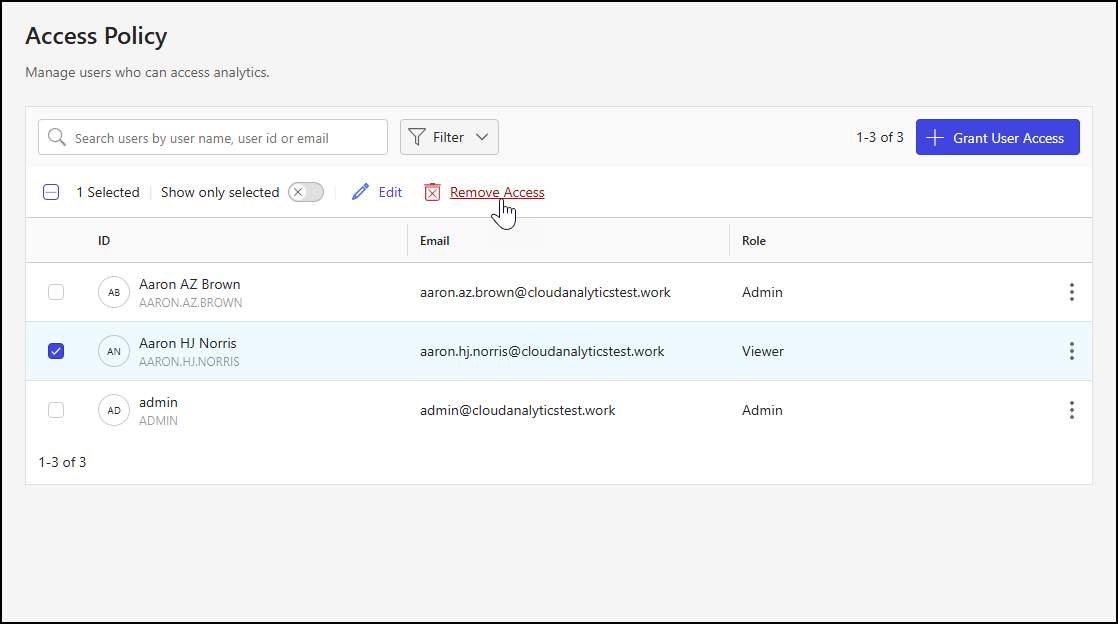
In the Remove User Access dialog, select Remove Access.
Figure: Remove User Access dialog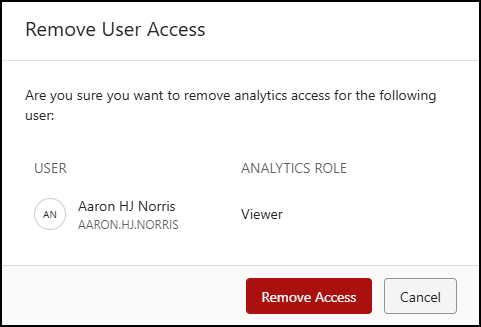
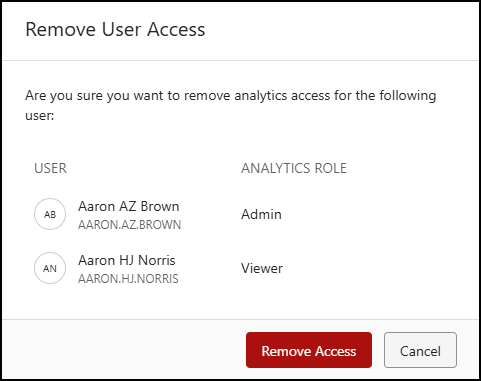
NOTE: You can remove billing analytics access for multiple users by selecting more than one user check box on the Access Policy user table, and then choosing Remove Access from the toolbar menu. An example of the Remove User Access dialog when multiple users are selected is shown in the figure below.
User table data output options
The following data output options are available for the Access Policy user table:
Search: Filter data output to match the provided user search string. For example, enter test in this field to display users test ca2, TEST CA 3, and Test_CA.
Figure: Search field
Filter: Filter data output based on values in the Role column of the Access Policy user table.
Select Filter > Role.
Figure: Role filter options
In the Role filter dialog, select a role. The Access Policy user table updates to display only those users assigned to the selected role.
The billing analytics role selected for filtering displays, as shown in the figure below.
Figure: Role filter
To remove role filtering:
Select X next to the Role filter display.
Select Clear all.