Quick filing using workspace search in iManage Work toolbar
Select the email you want to file.
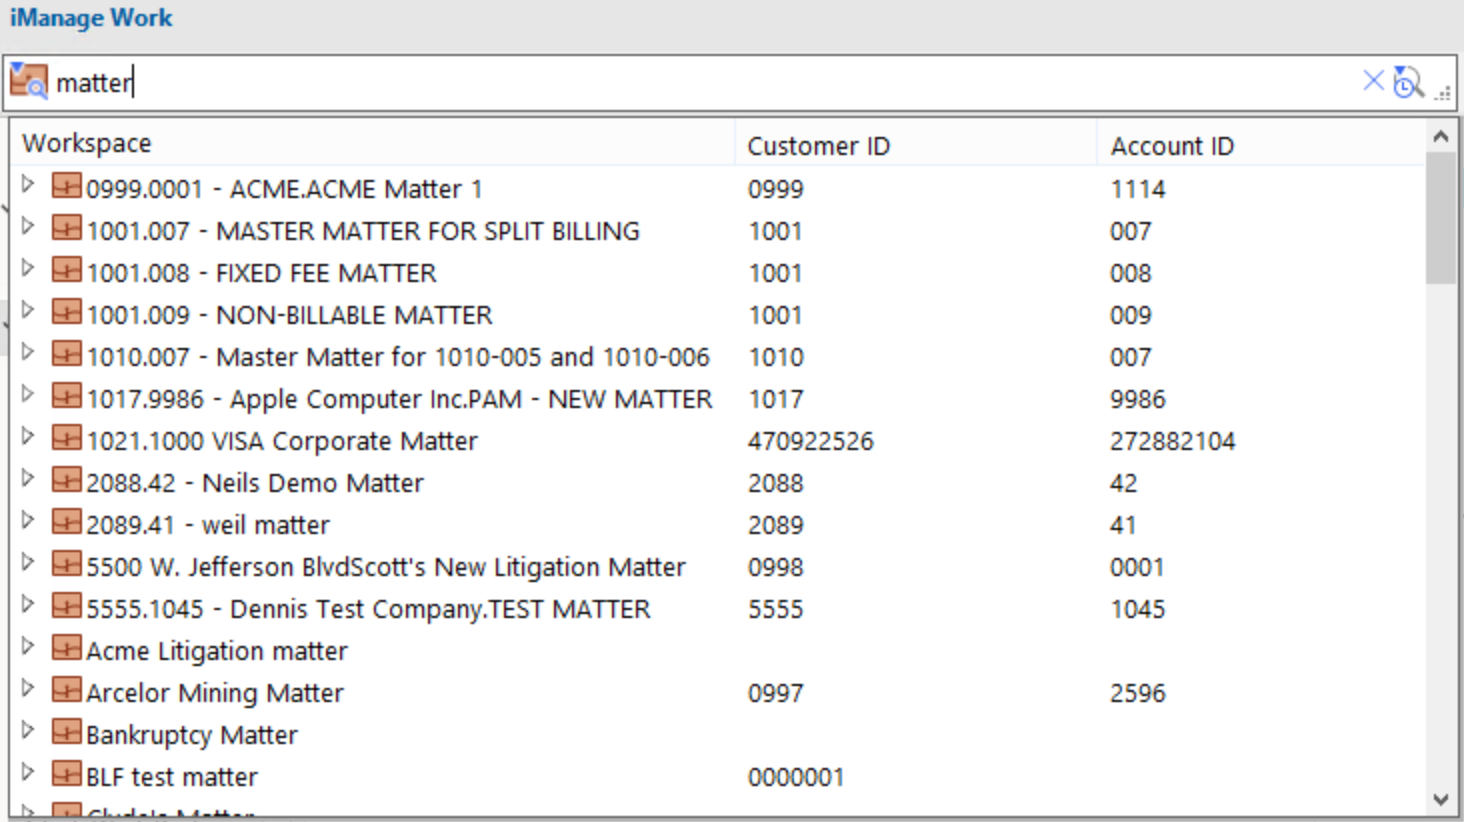
In the search field in the iManage Work toolbar, enter four characters of the workspace name. The search begins automatically.
Select
 to the left of the workspace in the list of search results and double-click the folder to which you want to file the email.
(Optional) Select
 to the left of a folder to select a folder within it. Repeat this until you drill down to the required level and locate the folder you want to file the email to.
Select the Quick File button on the toolbar, or right-click the email and select Quick File. The email is filed.
Figure: Workspace search in the toolbar

(Optional) You can perform the following tasks as required:
Select the search language using the Set language
 icon (located on the right-side of the search box), and select the database in which the workspace must be searched using the workspace icon
  on the left side of the search box.
Use the Clear search
 and Recent searches
  options.
