Deploying the add-in using Microsoft Office 365 admin center
As an administrator, you can configure the iManage Work add-in for Microsoft Outlook using your Microsoft Office admin account so that it is available to a few selected users or all users in your organization.
Sign in to your Microsoft Office 365 admin center using your credentials.
Select Home.
From the left navigation bar, select Settings > Integrated apps.
Figure: Integrated apps option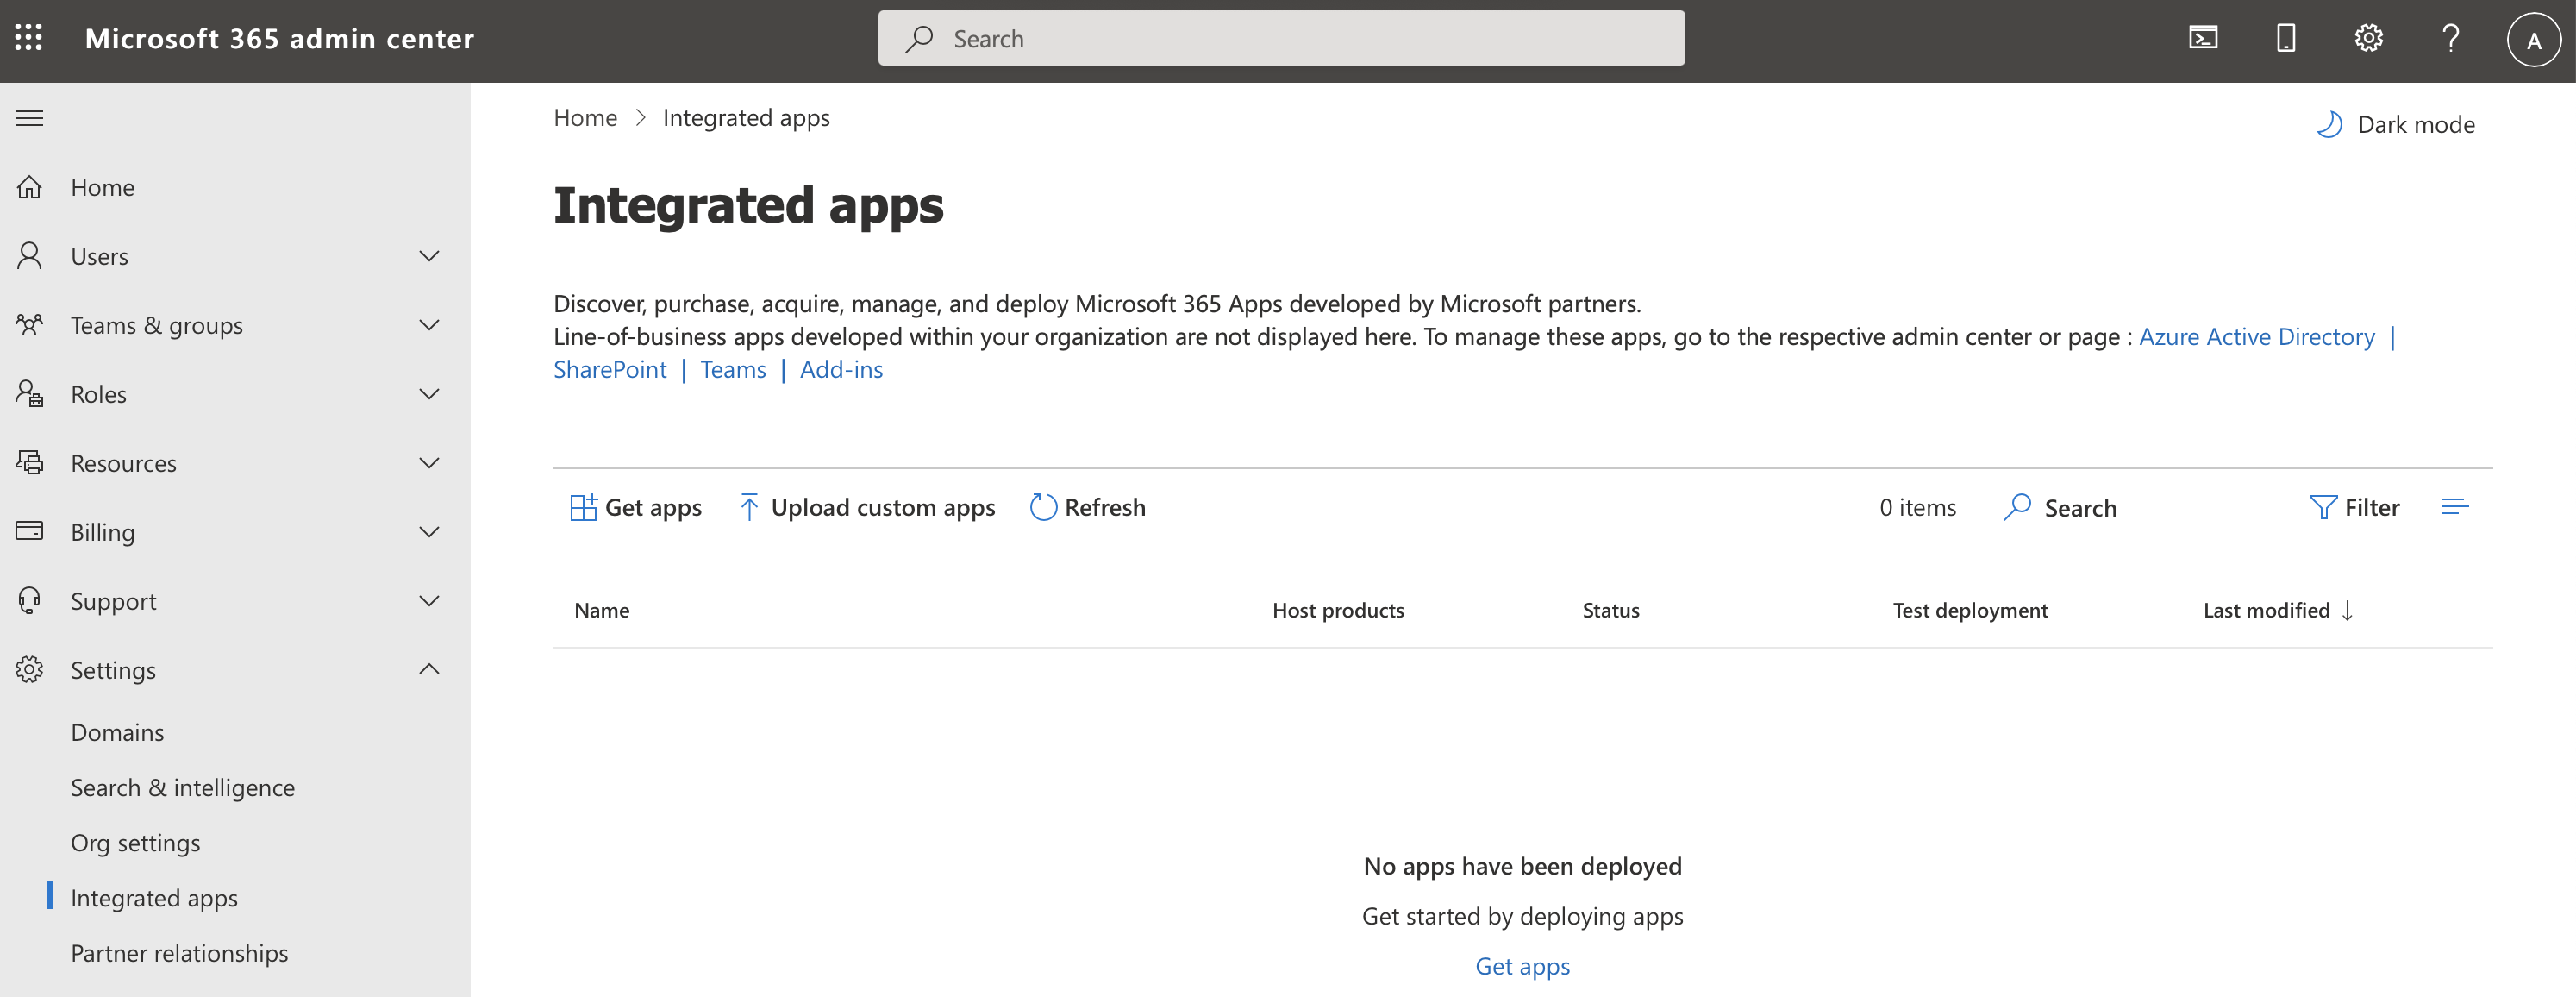
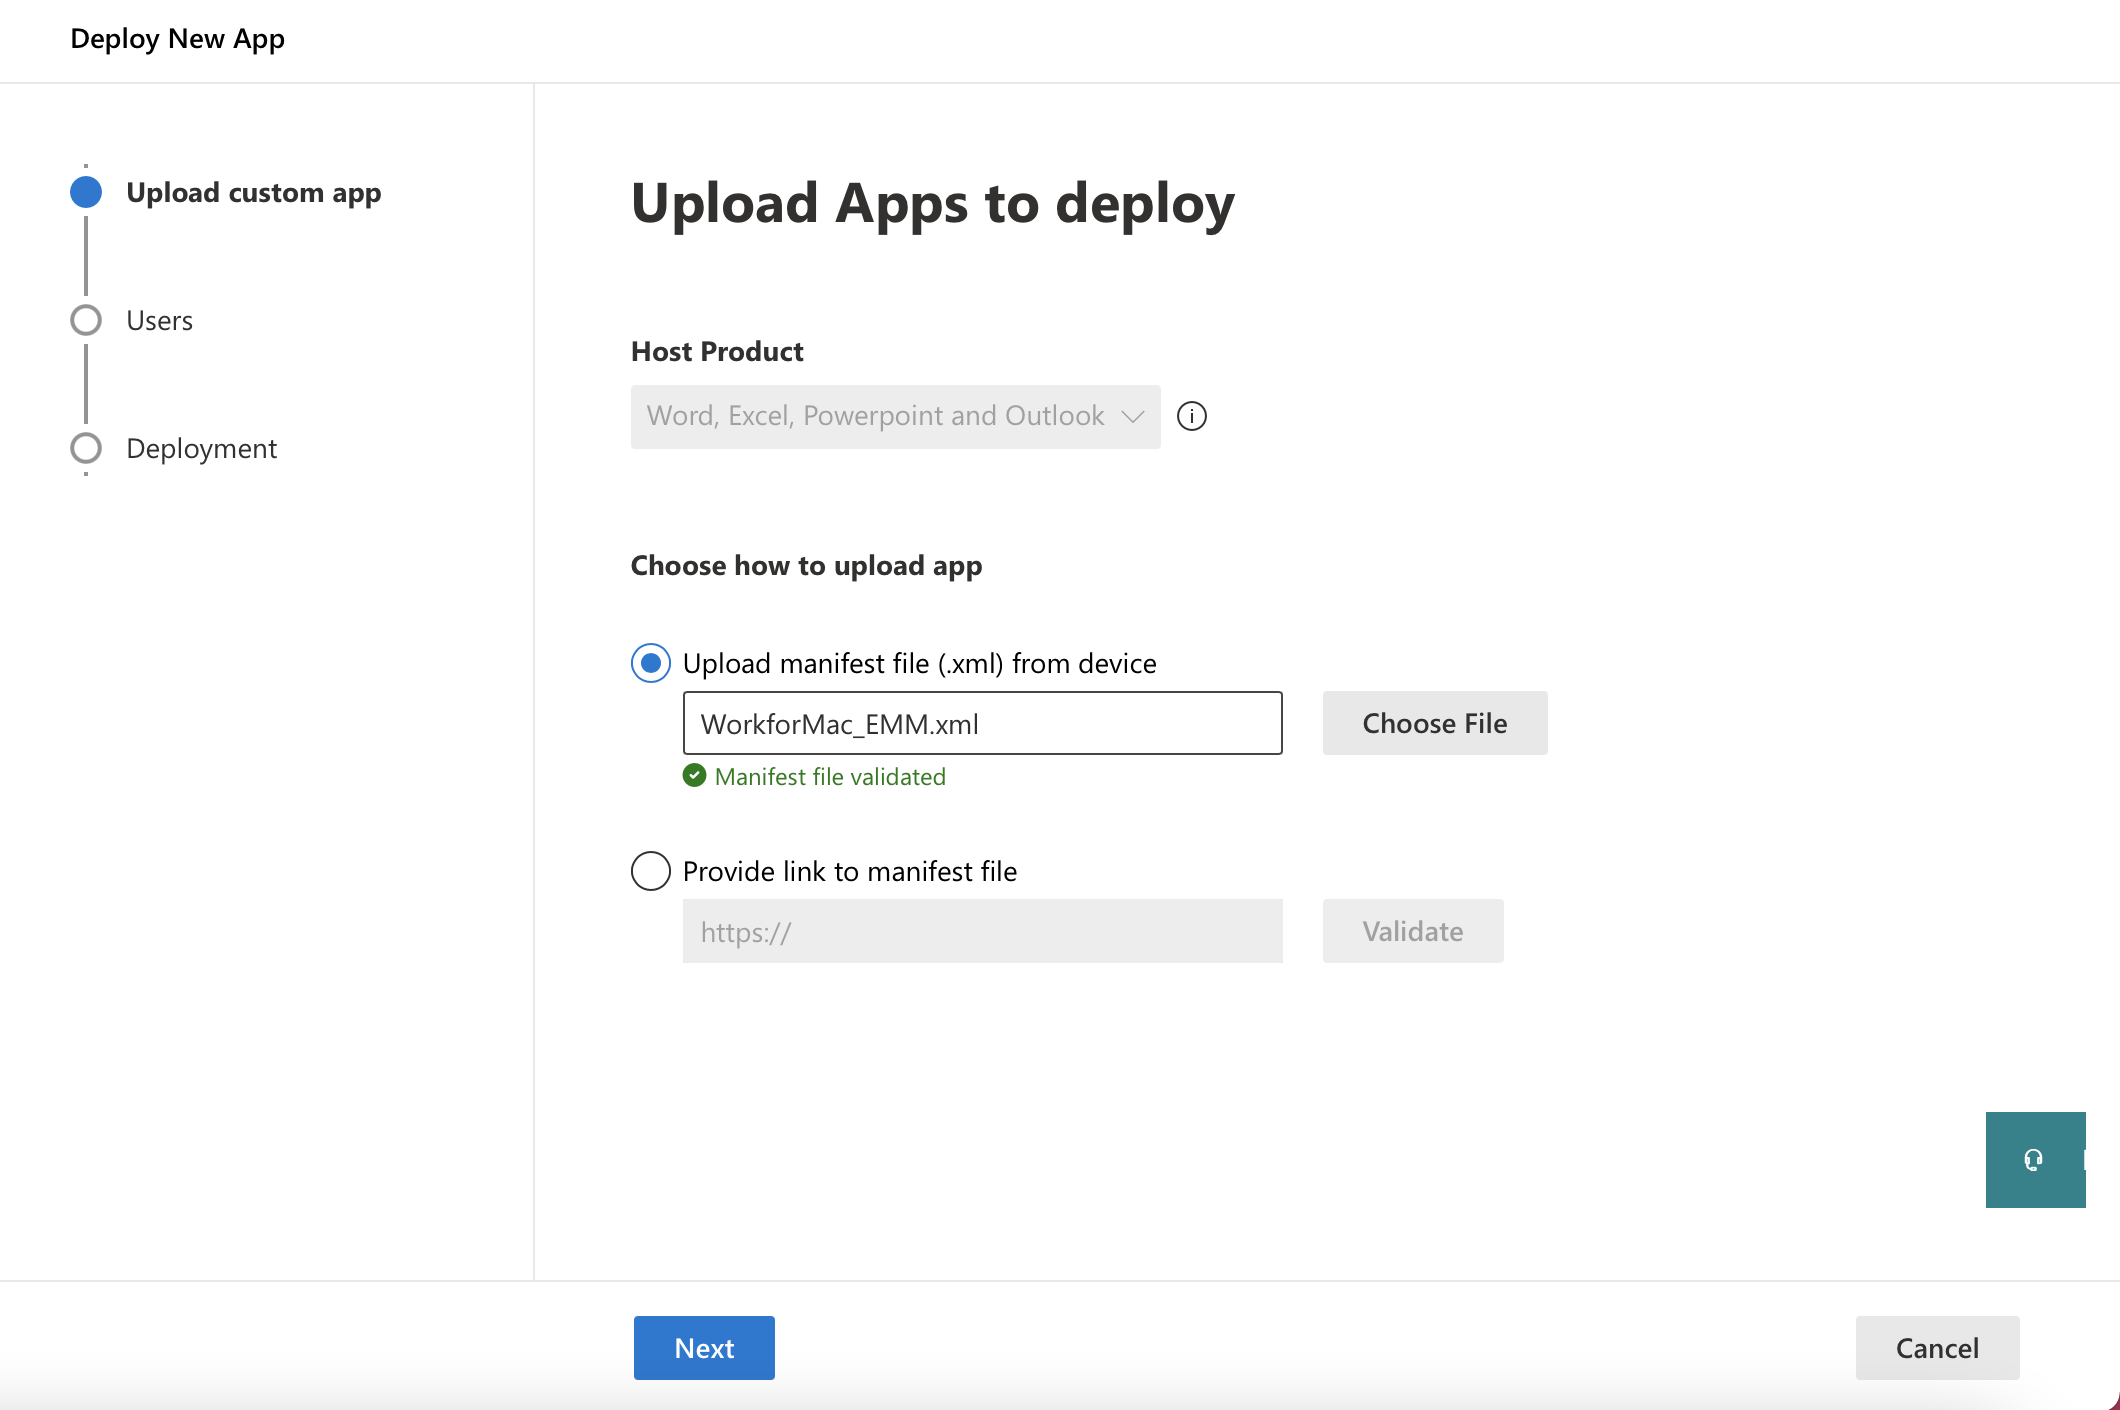
On the toolbar, select Upload custom apps. The Deploy New App wizard appears.
Select the Upload manifest file (.xml) from device option.
Select Choose file, upload the WorkforMac_EMM.xml file, and select Next.
Figure: Manifest file uploaded
Depending on who you want to deploy the add-in for, select one of the following options and select Next:
Just me
Entire organization
Figure: Option to deploy for the entire organization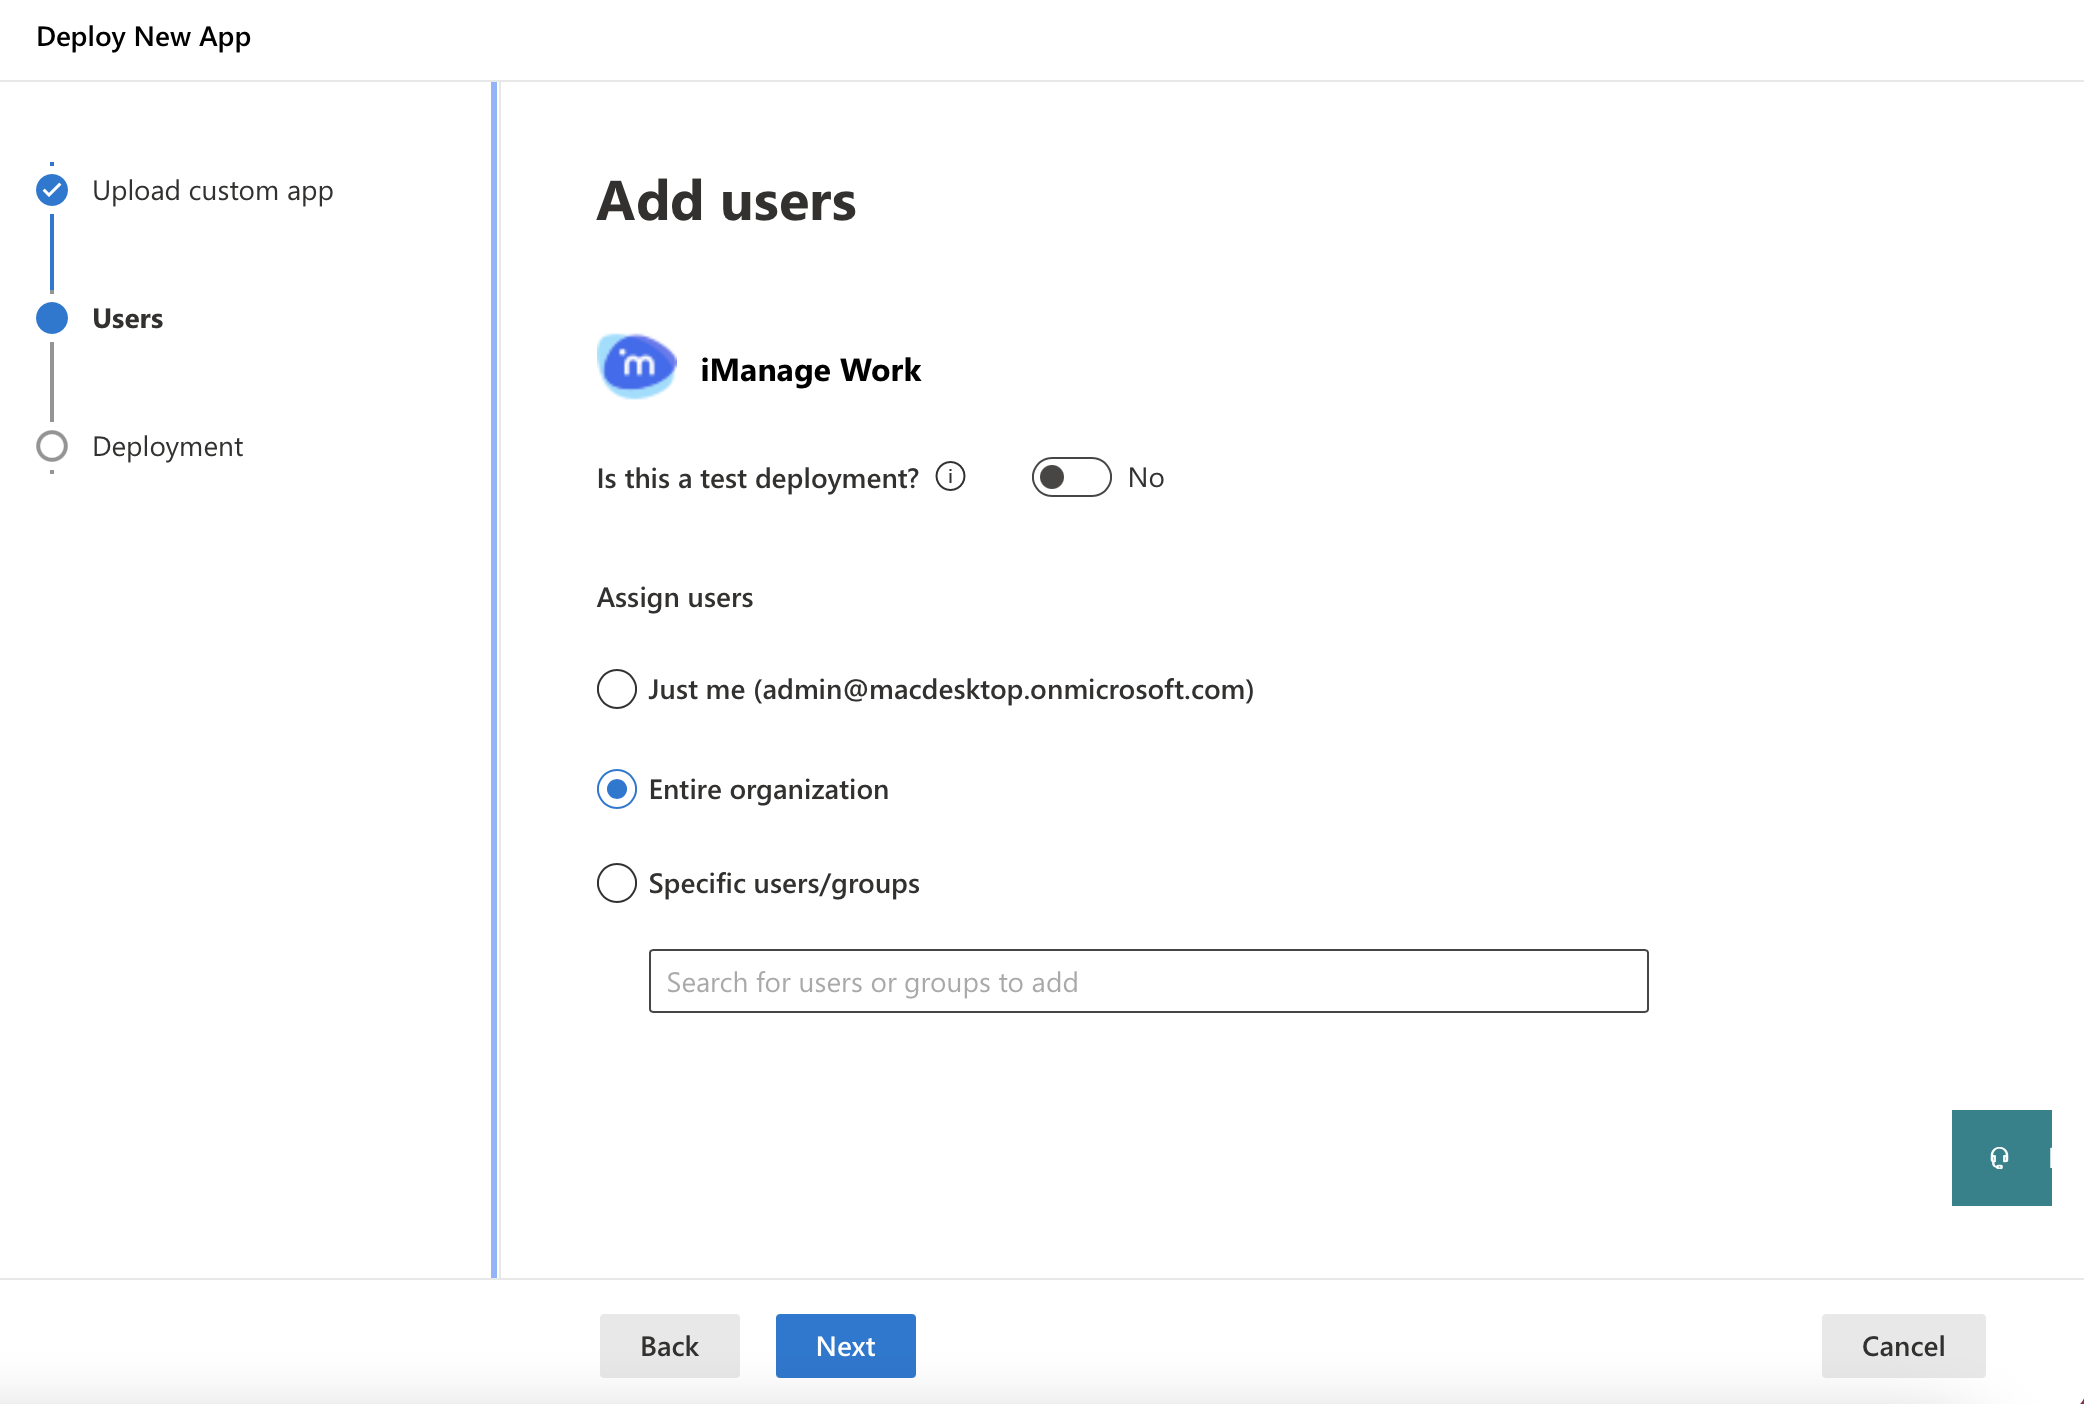
Specific users/groups
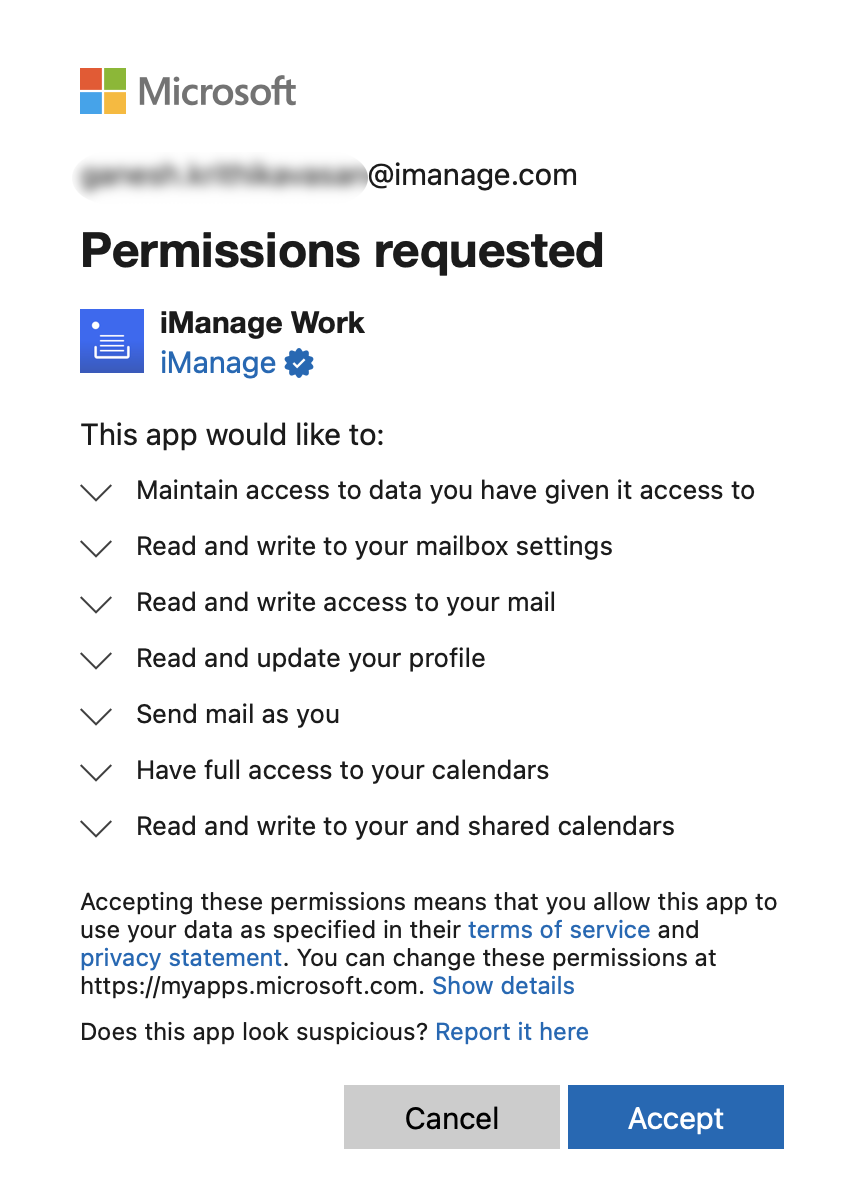
Select Accept permissions and sign in using your Microsoft Office 365 admin account.
Select Accept in the Microsoft permissions dialog box to give permissions for accessing you mailbox.
Figure: Permissions to access mailbox
Select Next and then select Finish Deployment.
Figure: Permissions granted
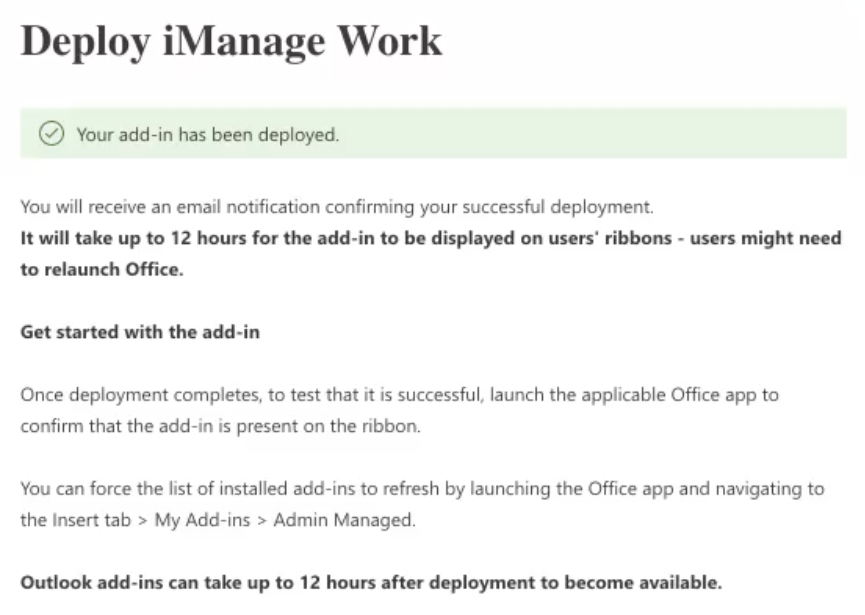
On the Deployment complete screen, select Done. The iManage Work add-in is listed under Integrated Apps.
Figure: Add-in deployed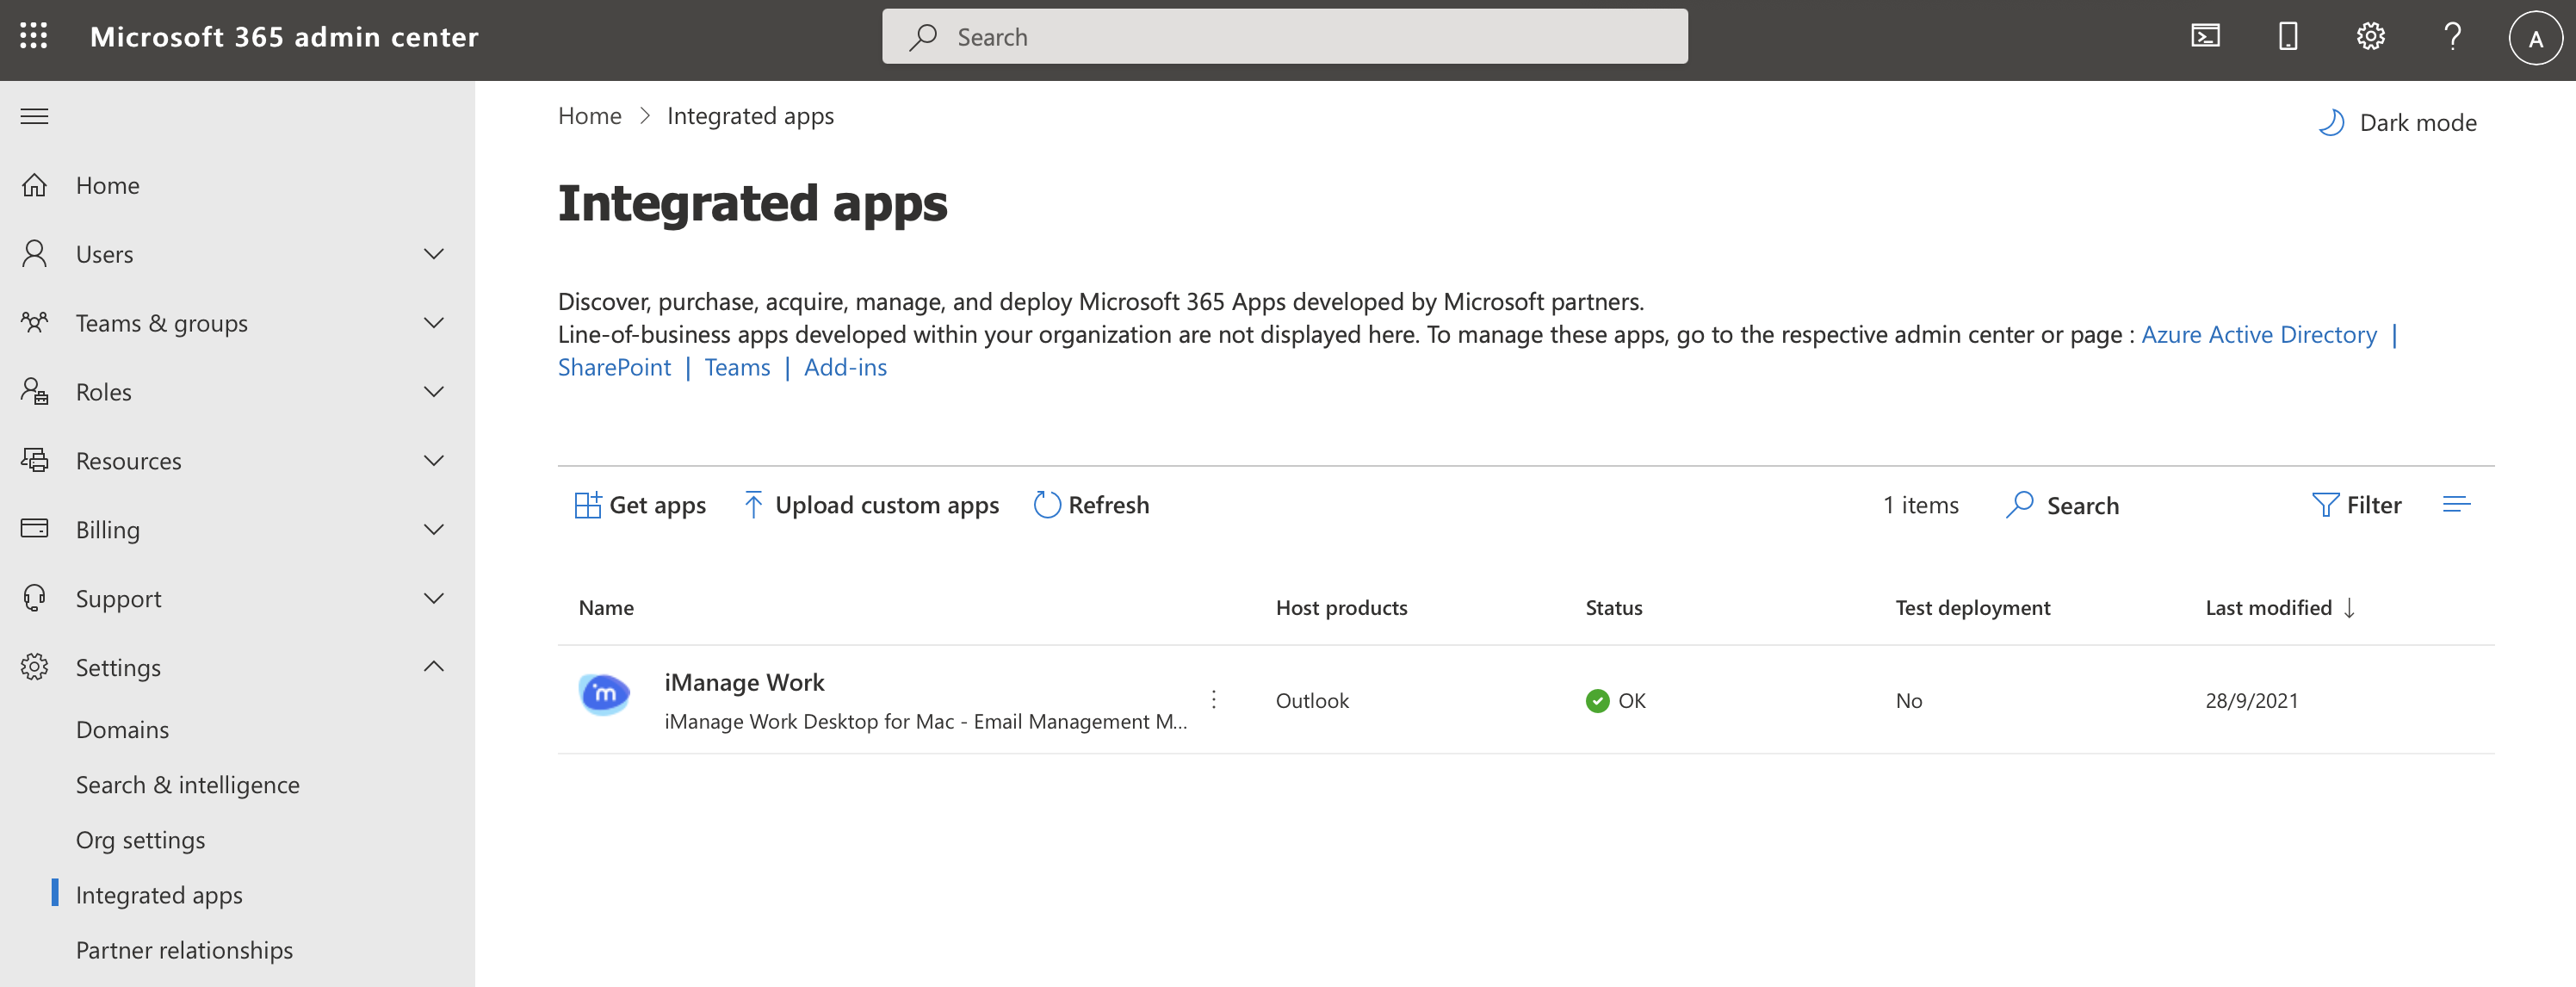
Due to Microsoft Outlook expected behavior, it may take up to 12 to 24 hours after deployment for the add-in to be displayed in users' Outlook toolbar. Users must wait for this duration and then restart Outlook to view and start using the panel.
Figure: Duration required for add-in to be displayed