Checking in files
After you update a file that you opened from iManage Work using the Edit option, you must save and close the file, or save the file and quit the application to ensure that the changes are saved to iManage Work. The changes are saved based on your check-in preferences. For more information, refer to the Check-In Default section in iManage Work Desktop for Mac Installation Guide.
Check-in failure
Files could fail to check in due to some reasons. Check-in failures are of two types:
Temporary failure: Due to reasons such as, unavailability of network or session expiration, and so on. The Retry button is displayed next to each file for which the check-in failed temporarily.
Permanent failure: Due to a conflict between the version in iManage Work and the version you are trying to check in. For example, if you connect to another server before checking in a file, or if the administrator unlocks the file in iManage Work. The Resolve button is displayed for files that have permanently failed to check in.
You notice the following application behavior when documents fail to check in:
Documents remain in the Documents > iManage folder.
 icon is displayed next to the Check In Documents option in the iManage Agent
  menulet. Select this option to display the Check In Documents dialog box that lists the files pending check in. The reason for the check-in failure is displayed for each file.
iManage Agent icon in the dock displays the number of files pending check-in. For example, if one file needs to be checked in, the
 icon is displayed.
Failure notifications are momentarily displayed to inform you about the check-in failure. To view all the notifications later, select the Notification Center
 icon in the upper-right corner of your Mac menu bar.
Notifications are displayed for pending check-ins every time the iManage Agent is relaunched.
Retry check-in (temporary failure)
Select Check In Documents in the menulet. The Check In Documents dialog box appears.
Select Retry next to each file to check it in. The files are checked in using the default check-in setting specified for the Preferences option and are removed from the list. For more information, refer to the Check-in default section in iManage Work Desktop for Mac Installation Guide .
Select Close when done.
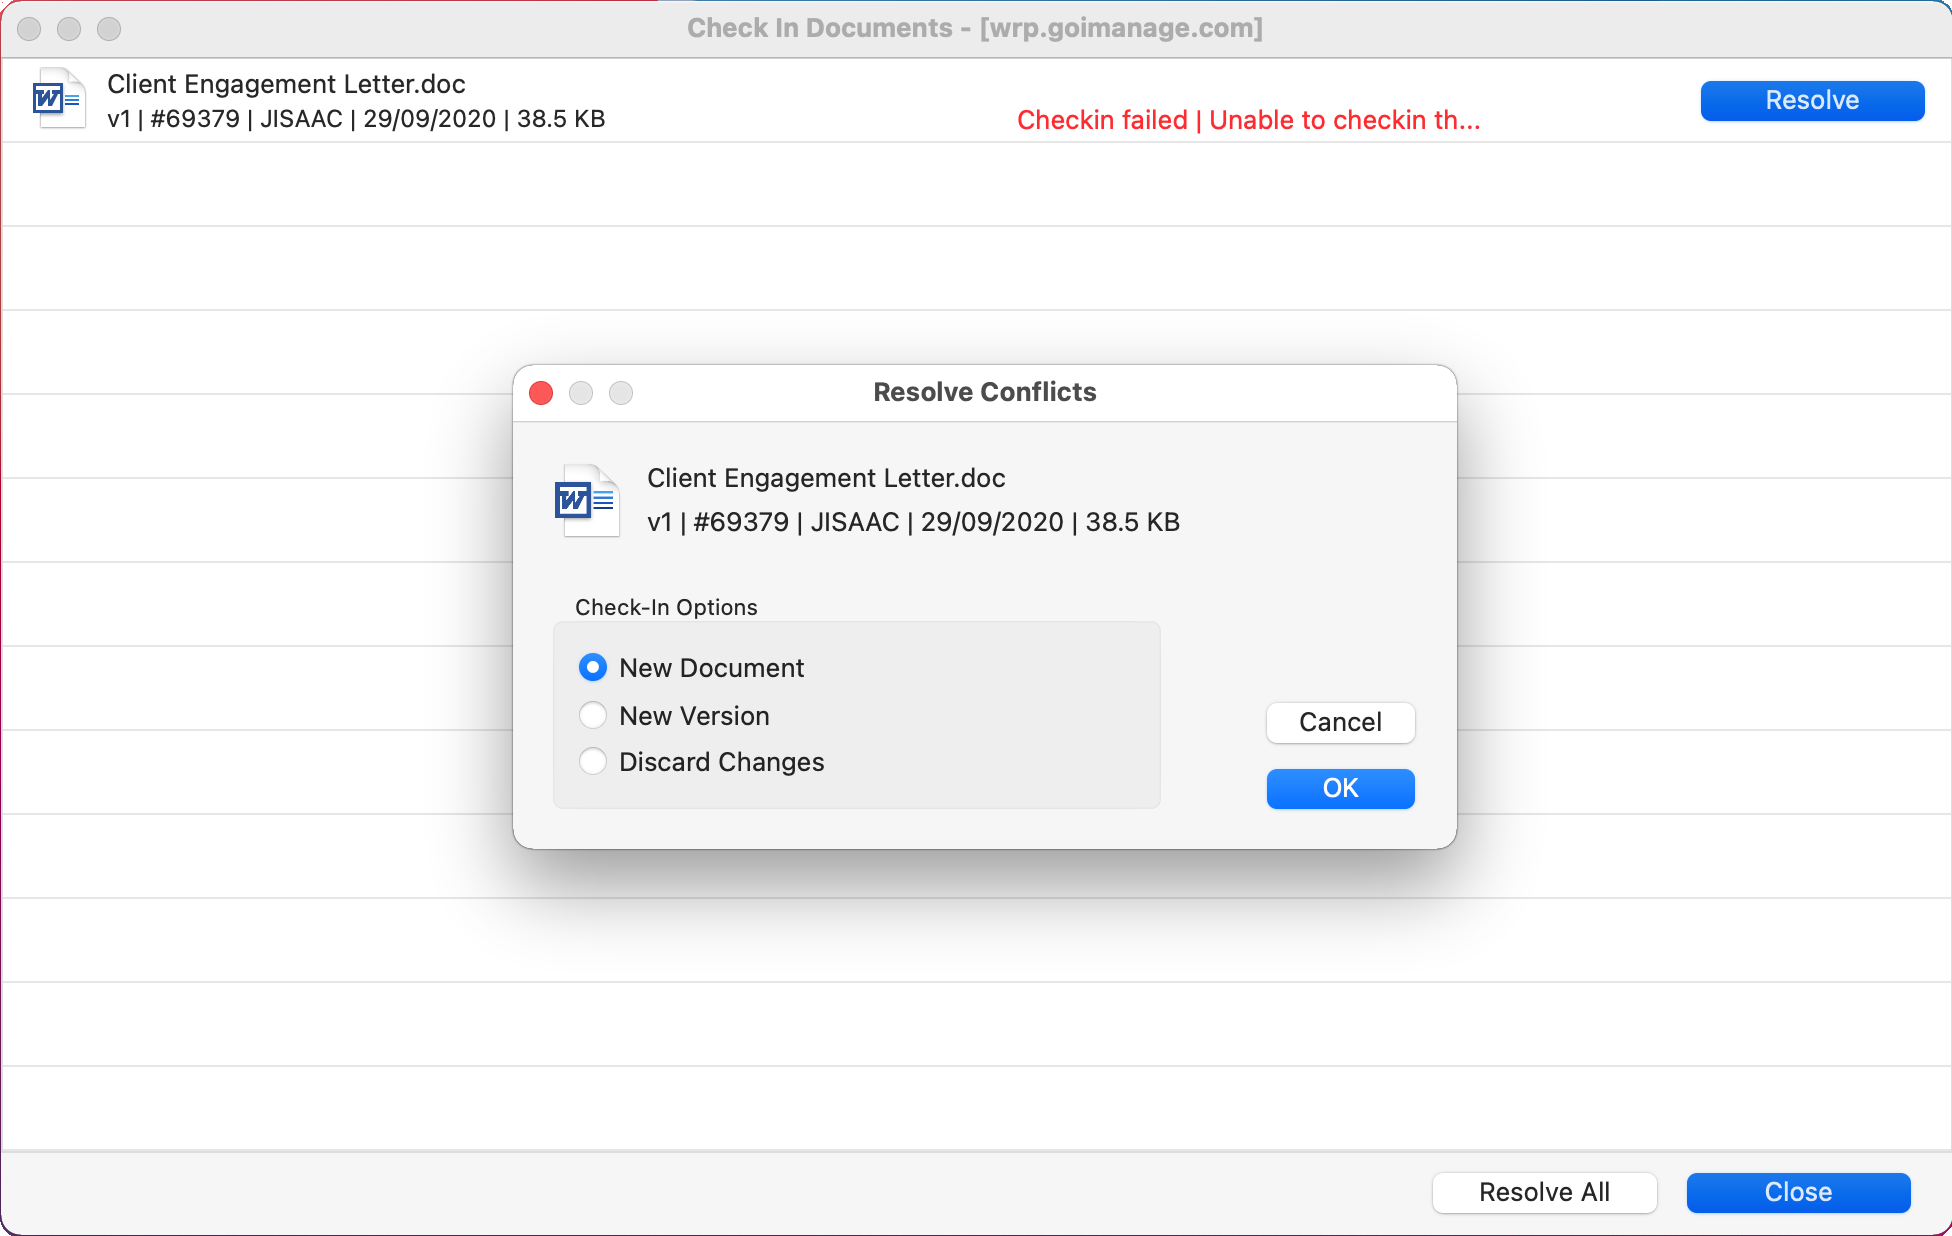
Conflict Resolution (permanent failure)
Select Resolve to display the Resolve Conflicts dialog box.
Select New Document, New Version, or Discard Changes as the check-in option and select OK. You are asked for confirmation if you choose to discard the changes.
The file is checked in and removed from the Check In Documents list.Select Close.
Figure: Conflict resolution options
After you check in files to iManage Work, the checked-in files are removed from the iManage folder and moved to the Trash on your Mac instead of getting permanently deleted. This ensures that you can retrieve the files locally if required. To permanently delete files from the Documents > iManage folder after check-in, the value of the Permanently Delete option must be changed to true. For more information, refer to the General settings section in iManage Work Desktop for Mac Installation Guide .