Classic
Access the Classic settings page by navigating in Control Center to Work Clients > Classic.
The Classic page enables you to manage settings for iManage classic clients:
Dialog Files: Upload and manage Dialog Editor files for use by iManage DeskSite users.
See Managing classic client dialogs for more information.WorkArea: Manage preferences for iManage DeskSite users.
See Configuring classic client preferences for more information.
Changes to the settings on this page will become active after DeskSite has been restarted.
Managing classic client dialogs
iManage Work environments include a default set of dialog forms which are used when performing operations within iManage classic clients (DeskSite and FileSite). The iManage Dialog Editor, included with on-premises iManage Work environments, enables you to customize these dialog forms to add, remove, or change the names and purpose of profile information fields.
For more information about the capabilities of Dialog Editor, see Using the Dialog Editor Tool in the iManage Work Server Administration Guide.
iManage Control Center enables you to upload and manage customized versions of these dialog forms in their exported format (.mhd file). When users connect to iManage Work using DeskSite in Compatibility Mode, any customized dialog forms are automatically retrieved and presented to the user while performing operations in iManage Work.
Using iManage Control Center, individual .mhd files can be uploaded for each supported language: English, Spanish, Portuguese, French, Japanese, German, Chinese.
The following dialog forms can be uploaded and managed in iManage Control Center:
Search Dialog
New Profile
New Version Profile
Properties
Search Workspaces
Quick Search
New Workspace Profile
Workspace Properties
Uploading dialog forms
To upload customized dialog forms (.mhd files):
At the top of the Classic page, select the library. Each library can have unique dialog forms. When a user accesses this particular library, they will see the dialogs you uploaded for this library. If no customized dialog form is uploaded, the iManage classic clients will display the default form for the dialog.
For the specific dialog which you want to update, select +Add .mhd file.
In the menu shown, select the appropriate language.
Figure: Add .mhd file - language selection menu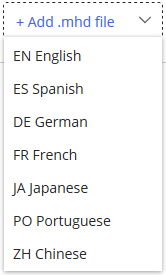
The File Upload dialog opens.Locate and select the .mhd file, then click Open.
The page updates to show the details of the dialog form you just uploaded.
Figure: Dialog form details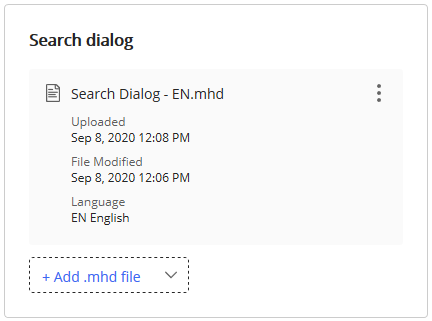
Users will be presented with this dialog after they restart DeskSite.
To ensure a consistent user experience, any changes made to add or remove properties in these dialogs should also be made available in Work 10 Web dialogs.
Replacing dialog forms
To replace an existing dialog form with a new version:
Select the
 icon in the details of the specific dialog form (.mhd file), then select Replace, as shown.
Figure: Replace a dialog form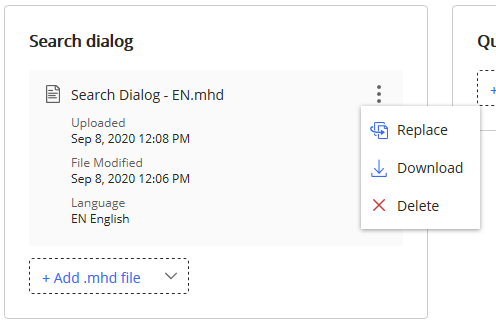
TIP: Before continuing, verify that you are performing this operation on the correct language.Locate and select the new or updated .mhd file, then click Open.
The page updates to show the details of the dialog form you just uploaded.
Downloading dialog forms
Deleting a dialog form will remove any customizations made to the dialog. Once a dialog form is deleted, iManage classic clients will display the default form for the dialog. See Default Forms for more information.
To download a dialog form:
Select the
 icon in the details of the specific dialog form (.mhd file), then select Download.
If necessary, select a location to save the file, and confirm the download operation.
Deleting dialog forms
Deleting a dialog form will remove any customizations made to the dialog. Once a dialog form is deleted, iManage classic clients will display the default form for the dialog. See Default Forms for more information.
To delete a dialog form:
Select the
 icon in the details of the specific dialog form (.mhd file), then select Delete.
A confirmation message appears. Select Delete again to confirm the delete operation.
Configuring classic client preferences
The WorkArea tab enables you to show or hide any of the following iManage Work navigation nodes in DeskSite and FileSite clients.
Checked Out Documents
My Favorites
Matter Worklist
My Matters
Document Worklist
Recent Searches
These System preferences apply across all libraries.
Figure: WorkArea preferences
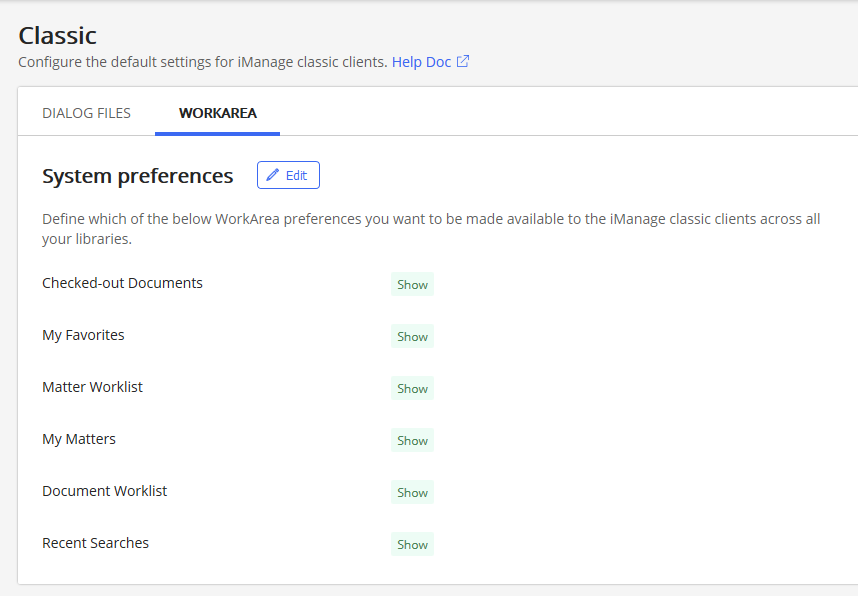
To modify these preferences:
On the WorkArea tab, select Edit. The System preferences dialog opens.
Figure: System preferences dialog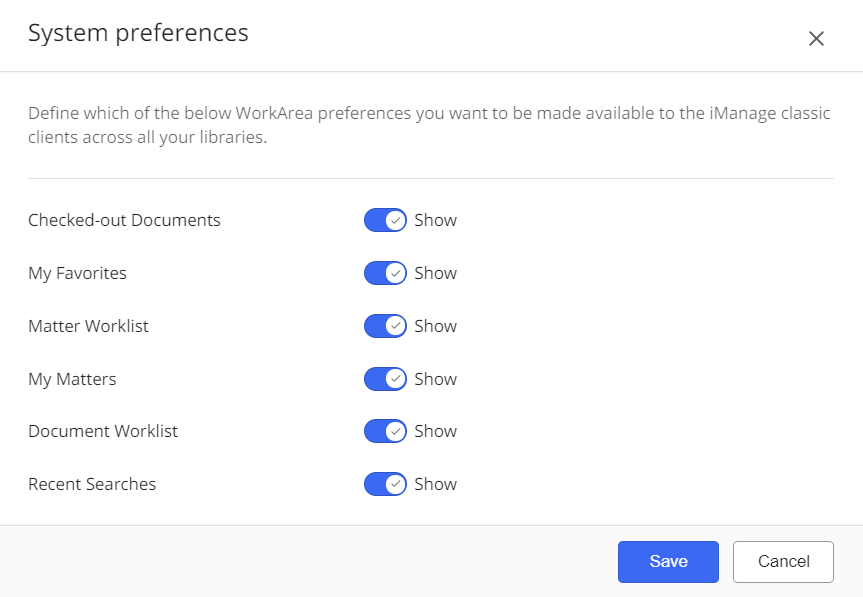
For each navigation node, select Show or Hide.
Select Save.
Users will see the changes to these preferences after they restart their iManage classic client.