Filters
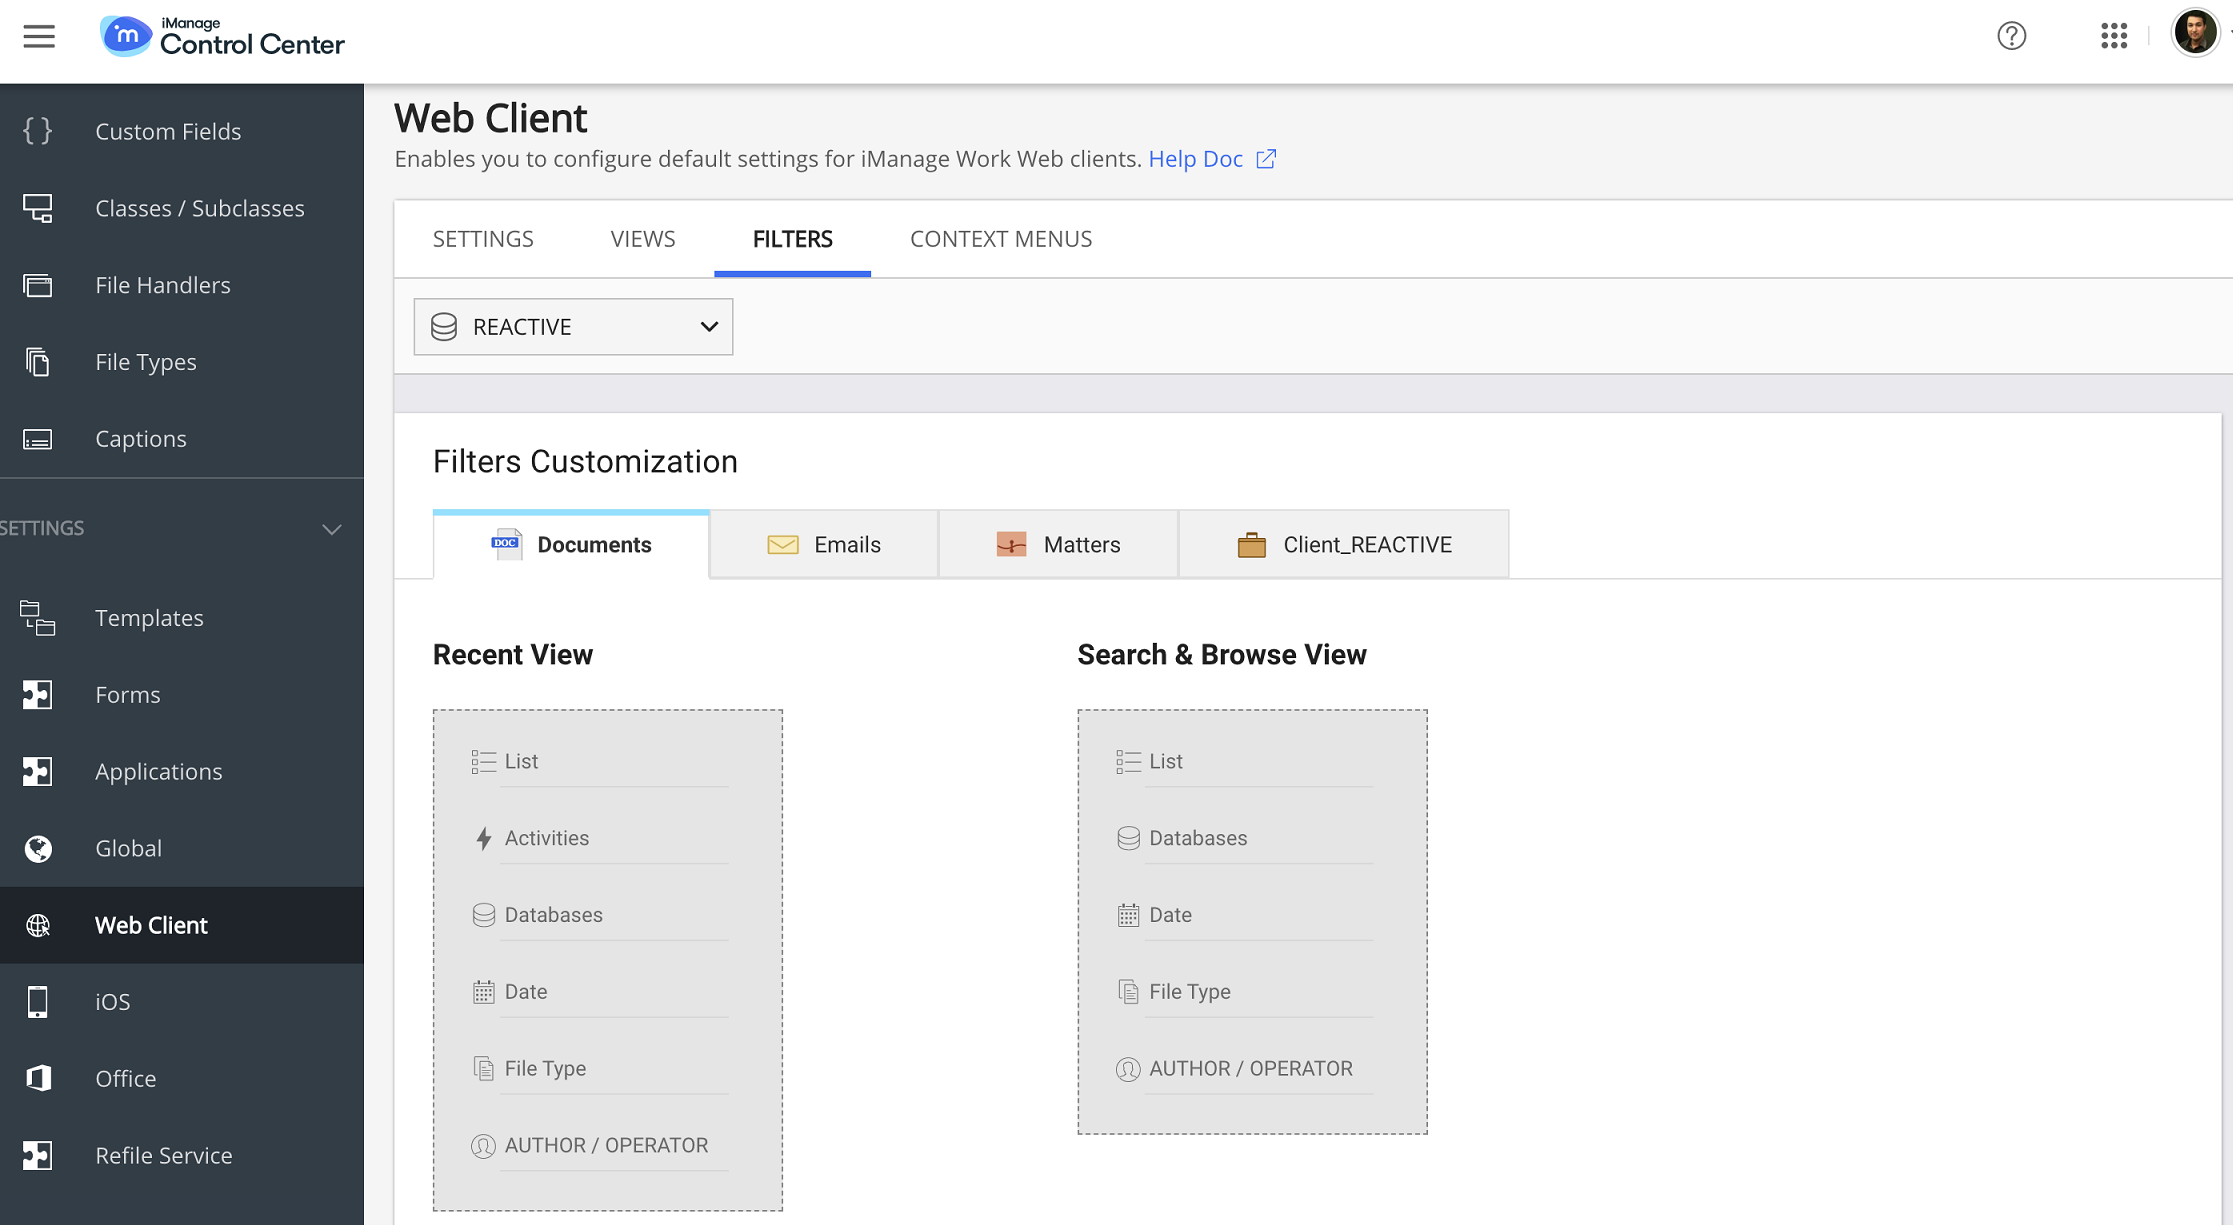
Access the Web Client Filters page by navigating in Control Center to Work Clients > Web Client > Filters.
Filters enables you to specify the filters for the following objects that are available to users in iManage Work client applications:
Documents
Emails
Matters
Custom1 field
Select the filters for each library from the list of custom fields for the following views:
Recent View: View of the iManage Work client application objects in the recently accessed list, that is, the objects a user has interacted with in the last 30 days. When users launch the iManage Work client application, by default, they see recently accessed list on the left panel.
Search & Browse View: View of the iManage Work client application objects in the search results set, and also while navigating through it. When you search for particular details the left panel gets automatically updated with the attributes that you set in Search & Browse View.
Figure: Filters
Select the library from the drop-down list on top of the page.
Select the tab (Documents, Emails, Matters, or Custom Field1) for the object type for which you want to set the filters.
In Recent View or Search & Browse View, select
 .
.Select +Add , and select custom filters from the drop-down list.
Select
 to remove any item from the list.
Select
 to confirm the list of filters and disable editing.
Select Apply changes to all databases to apply same filters to all the libraries. This option is available in the UI only if there is more than one library.
Select Save to save the filter settings. The user can now see the configured filters in iManage Work client applications.
Select Restore Defaults to revert to the default filters.