Settings
Access the Web Client settings page by navigating in Control Center to Work Clients > Web Client > Settings.
The Settings page contains the following three tabs:
General: configure general iManage Work 10 Web settings.
Feature: customize different feature options for the iManage Work 10 Web.
Access: define which groups can sign in to iManage Work 10 Web.
Navigation: select what navigation tabs are displayed as nodes and their order in iManage Work 10.
Toolbars: configure or customize actions for containers like Recent Matters, My Matters, Workspace, Folder and so on, in iManage Work 10.
Configure general settings
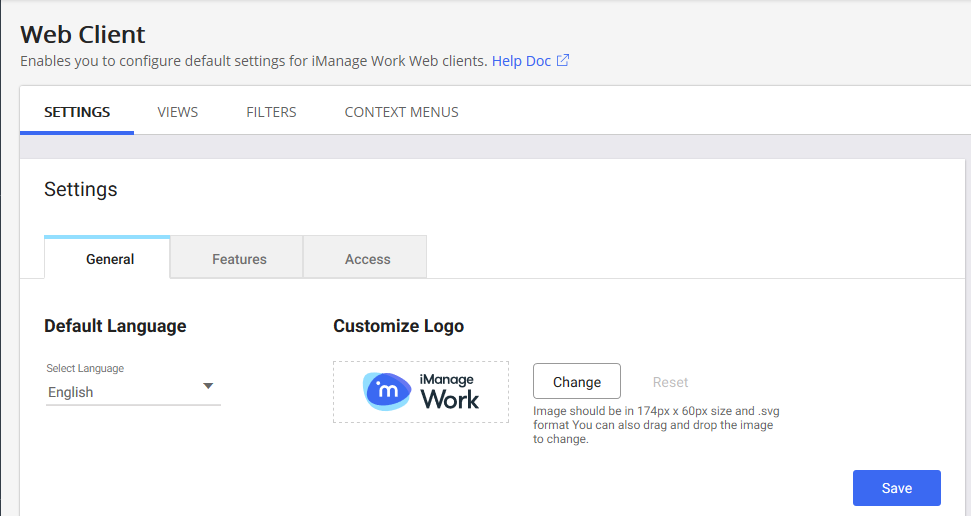
To configure general settings for iManage Work 10 Web, navigate to the General tab.
Set the default language for iManage Work applications using the Default Language option.
Hide specific languages by following these steps.
Customize your organization logo for iManage Work applications using the Customize Logo option.
Figure: General settings tab
Setting the default language
To set the default language to be displayed when users open iManage Work or iManage Control Center in their browser, select the desired language from the Default Language drop-down list, and then select Save.
Refresh the page in your browser to display the selected language in iManage Control Center.
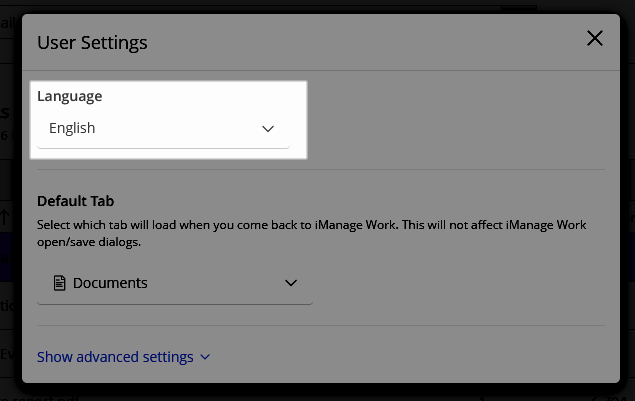
Individual users may also change their default language in iManage Work Web in the User Settings dialog by setting the Language option. This change applies only to their account and applies wherever they sign in to iManage Work.
Figure: iManage Work Web > User Settings > Language option
Hiding a specific language from browsers
Create a new file: C:\Program Files\Autonomy\WorkSite\WorkWebServer\settings.py
Add the following contents to the file, excluding any languages you do not want:
# -*- coding: UTF-8 -*-# Supported Languages IM_LOCALES = [ {'id': 'en-US', 'name': 'English'}, {'id': 'fr-FR', 'name': 'Français'}, {'id': 'es-ES', 'name': 'Español'}, {'id': 'de-DE', 'name': 'Deutsch'}, {'id': 'pt-BR', 'name': 'Português (Brasil)'}, {'id': 'ja-JP', 'name': '日本語'}, {'id': 'zh-CN', 'name': '中文简体'}]
Customizing the Logo
This section describes how to customize or change the logo displayed in iManage Work. The logo appears in the iManage Work at the following places:
Page headers (desktop view)
Left sidebar (mobile view)
Custom Logo File Requirements
The image must be in SVG format as it appears crisp in high density displays. You cannot upload an image in any other format such as JPG, PNG, GIF and so on.
The image size should be 174px x 60px. If the size of your image does not match, it will be scaled to 174px x 60 px automatically. However, the logo may appear distorted.
The SVG files exported from tools such as Adobe Illustrator or Sketch work properly without any additional effort. However, if the logo does not appear in the UI, open the image file in a text editor to view its XML format. Verify that the <svg> element has both xmlns and xmlns:xlink attributes are set. If these attributes are missing, the logo may not render.
For example, <svg xmlns="http://www.w3.org/2000/svg" xmlns:xlink="http://www.w3.org/1999/xlink" … > …. </svg>
Steps to Customize Logo
In the Customize Logo section of the General tab, select Change.
Figure: Settings
The file upload dialog opens.Locate and select the new logo. Select Open.
Alternatively, you can drag and drop the new logo into the Customize Logo area in your browser.Select Save to apply the new logo.
Select Reset to restore the default iManage Work logo.
Configure features
To configure Work 10 Web features, navigate to the Features tab.
Figure: Features
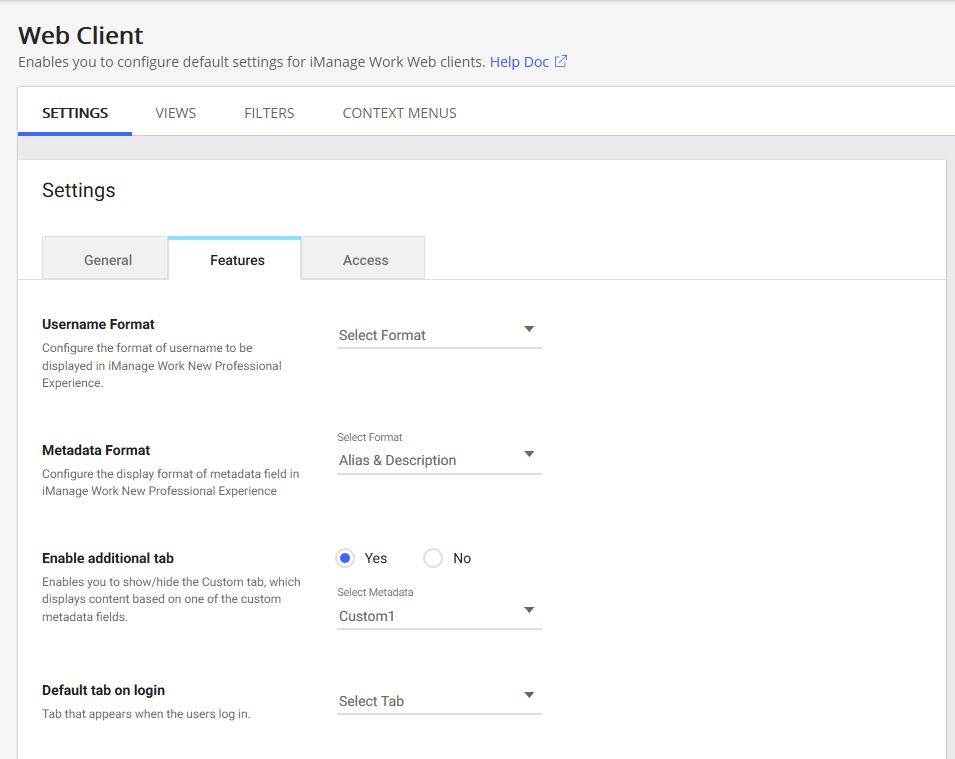
Customize any of the following Work 10 features, then select Save.
Table: Feature options
|
Option |
Steps/description |
|
Username Format |
Select the format of username to be displayed in iManage Work. |
|
Metadata Format |
Select Alias & Description or Description Only or both as the format for custom metadata fields to be displayed in iManage Work. |
|
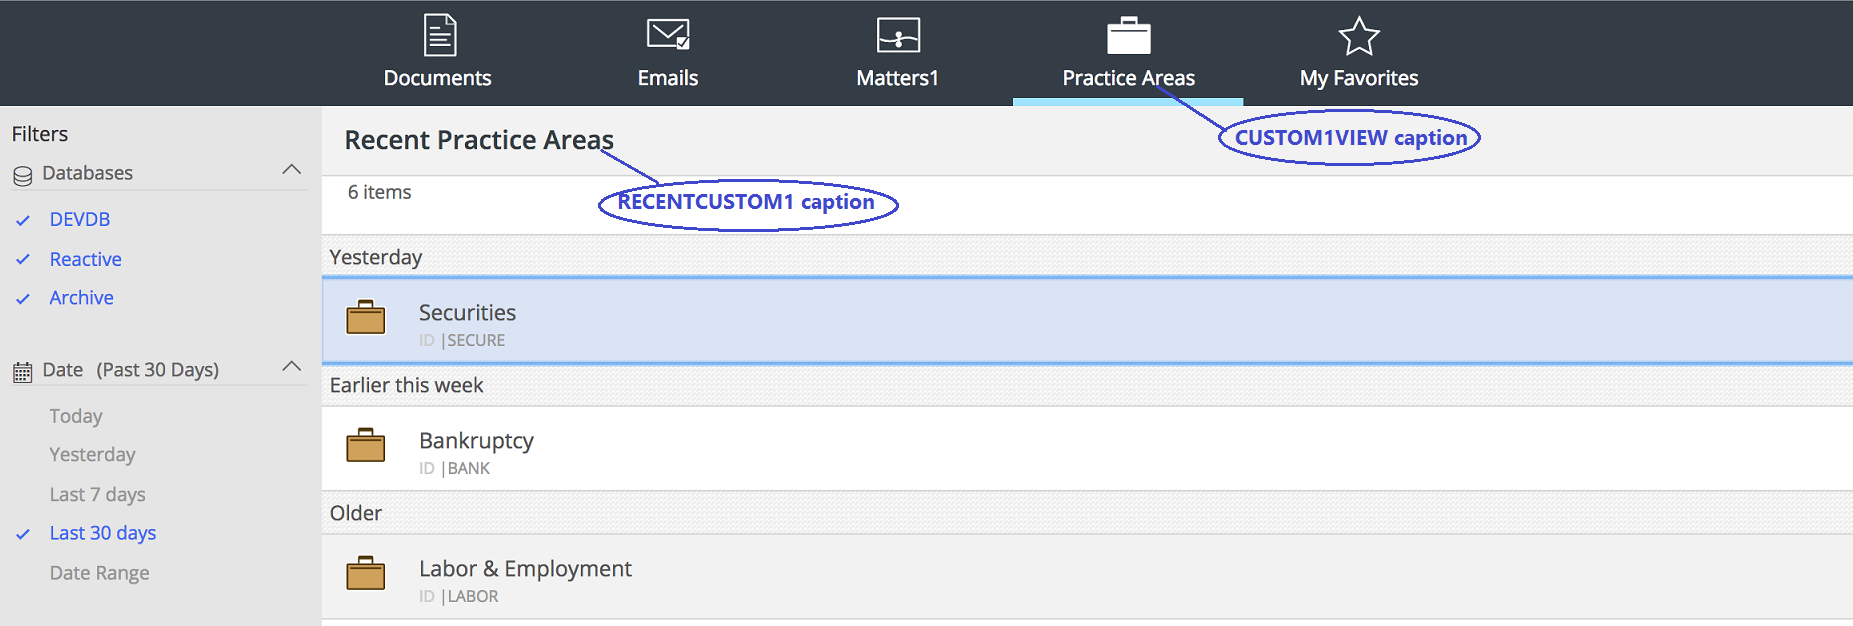
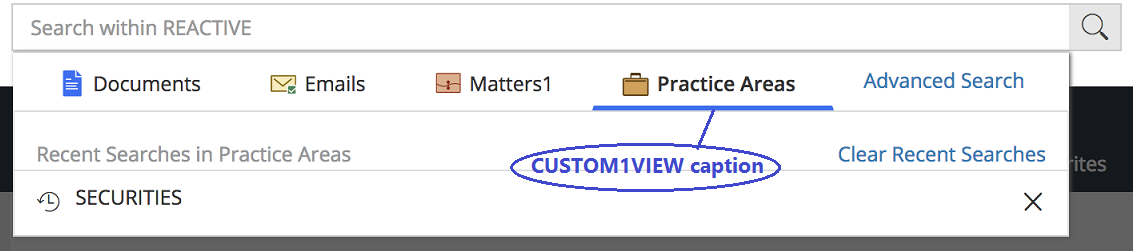
Enable additional tab |
Enables and configures an additional tab on the iManage Work home page. By default, this setting is disabled. When enabled, the additional tab displays a list of clients based on the user's recent activity. It is populated using the Custom1 metadata field. You can also chose a different metadata field between Custom1-12 and Custom29-30. This setting is enforced over the legacy registry setting "Custom View Metadata Field". Select Yes to add an additional tab, then select the metadata from the drop-down list. Optionally, select METADATA > Captions, and update the captions for CUSTOM1VIEW, and RECENTCUSTOM1 to reflect appropriate labels in iManage Work for the additional tab, and recent items. For example, if Practice Areas is added as an additional tab, then update the captions to reflect labels in iManage Work as Practice Areas, and Recent Practice Areas. Figure: iManage Work Home Page
|
|
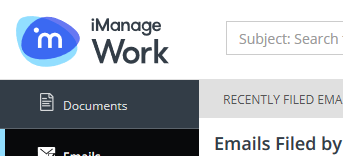
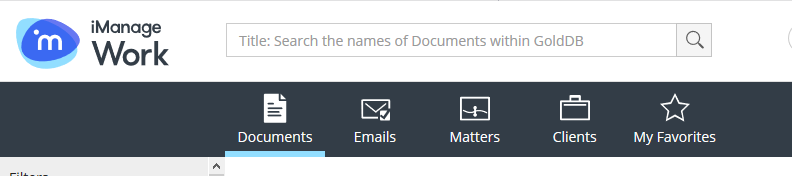
Default tab on Login |
Select which tab is loaded when users sign in to iManage Work. If not set, the Documents tab is displayed by default. Users can overwrite this preference and set their Web Default Tab in their User Settings. Figure: Default tab displayed on login
|
|
Lookup field dropdown limit |
Configures the number of suggestions shown in the dropdown of lookup fields. The default is 150 suggestions. |
|
New Folder in iManage File/Location Selection Dialog |
Allows you to show or hide the option to create a New Folder or choose a custom command to create a New Folder in the iManage File/Location Selection dialog. The default command for creating New Folder is iManage "New Folder" command.
|
|
|
|
|
Enable Work 10 Desktop for Windows Auto Updates App Banner |
Select the Windows check box if you want your end-users to see the following Enable Work 10 Desktop for Windows Auto Updates App Banner in the iManage Work application (Work Web client). By default, this check box is not selected. Only those end-users who do not have iManage Work Desktop for Windows will see this banner. Figure: iManage Auto Updates Banner
|
|
Internet Explorer Warning Message |
The first time a user signs in to Work 10 using Internet Explorer, display a banner recommending use of a fully supported browser.
Figure: Internet Explorer message See the List of limitations applicable to Microsoft browsers for more information. |
|
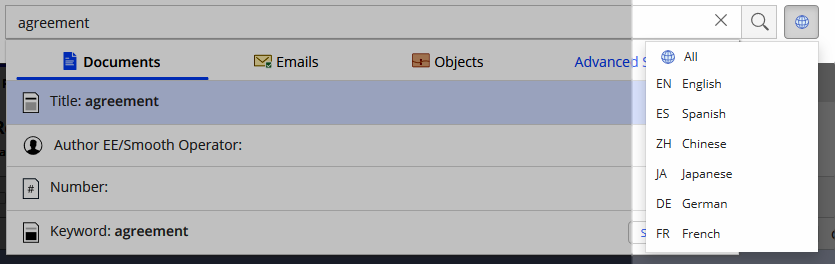
Enable Search Language Selection |
Configures whether the language search selection option is visible for simple and advanced searches in iManage Work.
Figure: Language search selection option (when enabled)
|
|
Title-click operation for files |
Configures the default action when a user clicks the title of a document or email. This option applies to iManage Work in a Desktop browser, iManage Work panel in Outlook, and Work Desktop for Mac.
The Edit/Open option should only be used if all your users have iManage Work Desktop for Windows or iManage Work for Mac installed. If this software is not available on users' machines, the the following message will be displayed: The Open in Protected Mode option is not currently supported for iManage Work Desktop for Mac. When this option is selected, the title-click action defaults to the Edit/Open functionality. |


Configure access settings
To define which groups can sign in to iManage Work 10 Web, navigate to the Access tab.
The users who are not in this list can still access iManage Work for Office, iManage Work 10 for Mobility, and iManage Work classic clients.
This feature is useful for firms who decide to provide the mobile access of iManage Work client application only to specific users, and control the data that is left on the devices. For example, mobile access is provided only to partners and attorneys, while the document support staff and secretaries are restricted.
Figure: Access
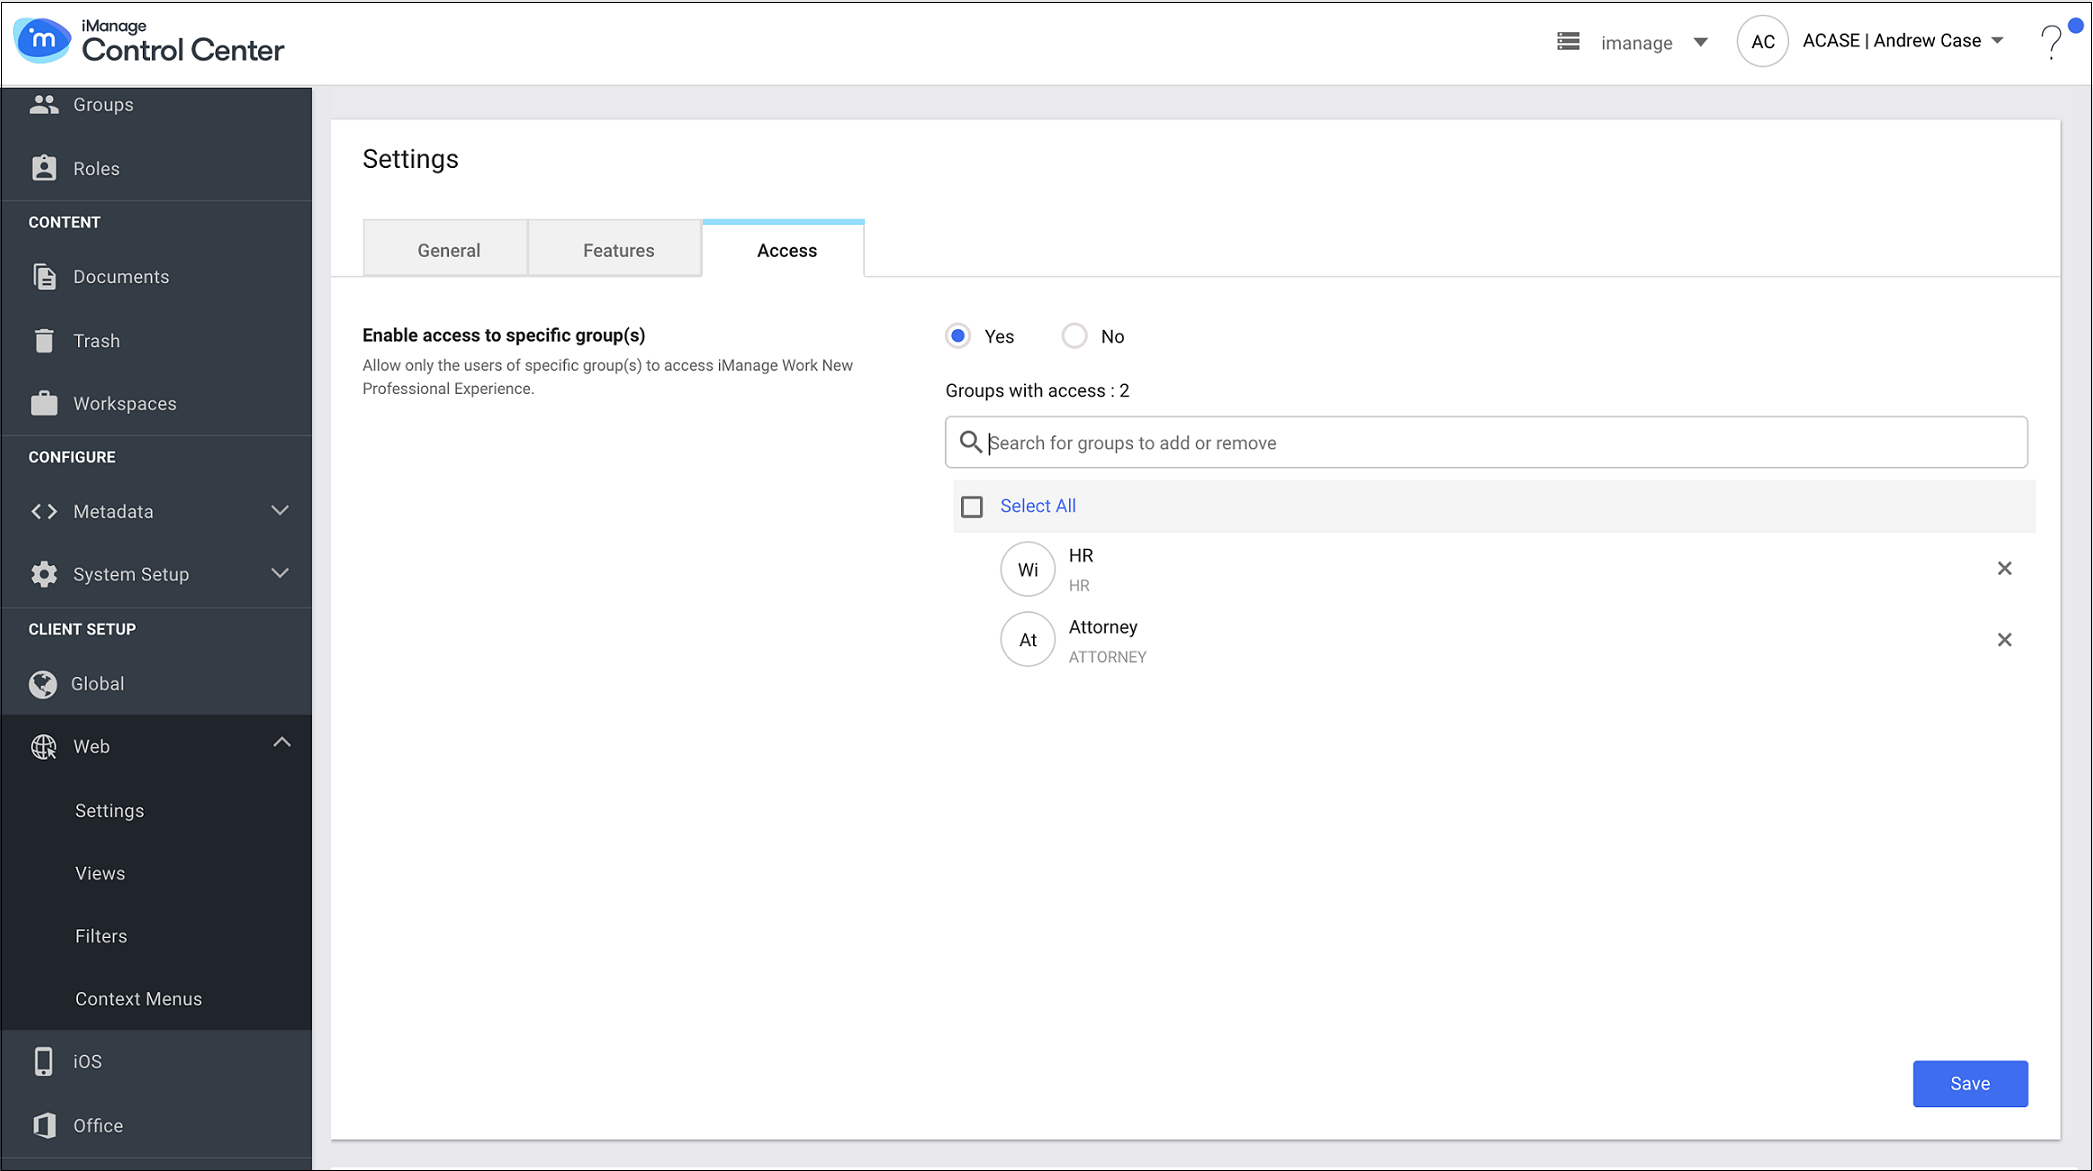
Select Yes to define which groups are allowed access to iManage Work. The field to search for groups appears.
Enter a name of the group to be added, and select Add to provide access to the group.
Select X to remove the group that has already been added.
Select No to prevent access to iManage Work for any users.
Select Save.
Configure navigation settings
To configure the navigation tabs that must be displayed as nodes and their order in iManage Work 10, navigate to the Navigation tab.
You can re-order, show or hide the nodes displayed in the side navigation panel in iManage Work, based on your organizational requirement. Default navigation nodes can be placed in new orders, and properly configured third party exte nsions can be enabled or disabled to show as nodes in the side navigation panel. These new customizations will now also be reflected in mobile views.
Figure: Configuring navigation settings
Navigate to Web Client > Settings > Navigation.
Select Edit, the Configure Navigation dialog box appears.
From the available list, select the required nodes or third party extensions to be displayed in the side navigation panel and, re-order them as required.
Select Save.
Configure the Details panel for iManage Work
You can re-order, show or hide the tabs (including custom tabs) displayed in the Details panel in iManage Work, based on your organizational requirement. These customizations will be reflected in iManage Work in the desktop view as well as the Open and Location Selection dialog boxes.
Figure: Configuring the Details tabs
Navigate to Web Client > Settings > Navigation > Details Tabs.
Select the tab you wish to configure and then select Edit.
A dialog box appears allowing you to set the default tab and change the order.After making the changes, select Save.
Configure toolbars
To configure or customize actions for containers like Recent Matters, My Matters, Workspace, Folder and so on, in iManage Work 10, navigate to Toolbars tab.
This release of iManage Control Center introduces a new Toolbar customization option that allows administrators to re-order, remove, group or add custom toolbar actions for containers like Recent Matters, My Matters, Workspace, Folder and so on, in iManage Work. All available actions can either be shown as commands along the top toolbar or, be placed under the action menus. When the available space in the toolbar reduces for the added actions, they are responsively added to the action menu.
Figure: Toolbars
Navigate to Web Client > Settings > Toolbar .
Select the container whose toolbar actions you wish to customize and then select the Edit (
 ) icon. The Configure Actions dialog box appears.
Customize the available commands to appear either on the toolbar or in the actions menu.
Select Save to close the Configure Actions dialog box.
Select Save.