Workspaces
The Workspaces page enables you to search for workspaces using various search criteria, and perform the following actions to manage workspaces:
Verify user access rights for the selected workspace using the Check Effective Access feature.
Verify user access rights based on the groups assigned in the Access Control List (ACL) using the Security feature.
View the details of a workspace using the View feature.
Copy a link to one or more workspaces using the Copy Link option.
View generic table options in User interface overview section.
Searching for workspaces
Select Content > Workspaces. The list of default search fields appears as shown in the following figure:
Figure: Workspace page
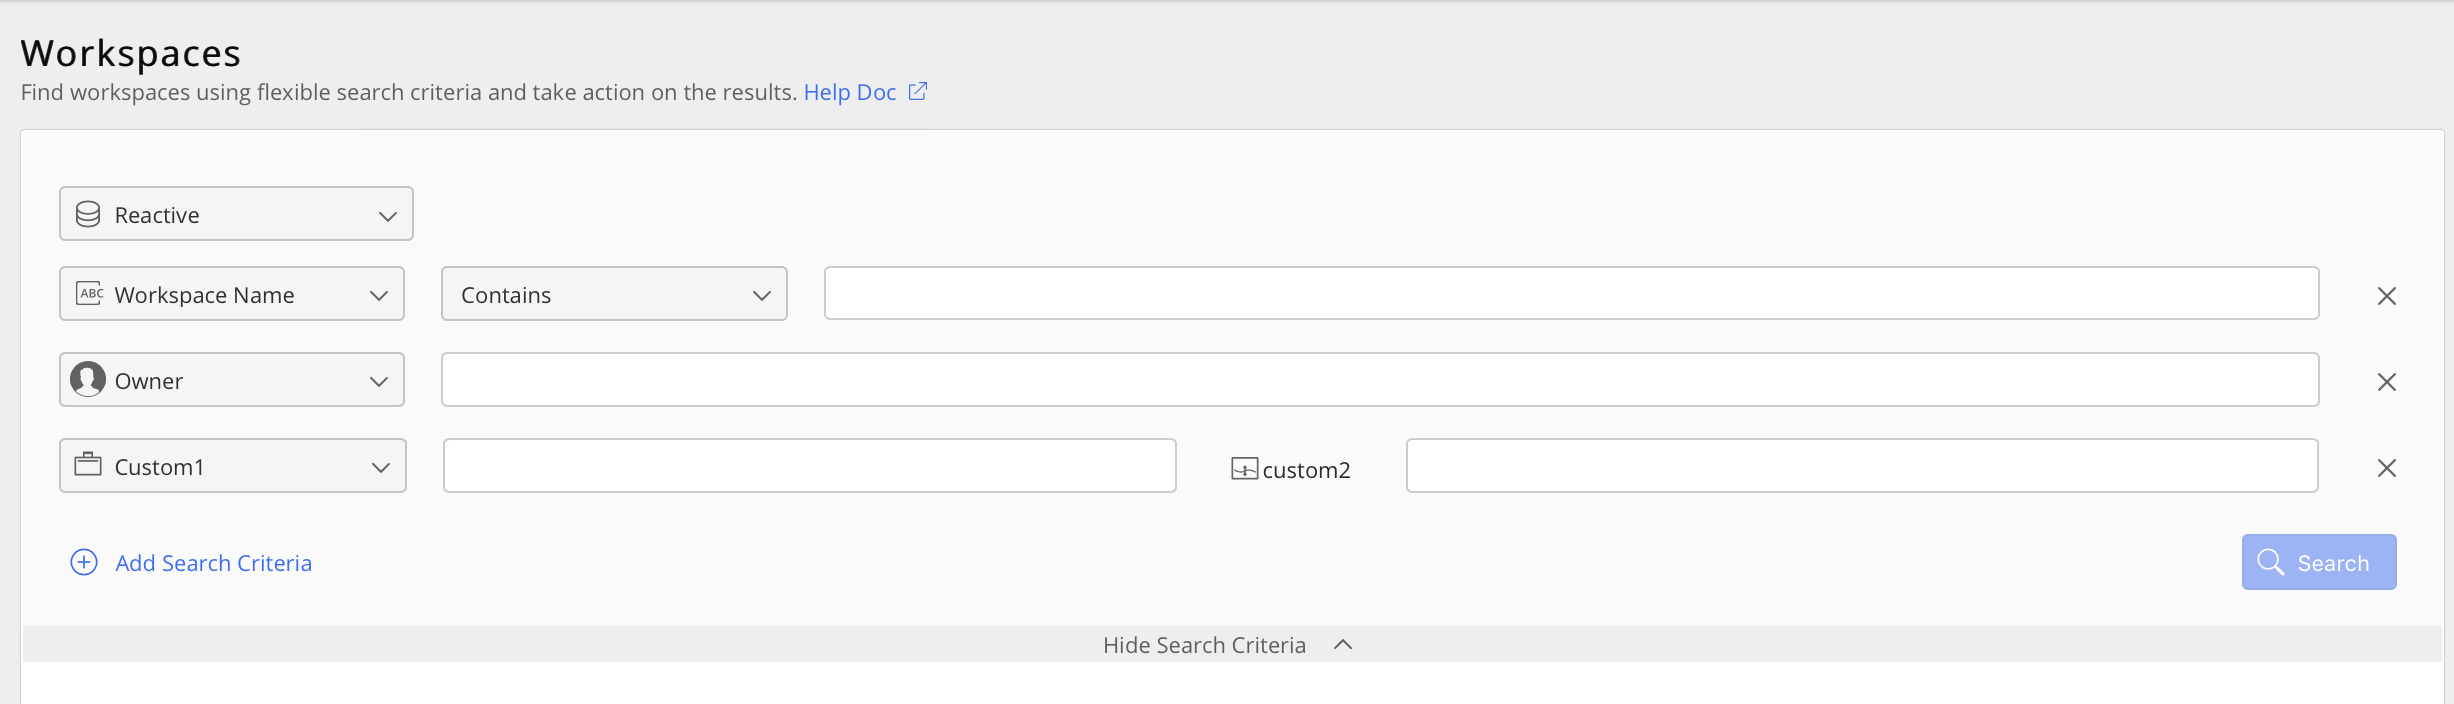
Use these search fields to refine your search, then select Search.
To add more search criteria, select
 .
.With the Search button enabled, the
 option is displayed;
In the preceding figure, the Hide Search Criteria toggle option is displayed.
To hide the search criteria and focus only on the list of filtered documents, select Hide Search Criteria.
Selecting Hide Search Criteria changes it to Show Search Criteria. Select this to view the search criteria list.
iManage Control Center preserves the search fields you enter when searching for documents, workspaces, or trash. When you add or remove search fields, your settings are automatically saved and will be present the next time you sign in and access the Documents, Workspaces, or Trash pages. This provides the advantage of not having to remember or reselect your search fields for subsequent searches.
Search fields are stored locally in the browser's cache for each individual library. If you switch to a different browser or to a different device, you will see the default search fields.
Checking Effective Access
To verify the access rights of a user for a selected workspace, use the Check Effective Access option. It evaluates all permissions (container default security, access permission, group memberships, and role abilities) and is available on the:
Ribbon bar: Select a workspace to see this option on the ribbon bar.
Kebab menu: Select the
 icon adjacent to each
workspace
to see this option.
icon adjacent to each
workspace
to see this option.
Context menu: Right-click a workspace name to see this option.
Use one of the preceding options to check the effective access of the workspace .
Right-click a workspace and select Check Effective Access. The following dialog box appears:
Figure: Check Effective Access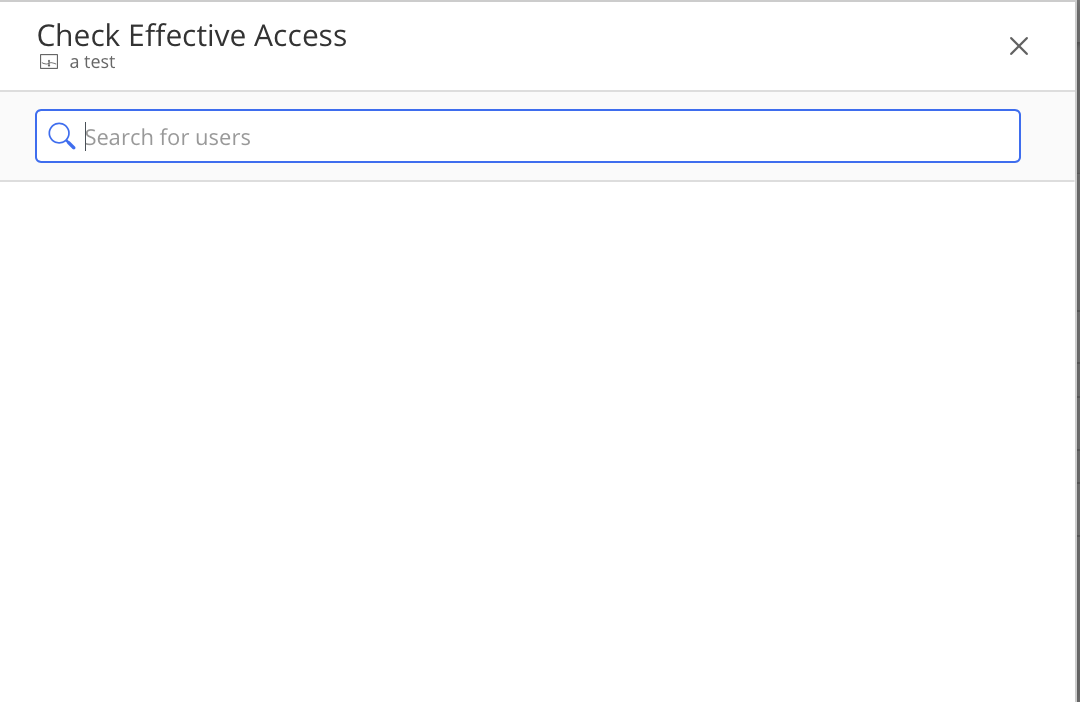
Enter a Username or ID. A suggestion list appears.
Select a user. You see the access right of the selected workspace.
Verifying security
To verify access permissions for the users and groups assigned in the Access Control List (ACL), you can use Security option. It is available on the:
Ribbon bar: Select a workspace to see this option on the ribbon bar.
Kebab menu: Select the
icon adjacent to each workspace to see this option.
Context menu: Right-click a workspace name to see this option.
Right-click a
workspace
and select Security. The security details for the
workspace
is displayed. The following figure gives you one such example:
Figure: Security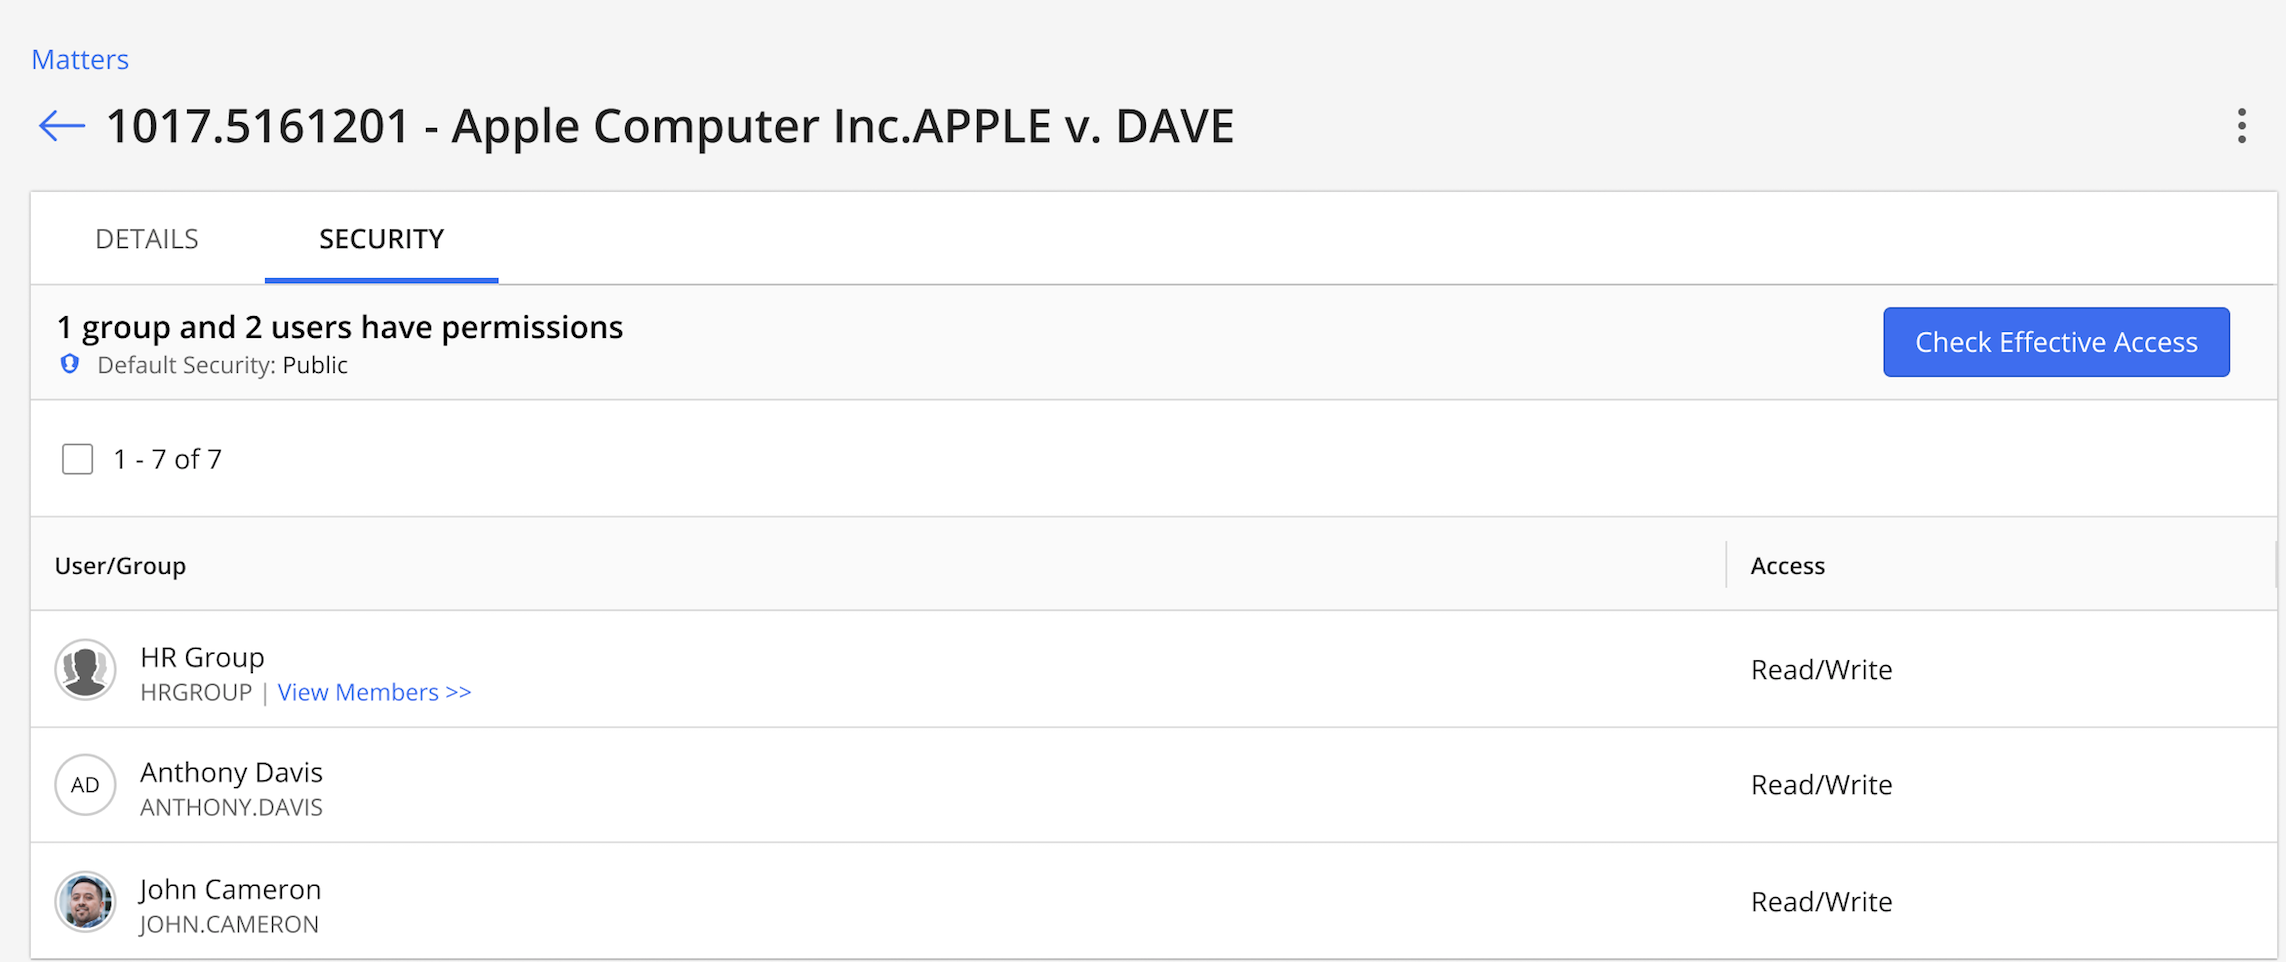
Viewing workspace details
To view the details of a workspace, use this View option. It is available on the:
Ribbon bar: Select a workspace to see this option on the ribbon bar.
Kebab menu: Select the
icon adjacent to each workspace to see this option.
Context menu: Right-click a workspace name to see this option.
Clickable link: I n the Doc #/Version column, select a workspace.
Use one of the preceding options to view the following workspace details:
Library
Name
Owner
Created On